You can create configurable products with various configurable attributes like product color, brand, size, and more. Configurable products allow customers to choose from available options while placing an order or designing products.
Backend Configurations
To create configurable products, navigate to Catalog ➤ Product, you will land on the “Products” page.
To configure the existing product, click on that particular product, or if you want to create a new configurable product, navigate to the “Add Product” button.

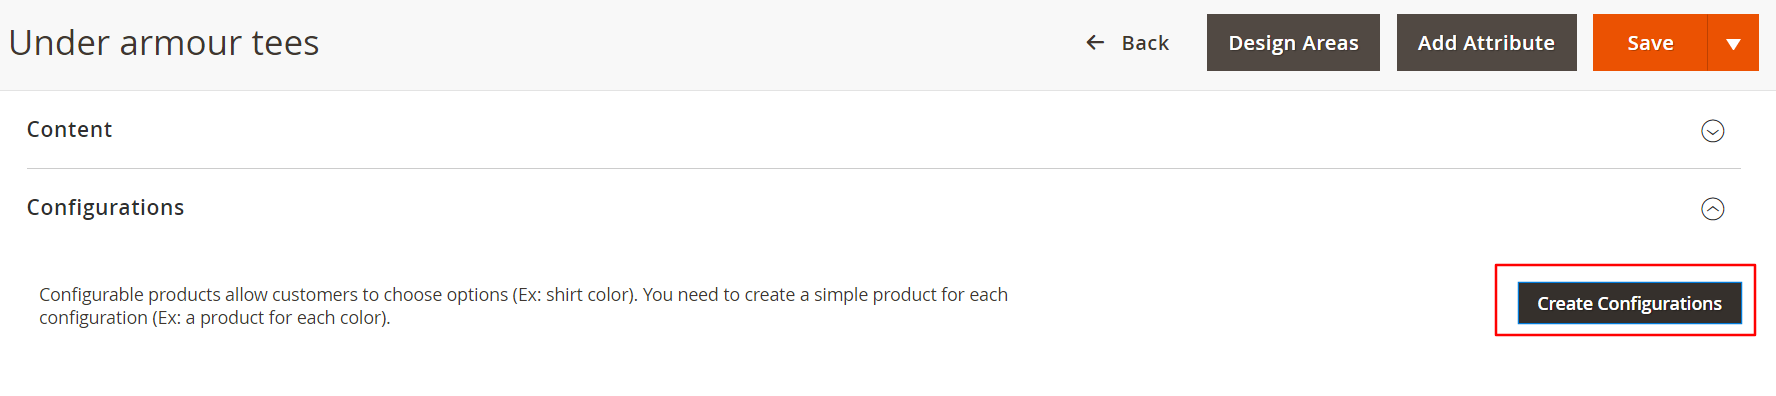
Set attributes and add Images for Products: On the product information page go to the product configuration section click on the “Create Configuration” button.
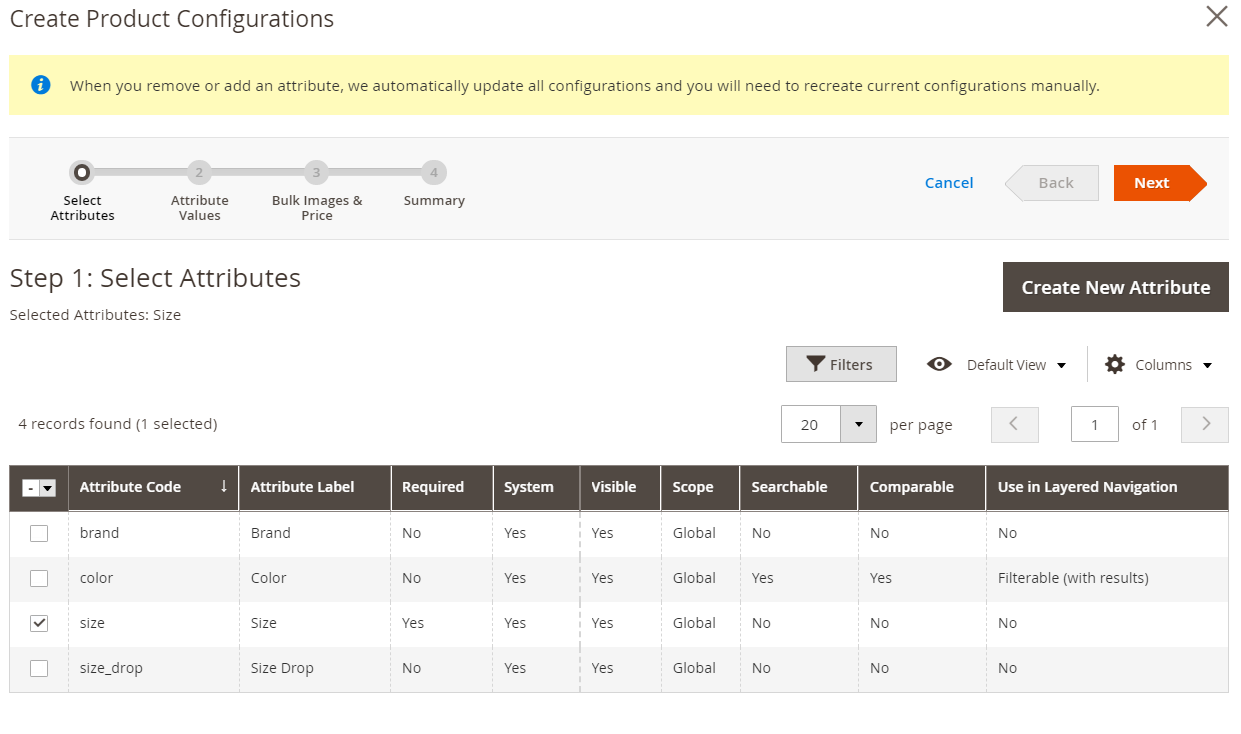
You’ll be redirected to the “Create Product Configuration” page. You’ll have to define these attributes in four different steps.
Step 1: Select Attributes
Select an attribute set for the particular product from the ‘Attribute Set’ list and enter the required details of the product. You can also add multiple attributes at once. You can set as many configurable attributes for your product as needed.
Click on the next button to apply the changes. You can also create new attributes by clicking on the “Add New Attribute” button.
 Step 2: Attributes Values
After selecting the attributes in the previous section, you need to add the values of these attributes. For example, you’ve selected color as one of the attributes so, in step two you have to define what colors do you have to offer for that particular product. You can choose as many options as you want. You can also add/remove attributes values. Click Next when you’ve selected the values of attributes.
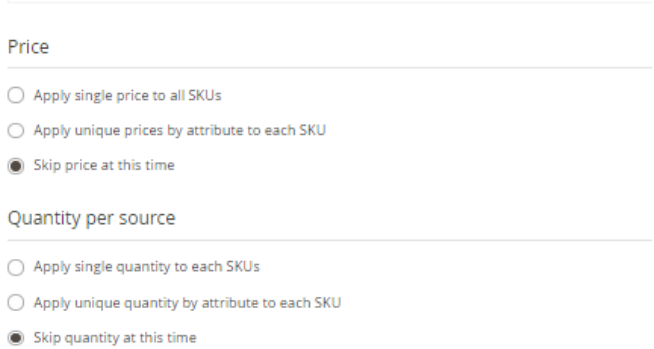
 Step 3: Bulk images, Price and Quantity
You can either assign one image for all products or unique images for each SKU. Similarly, for price, you can assign either a single price for all SKU or apply unique prices by attributes, individually. The same goes for the quantity option. Assigning the source is important here since this will be directly related to your inventory. Click Next when you’ve configured these options.

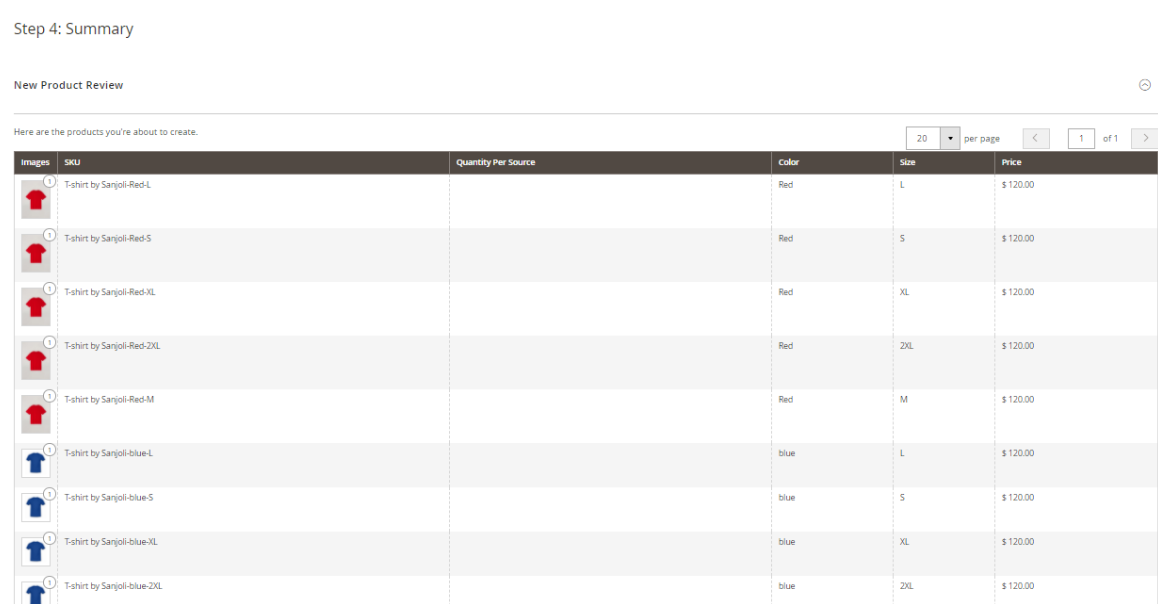
Step 4: Summary
The summary of all the three steps will be listed here. Verify your products and click on Generate products. Then click on save Products.
Note: Admin needs to set image-side manually for associated products images. Design area will be applied from the parent product. If a child product has a design area then it will give priority to the child product otherwise the parent product.
Lastly you’ll need to go to each and every product image and add it’s sides and later create the design area otherwise it won’t be listed in the product options section.
Select Image Sides and Create Design Area
By clicking on the “Design Areas” button, a pop-up window will appear on the screen. Select the “Image Side” from the “Image Side” dropdown list.
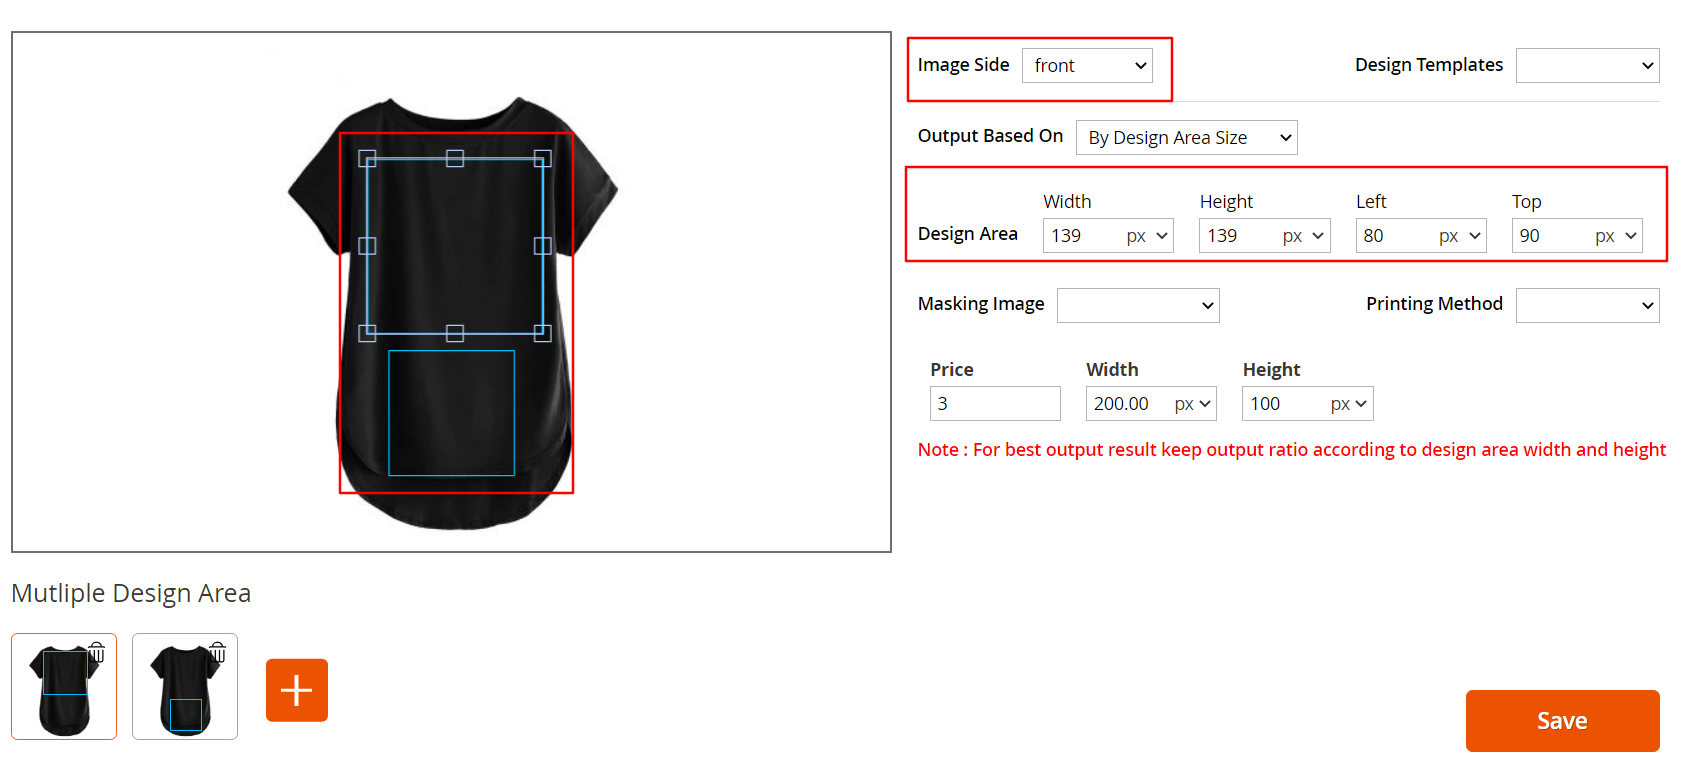
Now create the Design Area by reading this article. After configuring all the details click on the “Save” button.
You can also set the Multiple Design Areas in a single product by following this article.
Enable Product Designer
To enable the Product Designer Tool for a Product, Scroll down to the “Product Designer” option and set “Yes” for the “Enable Product Designer” option.
Front End View
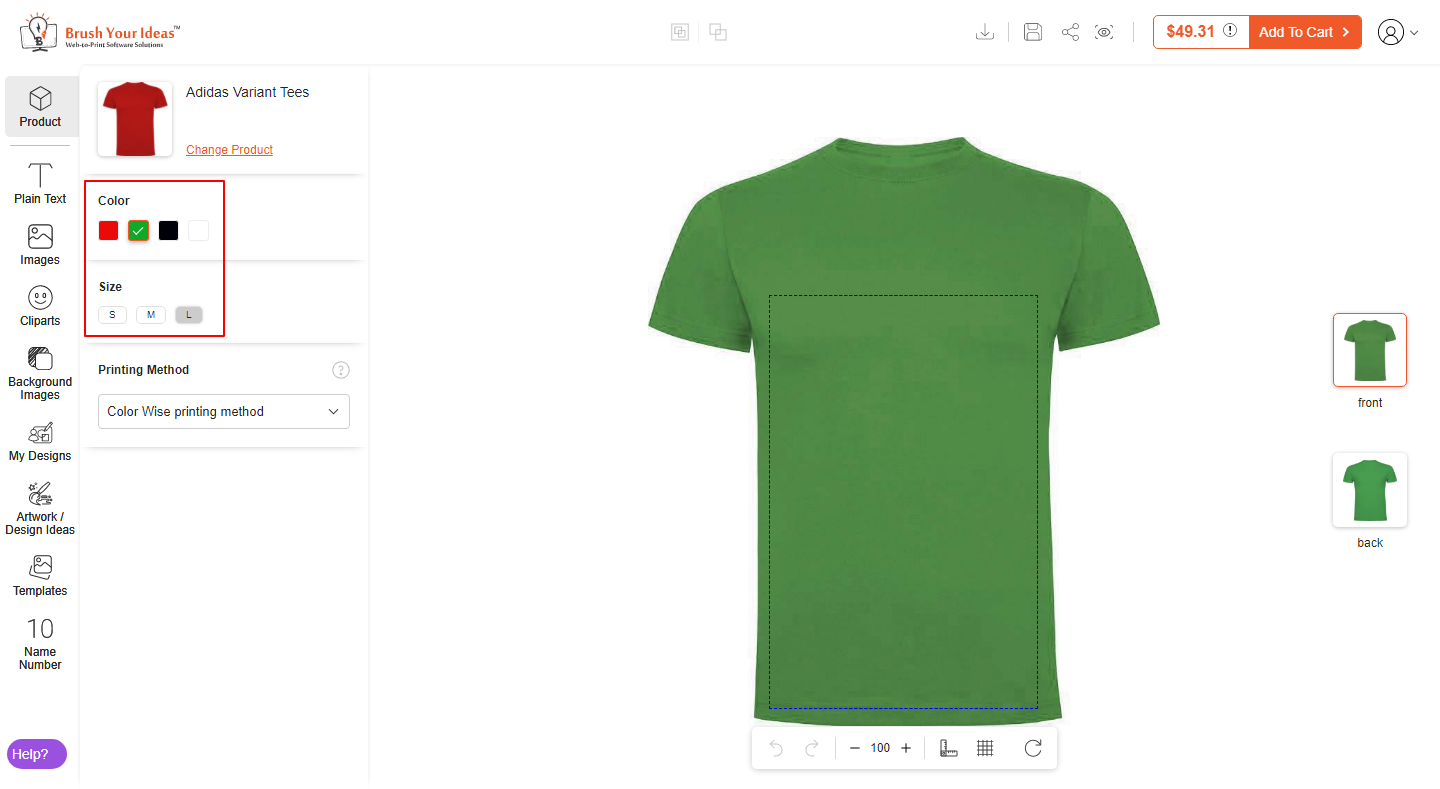
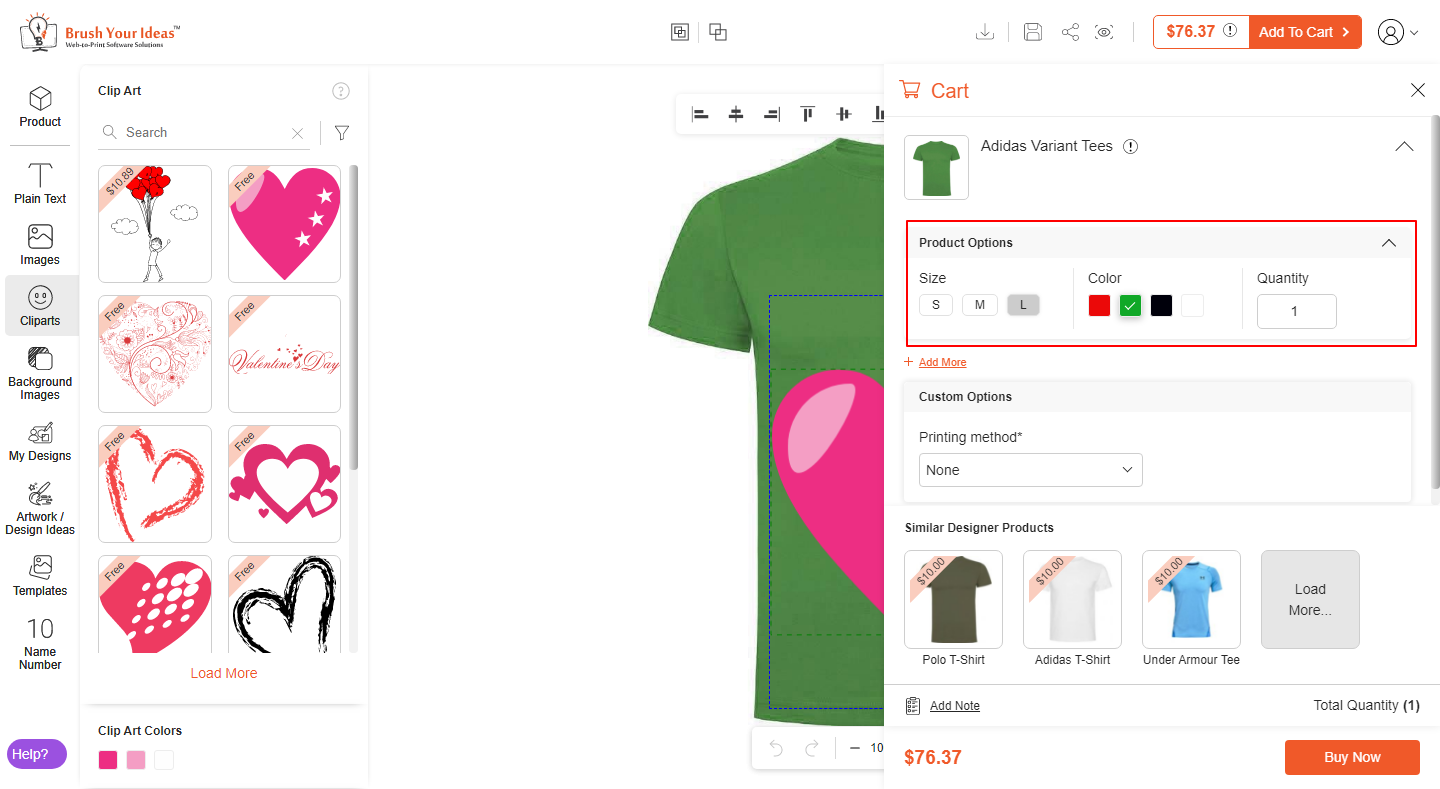
Once the attributes are configured from the Back End, the customers will see all the configured attributes in the Product section. After designing, when the customers add the product to the cart, an ‘Add To Cart’ window will pop up on the screen along with the attributes configured from the Back End, which can be changed as per the requirement.