


The design area is the predetermined area where you can allow your customer to apply designs to the product. With our PrintXpand product designer tool, you can offer multiple design areas to your customer. Let’s figure out, how?
Login to Backend
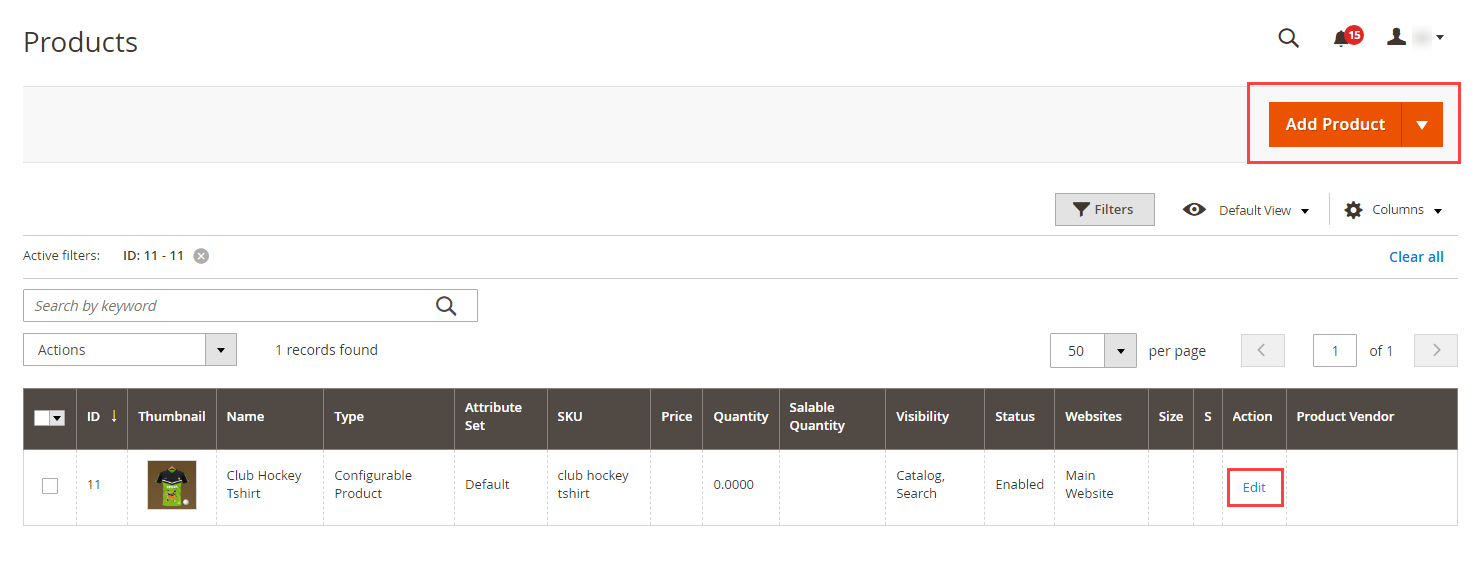
To add the multiple design areas go to Catalog ➤ Products, you will land on the “Products” page. For adding a design area to the new product click on “Add Product button”. And if you want to change the design area of the existing product, click on the “Edit” button.
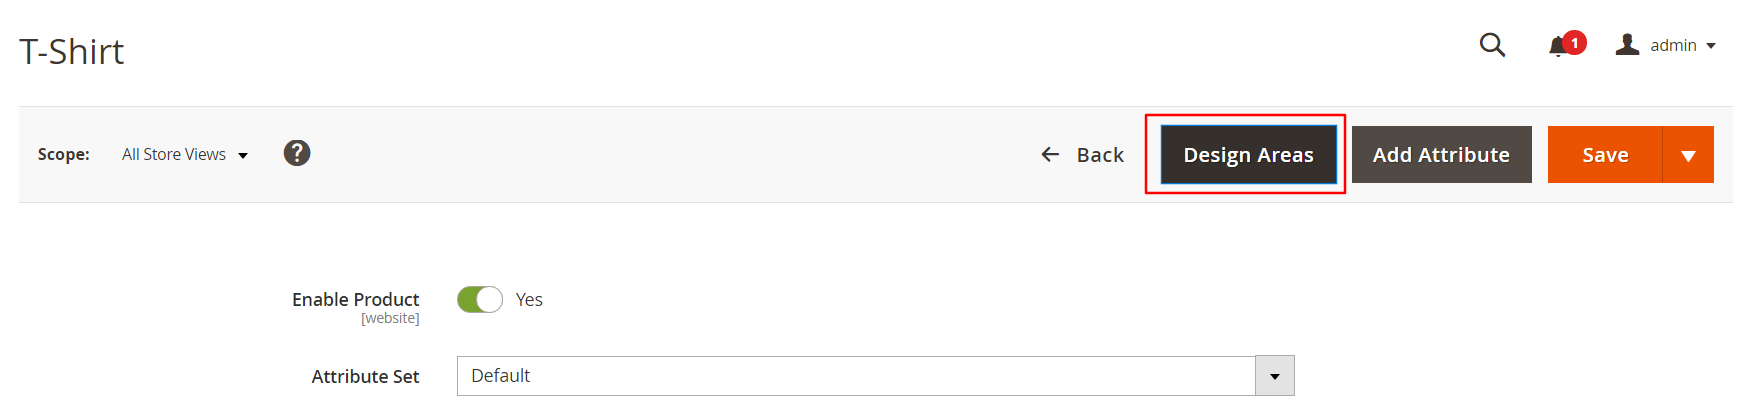
Click on the “Design Areas” button to add the design area.
To add the multiple design area click on the “Add Design” button. You can set up a design area by adjusting the Width, Height, Left, Top or you can just manually set the box on the product.
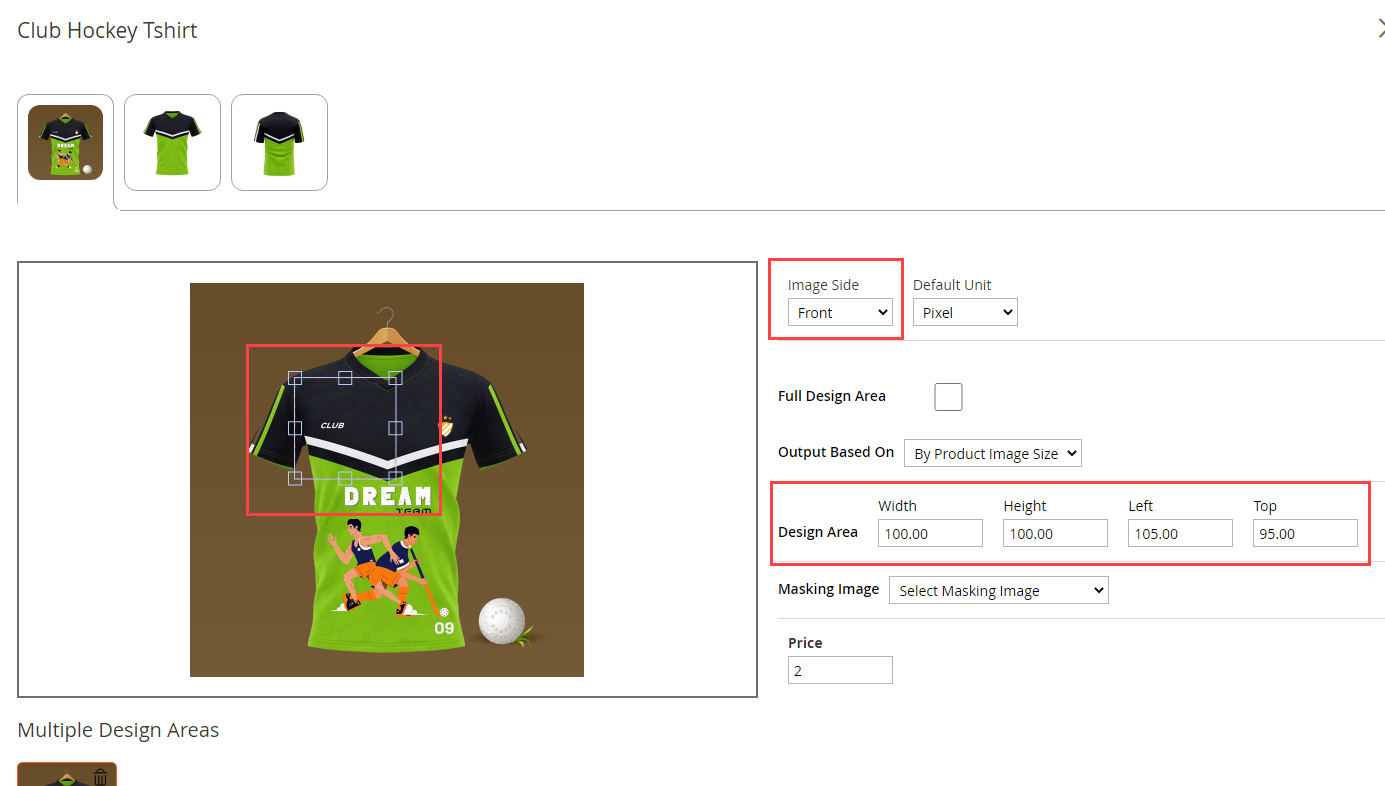 You can even add multiple design areas for the different images as well. Just select the different images and follow the above instructions.
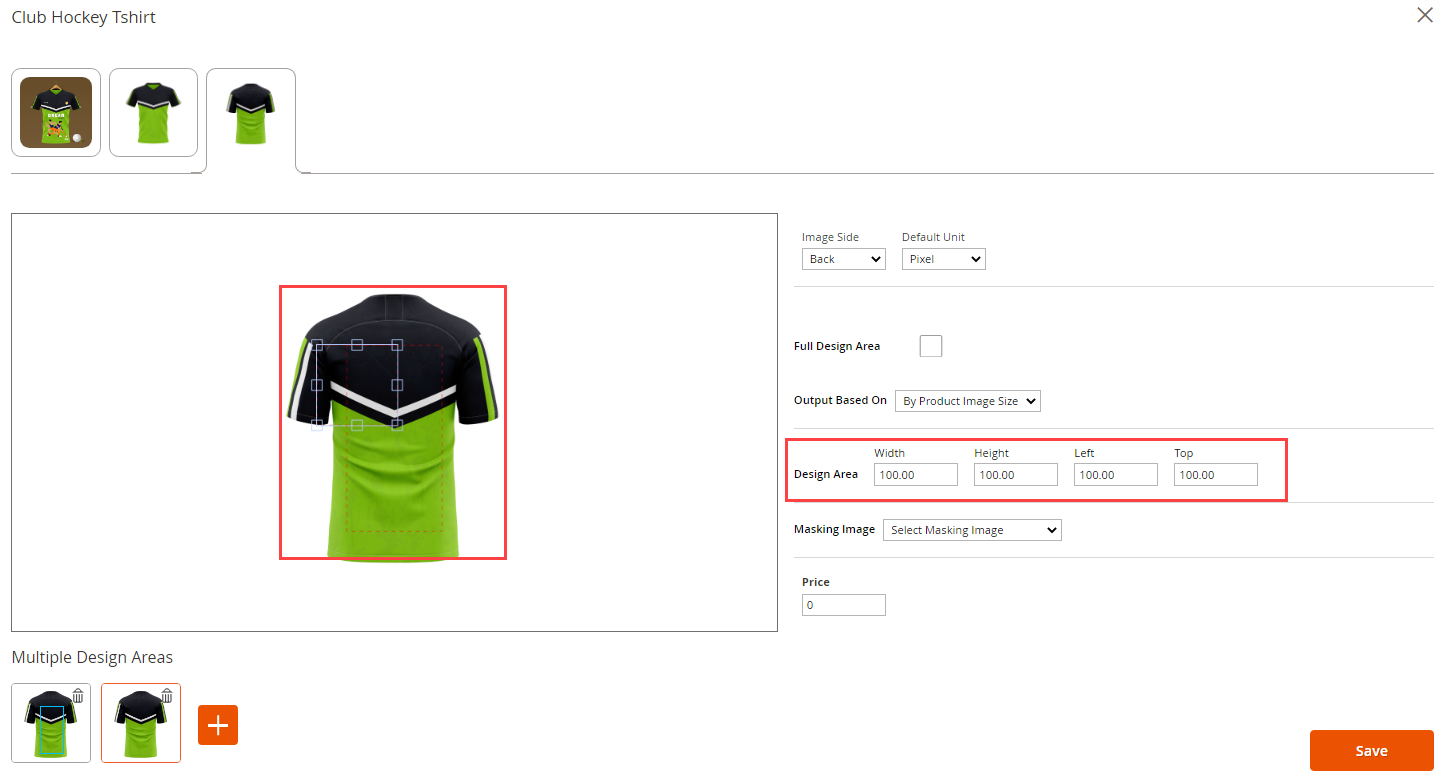
After adding the design areas, click on the “Save” button to save the design area.


