With our product designer tool, you can offer different styles of font. Your shopper can apply any font that you have added to the library. With this, you can add new fonts, delete, and edit fonts.
Login to Backend
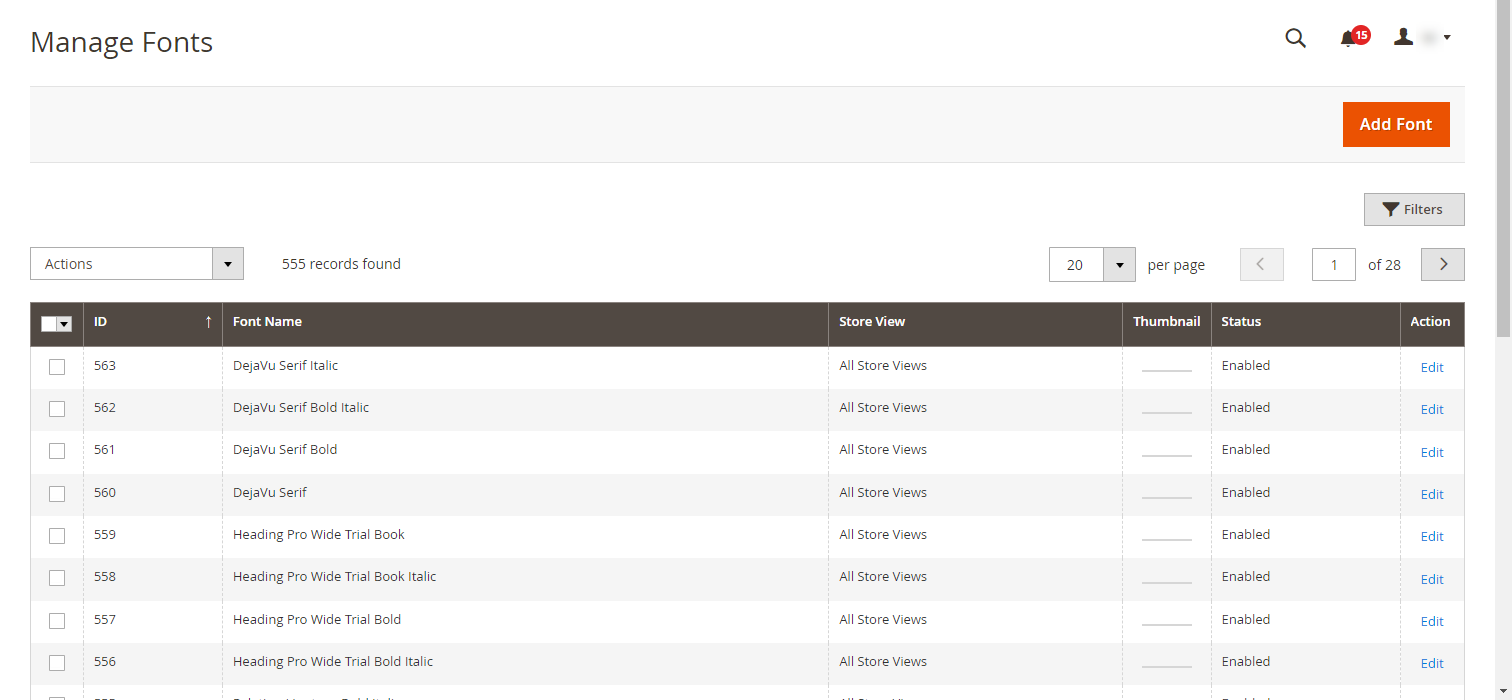
For managing the font’s library navigate to the Product Designer ➤ Manage Fonts, you will land on the Manage Font page. From this page, you can add, manage, and delete fonts.
For adding a font to your store, click on the “Add Fonts” button and you will be redirected to the “Add Fonts” page.
 Fill in the following information
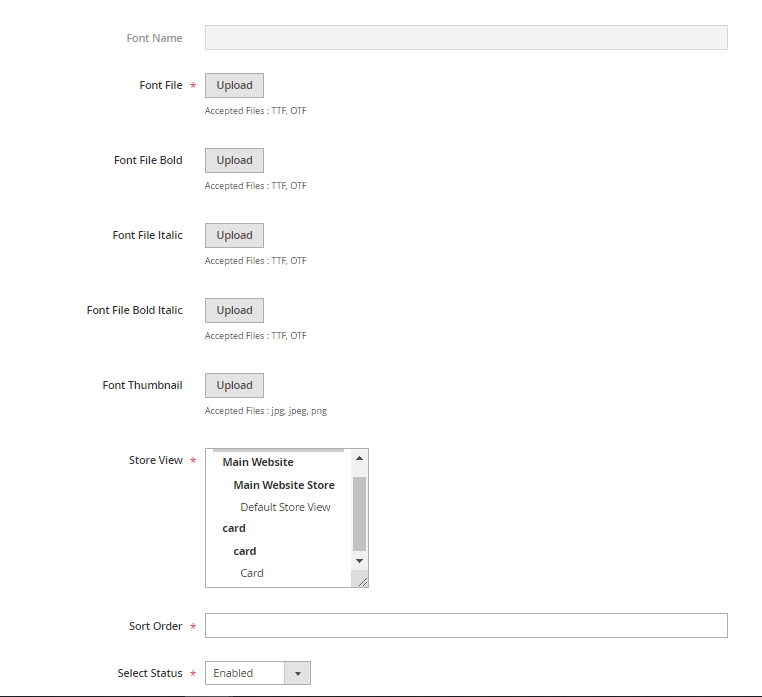
Font Label: Font label will automatically be uploaded as per the uploaded Font File.
Font File: Browse and upload the font file in TTF format.
Font File Bold : Upload the Bold version of the font.
Font File Italic : The Italic version of the font has to be uploaded.
Font File Bold Italic : Bold Italic version of the font should be uploaded.
Font Thumbnail: Browse and upload the thumbnail for the font.
Store View: Select the Store View for which you want this font to be visible.
Sort Order: Set the sort order for the font to be displayed.
Select Status: Select the status “Enabled” to enable the font in the store.
After all the configurations, click on the “Save” button to save the configurations.
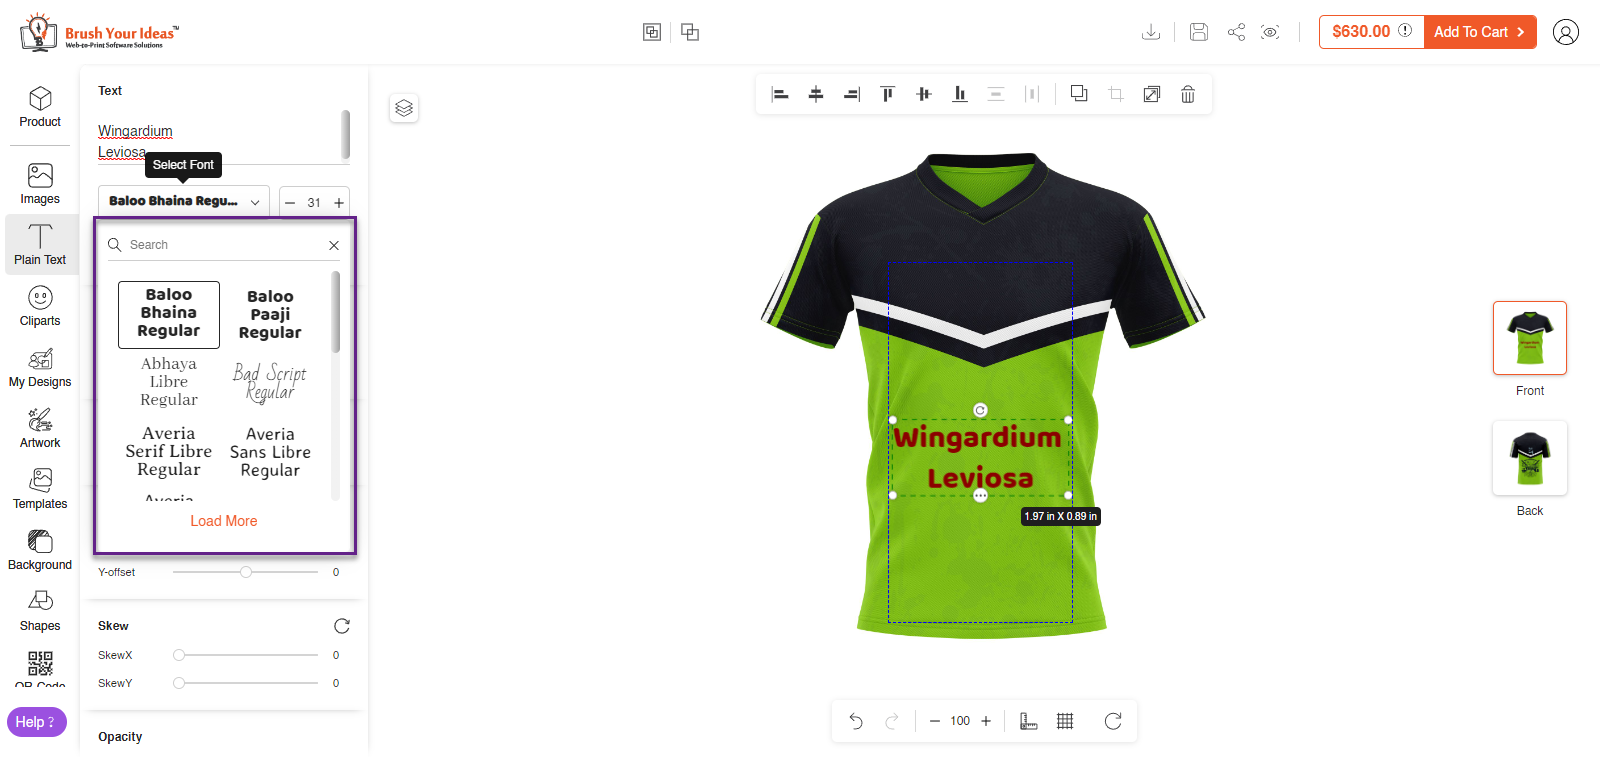
Frontend View
After backend configurations, your customers can add text from the left side of the designer tool.
Your customers will get the list of fonts on the left side of the “Designer Tool” under the fonts tab. From here, your customer can apply different font styles.