With PrintXpand, admins can provide their customers with a wide range of designing features, ideas, effects, templates, etc. PrintXpand also provides a provision to let the end customers upload a custom image from their local systems. By using PrintXpand’s Designer Tool, the end customers can upload their favorite and treasured images from their device to give a personalized touch in designing their product.
Login to Backend
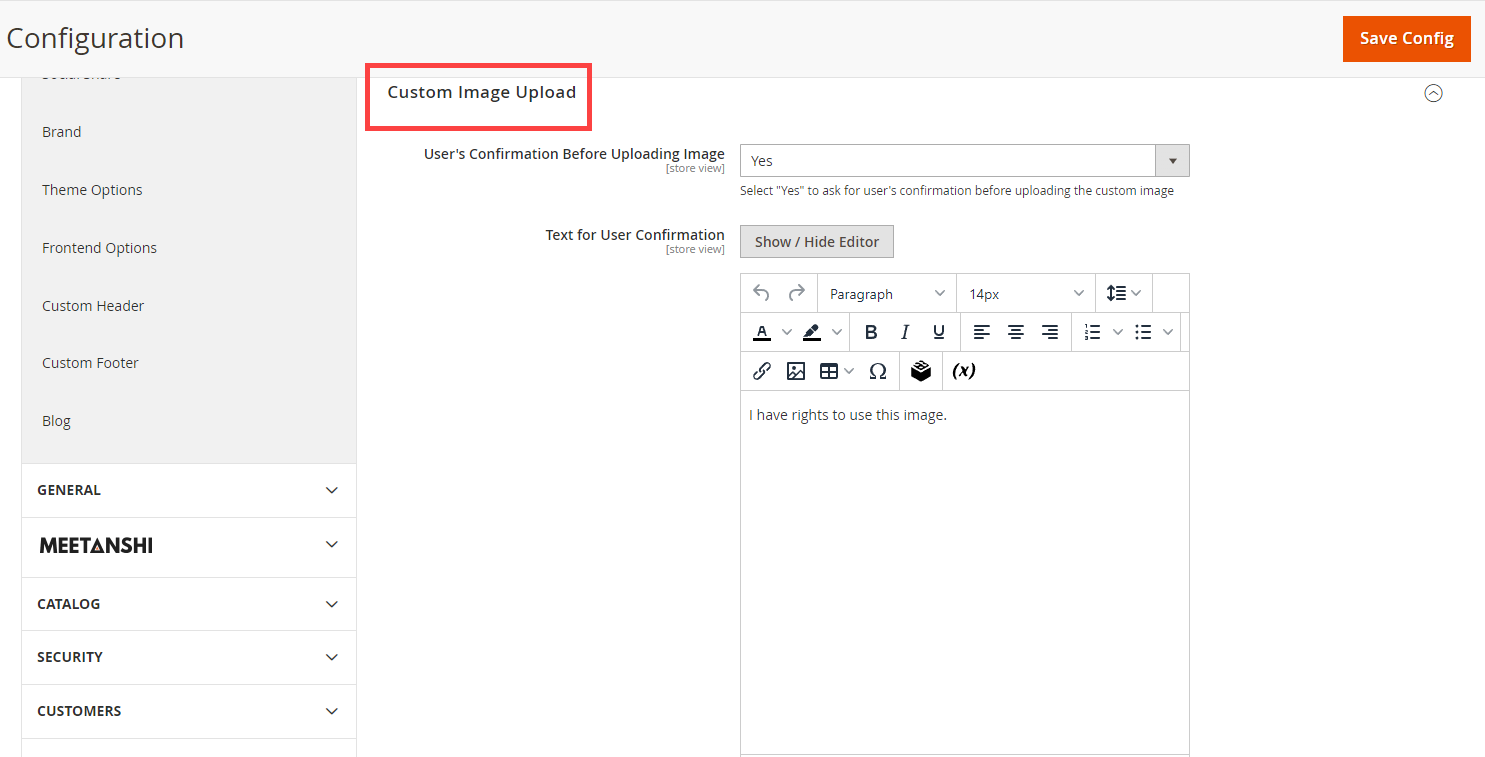
Navigate to the Stores ➤ Configuration ➤ PrintXpand ➤ Product Designer Settings, you will land on the “Configurations” page. Now navigate to the Custom Image Upload section and do the following configurations.

User’s Confirmation Before Uploading Image: Select Yes to ask for the user’s confirmation before uploading the custom image.
uploaded.
Text for User Confirmation: Enter the relevant confirmation message which will be displayed above the upload image button.
Allowed Extension For Upload: Select the file formats for image upload by the customer.
Enable Image Limit: Select Yes to set the maximum number of images allowed in a single design area.
- Image Limit: Enter the image limit to restrict the number of images uploaded by your customer in a single design area. For example, if you enter the image limit as three then your customer can’t upload more than three images in a single design area.
- Error Message: Add the message which will be displayed if the number of images exceeds the limit of the customized image.
Minimum Size of Image: Define the minimum size of an image in MB (Megabyte) that can be uploaded.
Maximum Size of Image: Define the maximum size of the image in MB (Megabyte) that can be uploaded.
Show Instruction: Select Yes to show instructions while uploading a custom image.


