Login to Backend
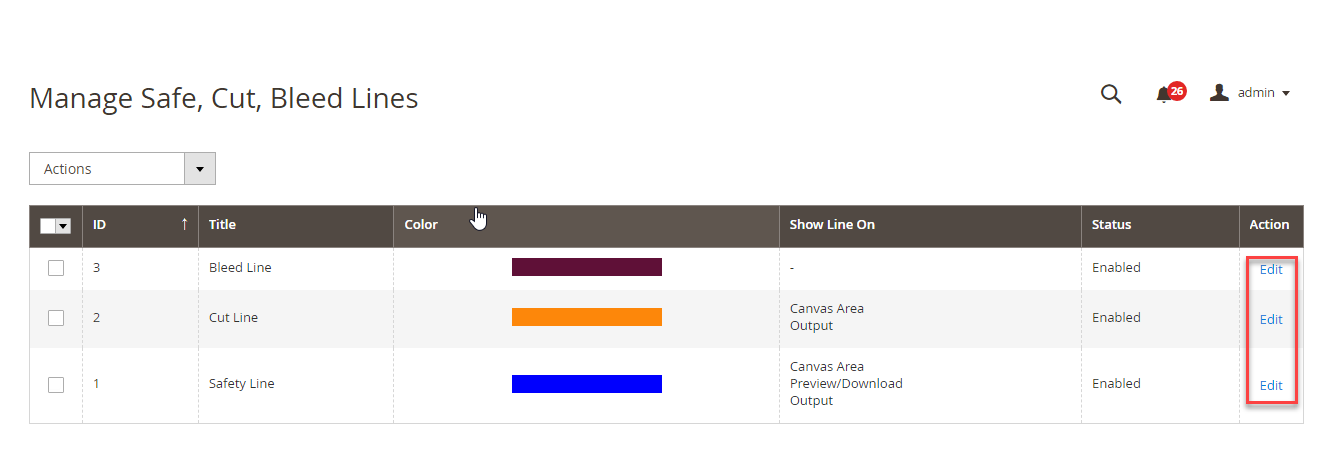
Navigate to Product Designer ➤ Manage Safe Cut Bleed Lines. Here you will get the bleed, cut, safe line by default in the grid view. Now click on the Edit button under the Action column and configure the lines as per your requirement.
After clicking the Edit button, you can edit the following details:
Line Title: Re-enter the title if you want to change it.
Color Code: Select the color of the line you want to keep on the front end.
Warning: Enter the warning message you want to show to your customers if the design is going outside the line.
Show Line On: Select where you want to show the lines. Note: Only applicable for safe and cut lines.
Select Status: Select Enable to enable the line on the frontend.
After editing all the configurations, click on the Save button to save the configurations.
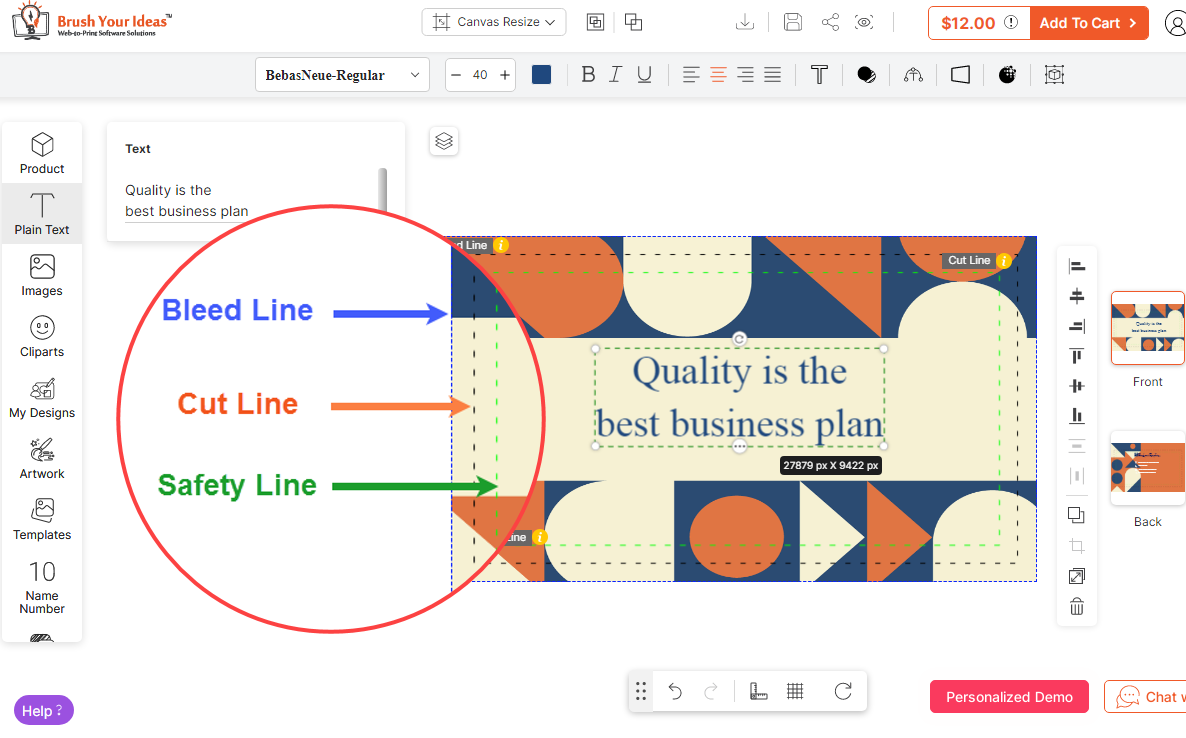
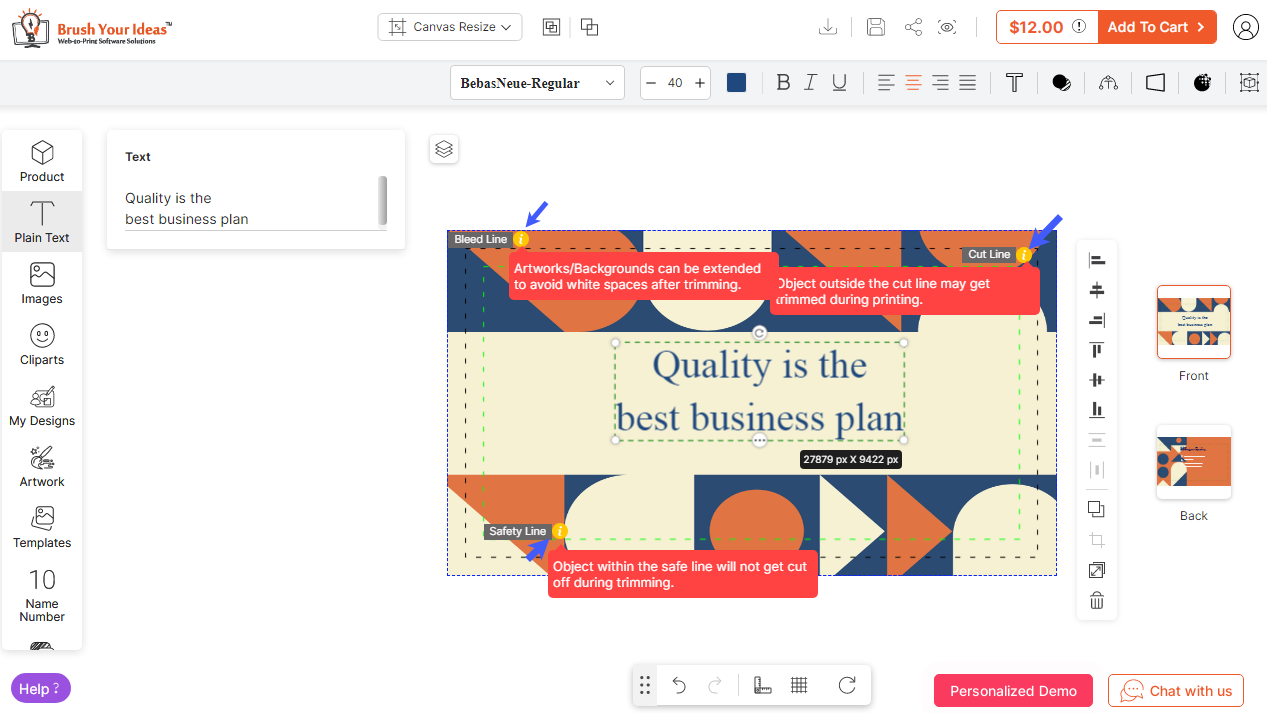
Frontend View
After configuring all the details, here is how to bleed, cut, safe lines will look on the frontend along with the warning messages.