You can add and manage the colors from the backend. The customers can select only those colors which you have enabled from the backend.
Login to Backend
To manage the printable colors go to Product Designer ➤ Manage Printable Colors, you will land on the “Manage Printable Colors” page.
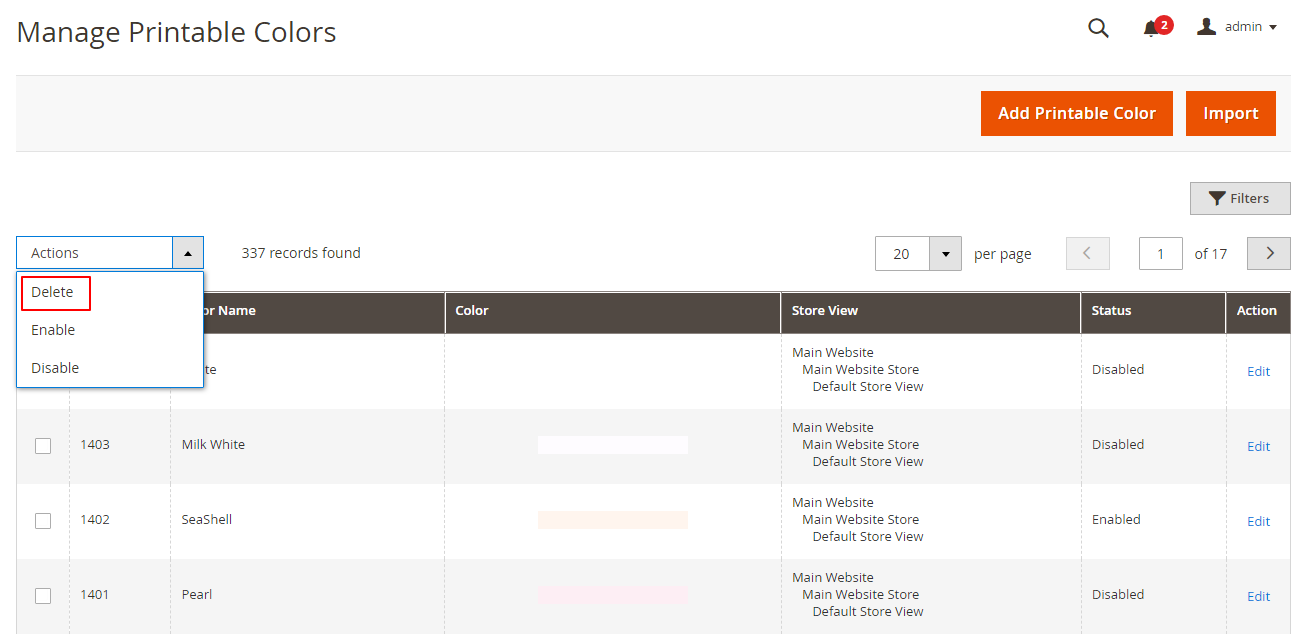
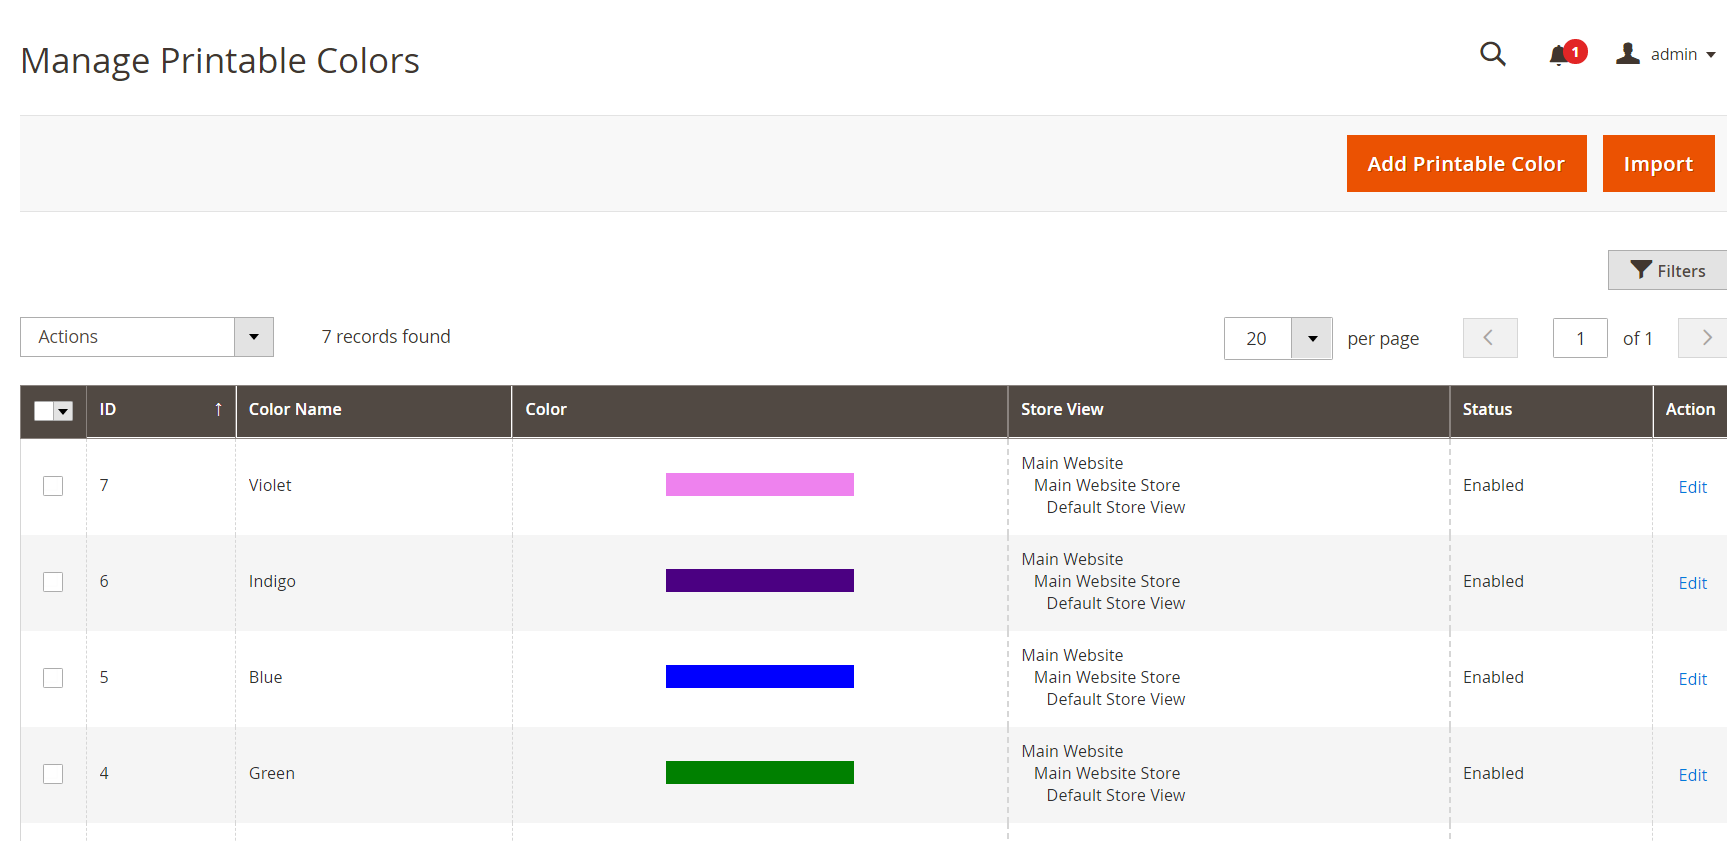 Here, you will get the list of all the printable colors with the details like name, color, store view, and status.
To add a new printable color click on “Add Printable Color” at the top right corner beside “Import”. After clicking “Add Printable Color”, you will be directed to the “Add Printable Color” page.
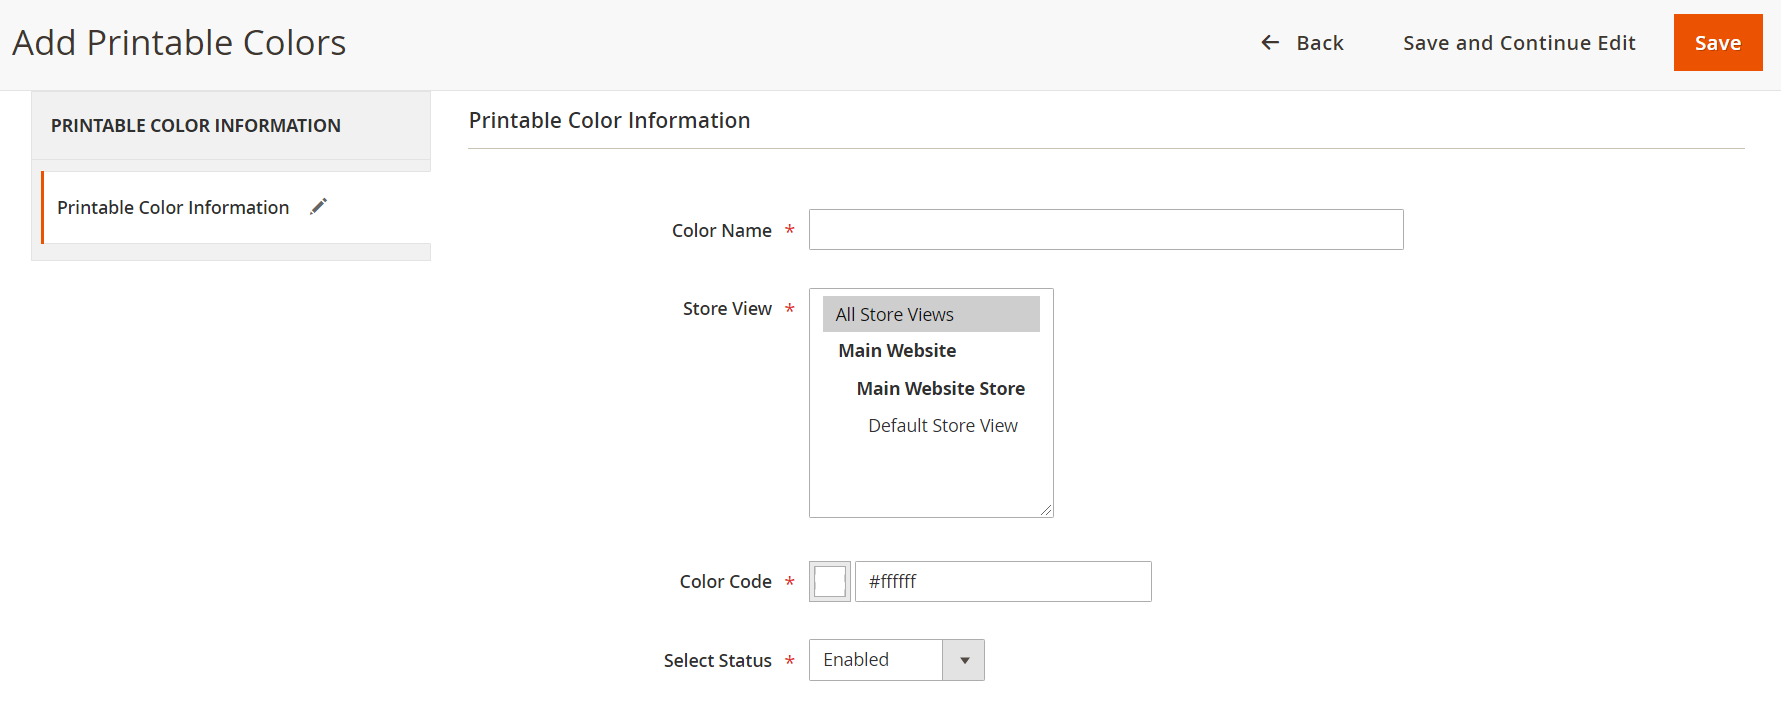 Color Name: Enter the suitable name of the printable colors.
Store View: Select the store view in which you want this manage printable color to be displayed.
Color Code: Enter the color code for the manage printable color or you can select the color from the Favorite Color box.
Select Status: Keep the status Enabled to enable the printable color.
After configuring all the details click on the Save button to save the configurations.
You can see this color in the list. For editing any color, click on the “Edit” button in the Action column.
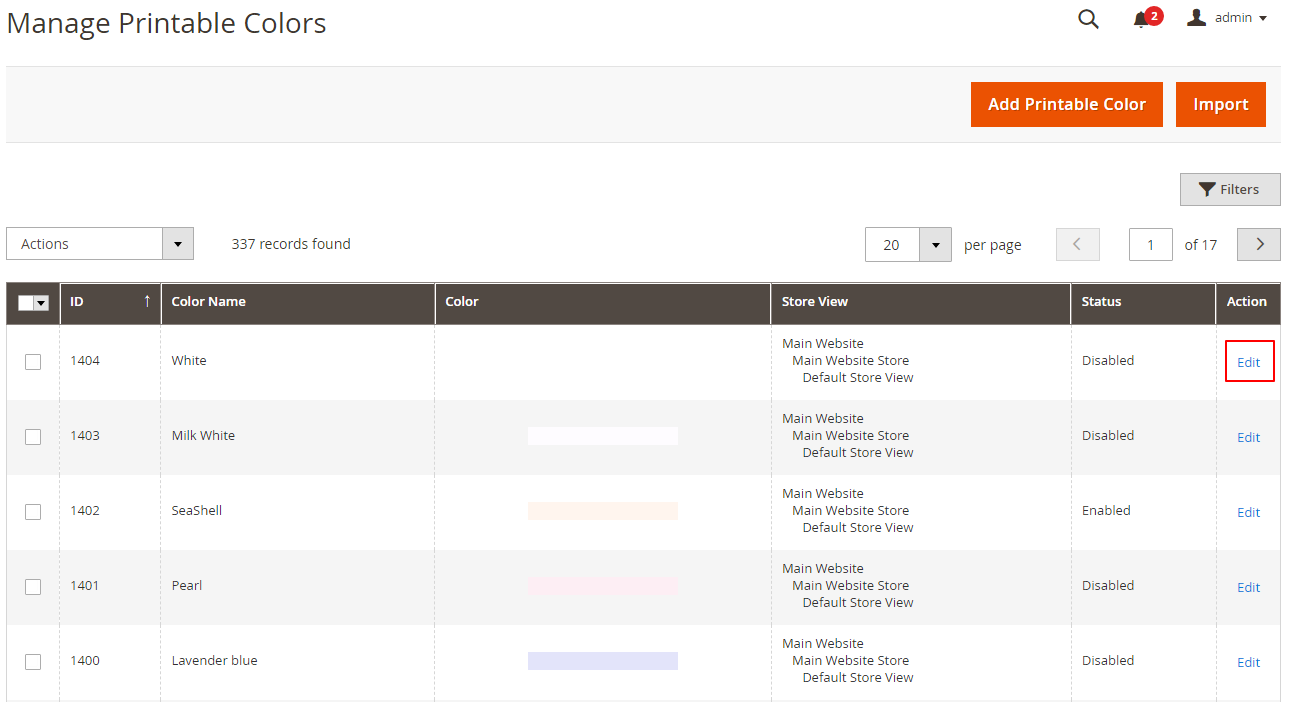
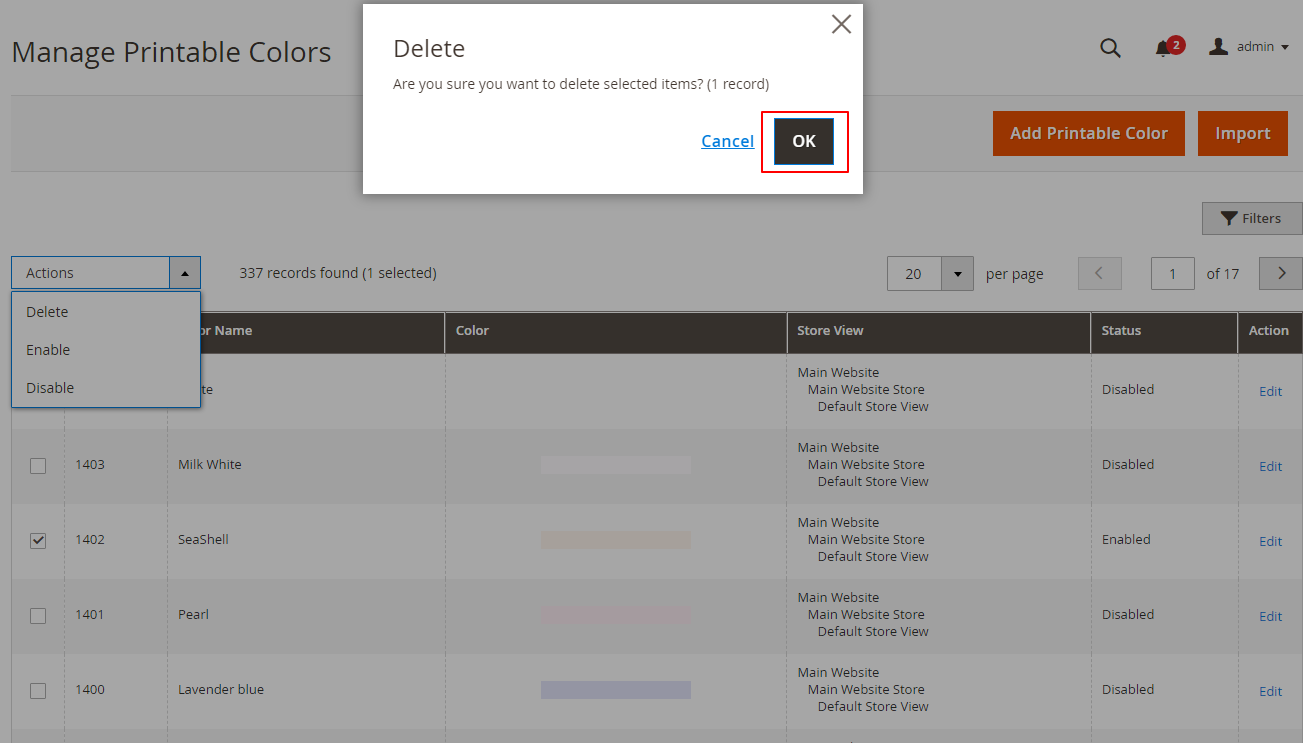
If you want to delete any color, select the background image, and choose the “Delete” option from the “Action” dropdown menu. After clicking the “Delete” button, a confirmation message will appear, where you have to click on “OK”.
Frontend View
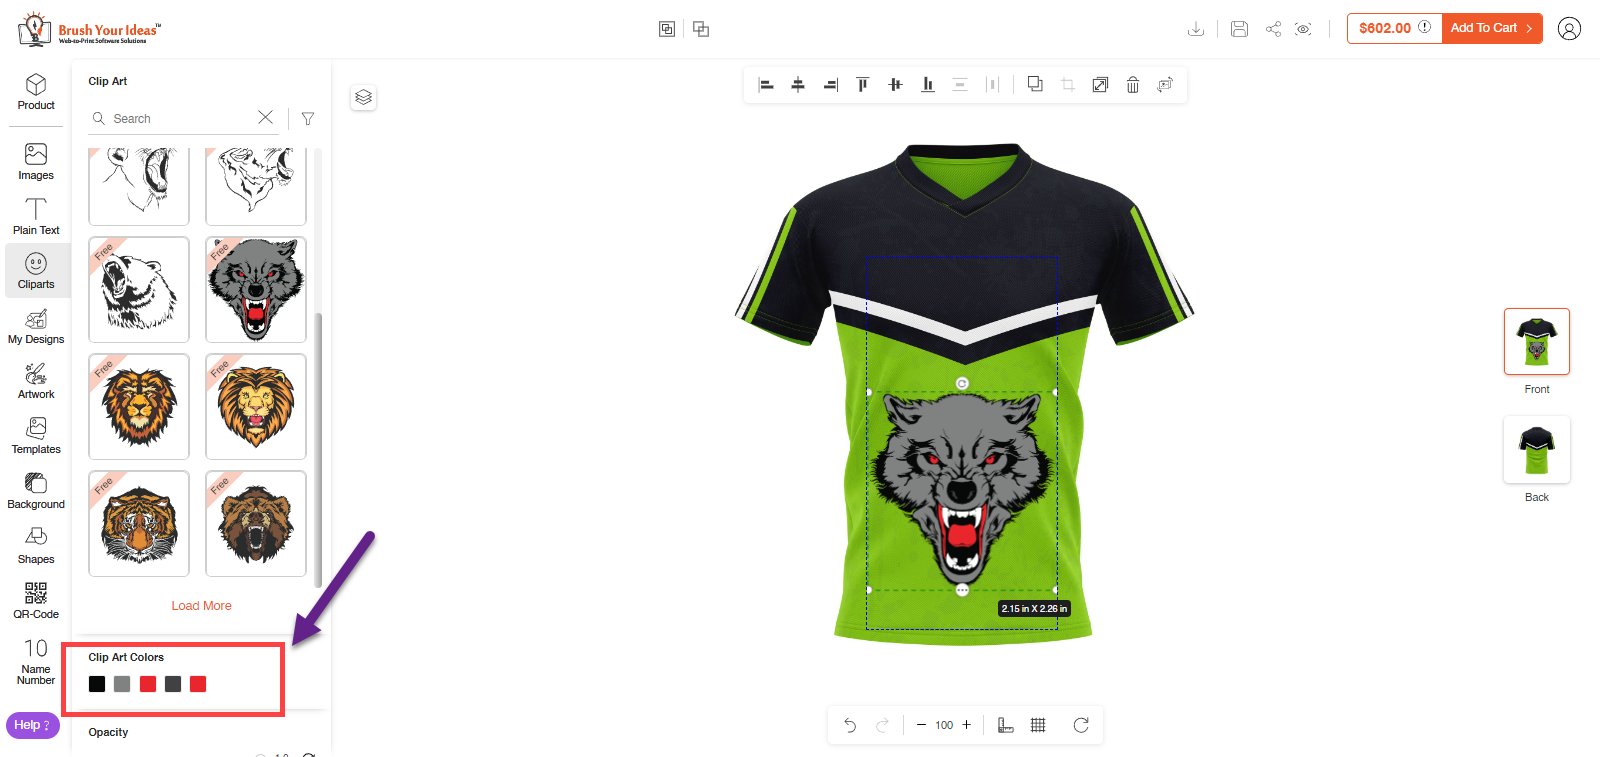
After backend configuration, these colors will be shown on the left side of the designer tool under the “Images” section. Once the customer selects any artwork or image, they will get the list of colors in the “Image Effect” tab as preset.