Image holds an important aspect when it comes to product customization. With our product designer tool, your customers can apply the effects and filters that can enhance product customization.
Login to Backend
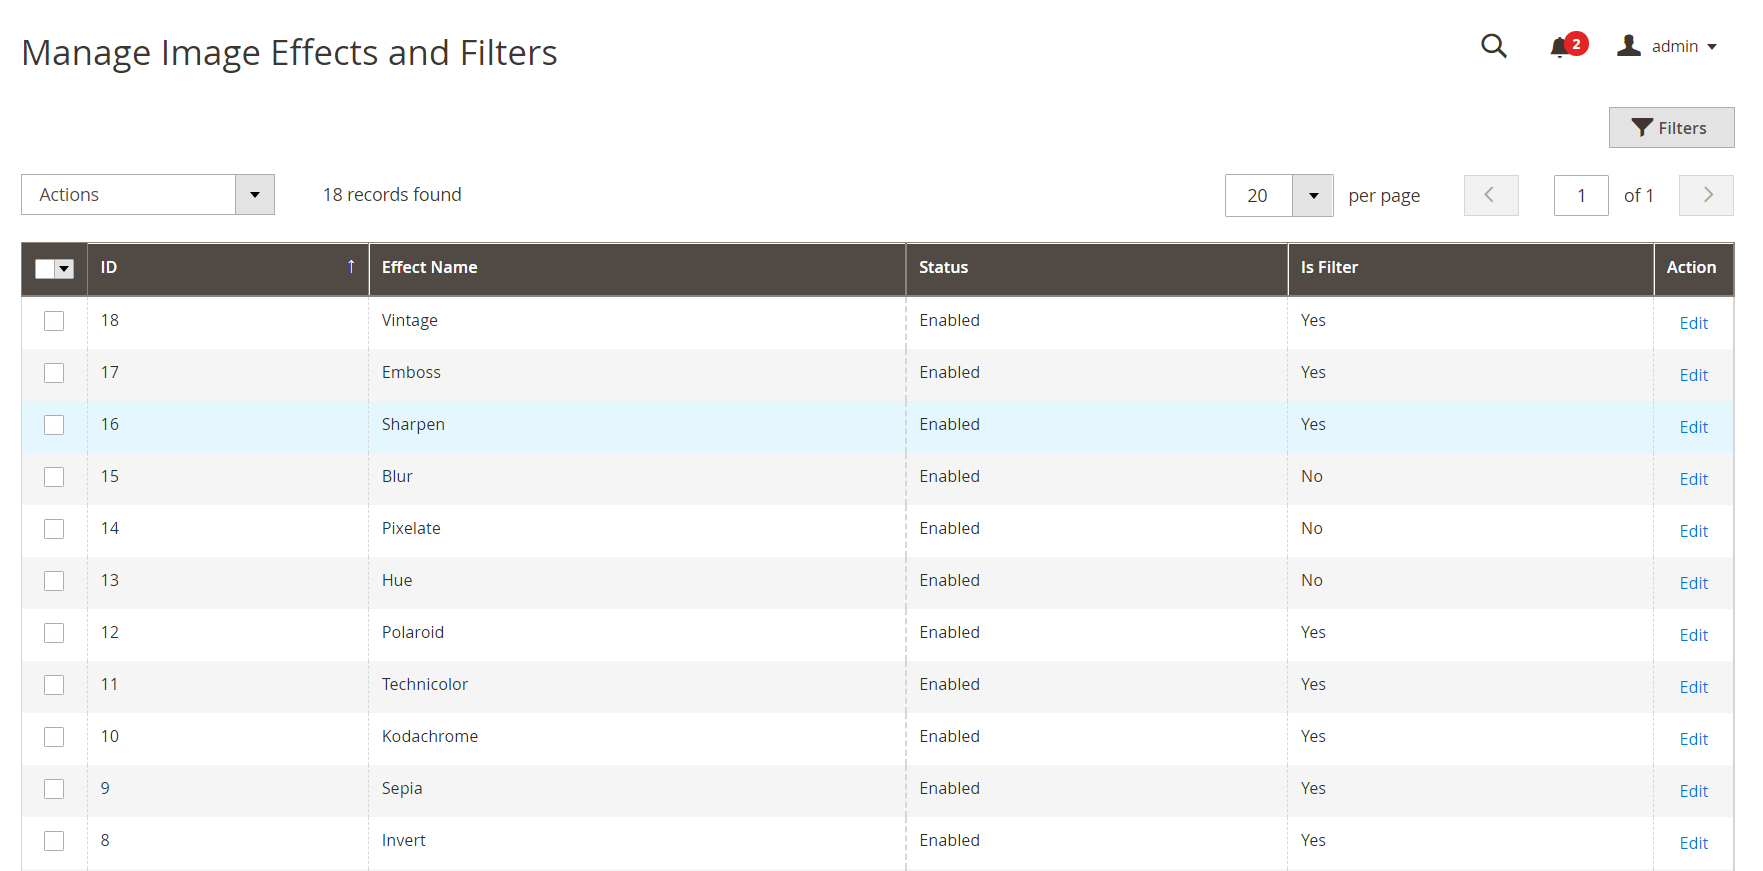
Navigate to the Product Designer ➤ Manage Image Effects and Filters, you will land on the “Manage Image Effects and Filters”.

In this page, you will get the list of effects and filters and all the details like Name, ID, Status, Action. To edit any effect or filter, click on the Edit button from the Actions tab.
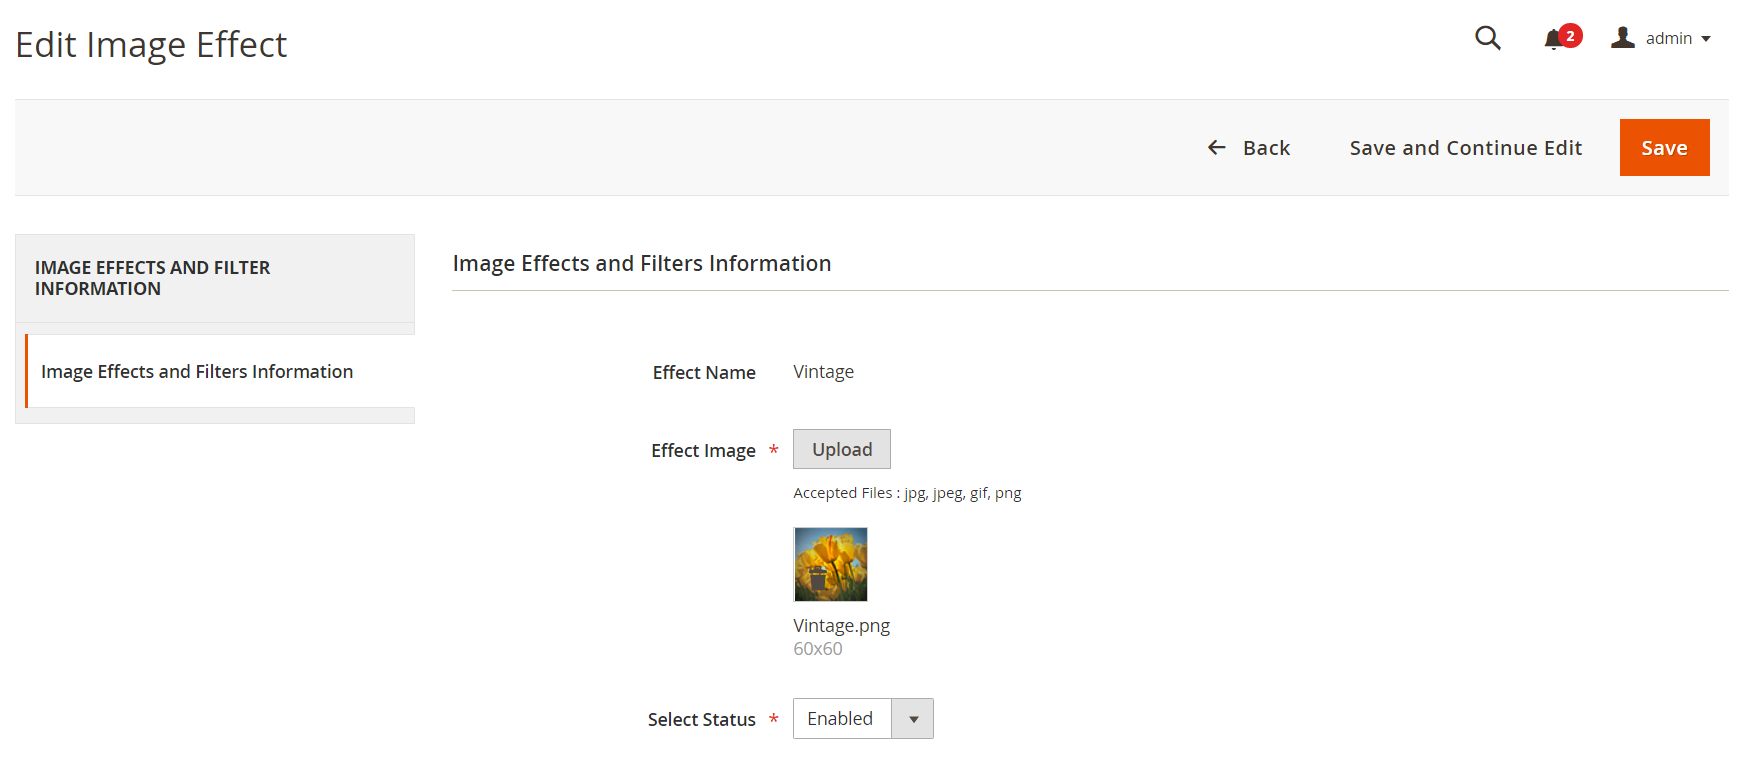
 Effect Image: Browse and upload the Image effect, if you want to change the image.
Select Status: Select the “Enabled” status, to enable the effect or filter.
After all the configurations, click on the “Save‘ button to save the configurations.
Frontend View
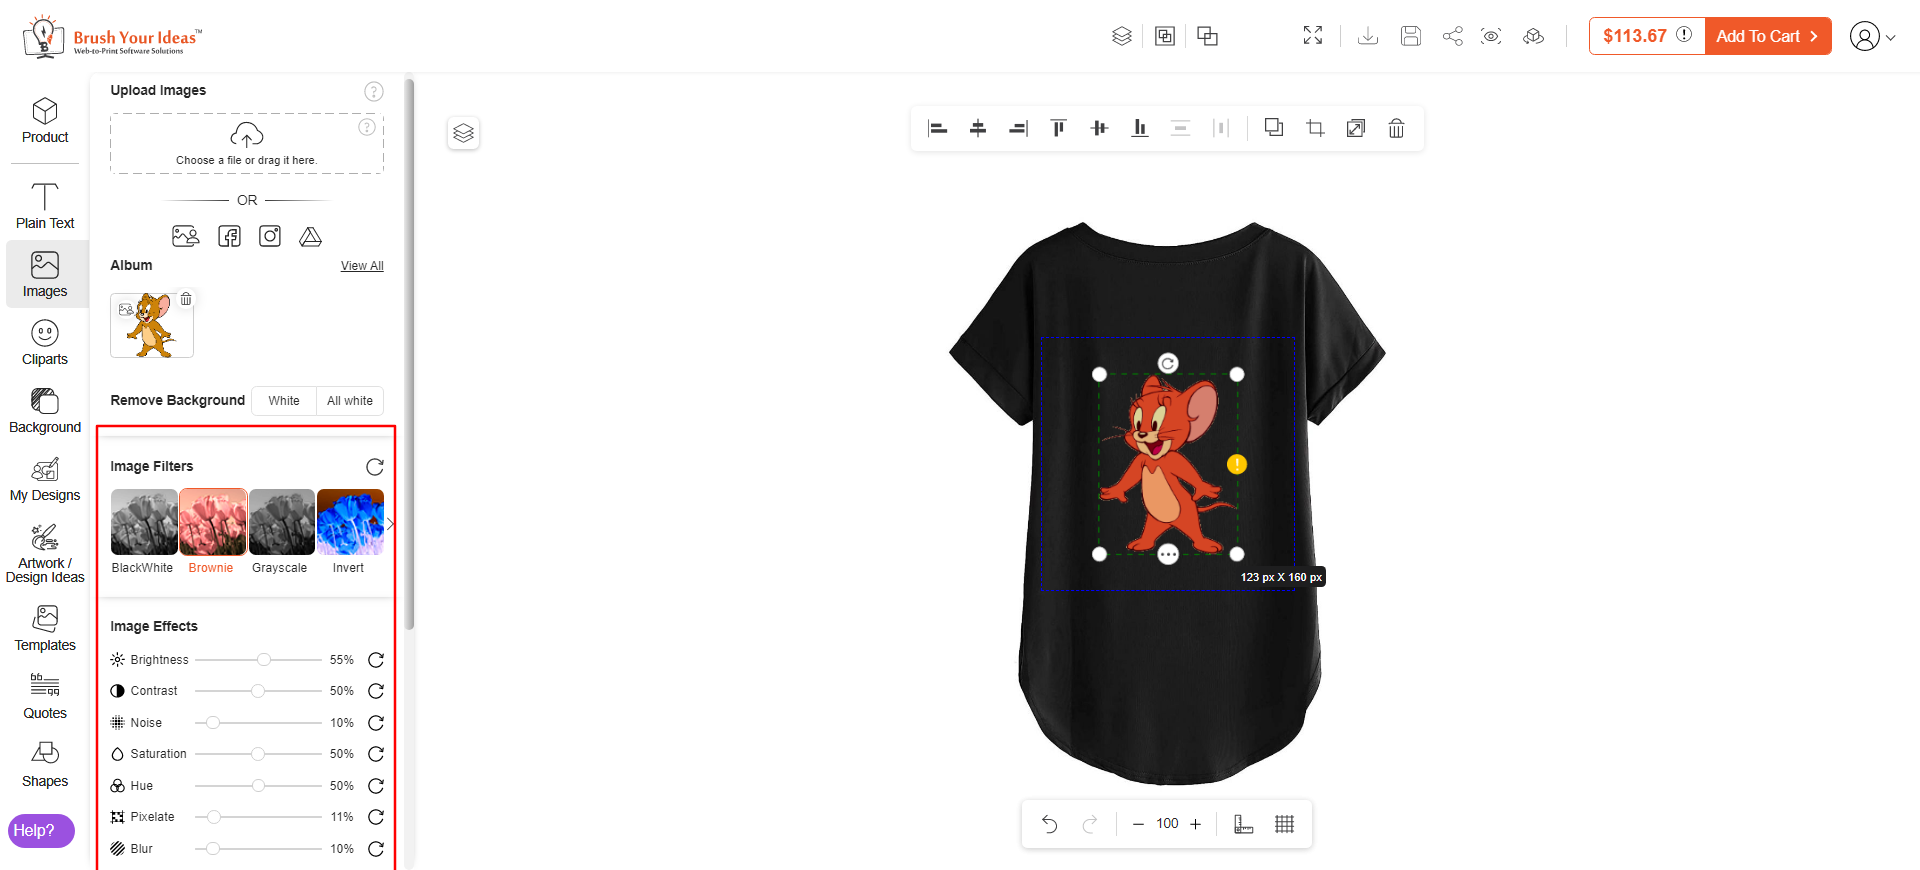
Once the effects and filters are configured, your customers can view them in the designer tool on the left side from the “Images” section.
 Note: You can apply the effects and filters only when the uploaded file is in JPG or PNG format. If the format is in SVG format then the customer can only change the internal colors.


