Predefined size for the product displays the general size of the product which will be the default size. In this article you will get to know how you can create a predefined size for the product.
Login to Backend
Navigate to Product Designer -> Canvas Resize -> Manage Predefined Sizes.
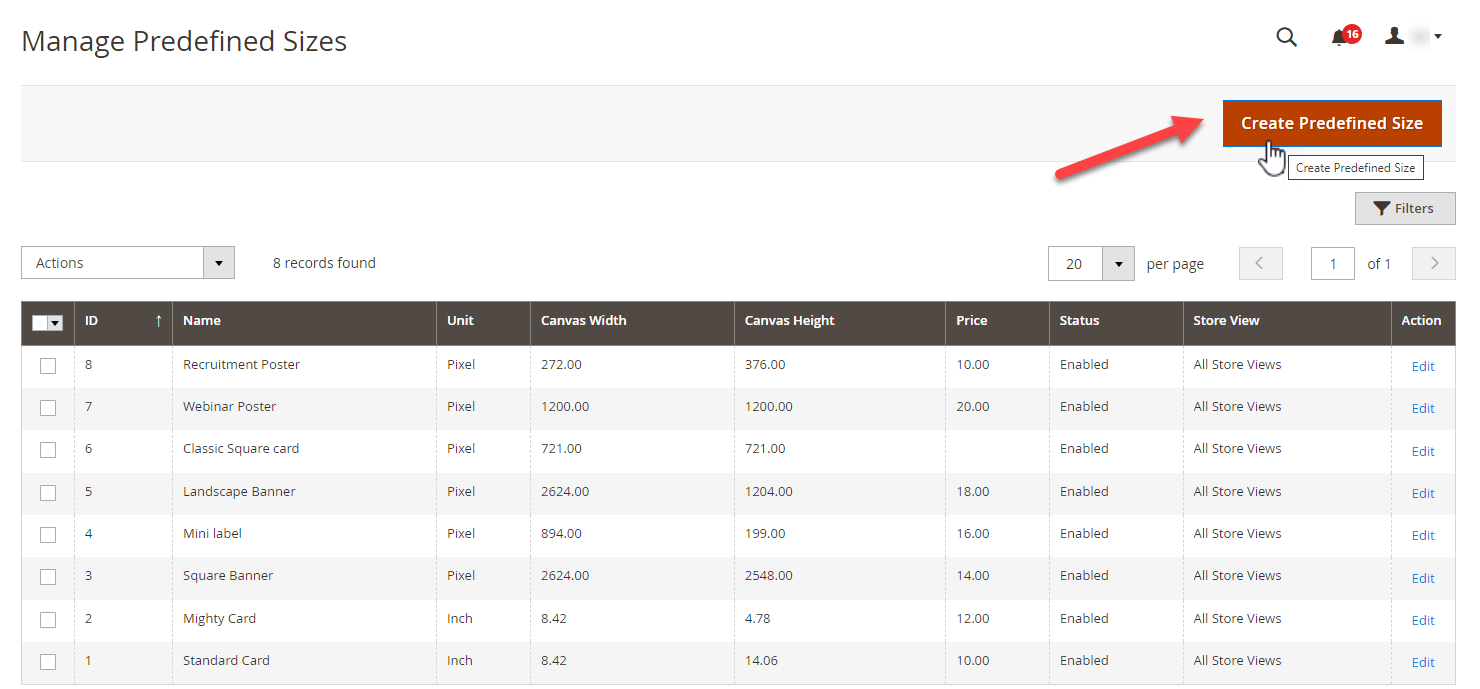
 You will land on the page where a list of predefined sizes is displayed. Here to create a predefined size for the product click on the Create Predefined Size on the right side of the page.
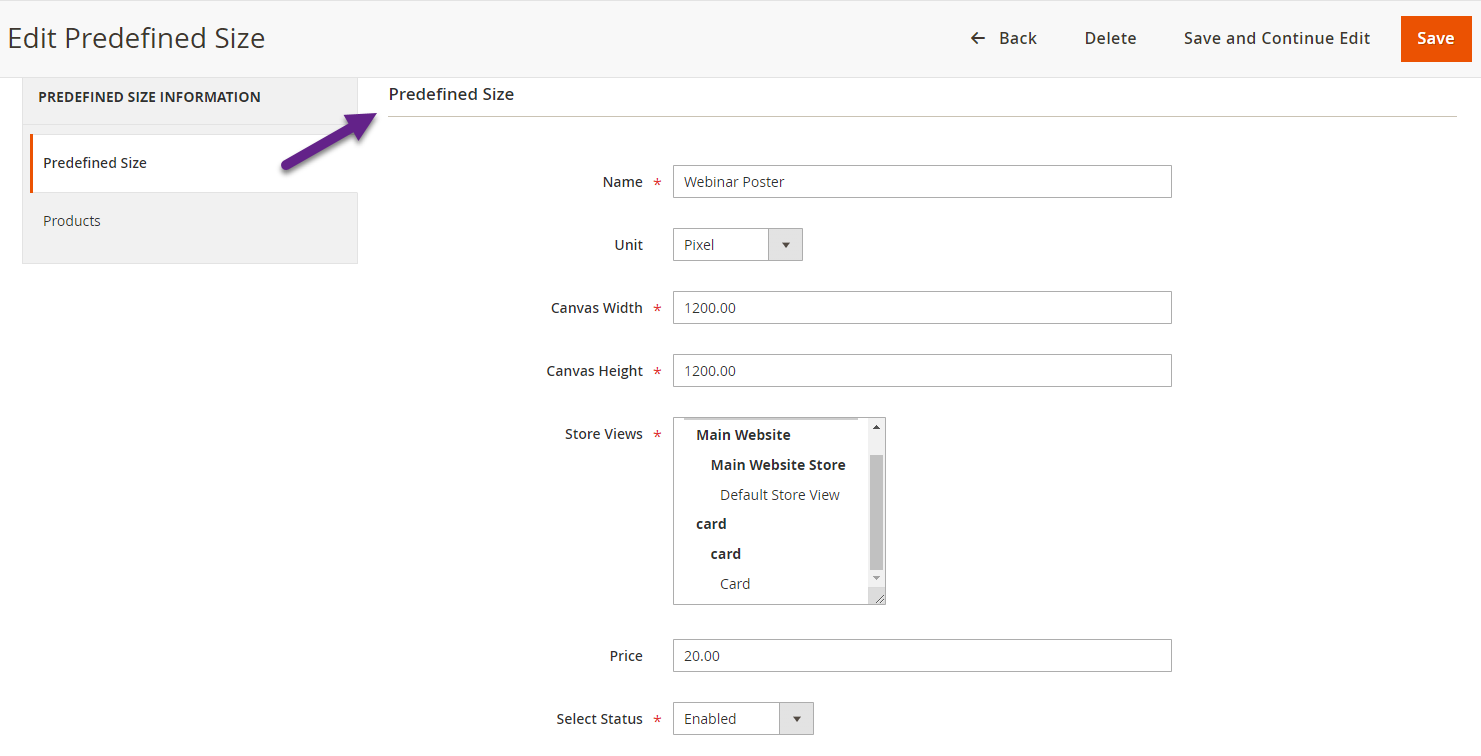
 Now in the Add Predefined Size page you have to fill all the fields given in Predefined Size section, such as :-
- Name : Enter the name here.
- Unit : Select the unit from the drop down.
- Canvas Width : Enter the width that you want to set as predefined width.
- Canvas Height : Enter the height that you want to set as predefined height.
- Store Views : Select the stores that you want to display these in.
- Price : Set the price in this section.
- Select Status : Set whether you want to enable this predefined size or not.
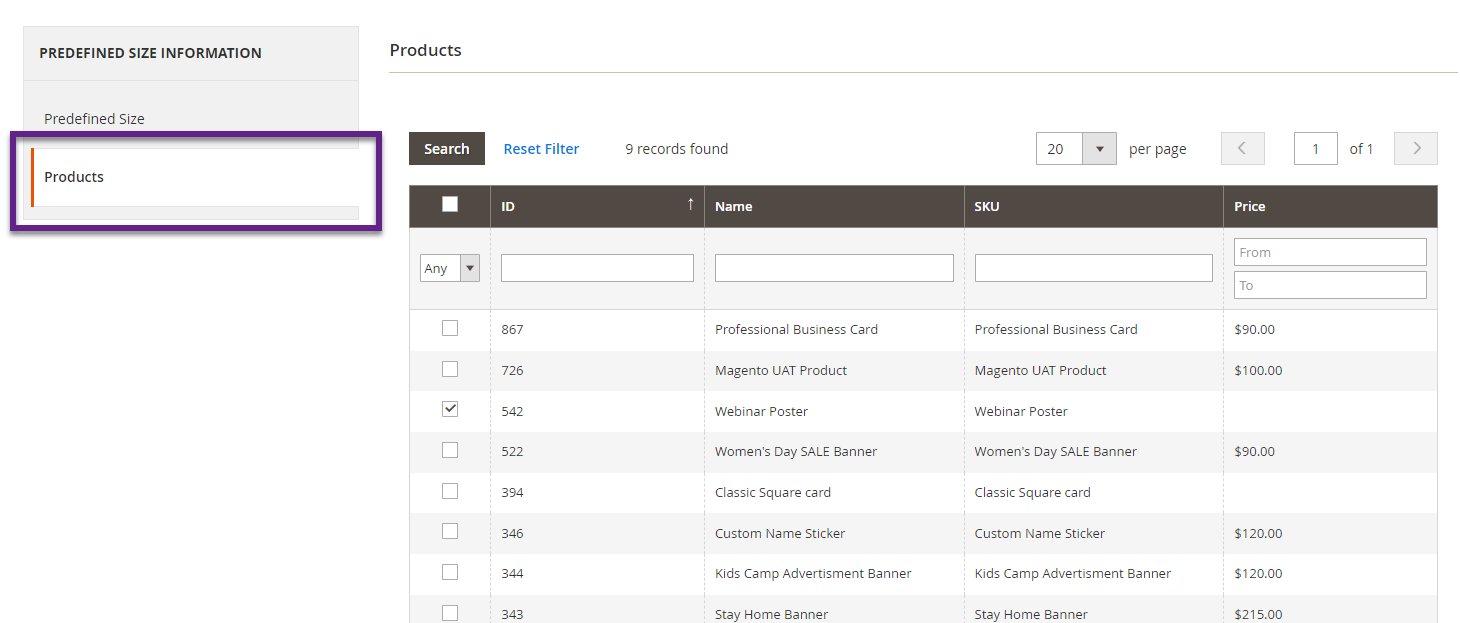
 There is another section, Products where you have to select the products for the particular predefined size. You can search the products as per ID, Name, SKU and Price Range.
You can Delete the Predefined Size by clicking on the right side Delete icon. After entering the required details you can click on Save and Continue Edit to save the configurations and remain on the same page but after saving the configurations if you want to return to the Predefined size’s listing page, click on Save.
By clicking on Back, you will be redirected to the Predefined Size’s listing page.