With a product configurator, you can offer 3D visualization of your products which will offer a realistic view of your products to your customers. In this article, you will get to know how to configure a formal shoe with Configurator.
Frontend
On the product listing page, when you hover onto the product, Configure It icon will be displayed. Click on it, in order to configure the product.
On the left side of the page few functionalities are displayed : –
- Zoom Out : Click on the “- ” icon in order to Zoom out the product.
- Zoom In : Click on the “ + “ button in order to Zoom in the product.
- Reset : Click on Reset button in order to reset the product.
- Preview : Click on this icon in order to view the product in full screen.

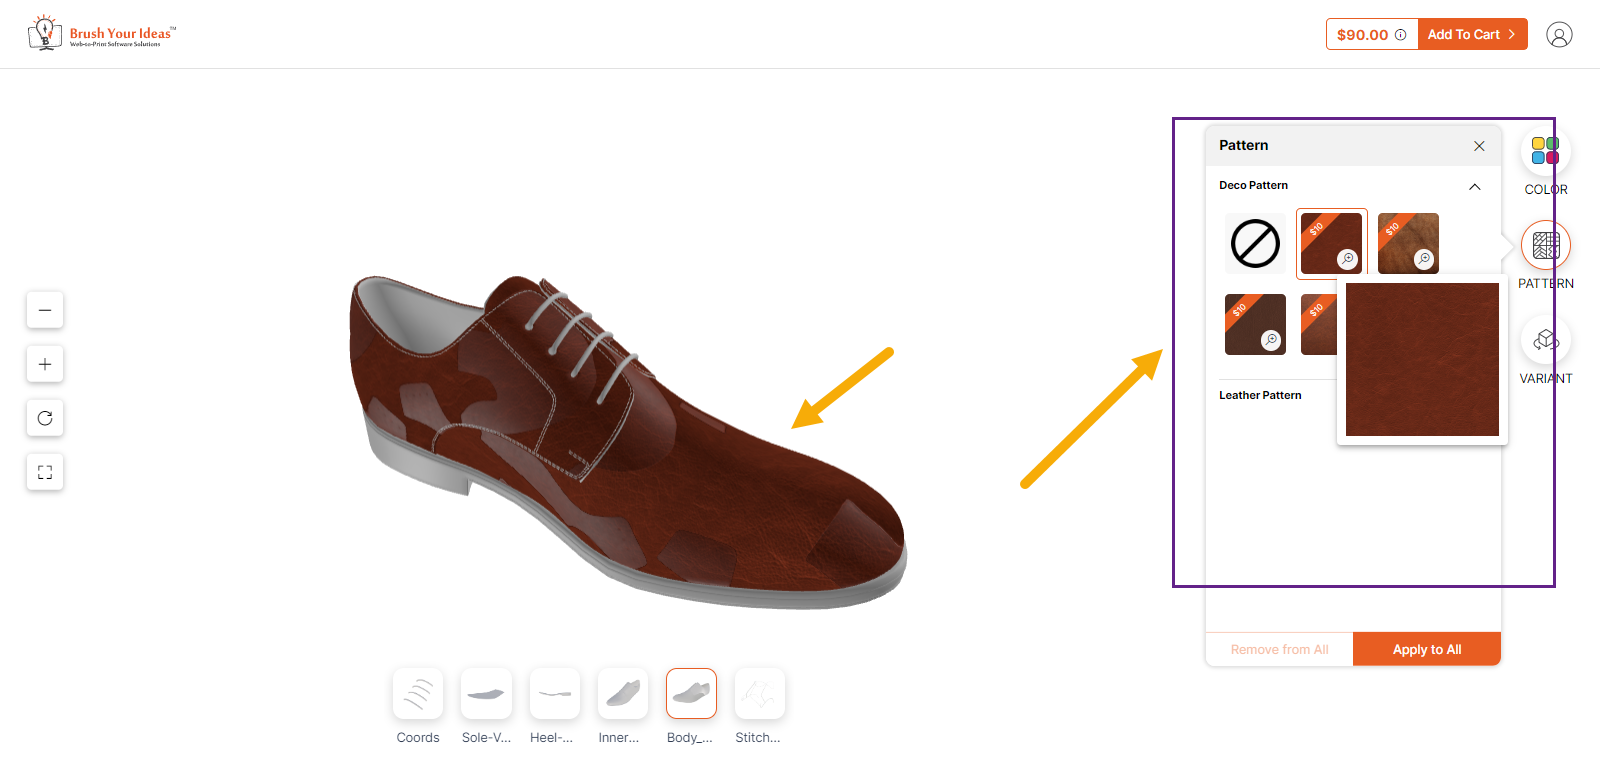
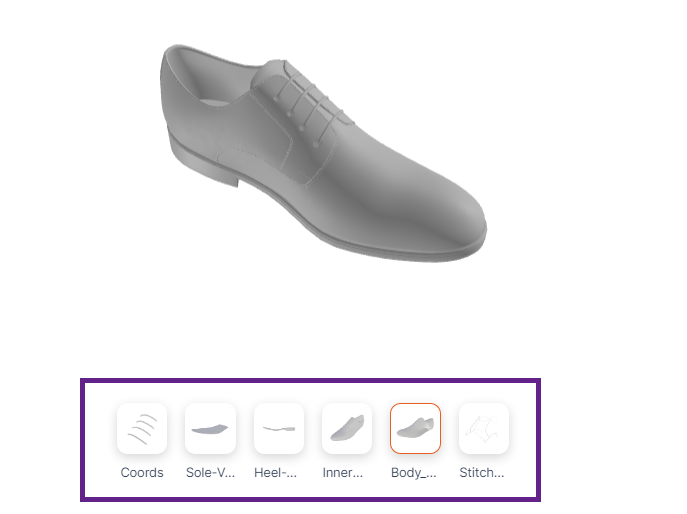
Below, there are various parts of the shoes that you can select and apply colors to.
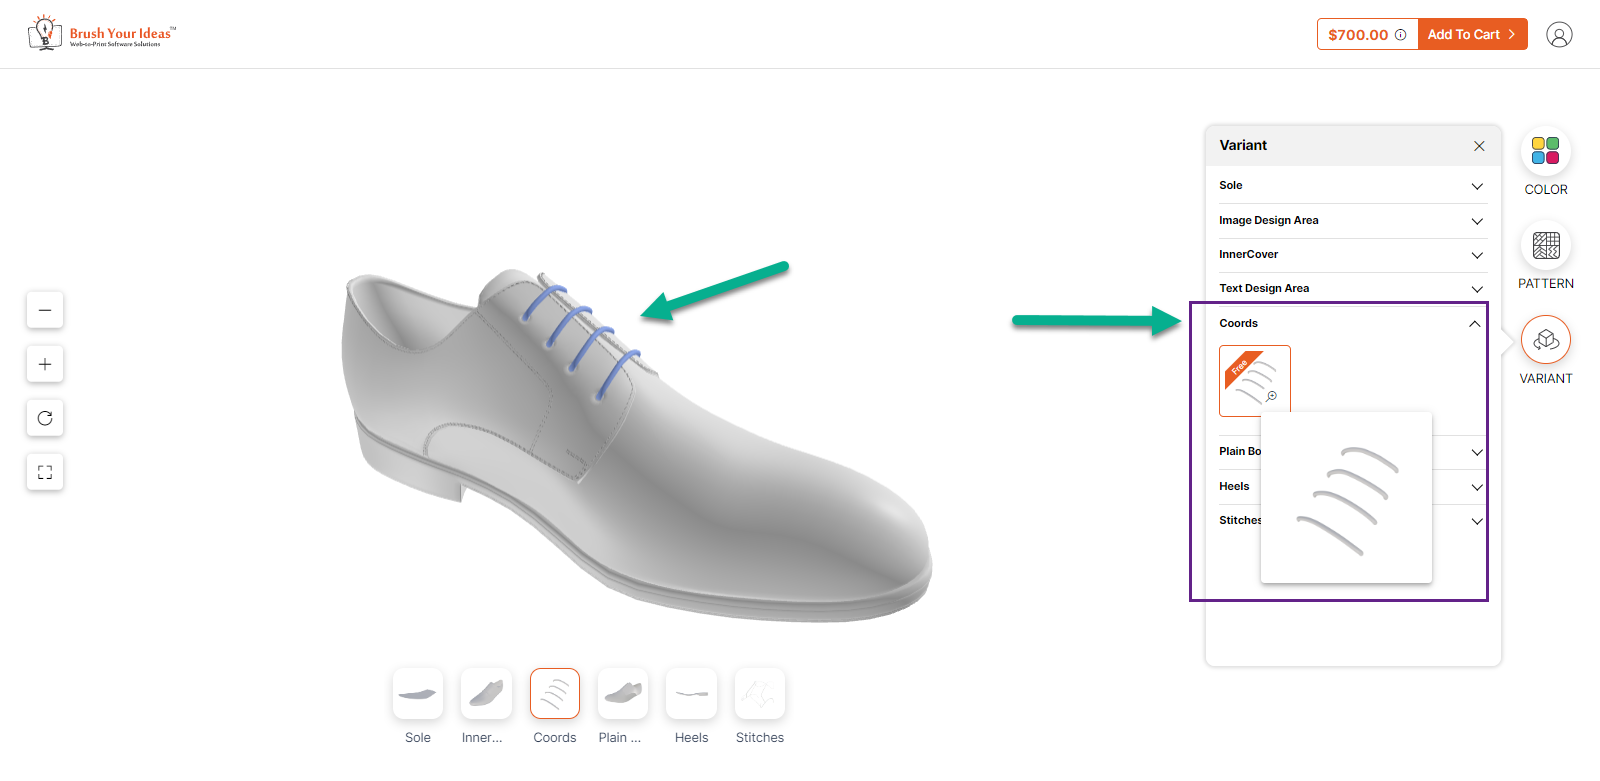
On the right side, there is a panel that includes Colors, Patterns, and Variants to configure the product.
The sequence should be Color, Pattern, Variant
VARIANT
the Variant section is displayed where different parts of the shoes along with the variants are displayed. You can select a particular part of the shoe in order to apply any variants.
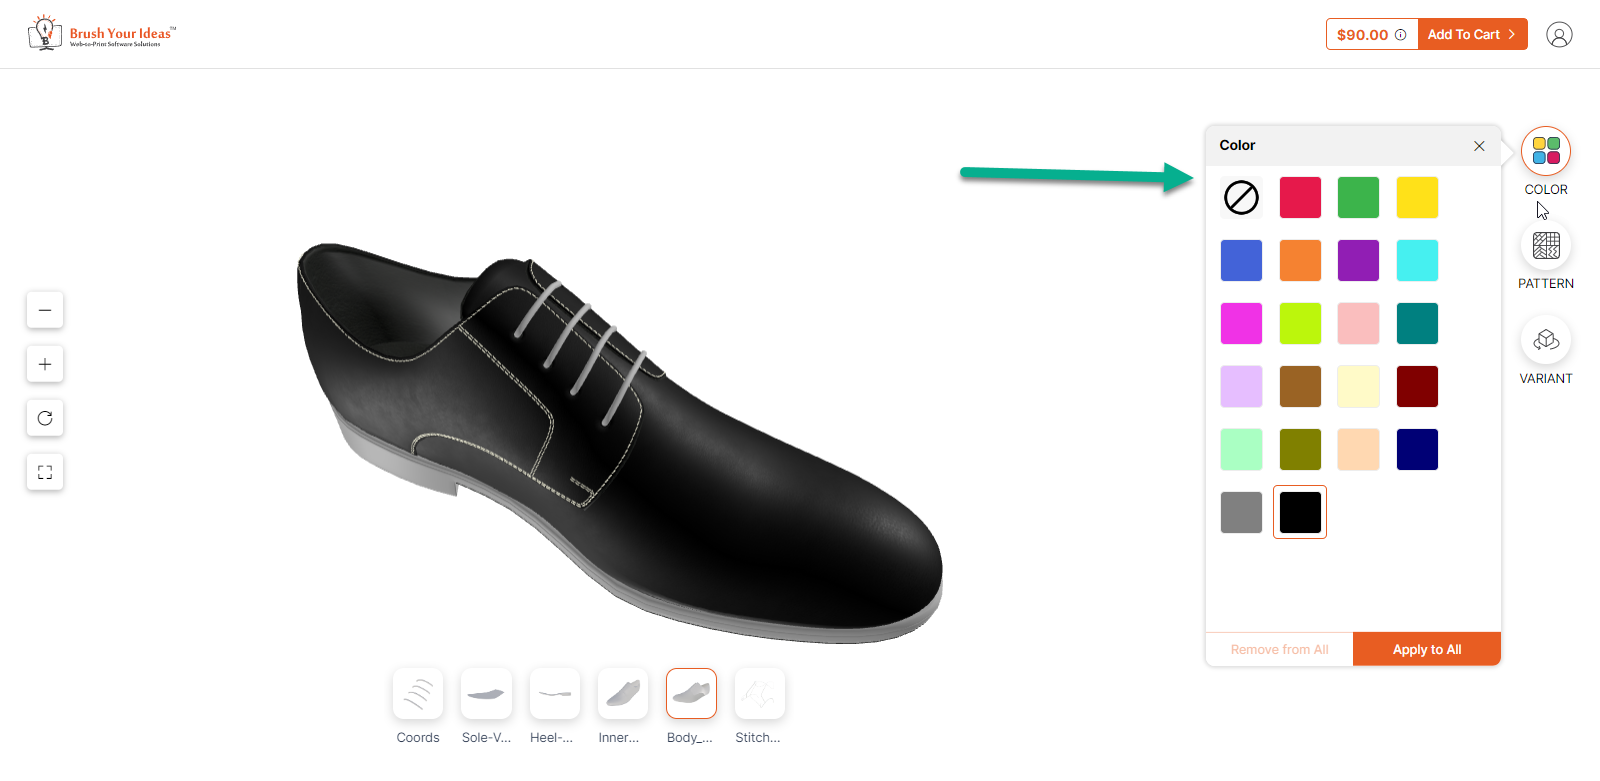
COLOR
To apply colors, you have to select a particular part and then go to the Color section and select from the given.
If you click on the Apply All button after selecting a particular color, then that color will be applied to the entire product and you can also remove the applied theme by clicking on the Remove All button.
PATTERN
In the Pattern section, various patterns that have been entered from the backend will be displayed. To apply the pattern you have to select the part you want to apply the pattern