


To assign tags to Clipart, go to Product Designer ➤ Manage Clipart Category, you will land on the “Manage Clipart Category” page. Here, you will get the list of clipart categories.
If you haven’t created a clipart category then follow these steps before assigning the tags.
Once you create the category, here is what you should do.
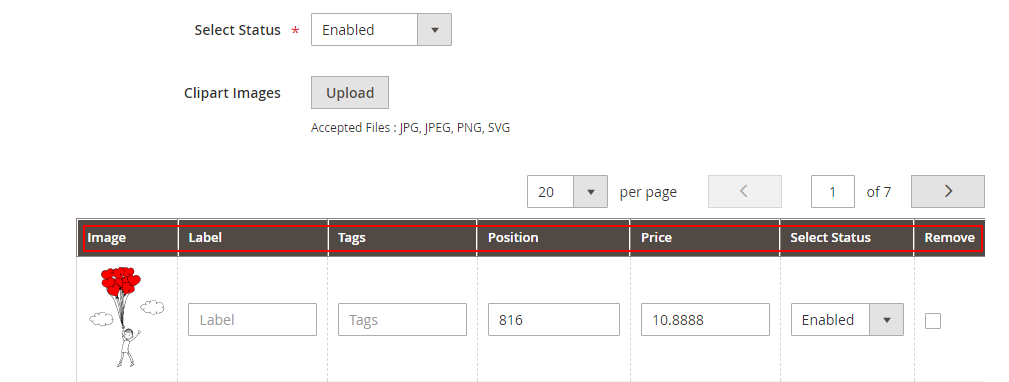
Label & Tags: Enter Label & Tags for clipart for easy search.
Position: Enter the no. of position for this clipart image to be displayed on the frontend.
Price: Enter the price you would like to charge whenever your shopper applies the image to the product.
Select Status: Select the status Enabled to enable the particular clipart.
Remove: Tick this option if you want to permanently delete the clipart.
After all the configurations, click on the “Save” button to save the configurations.


