


Not only you can add as many cliparts as you want but also you can categorize them easily.
Login to Backend
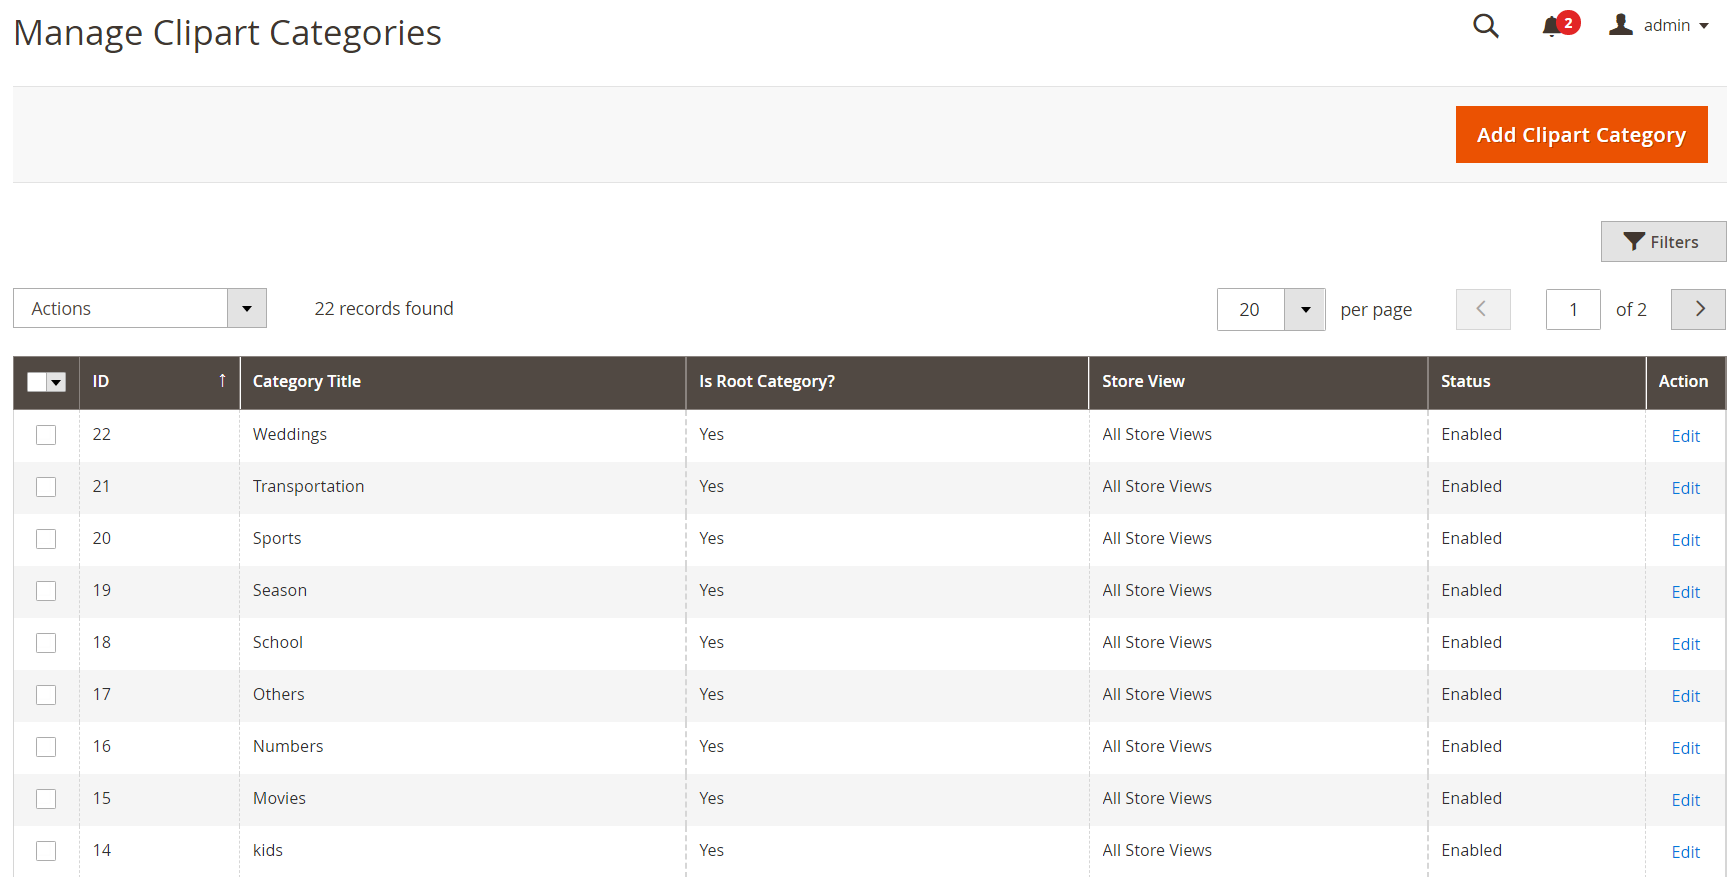
Navigate to the Product Designer ➤ Manage Clipart Categories, you will land on the “Manage Clipart Categories” page. In this page, you will get the list of clipart categories. You can Add, Edit, and manage them as per your requirements.
Click on the “Add Clipart Category” button for adding the clipart images and their categories.
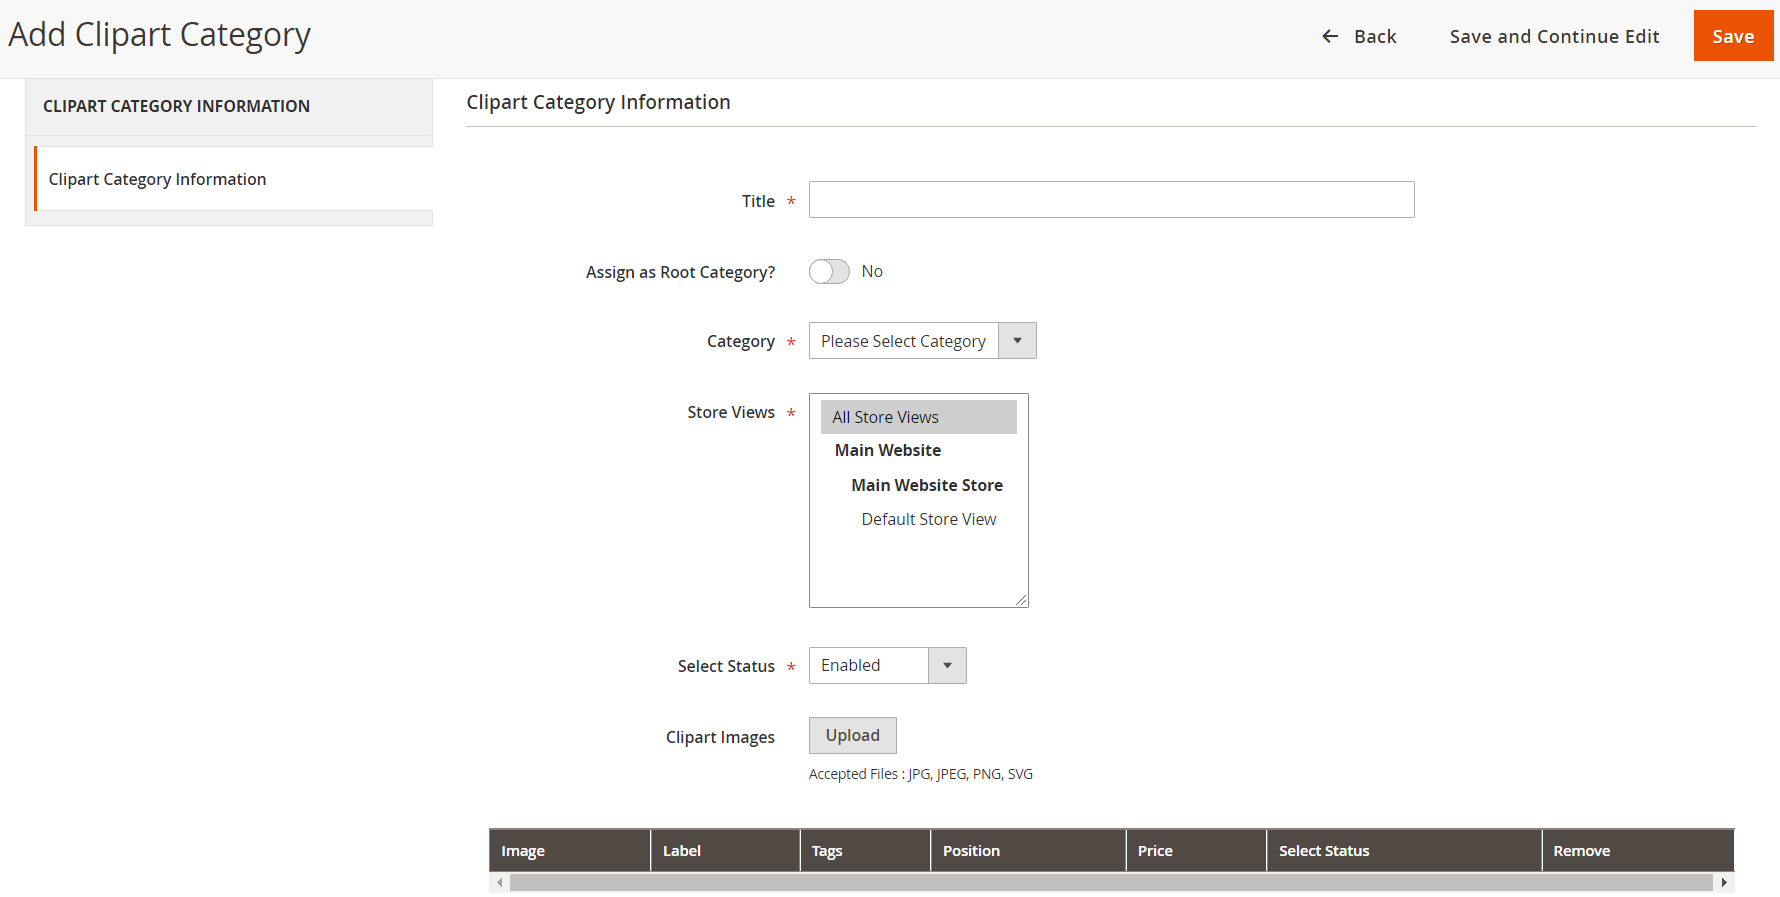
Title: Enter the suitable title for the clipart category.
Assign as Root Category: Toggle Yes if the category is the parent category.
Category: Assign the sub Category, if you have selected No in the Root category.
Store Views: Select the store in which you want this category to be visible.
Select Status: Keep the Enabled status to enable the clipart category.
Clipart Images: Browse and upload the clipart images that will be assigned to the category. File format should be JPG, JPEG, PNG, and SVG.
Frontend View
After doing the backend configurations, the Clipart tab will be visible on the left side of the designer tool. Your customers can explore the clipart from this tab. Shoppers can also easily search the clipart through the clipart category.
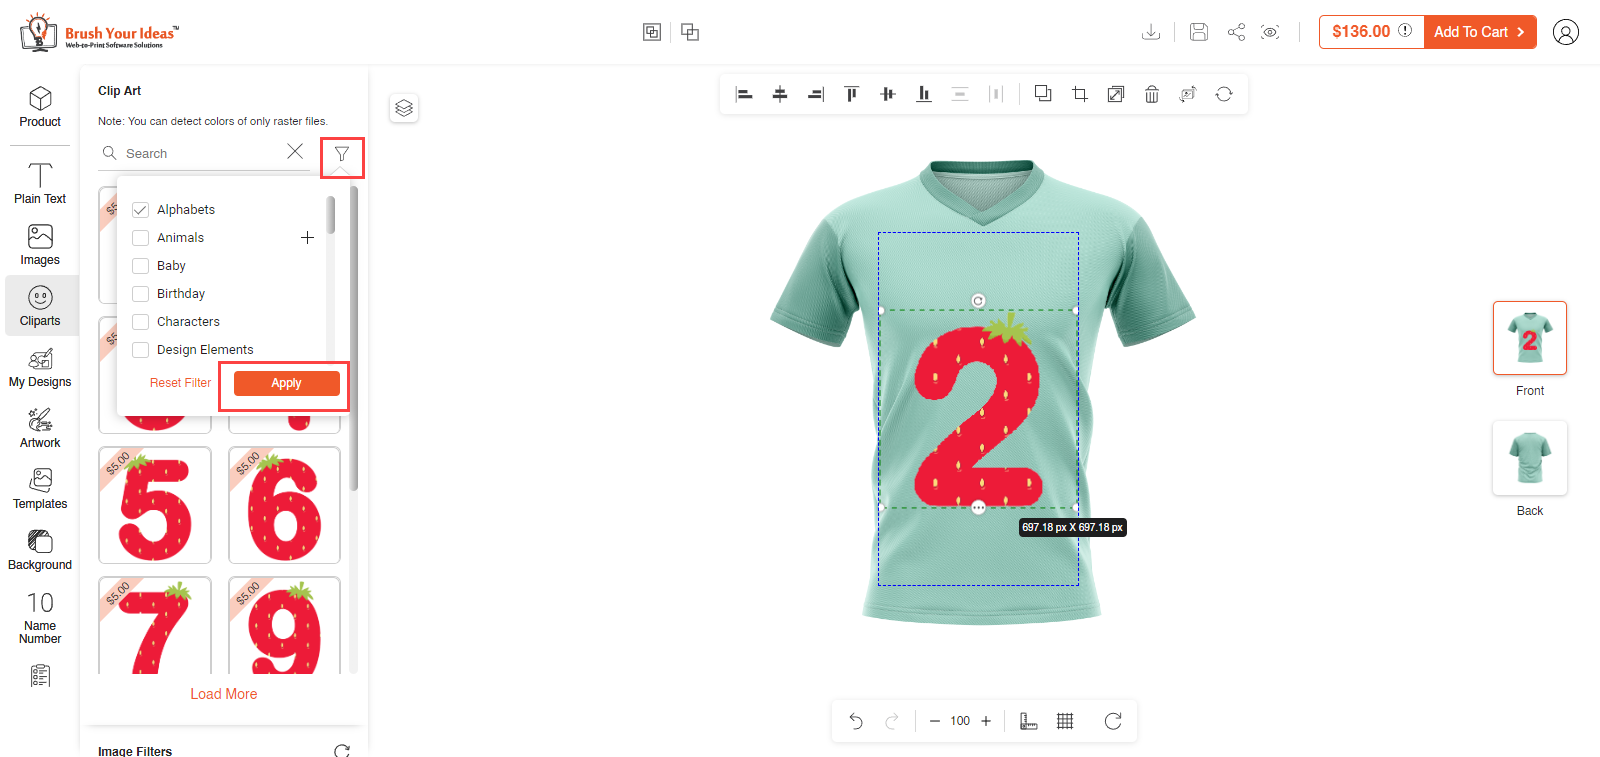 By clicking on the Funnel button, your user will get the clipart category. They just have to click the Apply button to get the categories.


