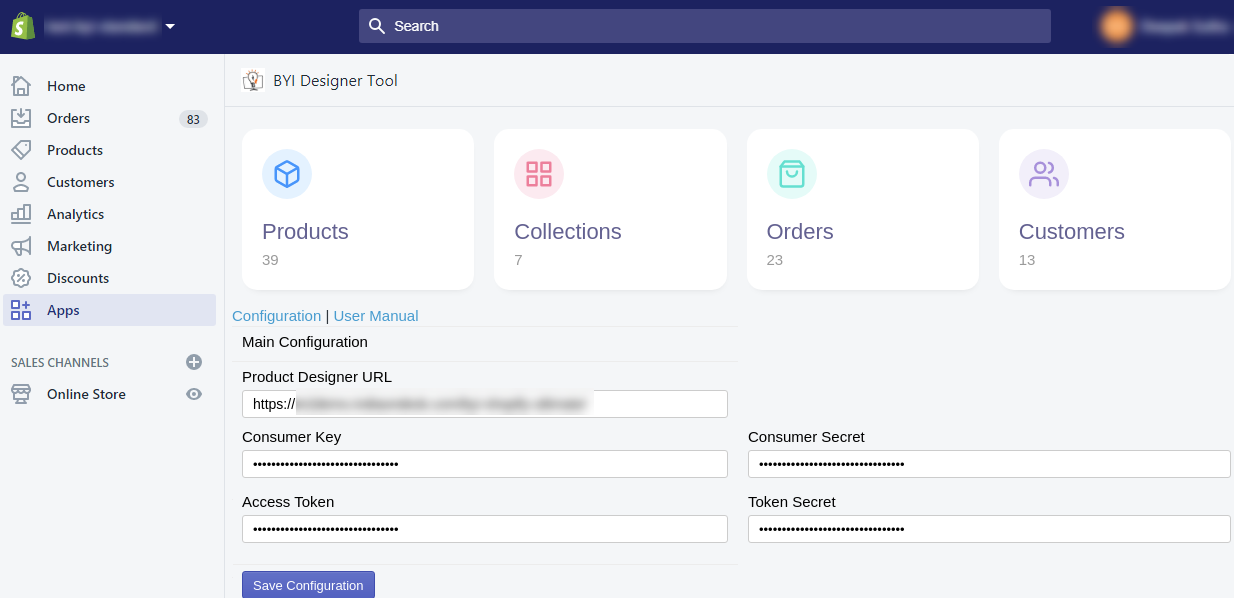
After the configuration of the modules and the data have been synchronized into the designer tool, you can manage the following configurations from the backend of the designer tool.
PrintXpand offers an API to connect your Shopify app with the product designer tool. Firstly, you need to integrate the API for the designer tool.
Login to Backend
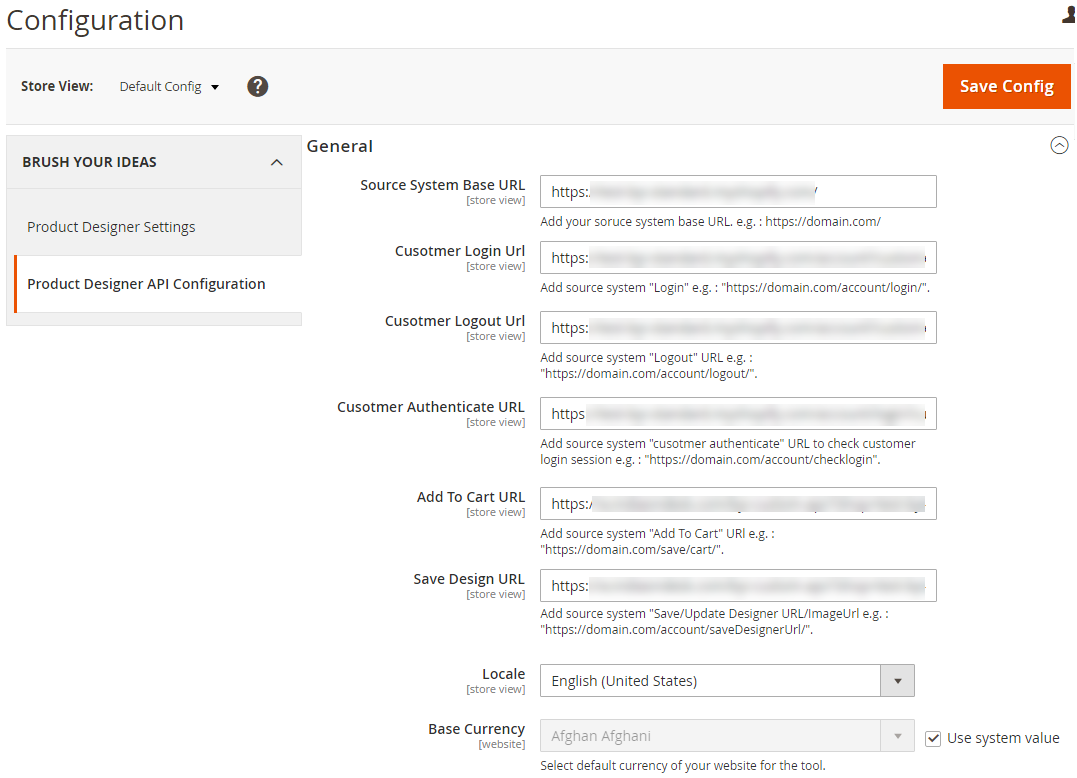
Go to Stores ➤ Configurations ➤ Product Designer Settings API Configuration General and do the following configurations.
General
Source System Base URL: Insert your Source System Base URL. i.e., https://domain.com/
Customer Login URL: Insert URL Source System Login. I.e., https://domain.com/account/login
Customer Logout URL: Insert URL Source System Logout. I.e., https://domain.com/account/logout
Customer Authenticate URL: Insert Source System URL for “Customer Authenticate” to check customer login sessions. I.e.,API https://domain.com/account/checklogin
Add to Cart URL: Insert Source System URL for the “Add to Cart” I.e. https://domain.com/save/cart/
Save Design URL: Insert Source system URL for Save/Update Design/Image. i.e., https://domain.com/account/saveDesignerUrl/
Locale: Select your language for your store view.
Base Currency: Select the default currency to display on your website for the designer tool.
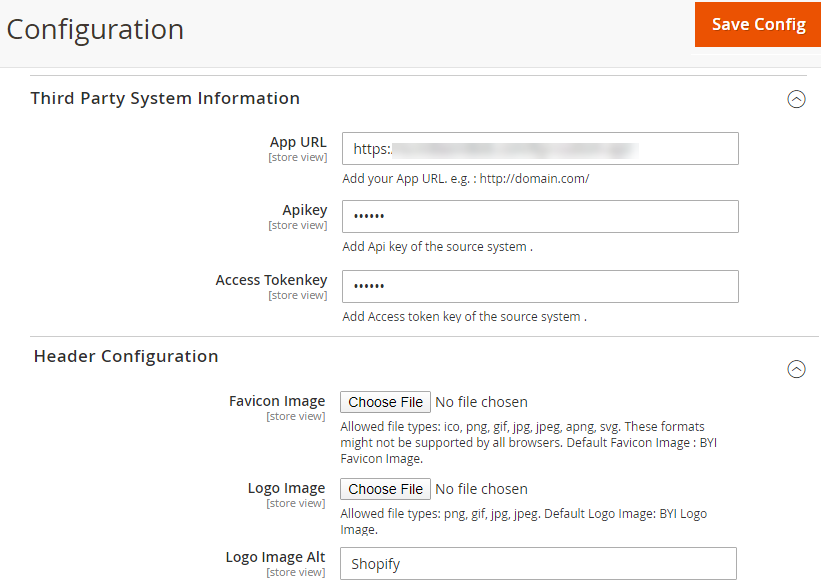
Third-Party System Information
App URL: Enter URL for your App.
Api Key: Enter the API key of the source system.
Access Token Key: Enter the Access token key of the source system.
Header Configuration
Favicon Image: Browse and upload the favicon image of the product designer page.
Logo Image: Browse and upload the logo image for the product designer tool page.
Logo Image Alt: To specify the text for the logo image.
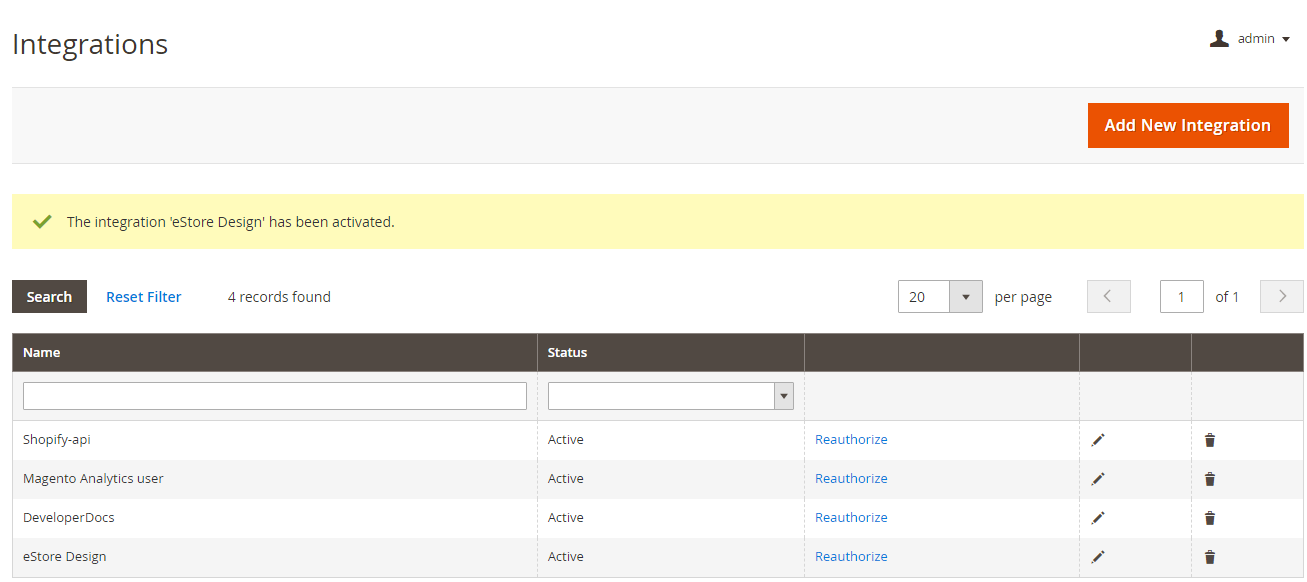
API Integration
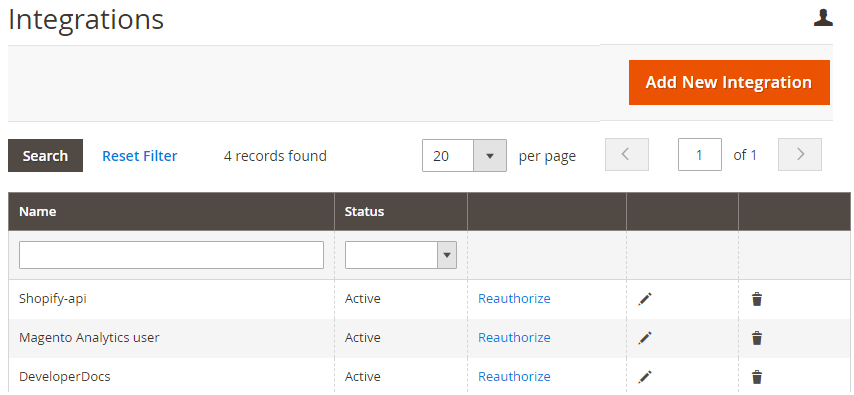
Navigate to the System ➤ Integrations to add the API Integration by inserting “Identity Verification” and selecting the resources for API calls. By pressing the “Add New Integration” button, the “New Integration” page will open up. You can find two settings provided for API integration: Integration info & API Integration Info.
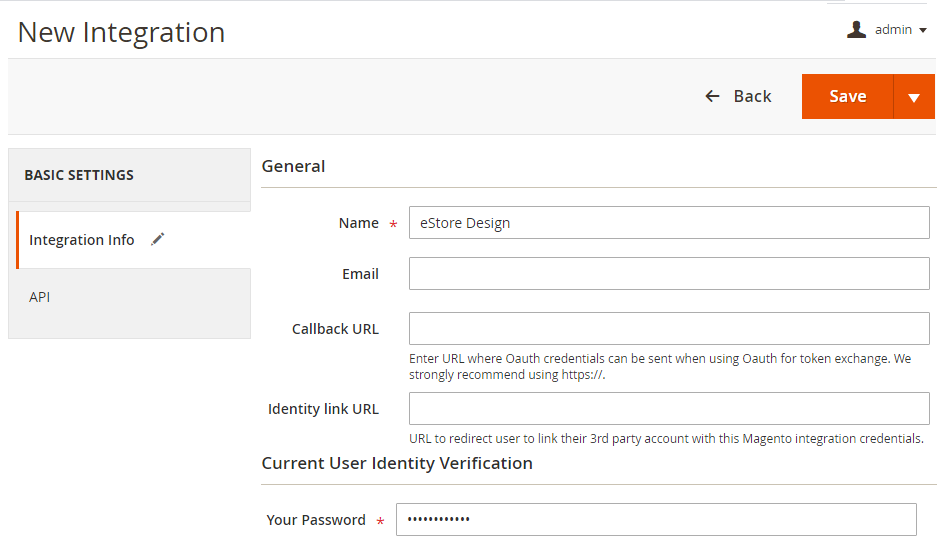
In the “Integration Info” section, you need to add the general information with the mandatory options.
General
Name: Enter the relevant name.
Email, Callback URL, and Identity link URL are non-mandatory fields in the API Integration,, so you can leave it empty.
Current User Identity Verification
Your Password: Enter the Password of your designer tool logged in.
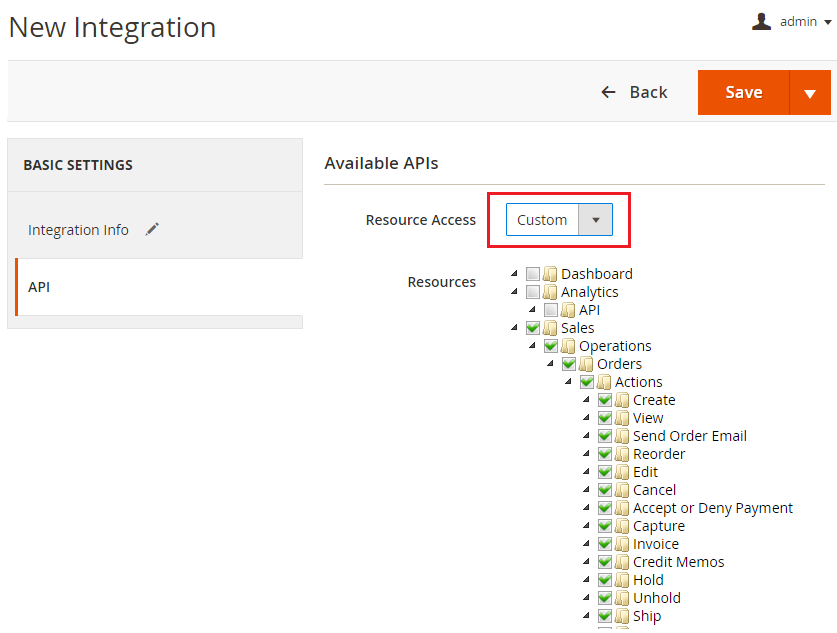
API
From this section, you can select the required resources for API calls. By pressing the “Resources Access” option, you can select the Custom resources by selecting individually or you can select all the resources.
After selecting the resources, press the “Save” button. The API integration will be saved, but the integration status will be shown as “Inactive”.
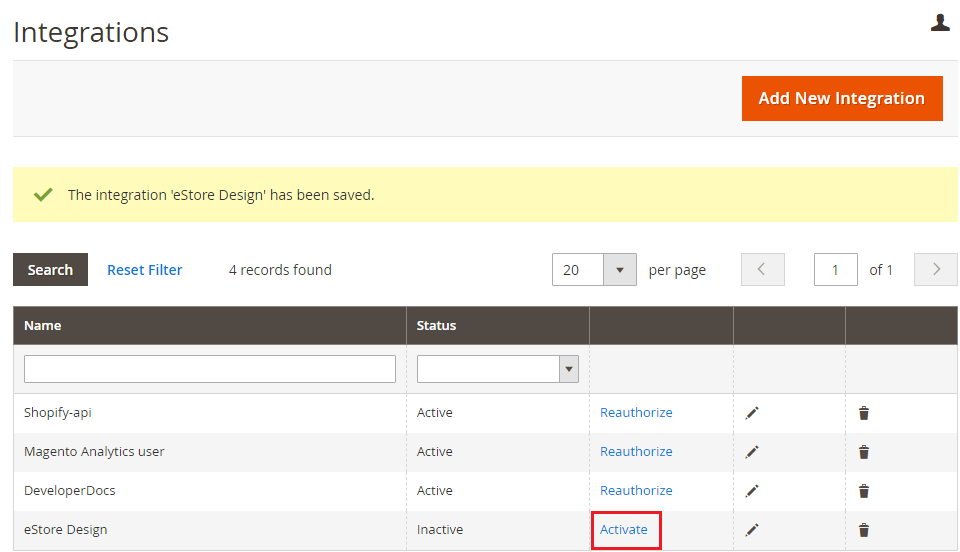
Activate the Integration
After adding the information, you need to activate this API integration by clicking on the Activate option. So that the integration token will be generated for the extension.
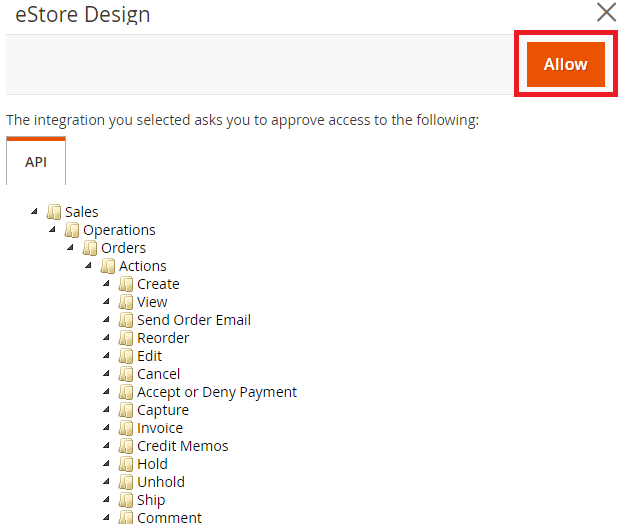
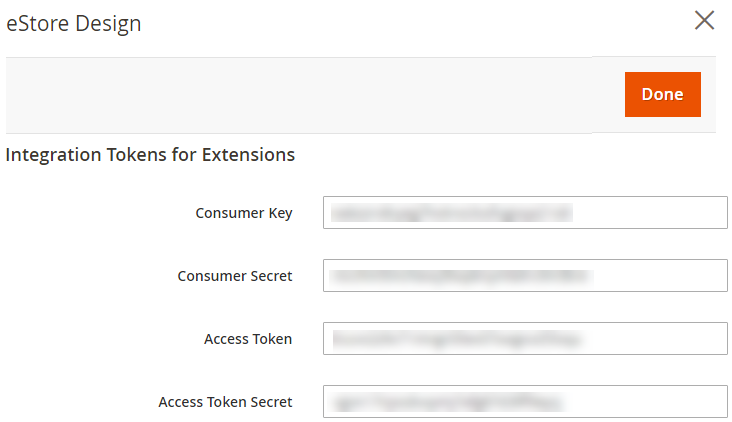
By clicking on the “Activate” option, first, you need to approve the selected integration by pressing on the “Allow” button. After pressing the “Allow” button, the integration token for the extension will generate. The following token will be generated: Consumer Key, Consumer Secret, Access Token, and Access Token Secret.
Once the token is generated, click on the “Done” button to activate the selected integration. Once the integration is activated, the status will be changed to “Active”.
After integrating the API and activating it, you need to configure the product designer API Configuration from the stores.