


Firstly enable the 3D preview feature in your store in order to manage 3D objects and make them visible in the product designer tool. After enabling the 3D preview feature here is how you can manage 3D objects.
Login to Backend
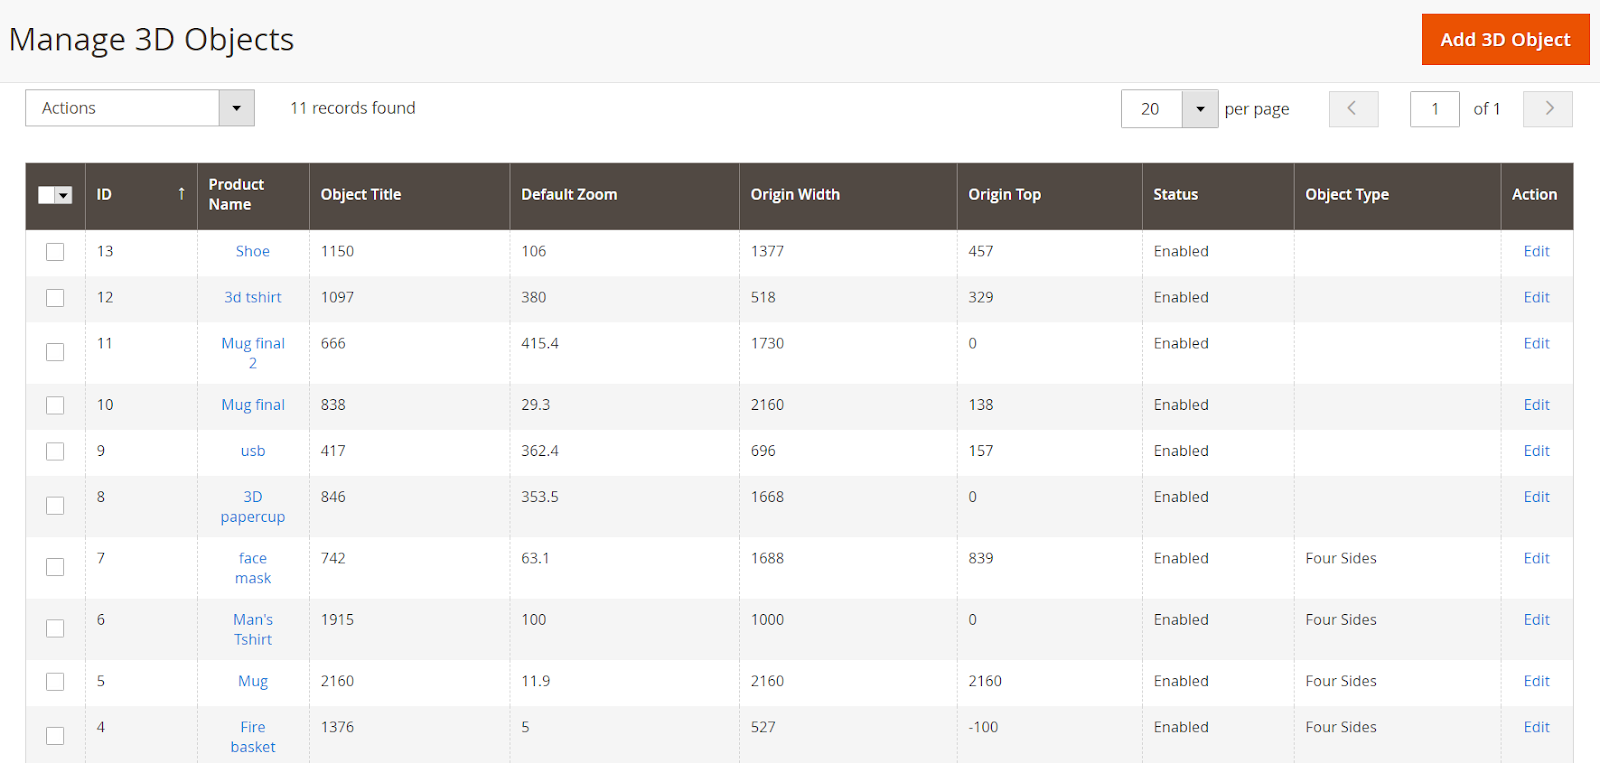
Go to Product Designer ➤ Manage 3D Objects, you will land on the “Manage 3D Objects” page. Here you can manage and add the 3D objects for your store.
To add a 3D object press the “Add 3D Object” button and do the following configurations.
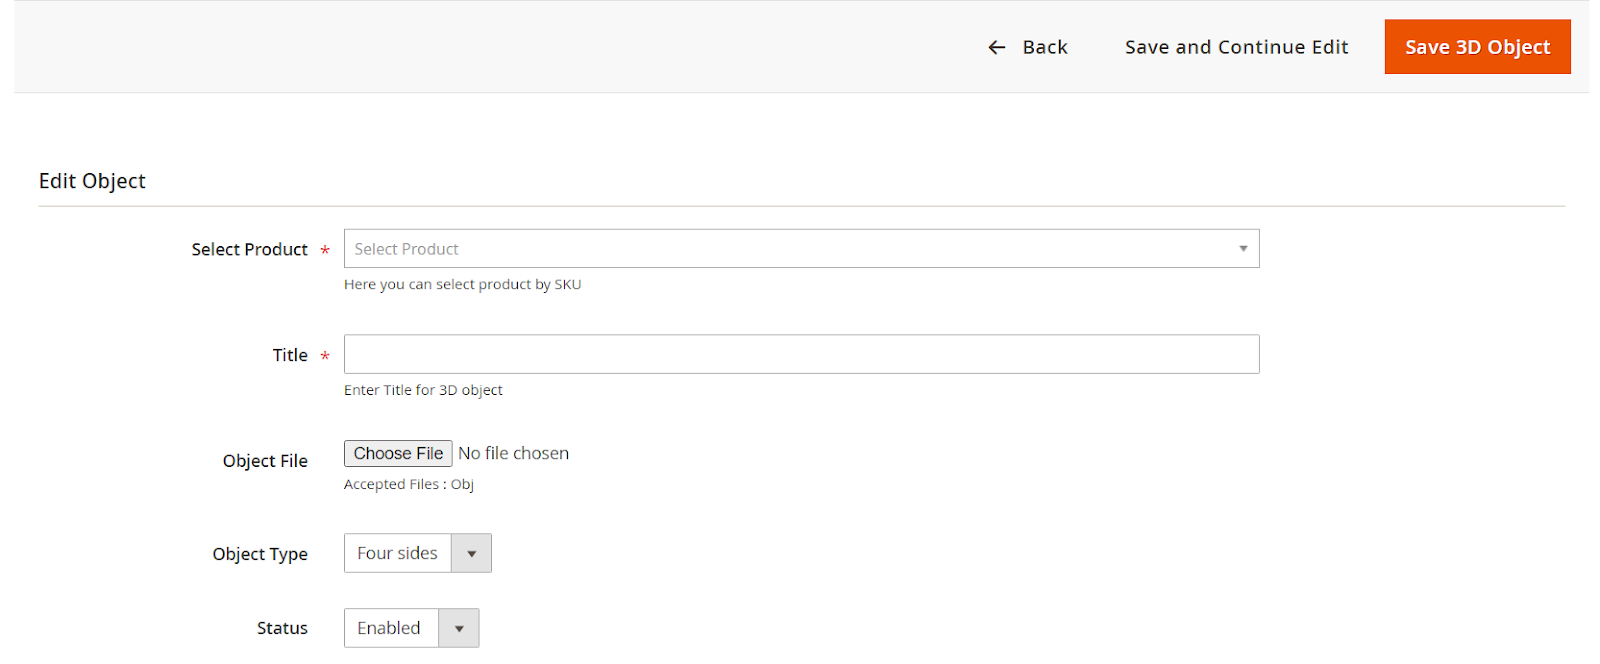
Select Product: Select the Product from your store for the 3D preview. You can also select the product by searching for it with SKU.
Title: Enter the suitable title for the 3D object.
Object File: Browse and upload the Obj file for the 3D preview of the object.
Object Type: Select the Object Type for this Object.
Status: Select “Enable” to enable the object in the product designer tool.
After configuring all the fields press the “Save 3D Object” button to save the object in your store. After saving the object you can see the “Set Origin For Object”. By pressing the “Set Origin For Object” you can set the origin of the object.
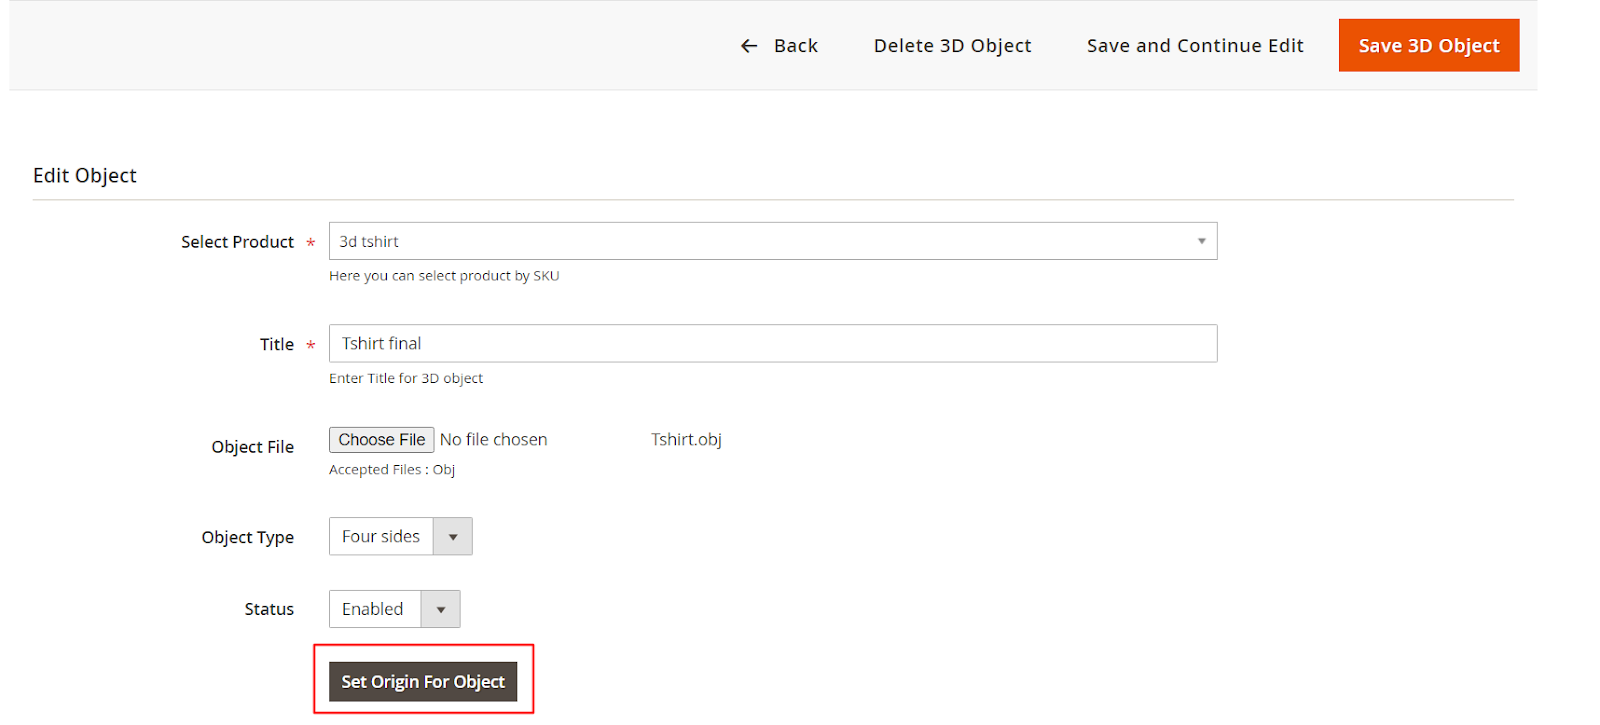

Origin Left: Select the origin left for your 3D object.
Origin Top: Select the top origin for your 3D object.
Origin Width: Select the origin width for your 3D object.
Origin Height: Select the origin height for your 3D object.
Default Zoom: Select the default zoom for your 3D model.
After configuring the origin of your 3D model, press the “Save 3D Object” button to save it for your store.
Frontend
After configuring all the details from the backend, the 3D preview of the product will be enabled.
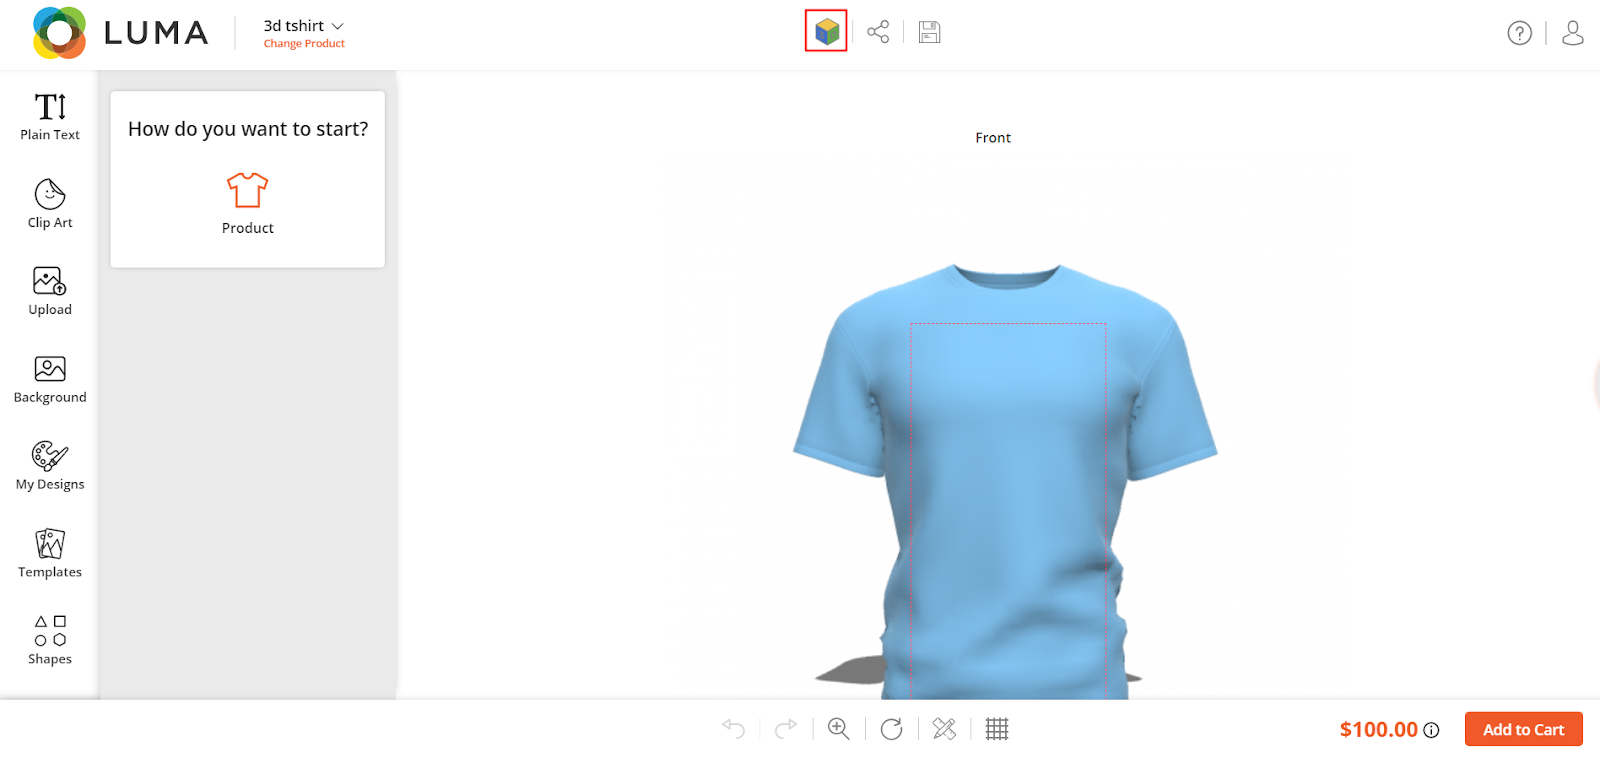
By pressing the 3D preview icon in the red box, your shopper can have a 3D preview of the object. By enabling the Auto Rotate feature the object will rotate automatically.
![]()


