Login to Backend
Now go to the Catalogs ➤ Products, you will land on the “Products” page. Press the “Add Product” button to configure the safe cut bleed lines for the new products or open the product in the Edit mode.
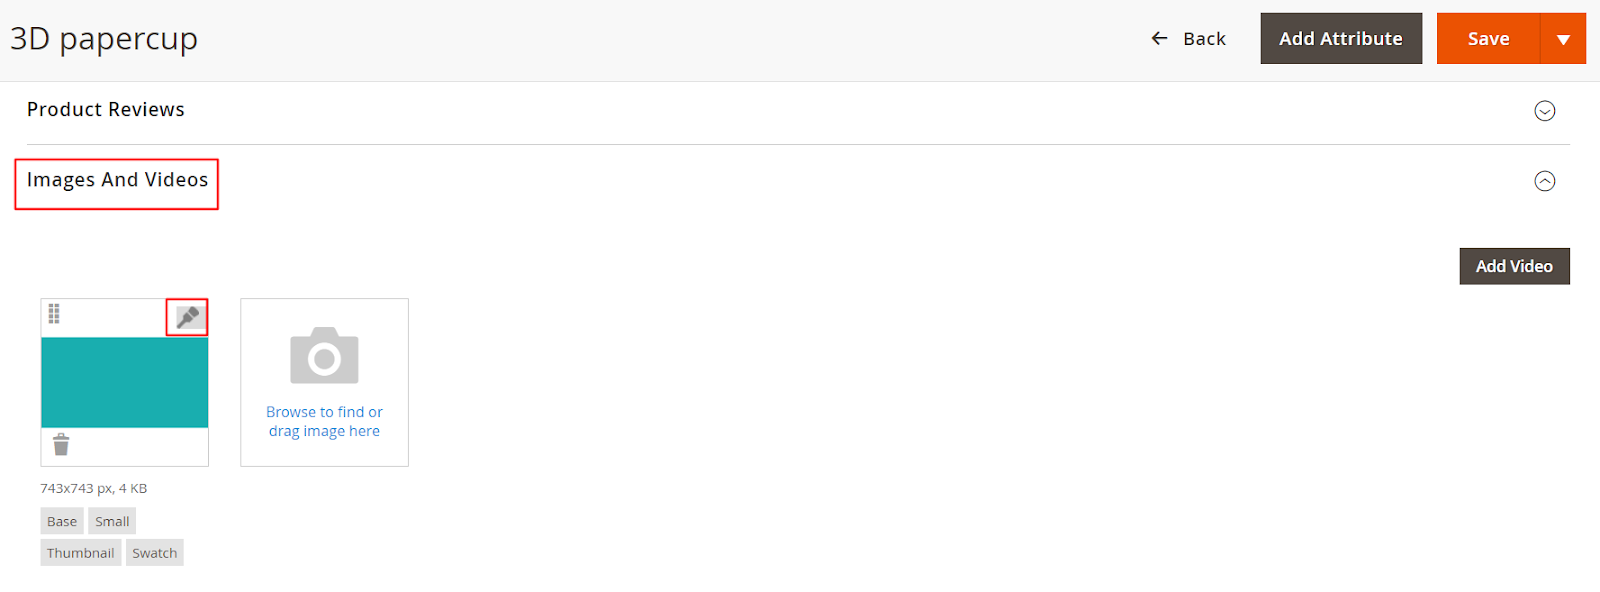
By scrolling down you will get the “Image and Video” option. Now press the “Design” icon over the image and you can see the Design Area page.
On the design area page, you will get the Set the Bleed Line & Safety Line.
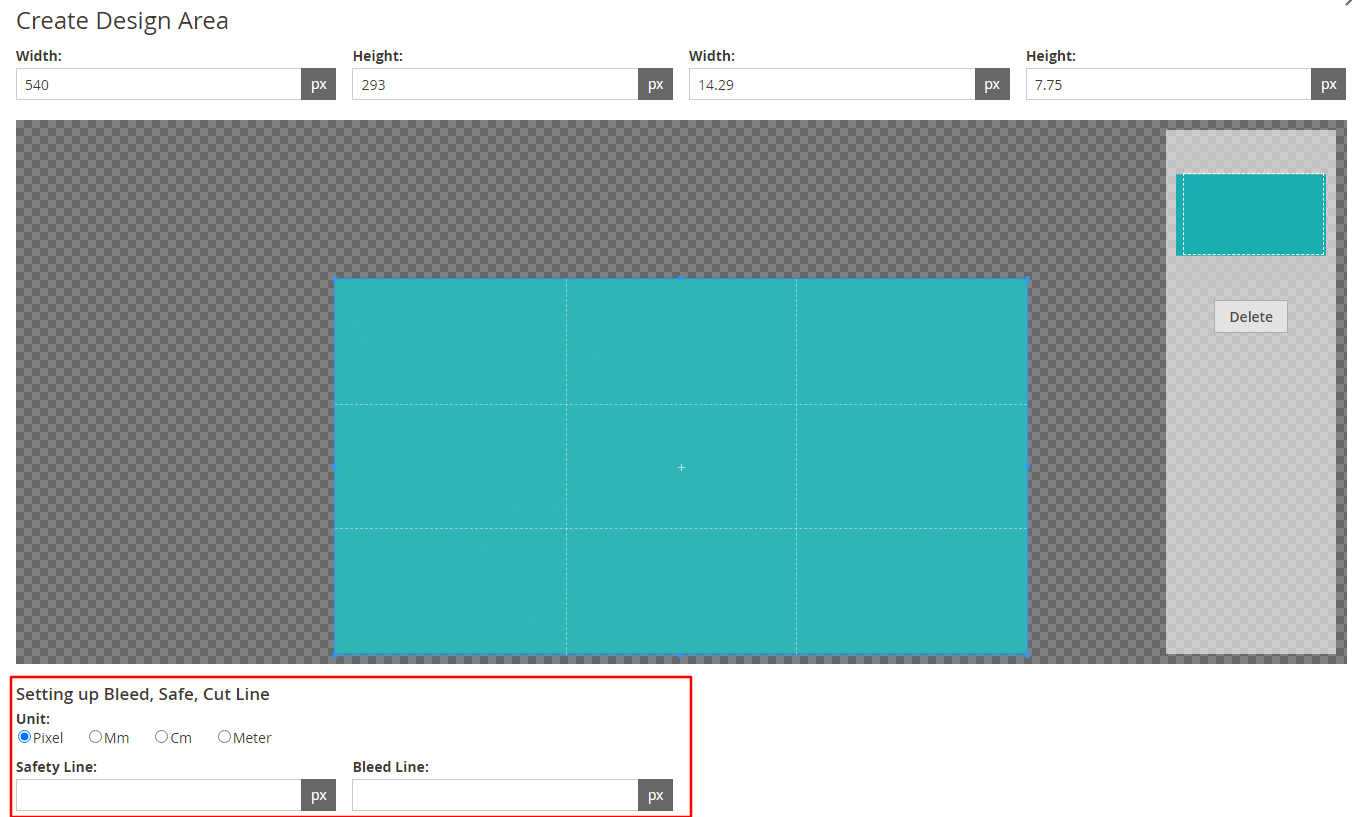
Here you can set the lines by selecting the unit: Pixel, mm (Millimeter), or cm (Centimeter).
Safety Line & Bleed Line: Insert the dimension for Bleed Line & Safety Line.
Note: For a standard business card, you should have about 6mm(0.25 inches) of the bleed dimension in your business card design.
After inserting the above details press on the “Save Design Area”.
Product Designer Section
After configuring the Design Area, now it’s time to configure the Product Designer Section. Scroll down to the Enable Safe, Cut, Bleed Lines under the Products Designer section. Safe, Cut, and Bleed lines will only appear on the frontend if you have selected “Yes” in this option.
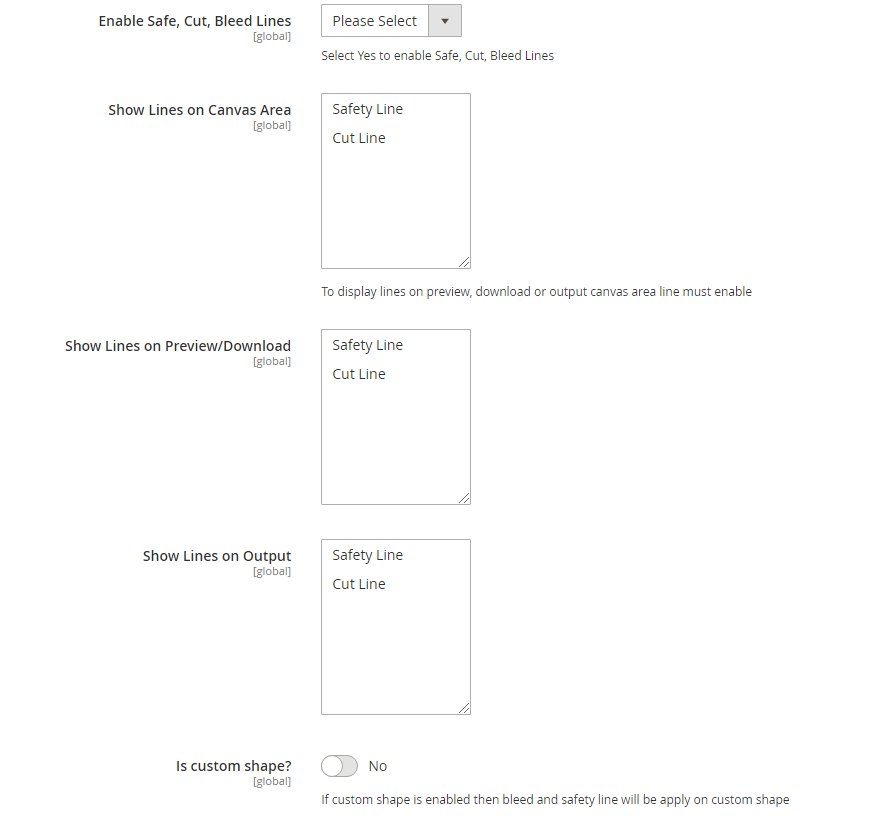
Show Lines on Canvas Area and Preview/Download: Select the lines for the canvas area, in the preview/download & Show Lines on Output. If you do not select from here then bleed safe lines will be shown as per the configurations done from Stores ➤ Configurations ➤ Product Designer Settings.
Is Custom Shape?: Toggle “Yes” to enable the safe, cut, bleed lines for the custom shapes well.
Note: The custom shape should be an SVG file.
Note2: Cut, Bleed, Safe Margin feature is an Add-on so one has to purchase it additionally.
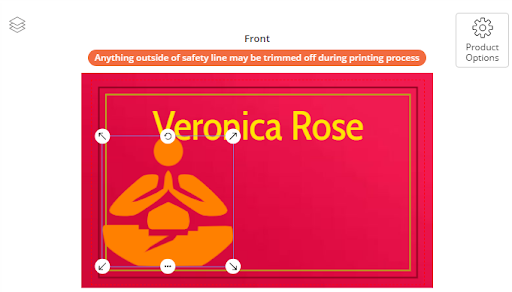
Frontend View
After enabling the feature, configuring colors, and other product-level configurations the designer tool enables the lines on the frontend.
The red dotted line is the bleed line. Many times the card is not printed properly or straight. So the bleed line is vital if you have the artwork that extends to the edges.
The Cut line (Trim Line) is the middle line where the cutting of the printer is usually stated.
The line containing all the content like texts and images is the safety line. If your design is in the safety line you are out of risk. If your design crosses the safety line the alert message configured at the backend will appear.
Similarly, when the design has crossed the cut line, then the alert message will highlight for the cut line. If you have enabled the lines for the custom shaper then the shape should be in SVG.