In this article, you will get to know how you can configure the Custom Image Upload section for your store.
Login to Backend
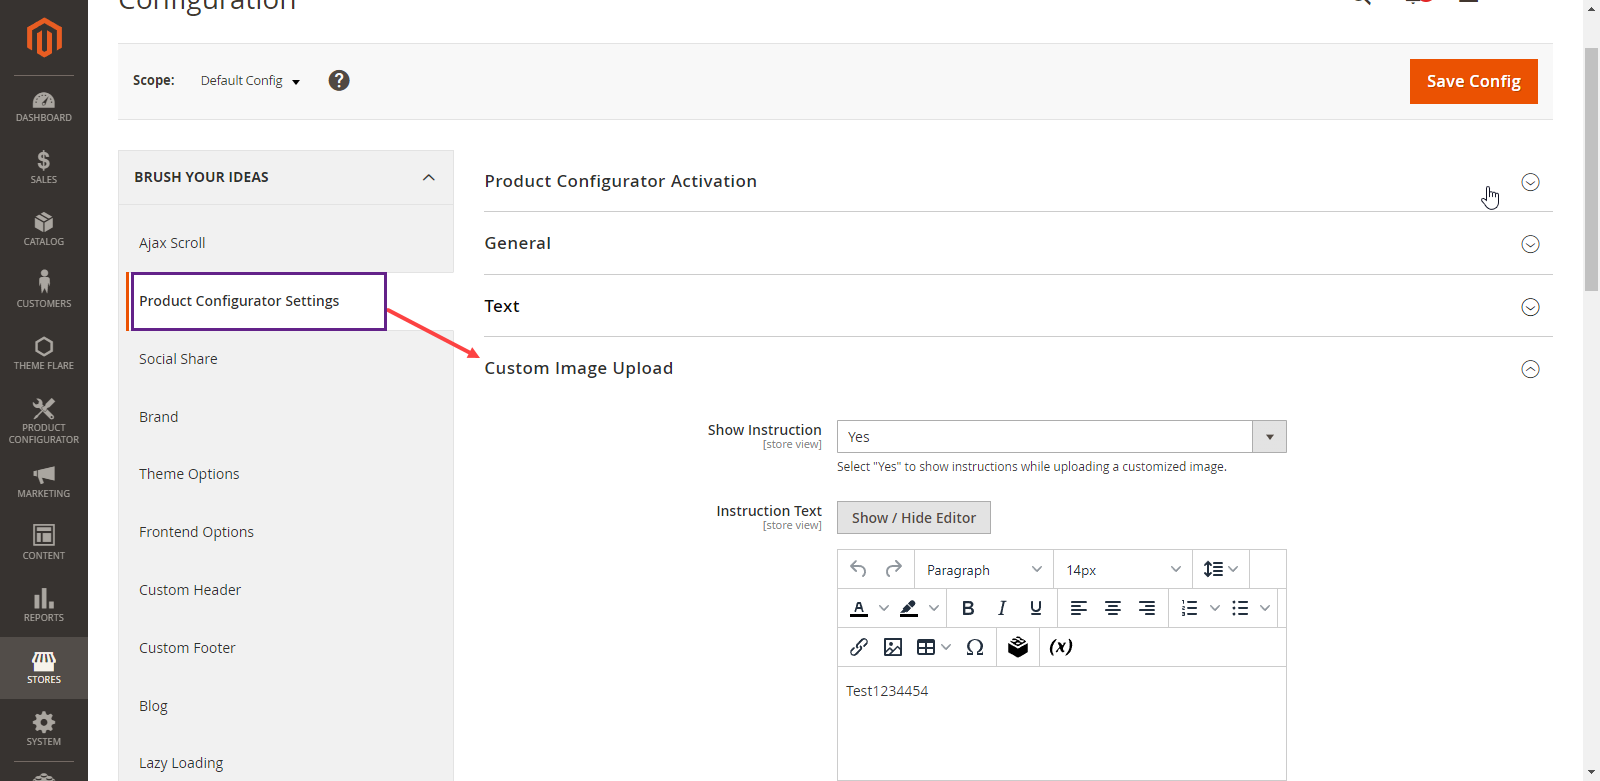
Navigate to the Stores ➤ Configuration ➤ Product Configuration Setting.

Under the Custom Image Upload section, you have to fill up the following configurations.

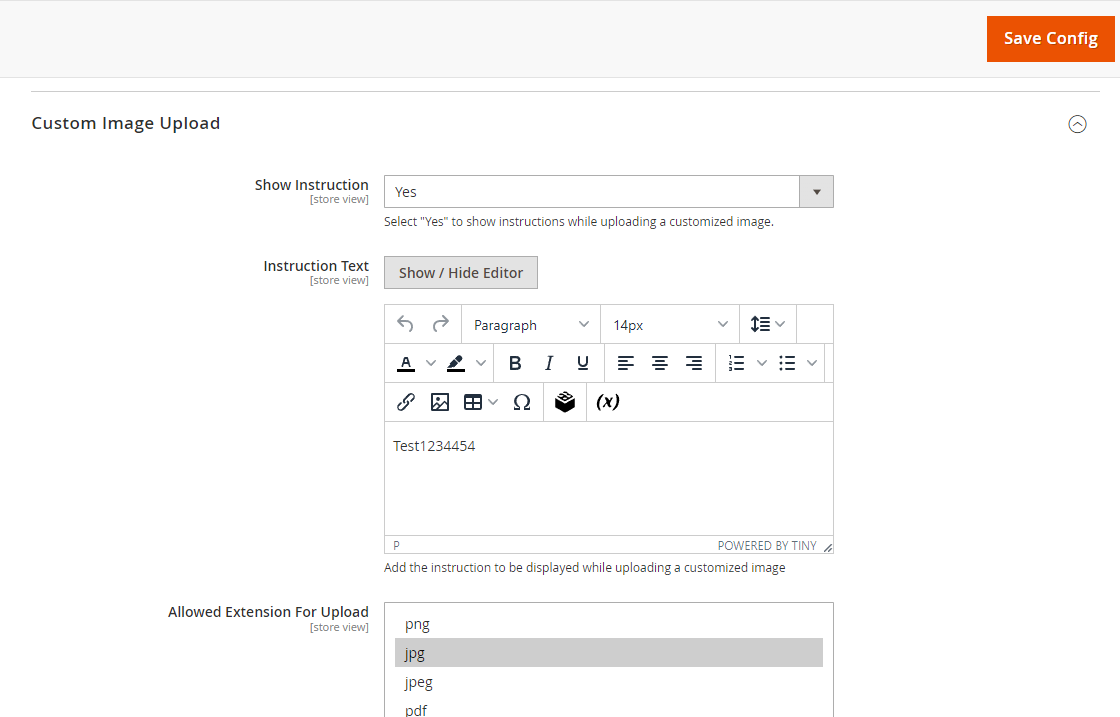
- Show Instruction: You can set “Yes” to show instructions while uploading a customized image and select the “No” option for not showing the instruction text box.
- Instruction Text: You can add the instruction to display while uploading a customized image.
- Allowed Extension For Upload: By selecting on the file type you can allow File Formats For Image Upload.

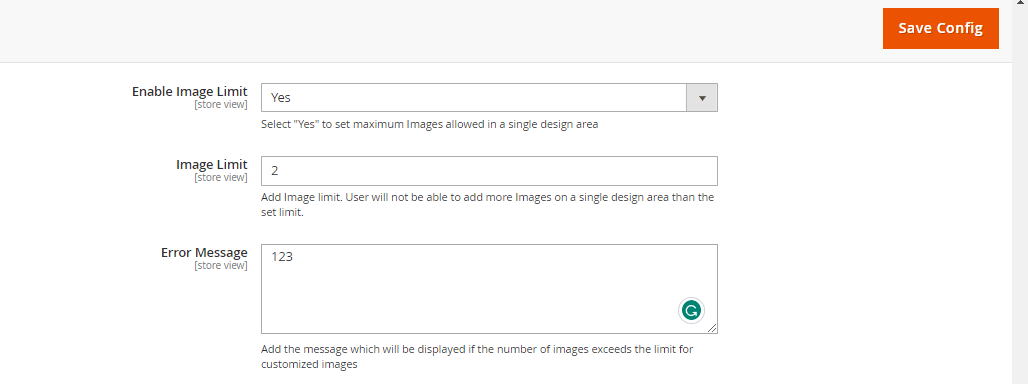
- Enable Image Limit: To enable Image limit select “Yes” option and to disable Image Limit select “No”.
When the “Enable image limit” option is selected as YES then you can see below field.
- Image Limit: Here you can add the Image limit. Users will not be able to add more Images on a single design area than the set limit.
- Error Message: Here you can Add the message which will be displayed if the number of images exceeds the limit for customized images upload.

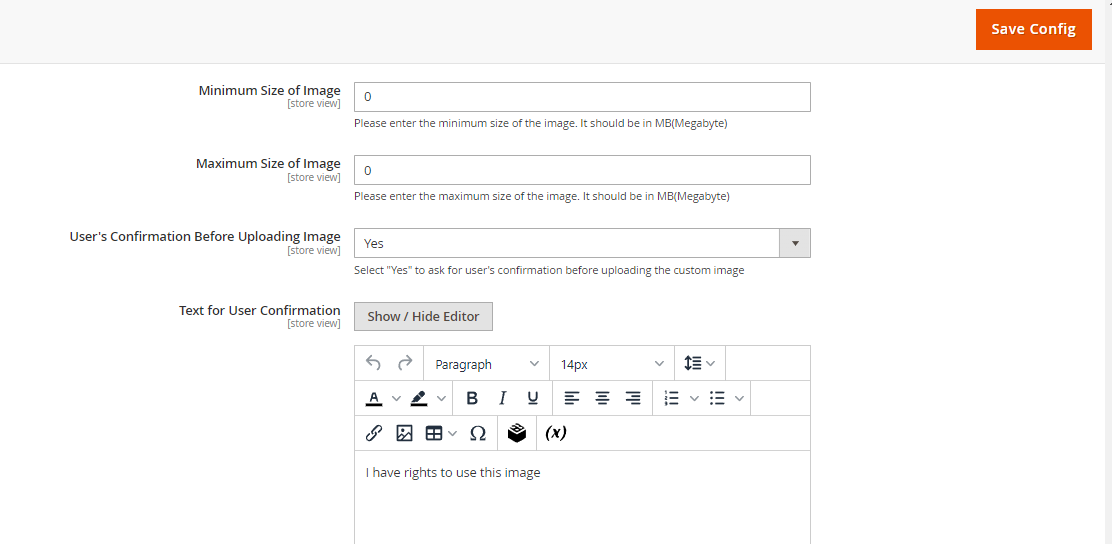
- Minimum Size of Image: You can set or enter the minimum size of the image. It should be in Megabytes.
- Maximum Size of Image: You can set or enter the maximum size of the image here. It should be in Megabyte.
- User’s Conformation Before Uploading Image: Select “Yes” from the drop-down menu to ask for the user’s confirmation before uploading the custom image and if you don’t want user confirmation select the “No” option.
When the “User’s Conformation Before Uploading Image” option is selected as YES then you can see below field.
- Text For User Conformation: Here add the confirmation message which will be displayed to the user before uploading the custom image.

- Enable Low-Resolution Warning: You can set “Yes” to display a low-resolution warning on image upload.
- Set DPI: You can set DPI For Image Upload.
After inserting all the information, Click on the “Save Config” Button.


