


In this article, you will be able to know how you can change the Design it button properties.
Login to WooCommerce Backend
Navigate to WooCommerce -> Settings -> PrintXpand Settings tab.
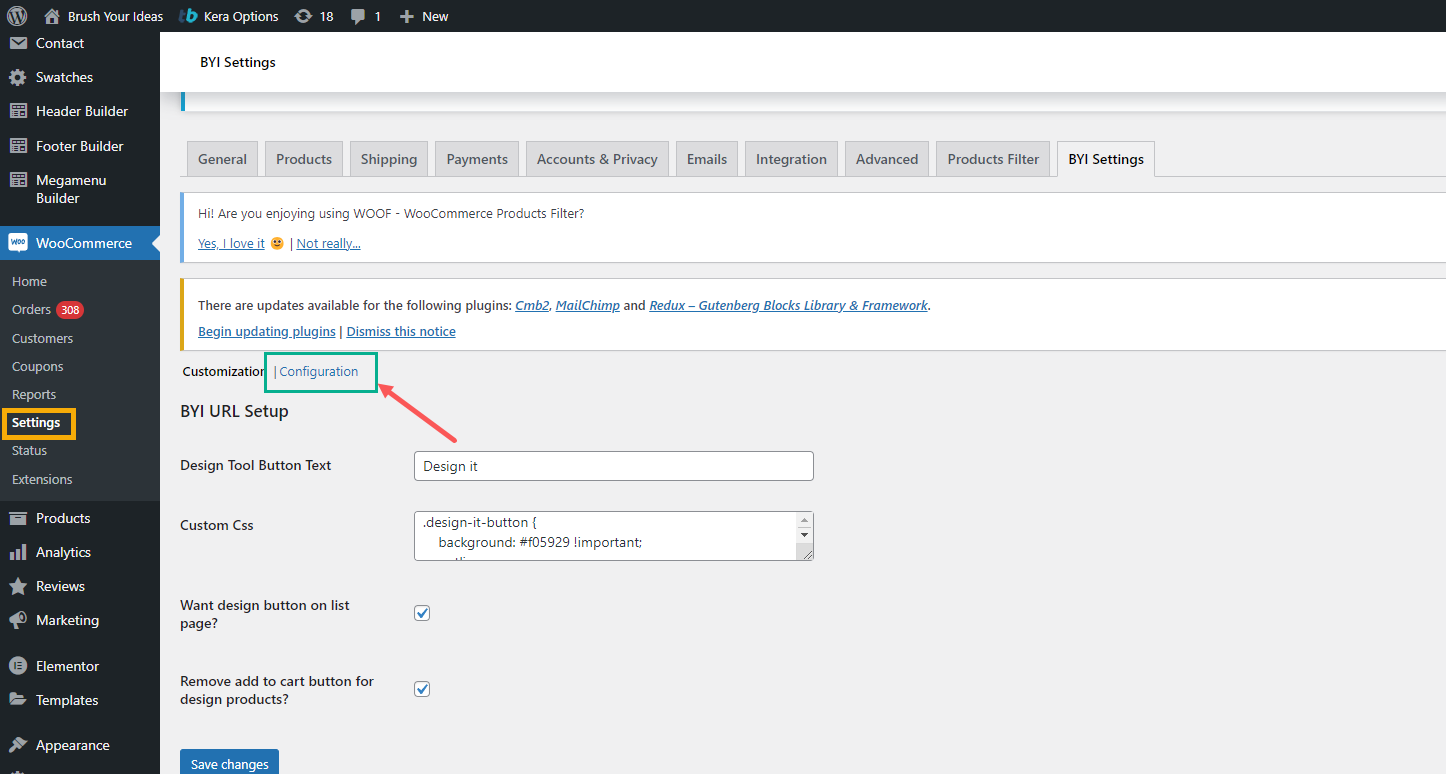
By clicking on the “PrintXpand Settings” tab, you will find the two sub-tabs named Customization and Configuration.
Here In the Customization, you can view the following details.
Design Tool Button Text: Insert the button ‘text label’ for the product design. By clicking on that button customer will be redirected to the “Product Designer” Page for that product.
Custom CSS: Here you can enter the CSS code for your design it button.
Want a design button on the list page? : To display the “Design it” button on the product listing page of products, enable this option by ticking the checkbox.
Remove add to cart button design products: To Show/hide the “Add to cart” button from the design products.
After everything is set up, click on the Save Changes button to save the changes.


