Designer Settings
Once the product is added, click the Designer Settings button to be redirected to the Designer Settings page.
Refer to the video for instructions on how to add a simple product: How to Add Simple Product
Product Designer Settings
In the Product Designer Settings section, begin by enabling the Product Designer Settings for the selected product. Then, configure the following fields:
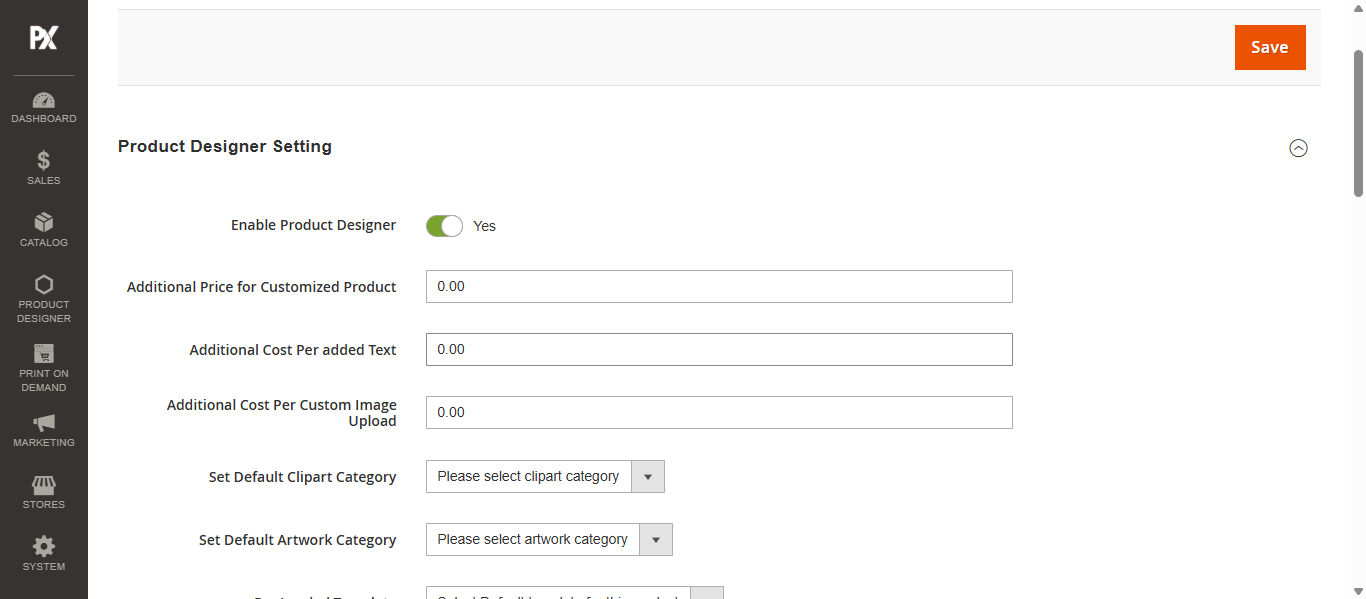
- Additional Price for Customized Product: Enter the additional charge to be applied for customized products.
- Additional Cost Per Added Text: Specify the cost that will be applied when a user adds custom text to the design.
- Additional Cost Per Custom Image Upload: Define the charge for each custom image uploaded by the user.
- Set Default Clipart Category: Select the default clipart category from the dropdown menu that will appear by default in the Designer Tool.
- Set Default Artwork Category: Choose the default artwork category for the Designer Tool from the dropdown list.
- Allowed Output Formats: Select the permitted output file formats for the final design.
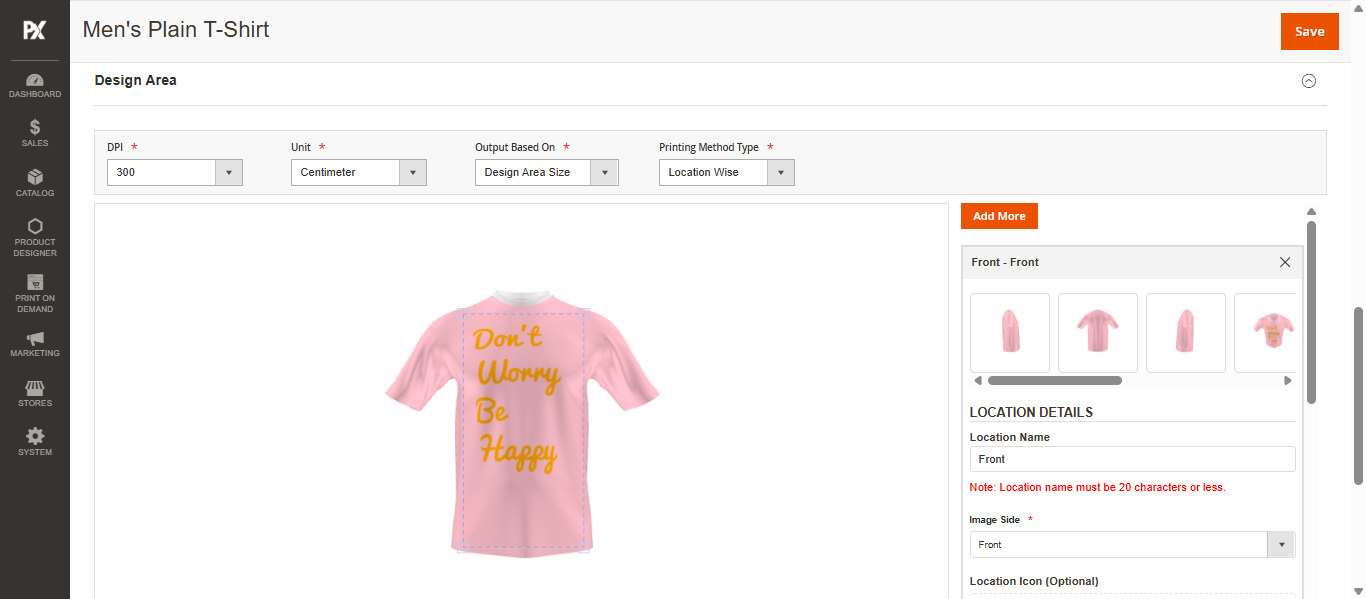
Design Area
Scroll down to the Design Area section. First, select the product image and configure the design area as needed.
Next, use the Image Side dropdown to choose the corresponding side of the product image. Then, set the Output Width and Output Height to define the dimensions of the design area.
Click the Save button to apply the changes. The Designer Tool for the simple product will now be enabled with the minimum required configurations.