Admin
Product Designer Setting
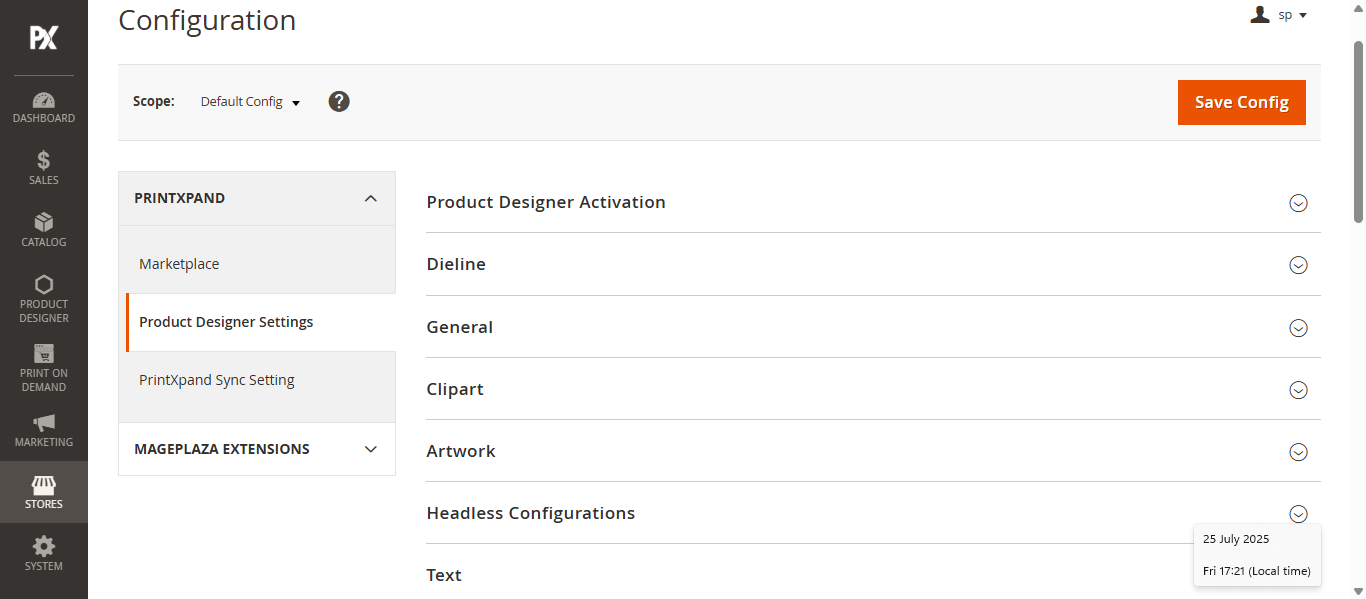
To set up the Product Designer Settings navigate to Store > Configuration >Printxpand > Product Designer Settings. Here Configure the Following Section to set up the Product Designer Settings:
- Product Designer Activation
- Dieline
- General
- Clipart
- Artwork
- Text
- Custom Image Upload
- Watermark
- Social Media Upload
- Ruler Gridline
- Cutlines
Product Designer Activation
To activate the Designer tool, configure the Product Designer Activation section. Complete the following fields:
- Activation Key: Enter the activation key for the Product Designer settings.
- Select Websites: Choose the websites where the Designer tool should be available.
- Enable Product Designer: Select Yes from the dropdown to enable the Designer tool in your store.
Dieline
To set up the Dieline product in the designer tool, configure the following fields:
- API URL: Enter the API URL for the Dieline integration.
- Access Token: Enter the corresponding access token.
General
In the General Settings section, configure the following fields to set up the Designer Tool:
- Designer Button on Category Page: Enable this option to display the Design It button on the category page.
- Add to Cart Button on Category Page: Enable this field to show the Add to Cart button on the category page.
- Design It Label: Enter the label for the Design It button.
- Enable Custom Color Picker: Select Yes from the dropdown to enable the Custom Color Picker.
- Product Designer Tool Page Title: Enter the title for the Product Designer Tool page.
- Language File: Upload the language file. Only .zip and .csv formats are supported.
- Translate Store Elements: Click this button to translate labels and messages used in the tool.
- Cache Lifetime: Enter the lifespan of cached data on Magento, in seconds.
- Text Direction: Select the text direction from the dropdown. Available options are LTR (Left to Right) and RTL (Right to Left)
- Add Mobile Logo: Upload the logo for mobile devices. Only .png, .jpg, and .jpeg formats are supported.
- Enable Order Data Removal: Enable this field to allow removal of order data.
- Allowed Output Formats: Select the output file formats. The admin can select multiple formats.Available options include: JPG, SVG, PDF, Vector PDF, AI, and EPS.
- Server Node Installation: Enter the path Install Node Server.
- Designer Tool Primary Color: Set the primary color for the Designer Tool. Avoid using very light colors, as they may reduce text readability.
Clipart
To set the default clipart category, select a category that will be shown to users when they click on Clipart in the Designer Tool.
- Set Default Clipart Category: Select the clipart category that will be displayed to users by default when they click on Clipart in the Designer Tool.
- Enable Clipart Limit: Select Yes to set a maximum number of cliparts allowed within a single design area.
Artwork
To set the default Artwork category, select a category that will be shown to users when they click on Artwork in the Designer Tool.
- Set Default Artwork Category: Select the Artwork category that will be displayed to users by default when they click on Artwork in the Designer Tool.
Text
To configure the default text settings in the Designer Tool, configure the following fields under the Text section:
- Default Font Type: Select the default font from the dropdown.
- Default Font Size: Enter the default font size.
- Enable Text-Object Limit: Select Yes to set the maximum number of text objects allowed in a single design area.
- Font Color: Select the default font color from the dropdown.
Custom Image Upload
To allow users to upload custom images, configure the following fields in this section:
- User’s Confirmation Before Uploading Image: Select Yes to prompt users for confirmation before uploading a custom image.
- Text for Confirmation: Enter the confirmation message that will be shown to users before the image upload.
- Allowed Extension for Upload: Select the allowed file formats for image uploads.Supported formats include PNG, JPG/JPEG, PDF, SVG, EPS, and AI.
- Enable Image Limit: Select Yes to set the maximum images allowed in a single design area.
- Minimum Size of Image: Specify the minimum file size (in MB) allowed for uploads.
- Maximum Size of Image: Specify the maximum file size (in MB) allowed for uploads.
- Show Instruction: Select Yes to display instructions during the custom image upload process.
Watermark
To configure the Watermark that will appear on the design in Design Preview and in the downloaded design image, configure the following fields:
- Watermark Type: Select the type of watermark—Image or Text.
- Add Image/Text:
- If Text is selected, enter the watermark text in the provided field.
- If Image is selected, upload an image in PNG format only.
Social Media Upload
To allow users to upload custom photos from social media platforms, configure the following fields in this section:
- Facebook App ID: Enter your Facebook Application ID.
- Instagram Client ID: Enter your Instagram Client ID.
- Instagram Client Secret Key: Enter your Instagram Client Secret Key.
- Google Photos Client ID: Enter your Google Photos Client ID.
- Google Photos Client Secret Key: Enter your Google Photos Client Secret Key.
Ruler Gridline
In this section, configure the following fields to enable Ruler and Gridline features for improved alignment and object placement:
- Unit of the Ruler: Select the unit of measurement from the dropdown. Available options are Inch, Millimeter, Centimeter, and Pixel.
- Ruler Size Gap: Enter the spacing between ruler markings.
- Unit of the Grid: Select the unit for the gridlines. Options include Inch, Millimeter, Centimeter, and Pixel.
- Size of the Grid: Enter the size of each grid square based on the selected unit.
Cutlines
In this section, configure the following fields to set up the Cutlines:
- Small Cutline Padding Size: Enter the padding size for small cutlines, in pixels (px).
- Medium Cutline Padding Size: Enter the padding size for medium cutlines, in pixels (px).
- Big Cutline Padding Size: Enter the padding size for big cutlines, in pixels (px).
- Extreme Padding for PDF: Enter the extra padding size for PDFs, in millimeters (mm).