Front Store
When designing a product in the Product Designer Tool, the bleed, safe, and cut lines appear in different colors to guide accurate placement:
- Bleed Line (Blue): Extend artwork/background beyond this line to prevent white edges after trimming.
- Safety Line (Green): Keep important elements within this line to ensure they are not cut off.
- Cut Line (Red): Represents the final trim edge; elements outside may be trimmed.
The cut line and safety line are also visible in the preview and downloaded files for reference.
Admin
Product Designer Settings
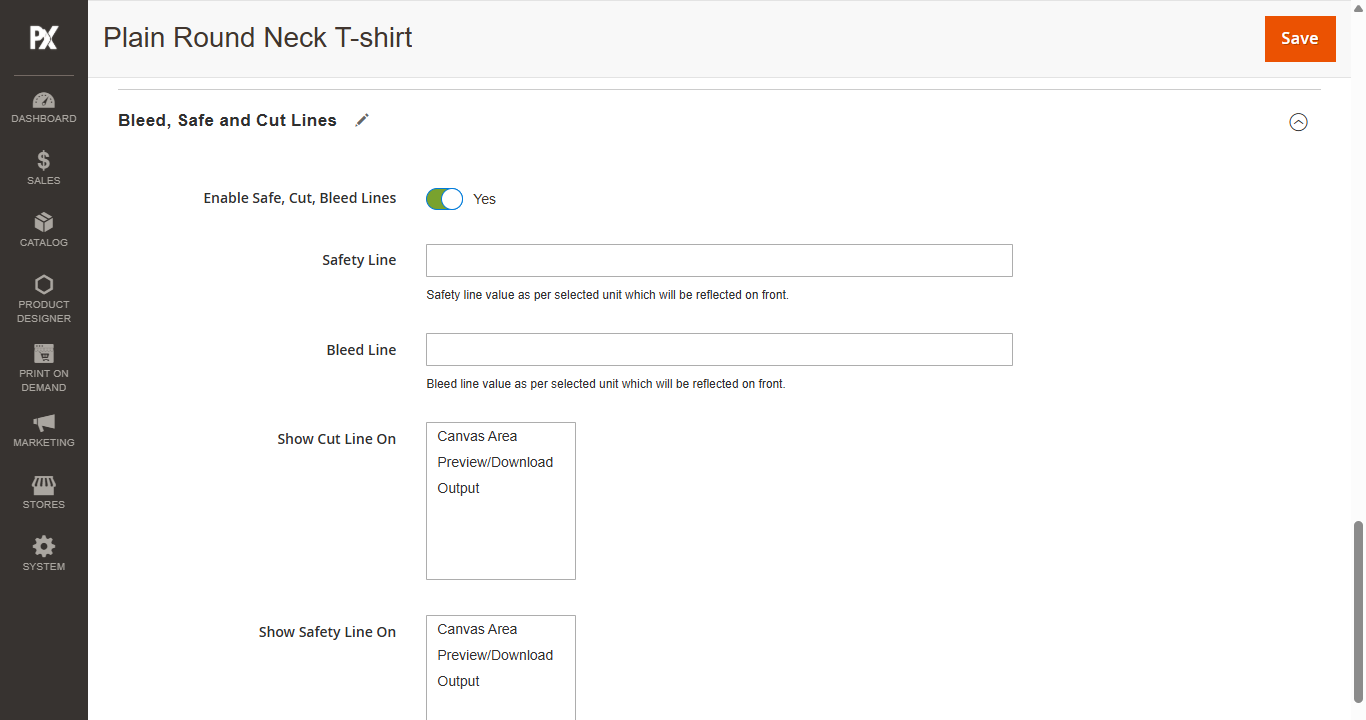
To configure the Bleed, Safe, and Cut Lines for a product, navigate to the Product Designer settings. Scroll down to the Design Area section, and select the unit for the lines from the Unit dropdown.
Next, navigate to the Bleed, Safe, and Cut Lines section and enable the Bleed, Safe, and Cut Lines option. When enabled, the following fields will appear:
- Safety Line: Enter the safety line value based on the selected unit. This will be reflected on the frontend.
- Bleed Line: Enter the bleed line value based on the selected unit. This will be reflected on the frontend.
- Show Cut Line On: Select where the cut line should be visible (Canvas Area, Preview/Download, and Output).
- Show Safety Line On: Select where the safety line should be visible (Canvas Area, Preview/Download, and Output).
- Is Custom Shape?: Enable this option to allow custom shapes for lines.
- Line Title: Enter the title of the line (e.g., Bleed Line, Safety Line, Cut Line).
- Color Code: Choose the color code to represent the line visually.
- Warning: Enter the warning message that will appear on the frontend for this line.
- Show Line On: Select where the line should be visible (Canvas Area, Preview/Download, Output). This option is only available for Safety Line and Cut Line configurations.
- Select Status: Choose the status of the line from the dropdown menu.
Click the Save button to save the configurations.
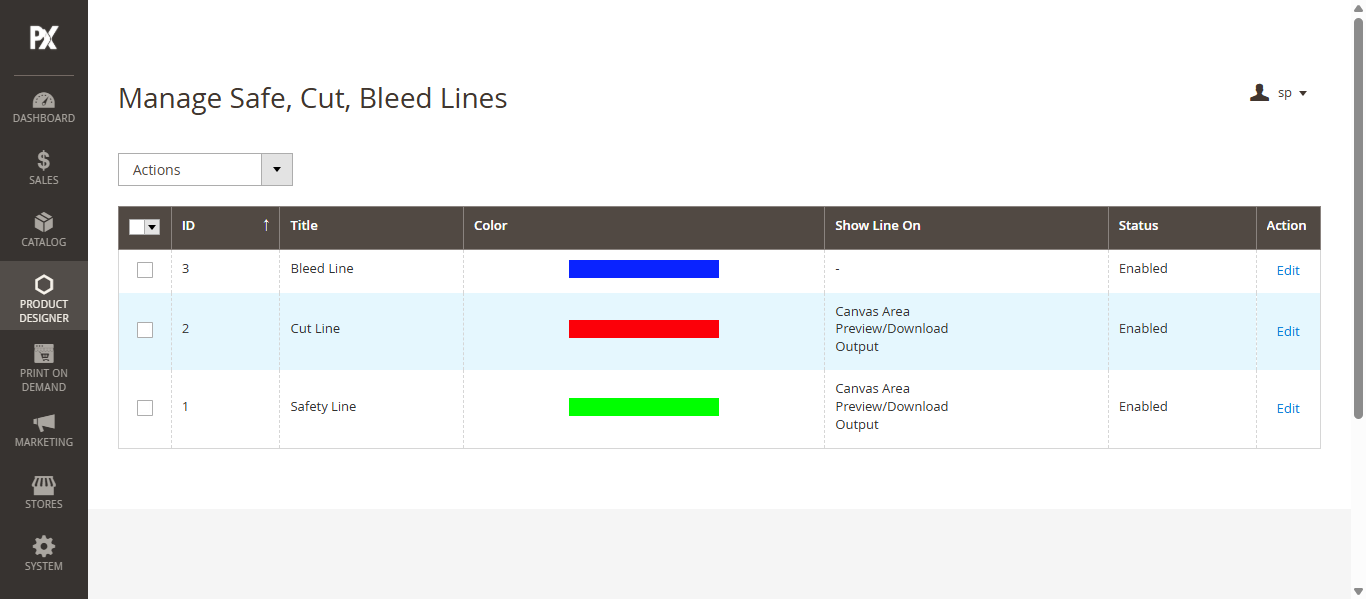
Manage Bleed, Safe and Cut Lines
To manage the global settings for Bleed, Safe, and Cut lines, navigate to Product Designer > Manage Bleed, Safe and Cut Lines. Here, all three lines are listed. Click the Edit button next to the line you wish to configure. Upon clicking, the following options will be available:
Make the necessary changes and save the configuration.