


Admin
Contour cut is a feature in printing where the printed design is trimmed along a defined outline or shape, rather than standard straight edges. This outline, known as the cut path, allows the final product to match the exact shape of the design. It is commonly used for creating custom-shaped stickers, labels, decals, and packaging.
Product Configurations Settings
To configure the Contour Cut feature, navigate to the Product Configuration settings.
Scroll down to the Customizable Options section to add a custom canvas size.
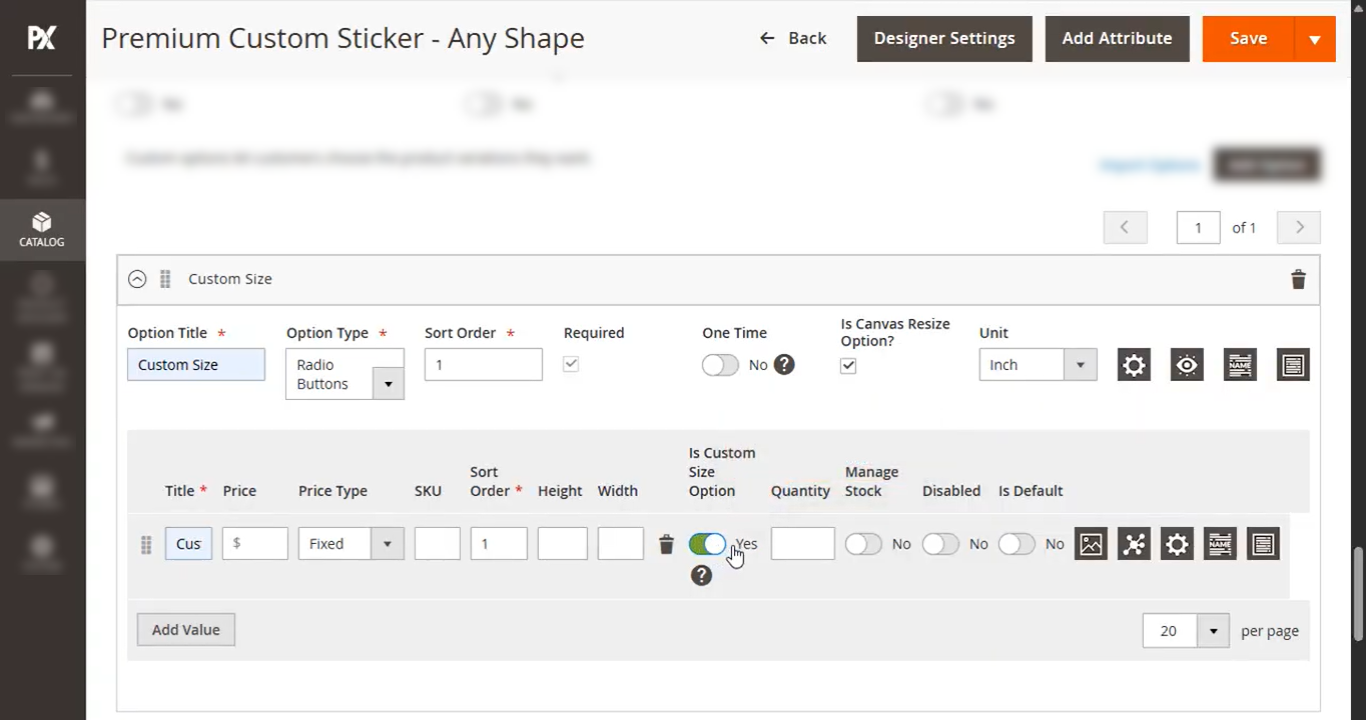
Click the Add Option button to create a new option. Once added, configure the following fields:
- Option Title: Enter a title for the option (e.g., Custom Size).
- Option Type: Select the appropriate option type from the dropdown menu.
- Is Custom Resize Option?: Enable this checkbox to mark the option as a resize option.
- Unit: Select the measurement unit for the canvas size.
- Title: Enter a title for the value.
- Is Custom Size Option: Enable this toggle to define this value as a custom size.
Next, click the Add Value button to add values to the option grid. Configure the following fields:
After completing all configurations, click Save to apply the settings.
Product Designer Settings
After adding the custom canvas size, click the Designer Settings button to enable the Contour Cut feature.
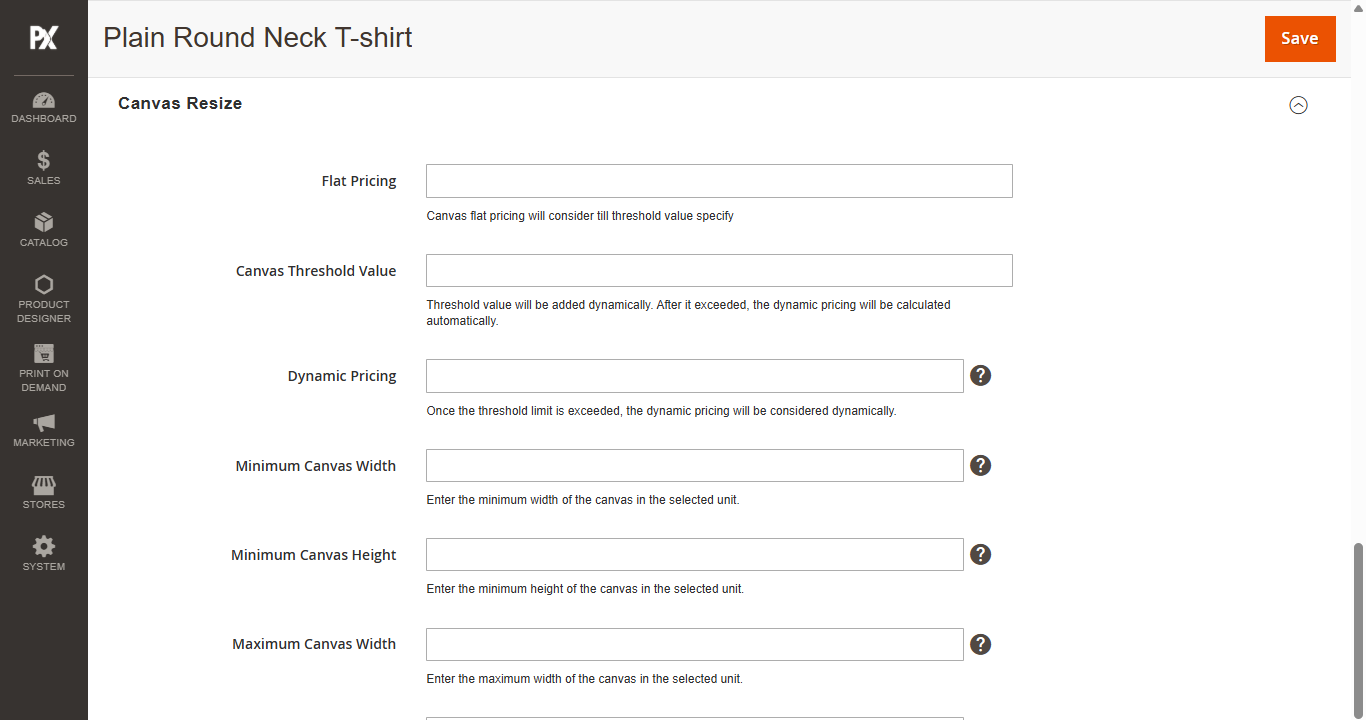
In Designer Settings, scroll down to the Canvas Resize section and configure the following fields:
- Flat Pricing: Set a flat rate for the specified canvas size.
- Canvas Threshold: Enter the threshold value. Once this value is exceeded, dynamic pricing will be applied.
- Dynamic Pricing: Specify the dynamic pricing amount, which will be automatically calculated when the threshold is surpassed.
- Minimum Canvas Width: Define the minimum allowed width for the canvas.
- Minimum Canvas Height: Define the minimum allowed height for the canvas.
- Maximum Canvas Width: Set the maximum allowed width for the canvas.
- Maximum Canvas Height: Set the maximum allowed height for the canvas.
- Contour: Enable this toggle to activate the Contour Cut feature.
Once all fields are configured, click the Save button to apply the changes.
Front Store
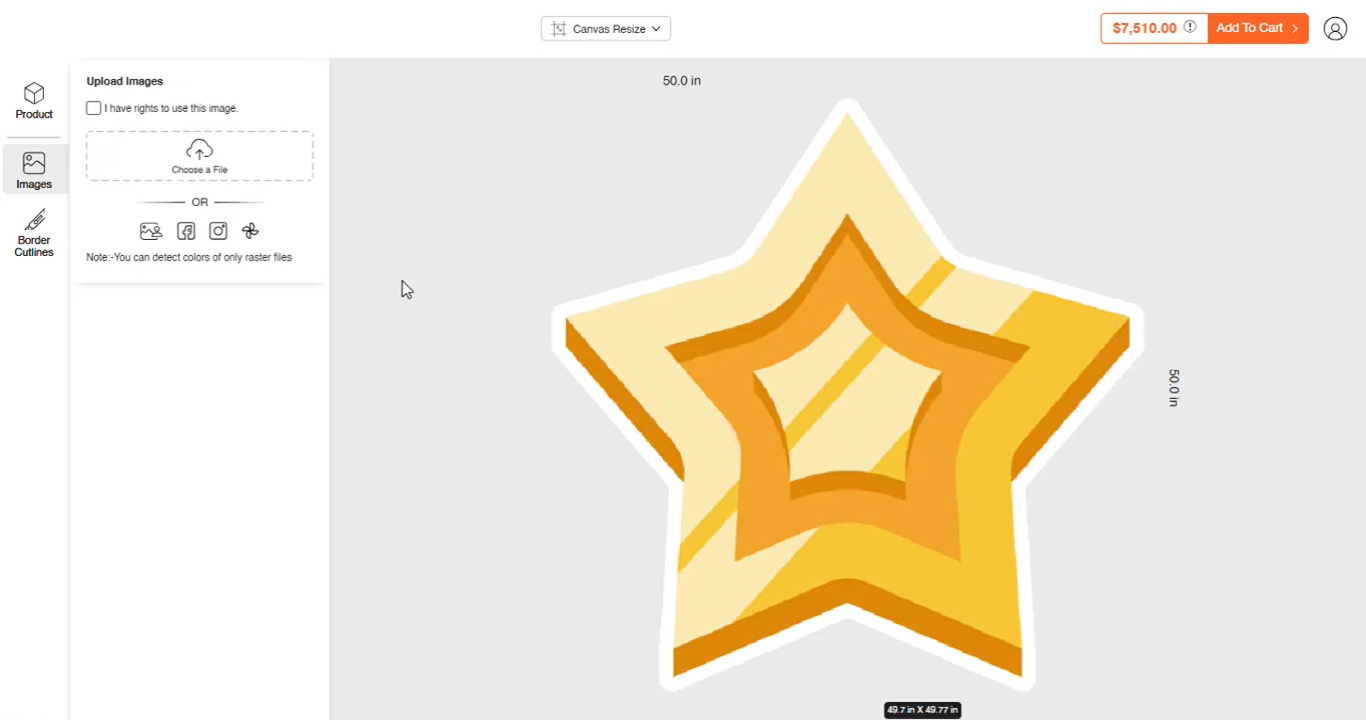
Now we will see how the Contour Cut feature works. To begin, select the Custom Sticker product. First, choose the Custom Size, then upload the image you want to use for the sticker. Click the Design It button to open the Designer Tool, where the product will be displayed with the Contour Cut applied.
To modify the border cutlines, click on the Border Cutlines option and select your preferred size from Small, Mid, or Big.
Refer to this video for more information:


