Apart from the pre-loaded unique cliparts, you can also add clipart to your store and can even categorize them easily.
Backend Configurations
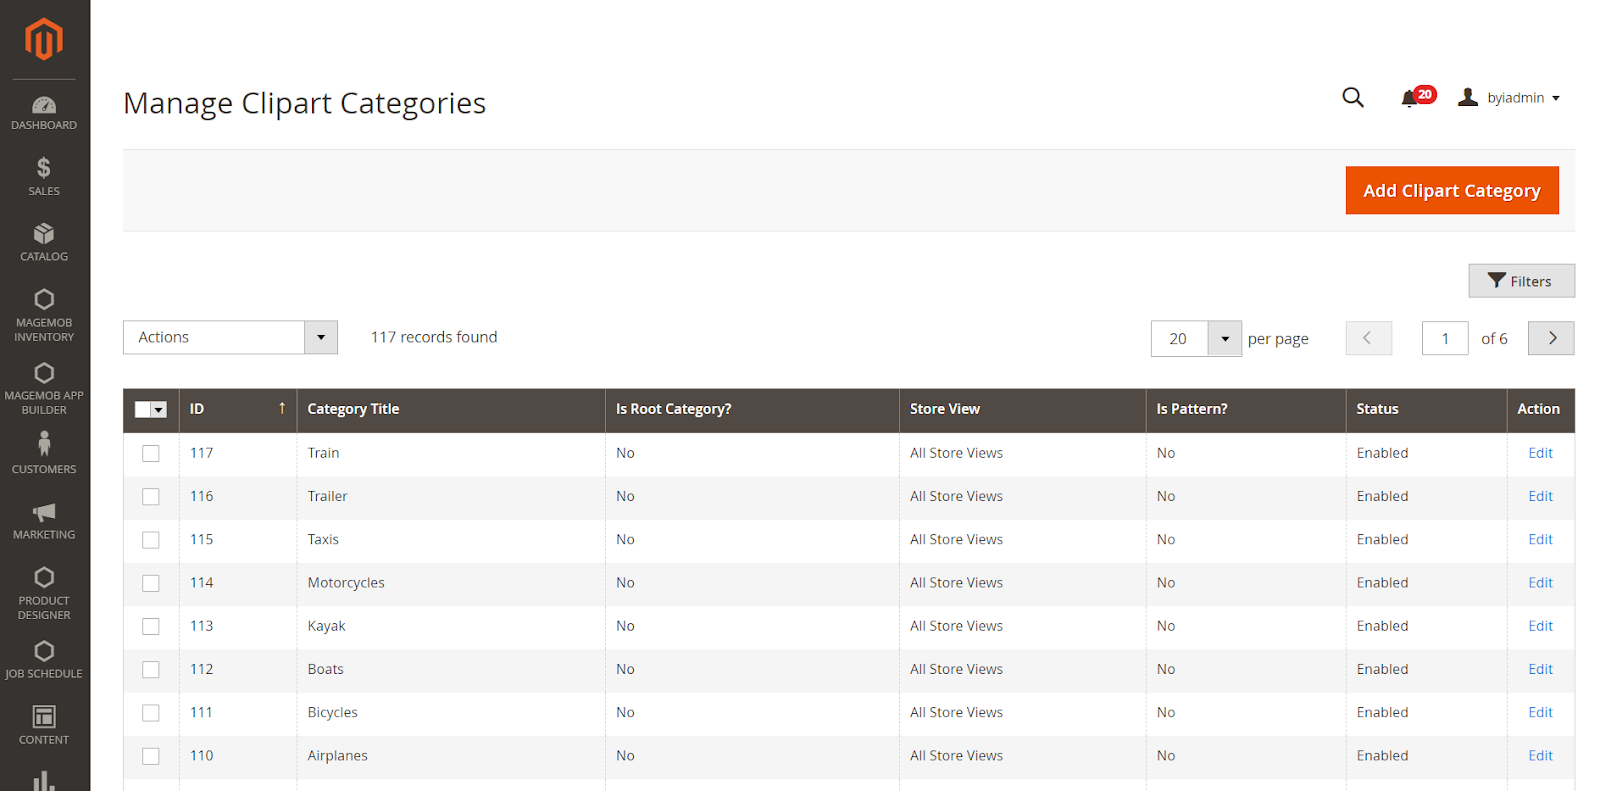
For adding and managing clipart and its categories, go to Product Designer ➤ Manage Clipart Categories.
The list of clipart categories will be open up. You can Add, Edit, and manage them as per your requirement.

Click on “Add Clipart Category” for adding the clipart images and its categories.

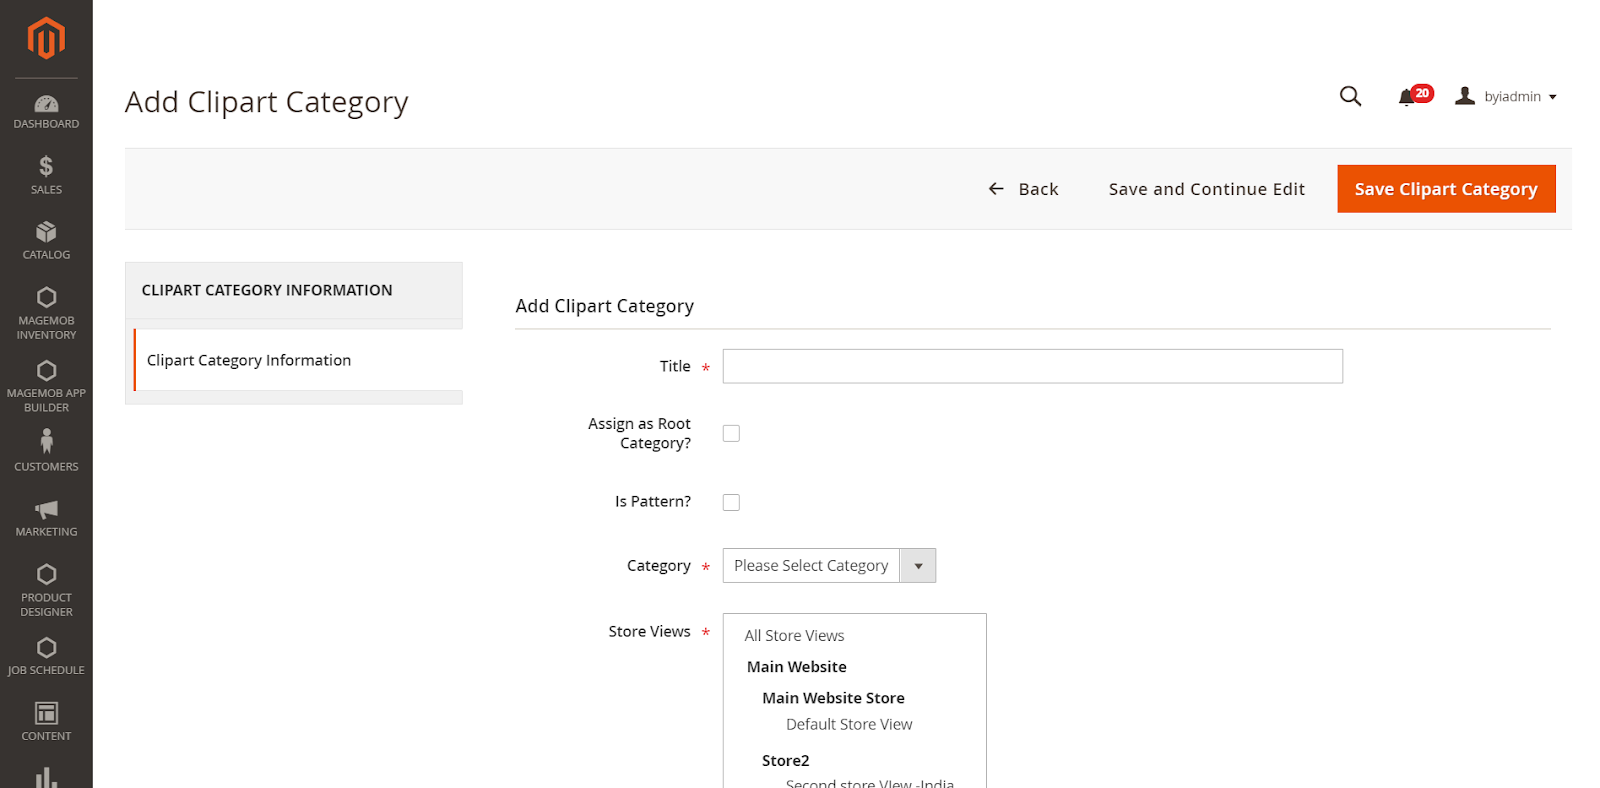
After clicking “Add Clipart Categories” you will be redirected to the Add Clipart Category page.
Enter the following details:
Title: Enter the Name for your clipart.
Assign as Root Category: Tick this option if it is a “Parent Category”.
Is Pattern: Tick this option if it is a “Pattern” or leave the box unchecked.
Category: Select the Category for your clipart from the category dropdown list.
Store Views: Select the store you want to display the clipart
Status: Select the status of your clipart (Enable/Disable).
Clipart Images: Upload the image to be added in the clipart category.
JPG, PNG, JPEG, and SVG files are only supported.
After entering all the details click on the “Save Clipart Category” button and it will be added in the “Manage Clipart Categories” list.
To delete any clipart category, select the category and click on the “Delete” option from the “Action” menu. On clicking the delete option a confirmation message will appear. Click on the “OK” button, the selected clipart category will be deleted.
Frontend View
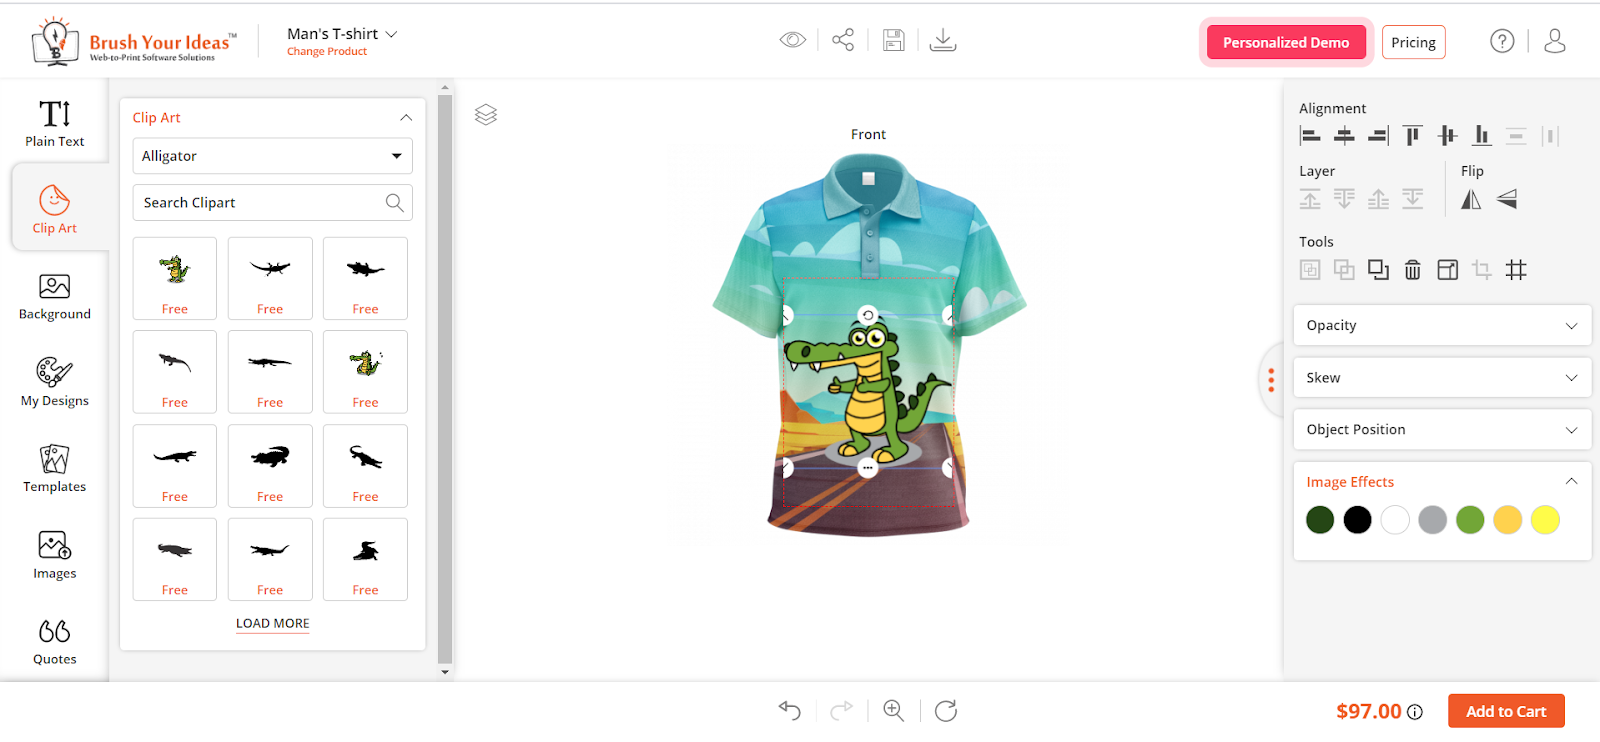
The Clipart tab can be viewed on the left side of the tool. Your customers can see the clipart and can explore it as configured in the backend. Your shopper can also select clipart from the category list or by the easy search.
Now, the customer can select their favorite clipart and can even personalize it by adding image effects from the right side of the tool. The shoppers can set the alignment of the clipart, front/back positions, rotate, and flip.

Note: Customers can crop the clip art but cropping will not be allowed on the SVG format.


