Login to PrintXpand
Login to the PrintXpand to manage Print ERP on one-page solution.
If you are already logged in to the Oddo-Admin, from the website configuration, click on the WEBSITE ? Print ERP.

Dashboard
When you login to the PrintXpand, you will directly navigate to the Dashboard. It is a user-specific dashboard, and you will see the following details on the dashboard: [1]
-> Progress Cards
-> Graphs
-> Alerts
-> Activities
Progress Cards: Progress cards display the progress of the different activities & processes with the number of the total records. So, the admin user will get the idea about ongoing activities & processes. By clicking on the any progress card, the admin user can redirect to that specific activity.
Graphs: Graphs display the analytics in different types of charts that will give you visibility regarding the sales activities, invoices, product wise sales as the admin user wants to set the object-wise. [2][3]
Note: “Progress cards” and the “Graphs” are configured from the Settings. Both will appear on the Dashboard (Home page) as the admin user has configured and want to see the analytics of the ERP.
Alerts: Admin users will get quick notifications in real-time regarding for other users’ activities and all. [1]
Activity Log: Admin user will get the owner wise (company wise) activities & ongoing processes logs.
Now, by clicking on the View More for “Alerts”, the admin user will redirect to all the alerts list page and check the all the alert notification with the specific details.
From the “Alerts” list page, Admin users can search & filter the notifications, import the notification in xlsx file and perform many other actions. By clicking on any record of the Alert, they will redirect to the detail page of that alert.
Now, by clicking on the View More for “Activity Logs”, the admin user will redirect to all the list of the activities page and check the all the activity logs with the specific details.
From the “Activity Logs” list page, Admin users can search & filter the logs, import the logs in xlsx file and perform many other actions. By clicking on any record of the logs, they will redirect to the detail page of that log. [4]


Progress Cards
Navigate to the Settings and click on the Progress Cards setting to manage and display the cards of different activities & ongoing processes. [1]
By clicking on it, the users will get the list of already configured progress cards. By clicking on any progress card record or ‘edit’ icon, the users can check the details and edit as per requirement.
Click on the Create button to configure a new Progress Card. By clicking on it, Users will redirect to the ‘New Dashboard Progress card’ page. From there, they can insert and select the required details like Model (object) that want to see on the Dashboard. [2]
By inserting the details click on the Save button to get the progress card on the Dashboard.


Dashboard Graphs
Navigate to the Settings and click on the Dashboard Graphs setting to configure & customize the Graphs to display on the Dashboard. [1]
By clicking on it, the users will get the list of already configured graphs with the details. By clicking on any graph record or ‘edit’ icon, the users can check the details and edit as per requirement.
Click on the Create button to create a new custom graph to get the states of the activities on the dashboard. By clicking on it, User will redirect to the ‘New Dynamic Dashboard’ page. From there, they can select the required Model (Object), Graph view (Bar, Multi-bar or Column Area Chart) details that want to see on the Dashboard. [2]
By inserting the details click on the Save button to get the progress card on the Dashboard.


User Settings
User Skills
For manufacturing any product or managing the printing process, you need to add the users’ specific
skills that they are experts in.
Click on the “User Skills” under the Settings ? User Settings, the admin user can manage the skills that will utilize during the manufacturing (MO) & Job Orders (JO).
Here you will get a list of the user skills, and you can active/deactivate as per your requirement for the process and availability.
To create a new skill, click on the Create button and insert the name of the skill.
Click on the Save button and the new user skill will be added.


Manufacture Settings
Artwork Product Category
You can create a new Artwork for the product by clicking on the “Create” button. [1]
Here you need to insert the relevant name for the Artwork Product Category and Approval Layer. [2]
Note: Approval layer define no. of the process of the product that the customer ordered to verify the product design and to match the customer’s expectations.
Workflows
Navigate to the “Workflows” to define the sequence of stages to follow the processes. [3]
Add New Workflow
By clicking on the Create button, you can create a new workflow as per requirement.
To select the stages for the workflow, click on the Add a line text caption and the list of the stages will appear. [4]
Select the required stages for the workflow and click on the Select button. The Job stages will be selected and listed under the “Work Center Job Stages”. [5]
Now, Save the workflow it will be listed in the workflows. [6]
Note: From this workflow, if you select the product which is already selected for another workflow, you will get the notification related to workflow is changed after clicking on the Save Workflow button. [7]
Job Stages
When the customer has ordered any product with its desired design, the product would follow some of the processes like manufacturing, designing, printing, and many others that defines the different Job stages. The admin users can create and configure the different Job Stages in the printing process.
To create and configure the different stages in the printing process with the customization, navigate to the Job Stages under the Settings ? Manufacture Settings. [8]
You will see the list of the different stages in the list (if stages are already added). You can find the list with the detail column-wise like a Job Stage name, Work Center, Required Skills & Duration.
You can edit the existing stages as per need just by clicking on the ‘edit’ icon or by clicking on any records, you can check the stage details.
To add a new stage to define the process, click on the ”Create” button and you will navigate the New Job Stage page from there you can configure the following Job Stage related details: [9]
– Job Stage
– Work Center
– Required Skills (User’ Skills)
– Company
– Start Next Job Stage
– Duration Computation
– Default Duration
Description: Enter the description for the workflow.
Work Sheet: You can select the type of file you want to send to your manufacturer.
– PDF: Select this option and upload PDF if you want to send the PDF to the manufacturer.
– Google Slides: Select this option to send the Google Slide to your manufacturer.
– Artwork Image: Select this option to send the custom image uploaded by your customers while customizing the product.
Once you inserted and selected all the required details for the Job Stage, click on the Save button, it will appear in the list of the Job Stages. Later, you can edit any stage as per you change and delete any unwanted stage. [10]
After inserting the stage, information click on the Save button. Thereafter a new Stage can be seen in the list. [11]
Later you can edit or delete as per your requirement.


Email Templates
Admins can create the readymade templates for various purposes so that you do not have to create it from scratch.
Navigate to Settings → Email Templates, you will get the list of created email templates. [1]
Click on the Create button to create the new template and enter the following details.
Name: Enter the name of the Email template. [2]
Applies to: Select the type of document to which this email template can be applied.
Content: Enter the Subject and content of the Email template.
Email Configuration: Enter the basic email configuration.
After the configurations, click on the Save button to save configurations. [3]
Once you save the email template, you can see it in the email template list.
You can also edit the email templates by clicking on the Edit icon. [4]


Theme Customization
You can also customize the theme as per your requirement. Click on the Customize Menu icon and do the following configurations.
Layout: Set the layout as per your requirement.
Colors: Set the theme as per your requirement.
Display Mode: Set the display mode as per your requirement.
Primary Fonts: Select the primary font as per your requirement.
Button Style: Select the style of the button as per your requirement.
Separator: Select the Separator Style and Separator Color.
Sidebar: Configure these sidebars settings:
– Choose Navbar Hover Style: Set the navbar hover style as per your requirement.
– Choose Navbar Hover Background Color: Choose the color of the navbar whenever someone hovers over it.
– Choose Navbar Font Color: Choose the Font color of the navbar.

Logo & Favicon
You can set the logo and favicon icon as per your requirement. Navigate to the Website → Configuration → Settings and upload the icon of favicon.
Now scroll down to the Website Logo section and upload the logo as per your requirement.


Simple Products
To get the list of the simple products, navigate to the Products → Simple Products, you will get the list of simple products. [1]
You will get the basic information of the product like ID, SKU, Name, Image, Price, Stock Quantity, Action Items (Edit and Info). [2]
Now click on the Create button to create the simple product.


Purchase Type Product
– Product Name: Enter the name of the product.
– Can be Purchased: Enable this option for the Purchase type product. [1]
– Image: Browse and upload the image of the product.
General Information [2]
– Product Type: Enter the type of product you are offering.
– Product Category: Enter the product category for this product.
– Internal Reference & Barcode: Enter the internal reference & barcode for better recognition.
– Product Industry: Select the industry for the product. You can also create the product industry by clicking on Create & Edit. [3]
Enter the information for the product industry and click on the save button to view it in the product industry list. [4]
– Sales Price & Customer Taxes: Enter the sales price and customer taxes for the product.
– Cost: Update the cost of the product.
– Company: Select the company for the product.
– Variants: You can add the variants of the product from the list. Click on the Add a Line and enter your variant. [5]
– Purchase: Define the vendor’s price list for the products. Click on the Add a Line hyperlink and enter the following information. [6]
– Vendor: Enter the details regarding your vendor.
– Price List: Set the price list of the product.
– Company: Select the company to which the vendor belongs.
After entering the information, save the vendor.
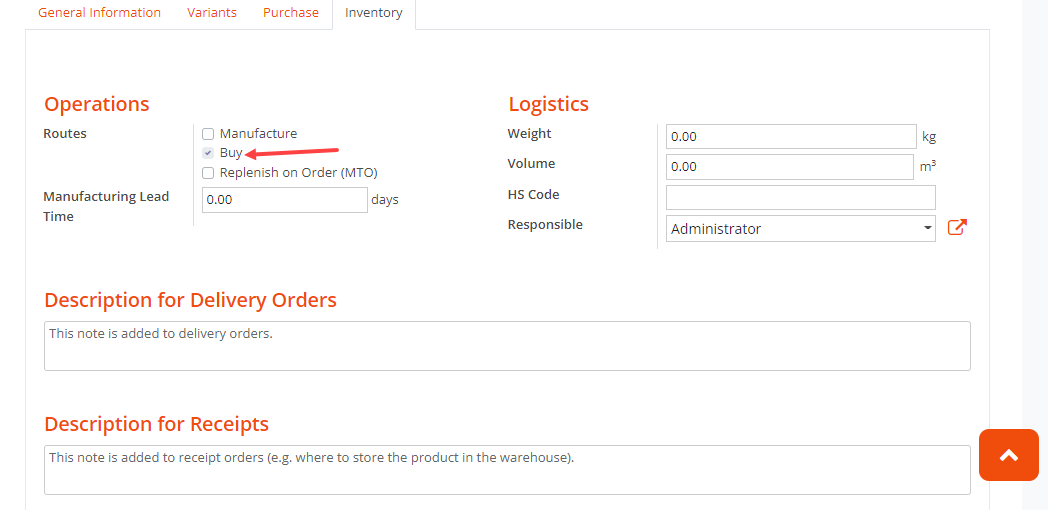
Inventory
– Routes: Select Buy in routes and enter the Manufacturing Lead Time for the purchase type products. [7]
– Logistics: Insert the information of the logistics like weight, volume, HS Code, and Responsible person.
– Description for Delivery Days & Receipts: Enter the description for delivery orders and Receipts.
After entering all the information, Save the product.
Once you save it, you can see it in the simple product list. [8]


Manufacturing Type Product
– Product Name: Enter the name of the product. [1]
– Can be Sold: Enable this option for the Manufacturing type product.
– Image: Browse and upload the image of the product.
General Information [2]
– Product Type: Enter the type of product you are offering.
– Product Category: Enter the product category for this product.
– Internal Reference & Barcode: Enter the internal reference & barcode for better recognition.
– Product Industry: Select the industry for the product. You can also create the product industry by clicking on Create & Edit. [3]
Enter the information for the product industry and click on the save button to view it in the product industry list. [4]
– Sales Price & Customer Taxes: Enter the sales price and customer taxes for the product.
– Cost: Update the cost of the product.
– Company: Select the company for the product.
– Variants: You can add the variants of the product from the list. Click on the Add a Line and enter your variant. [5]
Sales
– Invoicing: Select the invoicing policy for the product. [6]
– Sales Description: Enter the description of the product that you want to communicate to your customers and will be copied to every Sales Order.
eCommerce:
– Categories: Enter the category for the product that will be displayed on the frontend under shop. [7]
– Alternative Products: Select the alternative products for the products you are creating.
– Accessory Products: Select the accessories for the product you are creating.
– Description for the Website: Enter the description for the website.
– Extra Media: Browse and Upload the images for the products.
Inventory
– Routes: Select Manufacture in routes and enter the Manufacturing Lead Time for the purchase type products. [8]
– Logistics: Insert the information of the logistics like weight, volume, HS Code, and Responsible person.
– Description for Delivery Days & Receipts: Enter the description for delivery orders and Receipts.
After entering all the information, Save the product.
– Bills of Materials: You can also generate the bills of materials that you are ordering from your manufacturer. [9]
– Product: Select the product. [10]
– Product Variant: Select the product variant.
– Quantity: Enter the quantity for the product.
– Workflow: Select the workflow you want to apply to this product.
– Reference: Enter the reference of the product.
– BoM Type: Select the BoM (Bills of Materials) type to send.
– Company: Select the company that is related to this Bills of Materials.
– Components: Select the components and enter the quantity by clicking on the Add a Line. [11]
Miscellaneous [12]
– Manufacturing Readiness: Select when the products are ready to be manufactured.
– Consumption: Select if you can consume more or less components than the quantity defined on the BoM(Bills of Materials).
Click on the Save button to generate the Bill of Materials for the selected product.
Once you save it, you can see it in the simple product list. [13]


Artwork Products
Artwork products are by default Manufacturing types of products. Navigate to the Products → Artwork Products, you will get the list of simple products.
You will get the basic information of the product like ID, SKU, Name, Image, Price, Stock Quantity, Action Items (Edit and Info).
Now click on the Create button to create the Artwork product.

Manufacturing Type Product
– Product Name: Enter the name of the product. [1]
– Can be Sold: Enable this option for the Manufacturing type product.
– Is Artwork Product: Tickmark this option to make this option as an Artwork Product.
– Image: Browse and upload the image of the product.
General Information [2]
– Product Type: Enter the type of product you are offering.
– Product Category: Enter the product category for this product.
– Internal Reference & Barcode: Enter the internal reference & barcode for better recognition.
– Product Industry: Select the industry for the product. You can also create the product industry by clicking on Create & Edit. [3]
Enter the information for the product industry and click on the save button to view it in the product industry list. [4]
– Sales Price & Customer Taxes: Enter the sales price and customer taxes for the product.
– Cost: Update the cost of the product.
– Company: Select the company for the product.
– Variants: You can add the variants of the product from the list. Click on the Add a Line and enter your variant. [5]
Sales [6]
– Invoicing: Select the invoicing policy for the product.
– Sales Description: Enter the description of the product that you want to communicate to your customers and will be copied to every Sales Order.
eCommerce: [7]
– Categories: Enter the category for the product that will be displayed on the frontend under shop.
– Alternative Products: Select the alternative products for the products you are creating.
– Accessory Products: Select the accessories for the product you are creating.
– Description for the Website: Enter the description for the website.
– Extra Media: Browse and Upload the images for the products.
Inventory [8]
– Routes: Select Manufacture in routes and enter the Manufacturing Lead Time for the purchase type products.
– Logistics: Insert the information of the logistics like weight, volume, HS Code, and Responsible person.
– Description for Delivery Days & Receipts: Enter the description for delivery orders and Receipts.
After entering all the information, Save the product.
– Bills of Materials: You can also generate the bills of materials that you are ordering from your manufacturer. [9]
– Product: Select the product.
– Product Variant: Select the product variant.
– Quantity: Enter the quantity for the product.
– Workflow: Select the workflow you want to apply to this product.
– Reference: Enter the reference of the product.
– BoM Type: Select the BoM (Bills of Materials) type to send.
– Company: Select the company that is related to this Bills of Materials.
– Components: Select the components and enter the quantity by clicking on the Add a Line. [10]
Miscellaneous [11]
– Manufacturing Readiness: Select when the products are ready to be manufactured.
– Consumption: Select if you can consume more or less components than the quantity defined on the BoM.
Click on the Save button to generate the Bill of Materials for the selected product.
Once you save it, you can see it in the simple product list.


Products Attributes
Navigate to the Products → Products Attributes, you will get the list of the created product attributes. Click on the Create button to add a new attribute. [1]
– Attribute Name: Enter the name of the attribute. [2]
– Display Type: Select how you want to display the attribute name.
– Variants Creation Mode:
- Instantly: All attributes are created as soon as the attributes and its values are added to the product.
- Dynamically: Variant created only when its corresponding attribute and values are added to a sales order.
- Never: Variants are never created for the attribute.
Attributes Value: You can add the attribute’s value by clicking on the Add a Line. [3]
Enter the Value and tickmark the Is Custom Value field if it is the custom value. You can also edit the attribute’s value from the Action Items.
With the Edit action, you can add value for any attribute. [4]
Once you add an attribute click on the Save button. Now you can see the created attribute in the attributes list.


Product Categories
You can create any category you want to display on the frontend under the Shop section.
Navigate to the Products → Products Categories, you will get the list of created product categories. [1]
Now click on the Create button and enter the following information. [2]
– Name: Insert the name of the eCommerce Category.
– Parent Category: If this is child category then selects its parent category.
– Sequence: Insert the sequence you want to display this category.
– Image: Upload image for the product category.
After entering the information, click on the Save button to save the configurations.


Materials Availability
With the Material Availability feature, you can streamline your inventory and make sure that you never go out of stock again.
To manage your inventory, navigate to Inventory → Materials Availability you will get the detailed view of the material availability. You will have the details like Material ID, Material Name, Material Expiry, In Stock Quantity, Status, Updated Date, Action Items like Edit, Create PO, and Info.
To update the quantity of any stock, click on the Edit icon and you will get the edit view of the material availability.
Now click on the On Hand and Create button and enter the available quantity of the product.
Once you enter the quantity, the status will change to In Stock.


RFQ Orders
Here the admin can check & create the orders of the Purchase as per the Quotes. Admin will get information like PO Order ID, Item Name, Arrival Date, Purchase POC, Vendor Company, Total Amount, Status, and Action Items. [1]
You can also view the purchase orders in multiple views like list, kanban, calendar, pivot, and graph. [2]
Click on the Create button to create a purchase order and enter the following information. [3]
– Vendor: Select the vendor you want to send the purchase order.
– Vendor Reference: Enter the reference for the vendor.
– Currency: Set the currency of the
– Order Date: Set the order date of the purchase order.
– Company: Select the company of the purchase order.
– Products: Enter a product, section, note, and its other information for the purchase order. [4]
Other Options
You can send the purchase order via mail, you can print RFQ, Confirm your order once you receive the products of the purchase order, or cancel the purchase order. [5]
Once you create the purchase order, you will get it in the Purchase module. [6]


Dynamic Estimation Manager
Dynamic estimation manager gives you pricing based on the pricelist you have created and applied to your product. Navigate to the Dynamic Price Calculator → Dynamic Estimation Manager, and you will get the information like product, description, Quantity, No of Colour, No of Pages, and Total. [1]
Click on the Select Products and fill the following information. [2]
– Product: Select the product.
– Quantity: Enter the quantity.
– No. of Colour: Enter the no. of color.
– Custom Attribute: Select the custom attribute.
– Height & Width: Enter the height and width for the custom attribute.
– Values: Select the values for the custom attribute.
– Price: Here you will get the price automatically based on the pricelist. You can also re-enter the new price as per your requirement.
This way, you can configure the other custom attributes. Once you configure the custom attribute you will get the total price of the product. [3]
After all the configurations, save the estimation and it will be listed on the dynamic estimation page. [4]
You can also create quotations by clicking on the Create quotation button. For creating quotations you can follow the Artwork Quotation section.


Attribute Assignment
Product attributes are the ways to represent the product in front of your customers. Attributes allow the shoppers to find and compare the product to purchase. To create the product attribute navigate to the Dynamic Price Calculator → Attribute Assignment. [1]
Click on the Create button and enter the following information. [2]
– Name: Enter the name of the product attribute.
– Unit: Select the unit of an attribute.
– Unit Price: Enter the price of the unit.
– Apply Height Width: Enable this option if the attribute is related to the height & width.
– Is Dynamic: Enable this option if you want to enable dynamic height & width.
– Min & Max Height: Enter the min & max height for the attribute.
– Min & Max Width: Enter the min & max width for the attribute.
Attributes
Click on the Add a Line hyperlink, and enter the Height, Width, Value and Price. [3]
After adding all the information, Save the attribute. [4]
After saving the attribute, it will be listed in the Attribute Assignment page.
You can also Import or Download the attribute list from or to the system. [5]


Product Industry
You can create the product industry and assign the Product Attributes to the created product industry. Navigate to the Dynamic Price Calculator → Product Industry, you will get the list of created product industry. [1]
Now click on the Create button to create the product industry. [2]
– Name: Enter the name of the product industry.
– Qty Pricelist: Enter the pricelist of the quantity.
– Color Pricelist: Enter the pricelist of the color.
– Page Pricelist: Enter the pricelist of the page.
Product Attribute [3]
Click on the Add a Line hyperlink and add a value in it.
Product Assignment [4]
You can also assign the product to the particular industry.
After all the settings, Save the configurations. Now it will be listed in the Product Industry list. [5]


Pricelist
Pricelist lets you set the range pricing for the products. Navigate to the Dynamic Price Calculator → Pricelist, you will get the list of the pricelist. [1]
Click on the Create button to create the pricelist.
– Name: Enter the name of the pricelist.
– Pricelist Line: Click on the Add a Line hyperlink, set the range (From & To) and Price. [2]
– Products: Click on the Add a Line hyperlink and add the product. [3]
After all the configurations, Save the settings. Once it is saved it will be listed in the pricelist. [4]


Estimation Manager
Estimation Manager is all in one place, from where you can handle the pricing of multiple products based on the quantities.
Navigate to the Quote → Estimation Manager, to set the pricing based on the quantities. You will get the fields like Select, Products, and Units.

Create Pricelist
Navigate to Sales → Products → Pricelist, you will get the list of the pricelists. Click on the Create button and enter the following information. [1]
– Name: Enter the name of the price list.
– Currency: Select the currency for the price list.
– Company: Select the company for the price list.
Price Rules
From this section, you can fix the multiple price rules for the Pricelist. Click on the Add a Line button and Create a Pricelist Items.
Select Apply On: [2]
– All Products: Select this option if you want to apply the price list to all products.
– Product Category: Select this option if you want to apply the price list to selected categories in the Product Category field below.
– Product: Select this option if you want to apply the price list to selected categories in the Product field below.
– Product Variant: Select this option if you want to apply the price list to selected categories in the Product Variant field below.
– Min. Quantity: Enter the minimum quantity to be applied in order to activate the price list.
– Start & End Date: Set the start & end date for the price list.
Price Computation [3]
There are three types of price computations and those are:
– Fixed Price: Select this option if you are offering a fixed price on the products.
– Percentage (Discounts): Select this option and enter the percentage of discount you want to offer.
– Formula: From this section, you can set the condition of pricing.
-
- Based on: Select the base price on which you want to apply the price list.
- New Price: Set the condition for the price list.
- Price Discount: Enter the percentage you want to offer a discount.
- Charge: Enter the amount you want to charge after the discount.
- Rounding Method: Enter the number round figure the price. For example, you entered 10 in the rounding method and the price after discount and charge is 76 so the rounding method will round figure the price as 80.
- Min. and Max. Margin: Enter the minimum and maximum margin.
After creating the price list click on the Save & Close button.
Select the Pricelist from above and set the Quantities. [4]
We have configured 3 quantities and all those are added in the below field. Now click on Select Product and select the product for which you want to apply this pricing.
Select the products as per your requirement and click on the Set Estimation Products. Now the selected products will be listed under pricelist. [5]
You can see the price of the single Binding product and the Binding product with 50 units is different. This is because of the price list i.e 10% discount if the quantity is 50. [6]
You can also create a quotation for the orders by clicking on the Create Quotation button and entering the details like Customer, Pricelist, and Customer Reference. Now the quotation is created.
Once the quotation is created it will be listed under Artwork or Simple Quotation. Here is the indepth instructions of Quotations. [7]


Artwork Quotation
Quote section gives you every bit of information of the product that your customer has order from your store. Once you get the information you can send it for manufacturing and followed by delivery.
Navigate to Quote → Artwork Quotations, you will get the list of the artwork products ordered by your customers. You will get the basic information of the order like Quotation ID, Customer Name, Amount, Salesperson, Status, Opportunity Date, Created Date, Edit and info. [1]
Now click on the Order or the Edit icon for which you need to send it to manufacturing. Here you will get all the details of the order like customer name, address, amount, and much more. [2]
Scroll down to the Order Line section, here you will see the Product Name, Description, Customer Note, Customer Image(Image Uploaded by your customers), Artwork Comment, Artwork Image, Approval Status, Quantity, Unit Price, Taxes, Subtotal, and Action Items. [3]
In the Other Info you will get the information related to the Sales, Invoicing, and Delivery. [4]
Now click on the Edit button at the top and upload the Artwork Image from the Order Lines for approval. [5]
Once you upload an image click on the Artwork Approval button to send to your customers.
In the approval mail, your customer has to click a hyperlink to approve the design uploaded by you. [6]
Your customers will have three options for the Approval i.e Accept, Accept with Changes, and Resend With Comments. [7]
– Accept: This means your customer has accepted the design you have sent to them. [8]
– Accept with Changes: This means your customer has accepted and added the comments for the design. [9]
– Resend with Comments: This means your customer has refused the design you have sent to them.
Once your customer has rejected the design you can send it again for the approval.
Note: Your customers can only refuse the design three times. After the third time the order will get rejected.
Once your customer has accepted the design, Approval Status will be Accept else it will show Reject.
Also by scrolling down to the page, you will get all the information of the activity. [10]
Once you Confirm the order you can Create Invoice or Send an Email of the product. [11]


Manufacturing
After the approval cycle you can send it to manufacturing. [1]
You can also send it to manufacturing by navigating to the Orders → Artwork Products. Here you will get the list of the created products.
Scroll down to the Components section, here you will get the list of the components which will be needing the manufacturing process. [2]
– Product Components: Name of the components.
– To Consume: The no. represents the quantity to be consumed for manufacturing.
– Reserved: The no. represents the reserved quantity from the available product components.
– Consumed: The no. represents the reserved quantity from the available product components.
To reserve the product component, click on the Check Availability button. [3]
You can also Unreserve the components if you want to reserve it for the other product. [4]
Now click on the Plan button to send it for the manufacturing process.
Once you click on the Plan button, the total number of job orders will be visible.
Click on the Job Order and you will get the list of all the job stages. [5][6]
Once you click on the job stage, its detail page will open up. Click on the Start Working button the process will begin. [7]
Note: The working employee should be correct else it will show an error message. [8]
Now you have three options, i.e. Done, Pause, and Block. [9]
– Done: Click on Done to finish the process.
– Pause: Click on the Pause button to temporarily pause the process.
– Block: Click on the Block button to block the process. Enter the Loss Reason and Description.
Once you block the process you can Unblock it as well. [10]
Once you click on the Done button it will be in the Finished state. [11]
By clicking on the Next button you will be navigated to the next job stage. This way you have to complete every stage. [12]
Now click on the Mark as Done button if you are done with the Job Stages. [13]
Once you are done with the job stages you can also track the time consumed and date. [14]
Once you are done with the job stages, you can send it to Delivery.
Click on the Validate to deliver the order. Once you click on the Validate click on the Apply button to process all the quantities. [15]
Now the product is delivered to your customers. [16][17]


Create New Quotation
Click on the Create button and enter the following information. [1]
New
– Customer: Select the Name of your customers.
– Invoice Address: Select the Invoice address for the quotation.
Create Invoice Address:
Click on the hyperlink and Invoice Address Popup will open up.
Select Individual or Company and fill in the basic information.
Now, scroll down to the Contact & Address section and click on the Add button.
Once you click on the Add button, select the Address Type and enter the basic information of the contact like Name, Address, Notes, Email, Phones, Mobile, and Image.
Once the contact is added Save it and assign it.
– Delivery Address: Select the Invoice address for the quotation. For Delivery Address you can create the contact address by following the process of Invoice Address.
– Expiration: Select the expiration date for the product.
– Important Orders: Tick Mark this field if the order is important.
– Pricelist: Select the Price list and the Currency will be automatically updated.
– Payment Terms: Select the Payment Term for the Quotation.
– Estimated ETA: Enter the ETA till when the product will be delivered.
From the Order Line select the product for which you want to send the Quotation.
Once you select the product you can upload the Customer Image and Artwork Image and you can send it for the approval.
Once you upload an image click on the Artwork Approval button to send to your customers. [2]
In the approval mail, your customer has to click a hyperlink to approve the design uploaded by you.
Your customers will have three options for the Approval i.e Accept, Accept with Changes, and Resend With Comments. [3]
– Accept: This means your customer has accepted the design you have sent to them. [4]
– Accept with Changes: This means your customer has accepted and added the comments for the design. [5]
– Resend with Comments: This means your customer has refused the design you have sent to them.
Once your customer has rejected the design you can send it again for the approval.
Note: Your customers can only refuse the design three times. After the third time the order will get rejected.
Once your customer has accepted the design, Approval Status will be Accept else it will show Reject.
Also by scrolling down to the page, you will get all the information of the activity. [6]
Once you Confirm the order you can Create Invoice or Send an Email of the product. [7]


Orders
In this section, you will get all the details of your orders from your customers. Navigate to Orders, you will land on the Sales Orders page. [1]
You will get two sections of orders Artwork Order and Simple Order.
Once you open any of the above sections, you will get the details like Order ID, Customer Name, Product Name, Amount, Salesperson, Delivery Date, Order Status, and Action Items. There are also multiple views like list, kanban, calendar, pivot, graph, and activity. [2]
All the orders related to artwork products will be displayed in the Artwork Order section and the simple products order will be displayed in the Simple Order section.
You can also edit the order by clicking on the Edit icon. [3]


Manufacturing Order
After the artwork approval, the first process is the Manufacturing process. Navigate to Job → Manufacturing Orders, you will get the list of the manufacturing orders. [1]
You will get the basic information like MO Order ID, Product Name, Sale Order, Workflow, Material Status, Delivery Date, Order Status, Order Process, and Action Items.
You can Plan or Unplan any manufacturing order as per your requirement. [2]
You can create any manufacturing order by clicking on the Create button or you can edit as well by clicking on the Edit icon. [3]
Once you Plan or Unplan it will reflect in the Job Orders. It is one of the shortest way to create a Manufacturing Order.


QR Code Scan
You can also complete any job by scanning the QR code. Firstly you need to download the Job order sticker to your system. [1]
First QR code will redirect you to the Manufacturing page whenever you scan it.
And the QR codes in the Job Order Processes will help you in completing the job order of the manufacturing order by simply scanning it.
There are two ways you can complete job order through QR Code .i.e Manual and Automatic.
In the Manual way, you have to give the confirmation after scanning the QR code. [2]
Once you confirm the process it will also reflect in that manufacturing order.
For automation, navigate to More ➤ Settings ➤ User & Companies ➤ Companies, you will get the list of the created companies.
Now open the company in the Edit mode and enable the Automate Job Order Process.
Without any confirmation, this will automatically change the status of the job order by scanning the QR code.


Job Order
Once the manufacturing order is planned it will reflect in the Job Order section. Job order section shows every stage of the work that an order has to go through.
Navigate to Job → Job Orders, you will get the list of all the Job Orders. Once you land on the Job Order page, you will get the basic information like Job Order, Scheduled Date Start, Work Center, Manufacturing order, Product, Original Production Quantity, Unit of Measure, Status, Company, and Action Items. [1]
You will get multiple views as per the for the Job Orders section like list, pivot, graph, and calendar.
You can edit the job order by clicking on the Edit icon. [2]


Job Calendar
Job calendar gives you the calendar view of all the job stages. Navigate to the Job → Job Calendar, you will get the job order list and calendar. [1]
Once you land on the page you will see the calendar, Job Order List, Daily, Weekly, Monthly, Calendar, and List view.
The color of the job order represents the status of the job. Here is the explanation of them.
Purple = Finished
Green = Waiting for another WO
Yellow = Ready
White = In Progress
You can also Edit or Delete the particular job order by clicking on the activity. [2]
Edit View [3]
You can also view the job orders in the list view. [4]


Job Order Assignment
You can assign an employee from the Job Order Assignment. Navigate to the Job → Job Order Assignment, a panel will open up. [1]
Click on Add a Line, add a date of the job stage, select an employee you want to assign, and select the job order. Or you can just select the employee and job order.
Now click on the Update Employee button.
It will also update the Working Employee of the Job Order. [2]
Through this way you can assign working employed to the multiple jobs.
Note: In order to assign employees the job stage should be in pending stage.


Job to Process
Job to Process section lets you change the process of job order by dragging and dropping. Here is how you can change the process of job stages.
Navigate to Job → Job to Process, you will get the Job Order Kanban View. Here you will get five stages Waiting for another WO, Ready, In Progress, Finished, and Cancelled. [1] [2]
By just dragging and dropping you can change the status of the job stage. [3]
Note:
1. In order to change the status to In Progress from Ready, working employee of the job should be assigned.
2. Once the job is Finished you can’t change its status.


Customer Invoices
Navigate to the Invoices ➤ Customer Invoices, you will get the list of created invoices. You will get details like ID, Customer Name, Sale Order, Sales Person, Amount, Due Date, Status, and Action Items.
Click on the Create button and enter the following details. [1]
– Customer: Enter the name of the customer.
– Delivery Address: Enter the delivery address.
– Reference: Enter the reference of the customer.
– Invoice Date: Enter the date of invoice.
– Payment Terms: Select the payment term.
– Company: Select the company for the invoice.
– Currency: Select the currency as per requirement.
Invoice Lines
Click on the Add a Line hyperlink and enter the following information. [2]
– Product: Select the product for the invoice.
– Label: Enter the label for the invoice.
– Quantity & Price: Enter the quantity & price of the invoice.
– Taxes: Charge the tax as per your requirement.
– Subtotal: This field will display the subtotal of the invoice.
– Action Items: You can edit or have the information regarding the invoice line.
After entering the information, Save the invoice.
Once you saved the invoice, it will be listed in the Customer Invoice section. [3]
You can also have a preview of the invoice by clicking on the Preview button. [4]
You can even mark the invoice as Paid by clicking on the Post, Register Payment, and Validate it. [5][6]
Credit Note
You can also generate the Credit Note by clicking on the Add Credit Note button and enter the following details. [7]
– Reason: Enter the reason for the refund.
– Refund Date: Enter the date of the refund.
– Use Specific Journal: Select the journal in which the entry is to be reversed.
Once you reversed the entry it will reflect in the More → Invoicing → Customers → Credit Notes, you will get the credit note. [8]


Supplier Invoices
Navigate to the Invoices ➤ Supplier Invoices, you will get the list of created bills. You will get details like ID, Customer Name, Sale Order, Sales Person, Amount, Due Date, Status, and Action Items.
Click on the Create button to create the new bill and enter the following details.
– Vendor: Select the vendor for the bill.
– Delivery Address: Select the delivery address for the bill.
-Reference: Enter the reference for the bill.
Auto-Complete:
– Bill Date: Enter the bill date.
– Accounting Date: Enter the date of accounting.
– Payment Terms: Select the Payment terms.
– Company: Select the company.
– Currency: Select the currency.
Invoice Line
Click on the Add a Line hyperlink and enter the following information.
– Product: Select the product for the invoice.
– Label: Enter the label for the invoice.
– Quantity & Price: Enter the quantity & price of the invoice.
– Taxes: Charge the tax as per your requirement.
– Subtotal: This field will display the subtotal of the invoice.
– Action Items: You can edit or have the information regarding the invoice line.
After entering the information, Save the invoice.
Once you saved the invoice, it will be listed in the Customer Invoice section.
You can even mark the invoice as Paid by clicking on the Post, Register Payment, and Validate it.
Credit Note
You can also generate the Credit Note by clicking on the Add Credit Note button and enter the following details.
– Reason: Enter the reason for the refund.
– Refund Date: Enter the date of the refund.
– Use Specific Journal: Select the journal in which the entry is to be reversed.
Once you reversed the entry it will reflect in the More → Invoicing → Customers → Credit Notes, you will get the credit note.


All Users
From here you can manage and create the users for your store. Navigate to Users → All Users, you will get the list of all the users. [1]
To create the new user click on the Create User button and enter the following information. [2]
– User Name: Enter the User Name to create the new user.
– Email Address: Enter the email address for the new user.
– Is Printer User: Tick mark this field if the user you are creating it the printer user.
– Company: Select the company of the for the user.
– Image: Upload the image of the user.
After entering the above information, click on the Create User button. Through this way you can create the new user for your company.
You will also get other information like User ID, Image, User Name, User Type, Online/Offline, User Status, Action Items like Edit and Job Order. [3]
– Online/Offline: This shows whether the particular user is online or offline. [4]
– User Status: This status shows whether the user is active or inactive with us.
You can also edit the user details by clicking on the Edit icon. [5]


Deliverable Orders
Navigate to Reports → Deliverable Orders, you will get the report in the Kanban view classified into three parts Today’s Order, Important Order, and Others.
Each card consists of the following details.


Resource Availability
From the Resource Availability section you can apply for the leave and this also will give you a calendar view of the availability of your resources.
Navigate to the Reports → Resource Availability, you can see the leaves. [1]
- Calendar view
- Leaves of the employee will be displayed in the calendar.
- You will get the list of the employees. You can also use this list to filter the leaves based on your employees.
- There are multiple views of the calendar and those are Today, Day, Week, and Month.
You can also create the leave by clicking on the particular day in calendar and enter the following details.
Select the User and Type of leave. You can apply leave for Full Day, Half Day, and Custom Hours. [2]
For Full Day
– From: Set the date of leave.
– Duration: Enter the no. of days you want to take leave.
– Description: Enter the description for the leave.
For Half Day
– From: Set the date and select morning or afternoon to take the leave.
– Description: Enter the description for the leave.
Custom Hours
– From: Set the date of the leave.
– Custom Hours: Set the custom hours of leave.
– Description: Enter the description for the leave.
After entering the details, click on the Save button. Now the leave is listed in the calendar.
Admin can Approve or Refuse the leave of an employee. Also you can see the paid time off for the current year. [3]


User Work Details
Navigate to Reports → User Work Details, you can see the work details of the users in the table view.
You can also give a detailed view by adding more details like Created by, Created on, Last Updated BY, Last Updated On, Start Date, and User.
We have added users and months for more detail.
You can also be more detailed with the user work details. For example, if you want to check the duration based on the daily basis of each month, you can add Day to that particular month.
You can measure work by duration and count. By adding duration you will get the total working duration in the month of the particular user and the count represents the total no. of days worked.
You can also flip the axis of the table, expand the table, and download the CSV file into your system.


Status Wise Job Report
If you want to view the report based on the Status of Job then the Status Wise Job Report is your way to go. Navigate to Reports → Status Wise Job Report, you will get the report in kanban view. [1]
You will get the report (Cards) in 5 stages Waiting for another JO, Ready, In Progress, Finished, and Cancelled.
Each card consists of the following details: [2]
You can change the color of the card as per your requirement. [3]
You can fold the status as per your requirement by clicking on the Setting → Fold. [4]
For a quick view, there is a counter for each status, which represents the total count of the job order in that particular status. For example 4 in “Ready” represents four job orders are ready to process. [5]


Job Stages MO Report
Here you will get the report related to the Job stages of manufacturing orders. Navigate to the Reports → Job Stages MO Report, you will get the report in kanban view.
You will get the columns based on the Job Stages you have created.
Each card consists of the following details.
You can change the color of the card as per your requirement.
You can fold, edit, and delete the stages as per your requirement by clicking on the Setting.
Fold
Click on the fold to fold the stage.
Edit Stage
Once you click on the Edit Stage button, you can edit the stage as per your requirement.
Delete
Click on the delete button and then OK to confirm the delete action.
For a quick view, there is a counter for each status, which represents the total count of the job order in that particular Stage. For example 12 in “Printing” represents 12 job orders in the printing stage.


Notifications
In the Notification section, you will get the details regarding Activities, and Alerts. Navigate to the Notifications section and you will land on the Activities tab. You will get the details like Activity Type, Due Date, Document Name, and Summary. [1]
In the Activities section, you will get the details regarding the activities of your employees like time offs and leaves. You can also open the activity in the Edit mode and change the details. [2]
In the Alert section, you will get a notification of each activity in your store. Once you land on the alert section you will get details like Date, Type, Subject, and Subtype. [3]
You can also open it in the Edit mode by clicking on the alert and change the details. [4]


Attendances
You can easily track the presence of your resources with the help of the Attendance module. Navigate to the More ➤ Attendances, you will land on the Check-In/Check-Out Page.
From here you can Check-In to your system. Once you checked in you can also Check Out from here. You will also get the break duration and the timings of Check-ins/Check-out.
You can check the past records of check-ins and check-outs, by navigating to the Manager ➤ Attendances.
You can also create check-ins/check-outs manually by clicking on the Create button.
Once you click on the button, select the Employee, enter the check-in/check-out time and Save it.
You can also edit the record by clicking on the Edit icon under the Action Items.


Create Company
Navigate to the More ➤ Settings ➤ User & Companies ➤ Companies, you will get the list of default created companies.
Now click on the Create button and enter the following details.
– Company Name: Enter the name of the company.
– Image: Browse and upload the image.
– Address: Enter the address of the company.
– Phone: Enter the phone number of the company.
– Email: Enter the email address of the company.
– Website: Enter the website address of the company.
– Tax ID: Enter the Tax identification ID for the financial purposes.
– Company Registry: Insert the company registration number.
– Currency: Select the currency you want to keep for the company.
– Parent Company: Select the parent company.
– Automate Job Order Process:
After adding all the information, save the settings and the new company will be created.


Time Off
You or your agents can manage the leaves, from the Time Off section. Navigate to the More ➤ Time Off, you will get the dashboards with the no. of paid off leaves, compensatory days, and calendar view. [1]
Now, click on the New Time Off Request and fill in the following details to apply for leave. [2]
– Time Off Type: Select the time off type.
– From: You can apply the leave for full day, for half day, and custom hours.
For Full Day [3]
– Date: Select the date of leave.
– Duration: Enter the duration of leave.
For Half Day [4]
To apply for the leave for a half-day, tickmark the Half-Day field, select the date, part of the day i.e. Morning or Afternoon, and enter the description for the leave.
Custom Hours [5]
To apply the leave for custom hours, tickmark the Custom Hours field, select the date, set the duration i.e. From & To, and enter the description for leave.
After entering the details of leave, Save the time-off request.
Once the leave is applied, your admin can approve or reject it by navigating to the Reports ➤ Resource Availability. [6]
You can see the leave in calendar. Now open the leave in Edit mode and click on the Approve & Validate to approve the leave or Refuse button to reject the leave. [7]
Once the leave is approved, it will also reflect in the Paid Time Off. [8]


Frontend
Once your customer visits your online store they will land on your home page. [1]
By clicking at the Shop they can explore all your products. [2]
- Your customer can search the product as per their requirements.
- They can also select the currency as per their choice.
- They can navigate to other pages to check other products.
- They can set the views i.e Grid and List view as per their requirement.
- Sorting feature to get the product as per their requirement.
- They can select the product category-wise.
Your customer will get the multiple products added by you from the backend. The labels will give the idea of the product to your customers. [3]
They can select the attributes as per their requirement. By scrolling down they will get the recently viewed and alternative products as configured from the backend. [4][5]
Customers can add the comments for the product and upload the design as per their requirement. [6][7]
While checking out, there will be a pagination containing Review Order, Address, and Confirm Order. [8]
In the cart page, your customer will get the product details like image, product, quantity, order price, and suggested accessories with the product. [9][10]
Customers can also apply the promo code if they have one. Now they can process the checkout. [11]
Now, customers are at the checkout page. They can edit the billing & shipping address and pay for their order. Once they pay the order they will get the confirmation message and the order number. [12][13]
If your customer needs support they can also connect with you by navigating to the Contact Us page. [14]
Your customers can have a quick view of the products by clicking on the My Cart. [15]


