Top Header
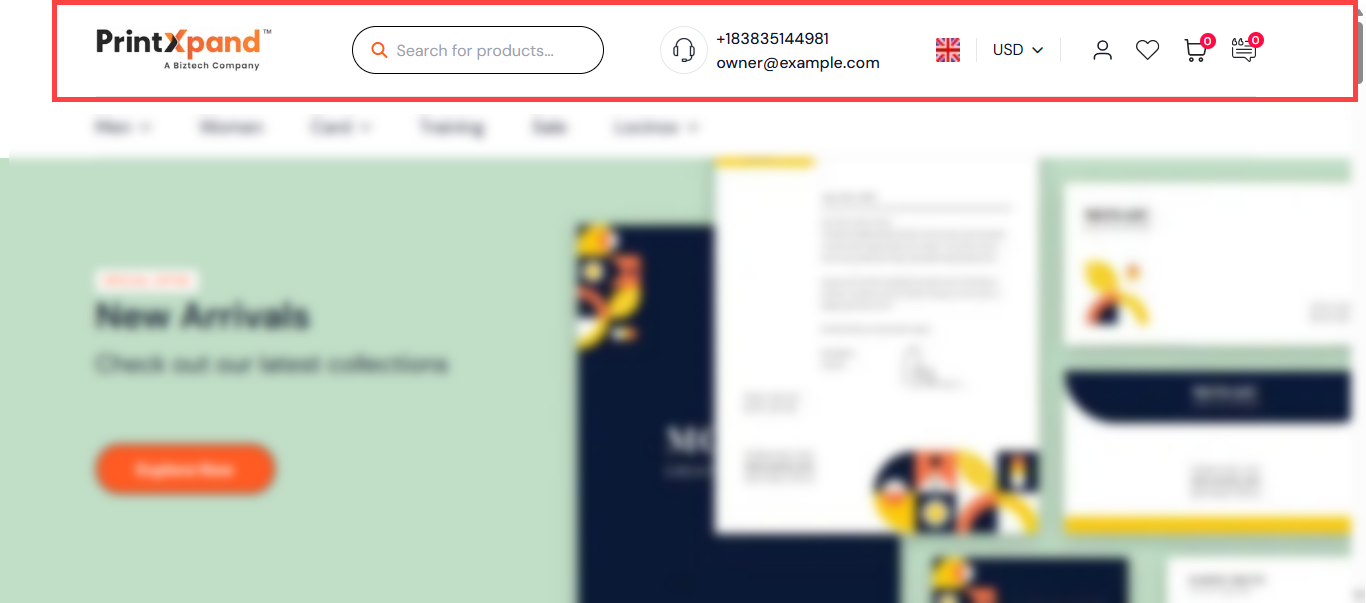
At the top of the home page, the header contains the following elements:
– Logo
– Search Bar
– Contact Information
– Country flag
– Currency
– My Account
– Whishlist
– Cart
– Quote Cart
Logo
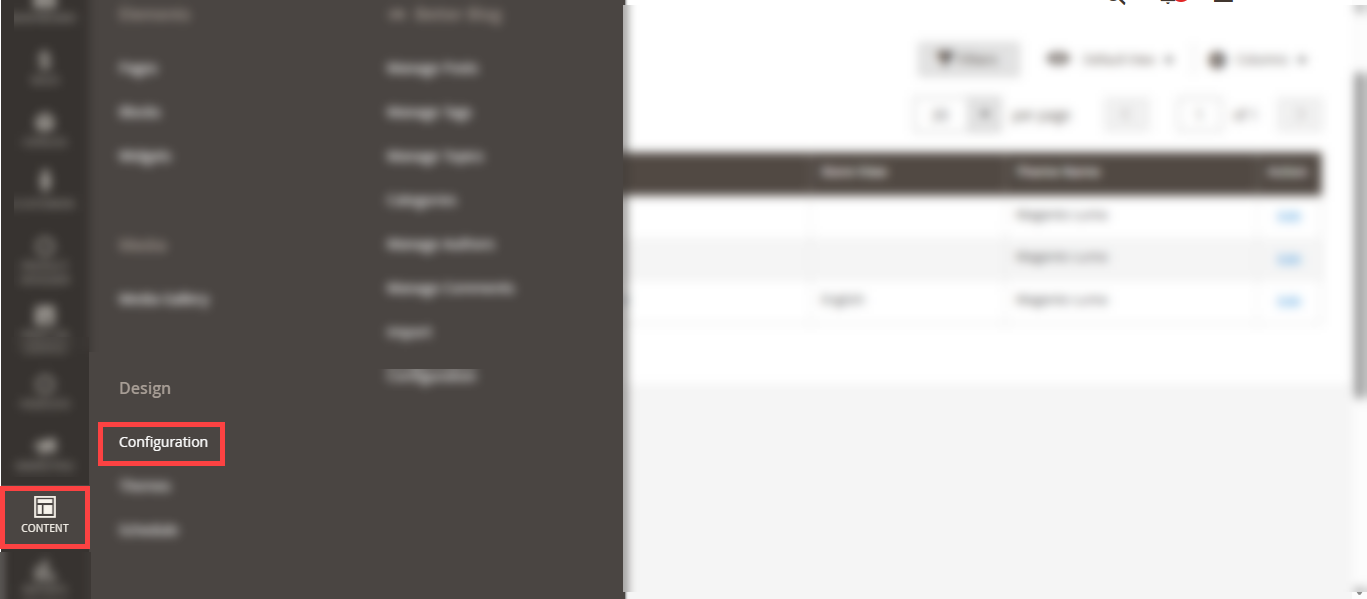
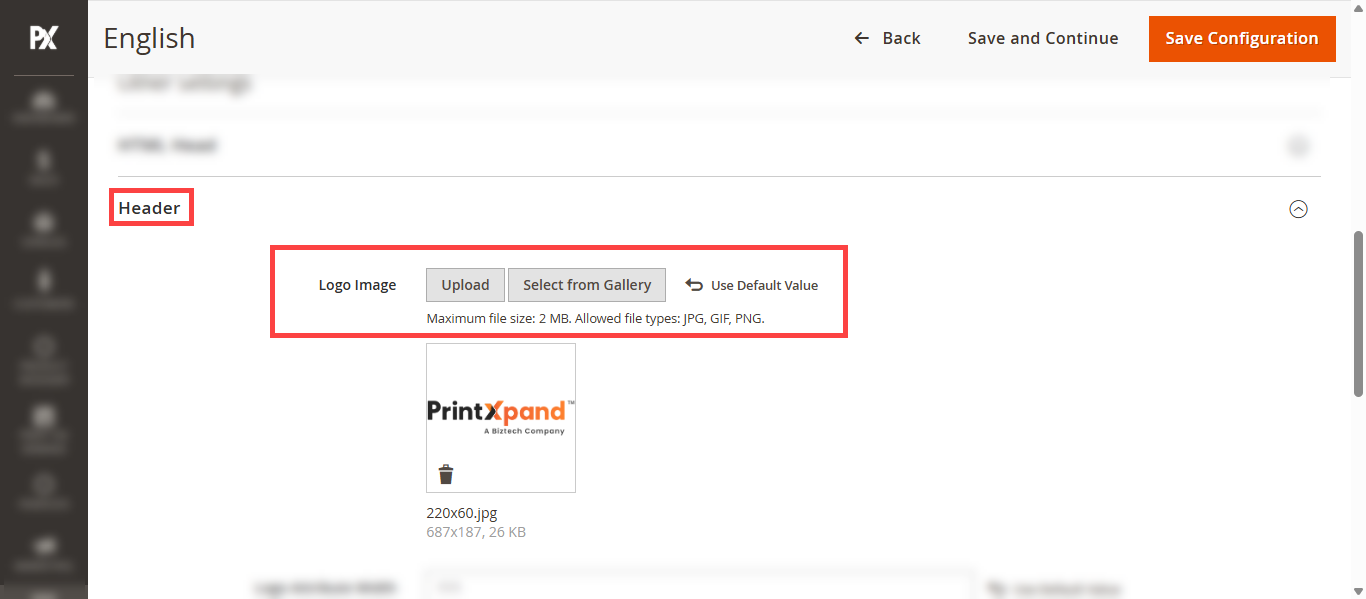
To add the logo on the front-store navigate to Content > Design > Configuration. [2]
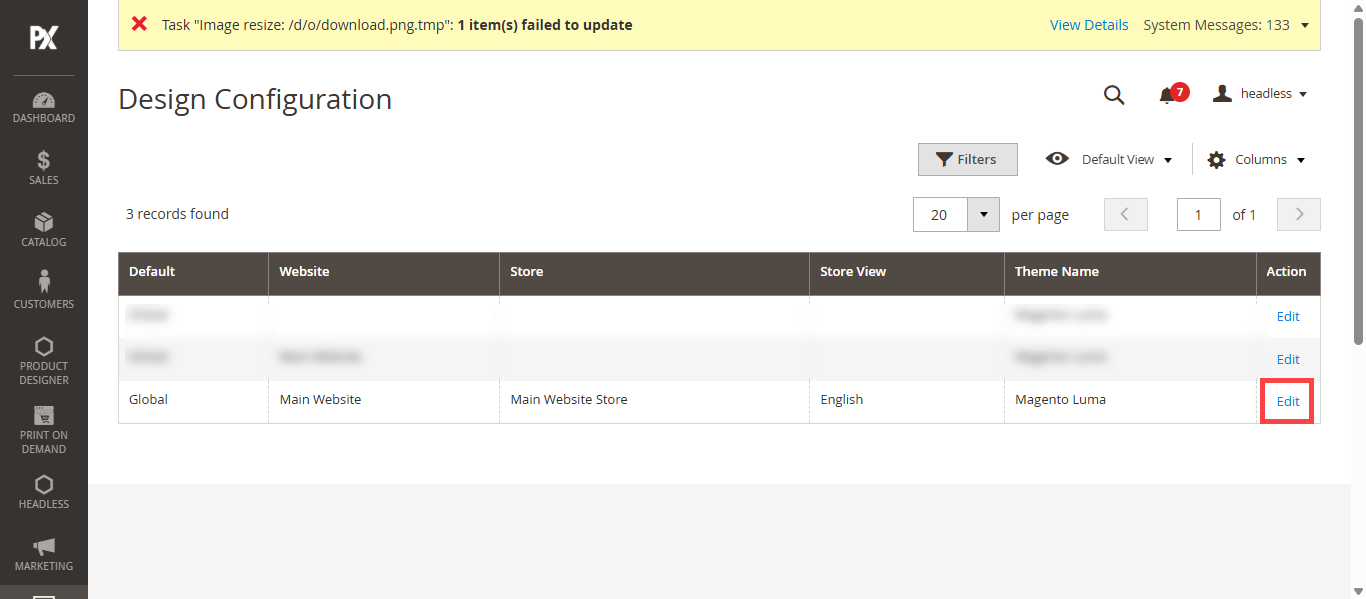
Here click on Edit icon in Action column for respective store to open its configuration.[3]
Here navigate to the Header Section and upload the Logo image. Only JPG, PNG and GIF formats are supported.[4]
Search Bar
For the Search Bar, the default Catalog Search functionality of Magento is used. It provides basic search capabilities without additional customization.
Contact Information
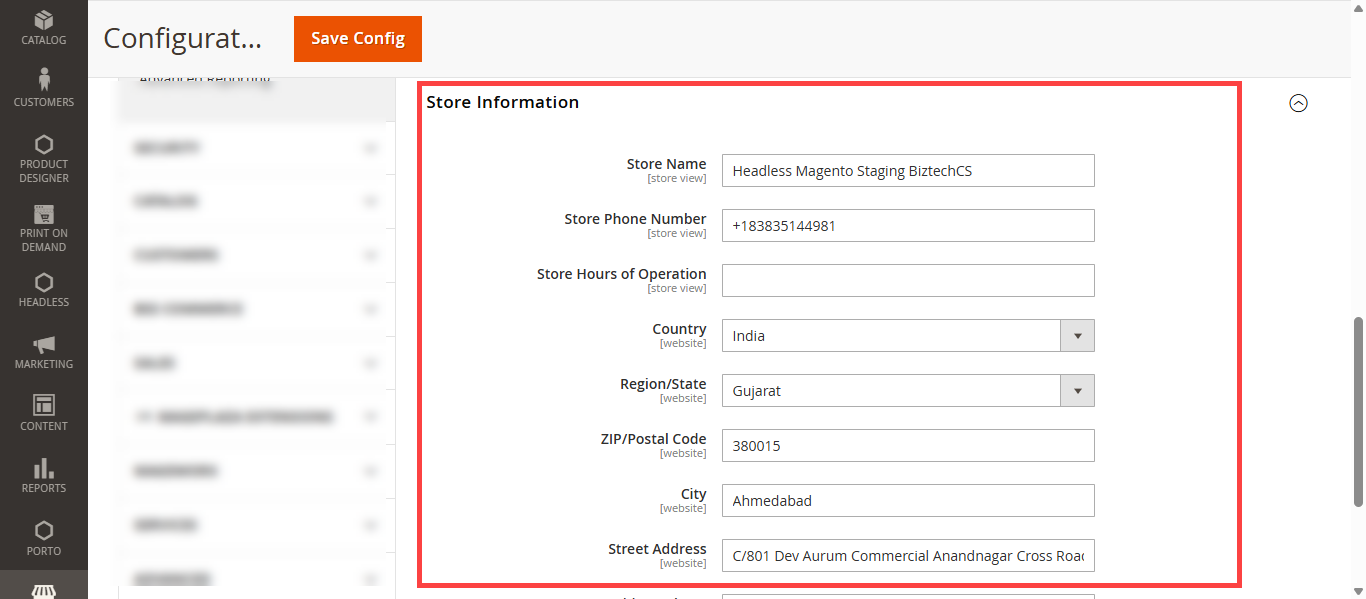
To add contact information, navigate to Store > Configuration > General > General > Store Information. Fill in the following fields to display the contact details in the header and footer: [5]
– Store Name: Enter the store name, for example, Headless Staging BiztechCS.– Store Phone Number: Enter the store’s phone number.
– Country: Select the country from the dropdown menu.
– Region/State: Select the region or state.
– ZIP/Postal Code: Enter the ZIP or postal code.
– City: Enter the city name.
– Street Address: Enter the primary street address.
– Street Address Line 2: Enter the secondary street address, if applicable.
Country Flag
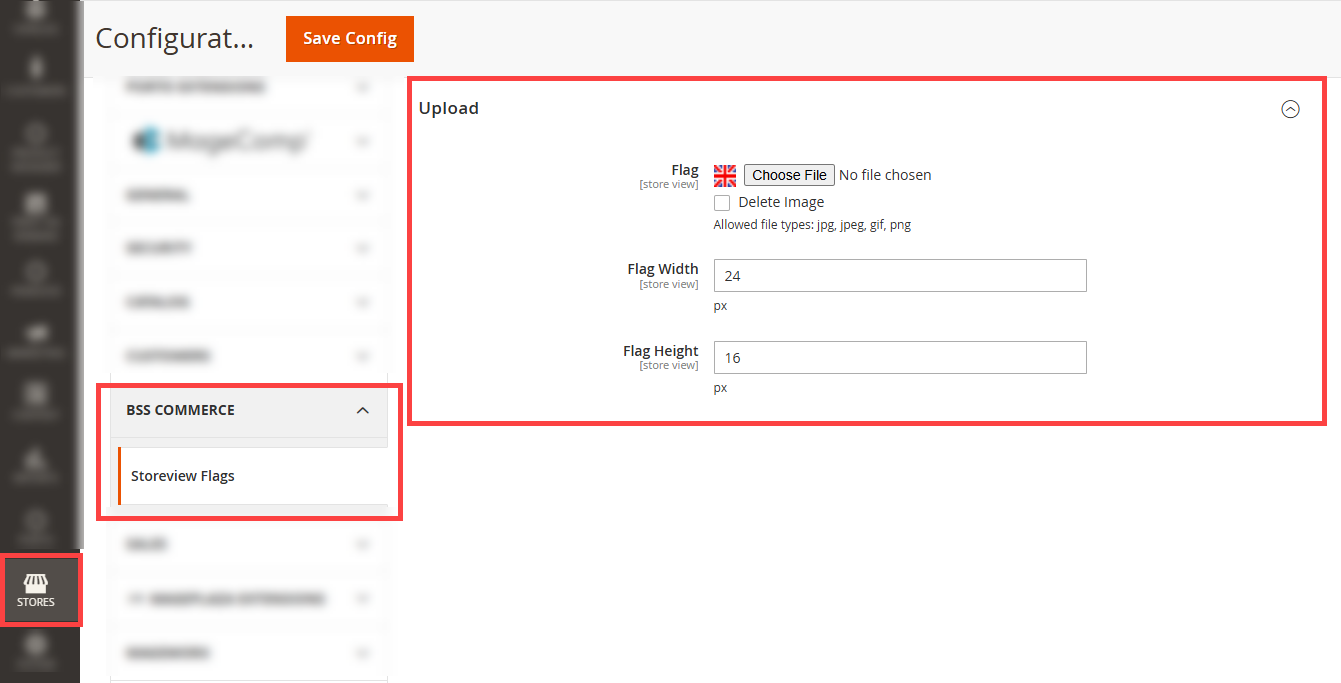
To add the country flag in the header, navigate to Store > Configuration > BSS COMMERCE > Storeview Flags. In the Storeview Flags section, go to the Upload tab and configure the following settings: [6]
– Flag: Upload the flag image (accepted formats: JPG, JPEG, GIF, PNG).
– Flag Width: Enter the width for the store view flag.
– Flag Height: Enter the height for the store view flag.
Currency
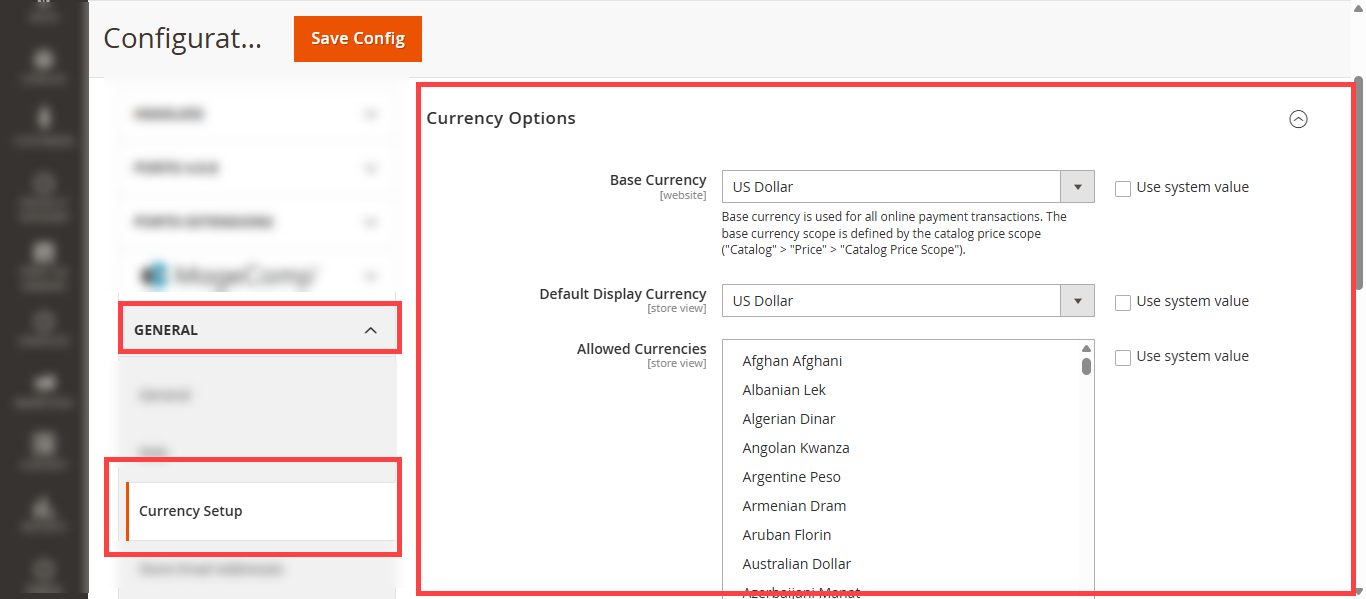
To set the currency, navigate to Store > Configuration > General > Currency Setup. Under the Currency Options section, configure the following fields: [7]
– Base Currency: Select the base currency from the dropdown.
– Default Display Currency: Select the default display currency from the dropdown.
– Allowed Currencies: Select the currencies to be allowed; multiple selections are supported.
My Account
Use the default Magento setup for seamless integration. Optimize functionality without additional customizations.
Wishlist
Utilize the default Magento configuration for standard functionality. Ensure smooth operation without custom modifications.
Shopping Cart
Use Magento’s default settings for a quick and reliable setup. Avoid complexities by working with built-in features.
Quote Cart
Use the default Magento setup to maintain stability and compatibility. It offers all essential features without extra configuration.
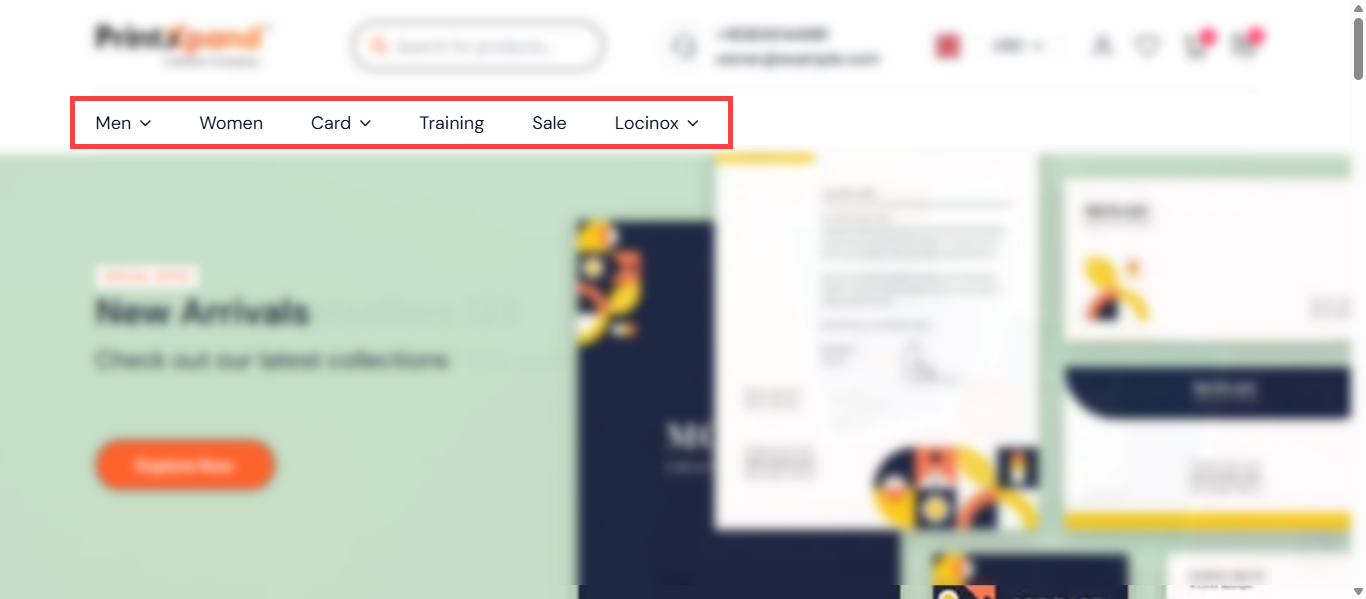
Categories
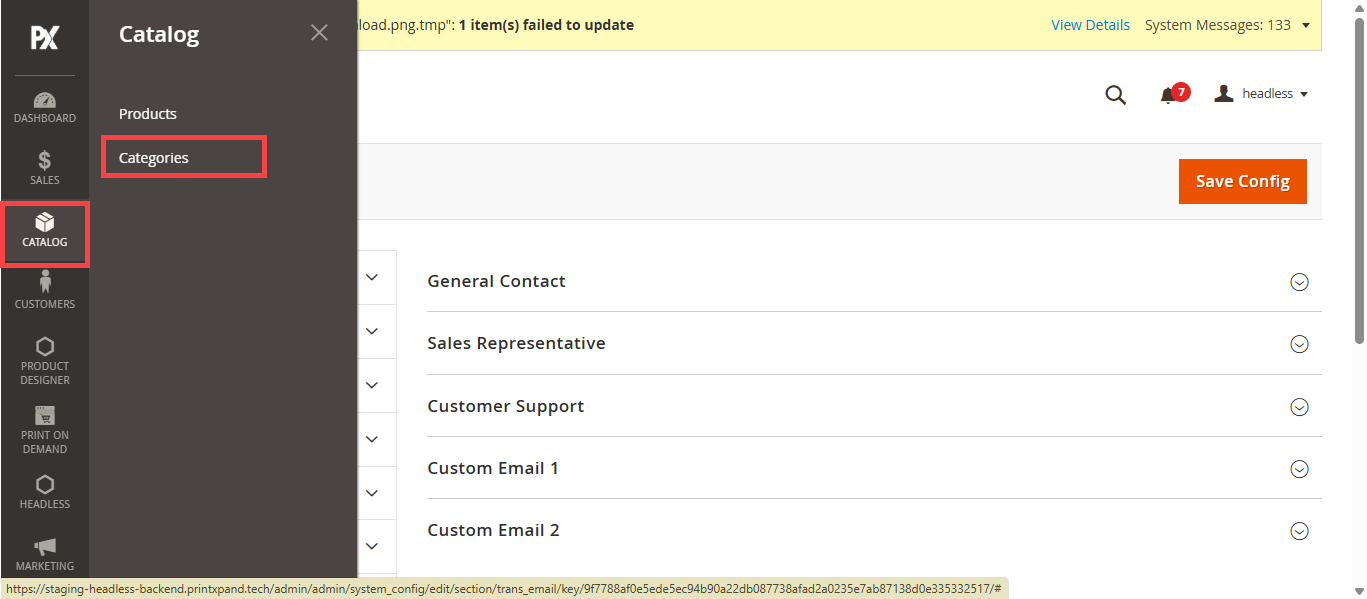
In the header Section we have the Categories. To manage the categories navigate to Catalog > Categories. Here the admin can add the Category. [2]
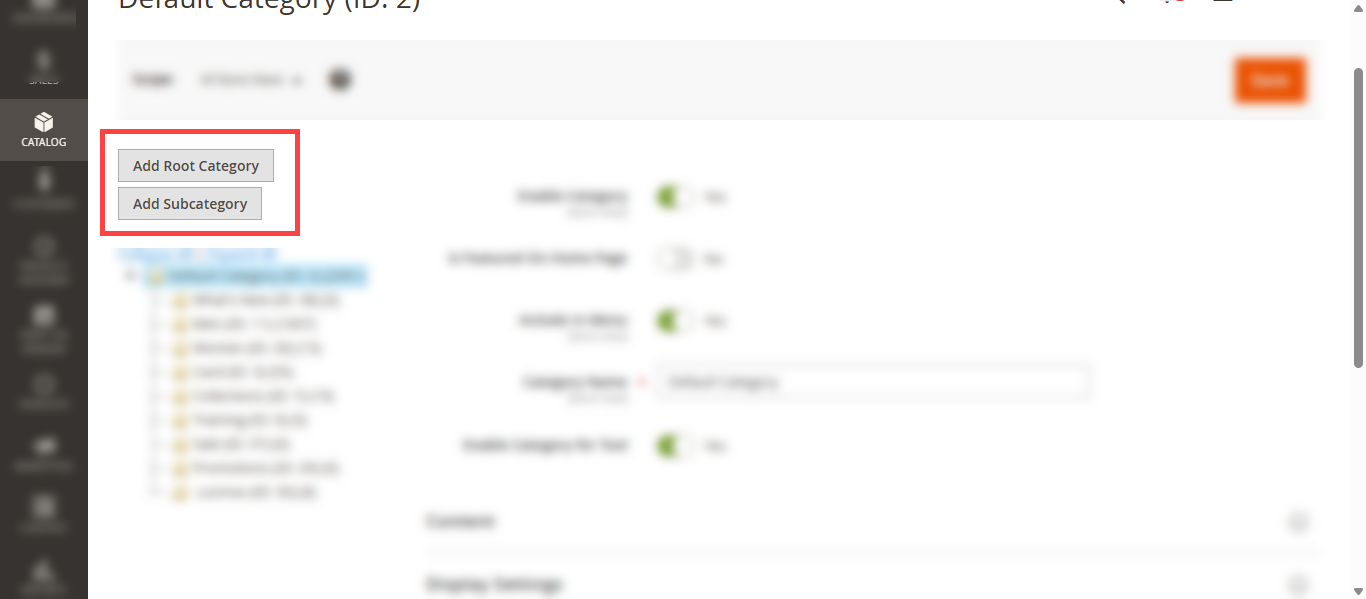
Magento uses a hierarchical category structure.The top-level is called the Root Category and under each Root Category, admin can create subcategories. [3]
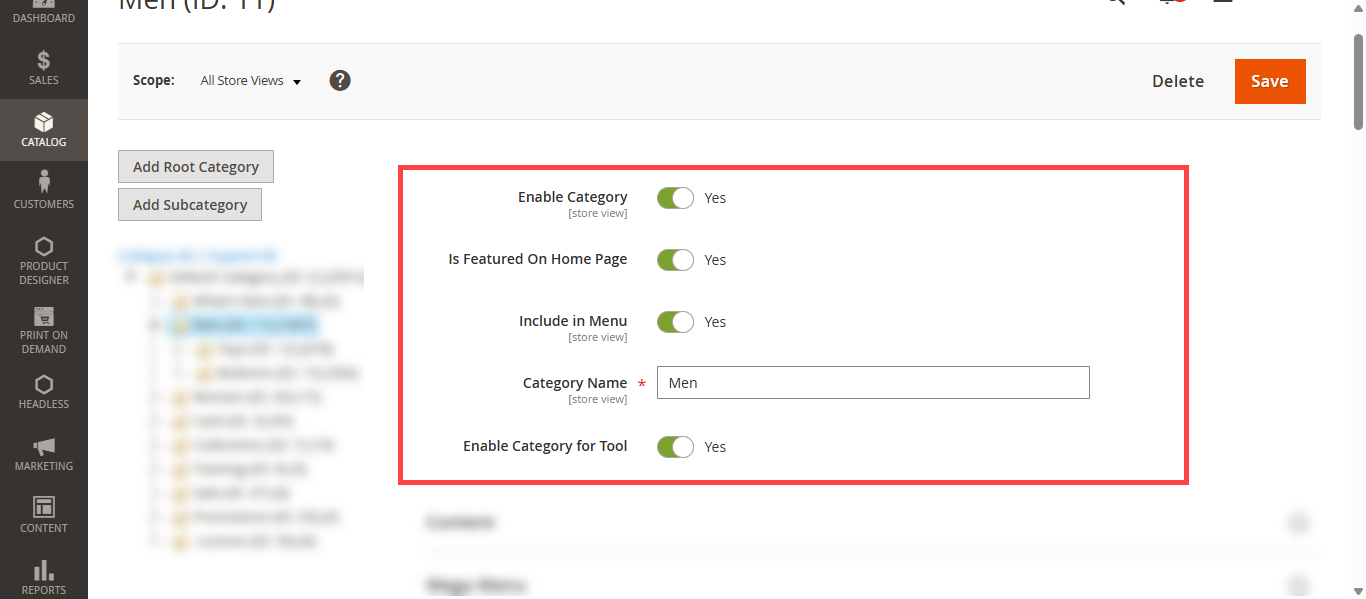
To add the New Category click on the Add Subcategory button. Now configure the following fields: [4]
– Enable Category: Set to Yes to make the category active.
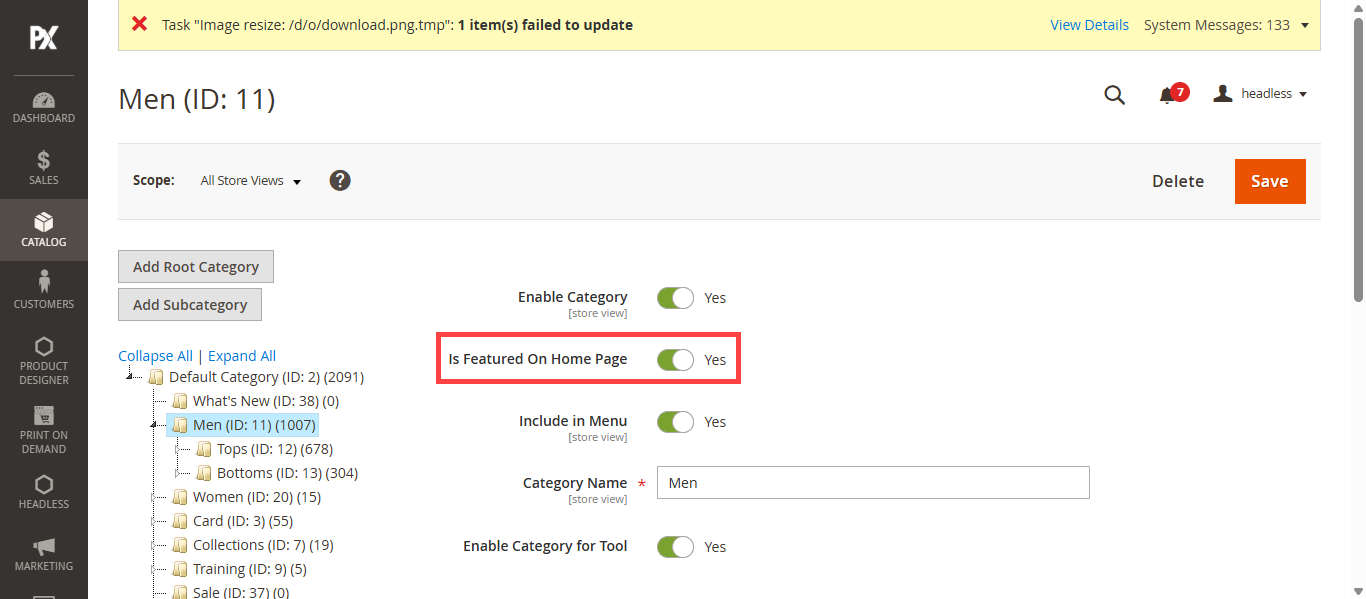
– Is Featured On Home Page: Set Yes to Feature on Home Page.
– Include in Menu: Set to Yes if you want to show it in the top navigation menu.
– Category Name: Enter the name of the category.
– Enable the Category for Tool: Set Yes to enable the category for tool.
Mega Menu
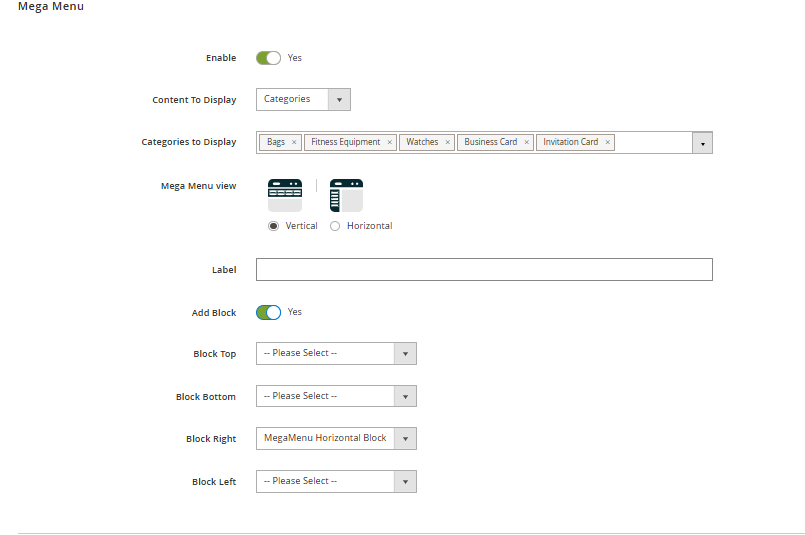
Mega Menu section from here you can enable the Mega Menu for the particular category. [5]
– Enable: If Enabled then Mega Menu functionality will work for this category.
– Content to Display: In this field select the content to display from Category, Products, CMS Page, and Custom Link.
– Categories to Display: If Category selected in Content. Select the Categories to display in the Mage menu.
– Mega Menu view: Select the Menu view from Horizontal and Vertical.
– Label: Enter the label as your preference.
-Add Block: Set Yes to add the block.
– Block Top– Block Bottom
– Block Right
– Block Left
Display Settings
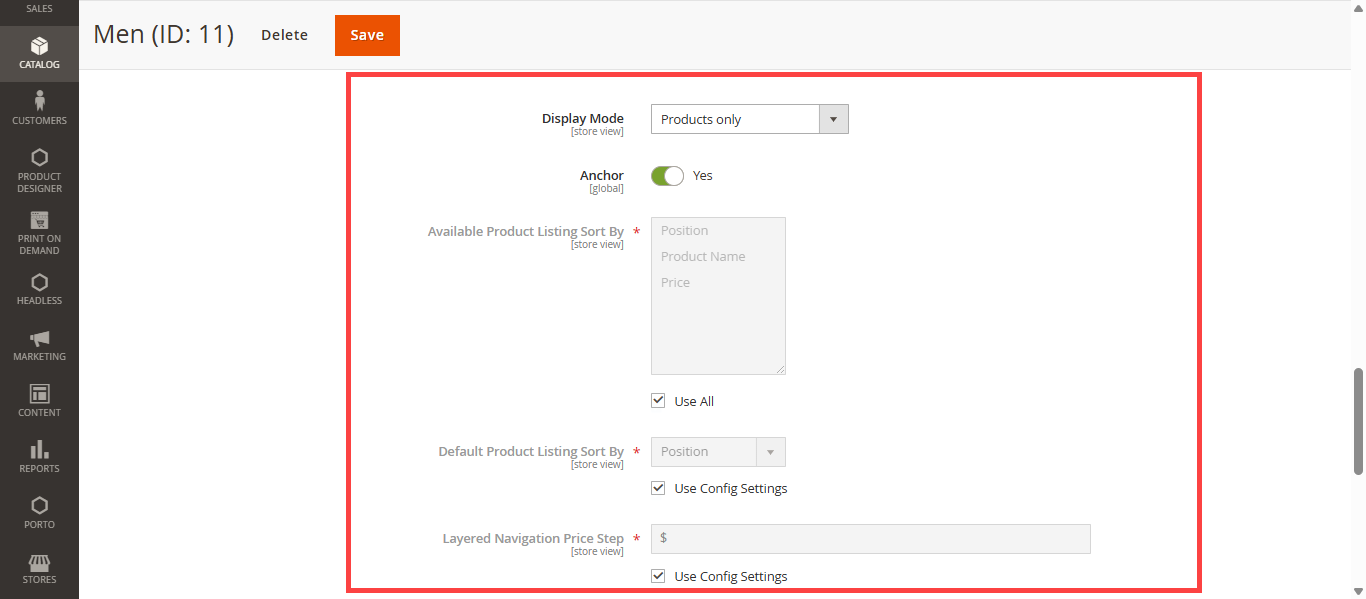
Now Configure the following Fields to display the category: [6]
– Display Mode: Choose one of the following options: Products Only, Static Block Only, or Static Block and Products.
– Anchor: Set to Yes to enable layered navigation filters.
– Available Product Listing Sort By: Select the sorting options for product listings from Position, Product Name, or Price. You can check the Use All box to enable all options.
– Default Product Listing Sort By: Select the default sorting method from Position, Product Name, or Price. Check Use Config Settings to apply the global configuration.
– Layered Navigation Price Step: Enter the price step value for layered navigation. Check Use Config Settings to apply the default configuration.
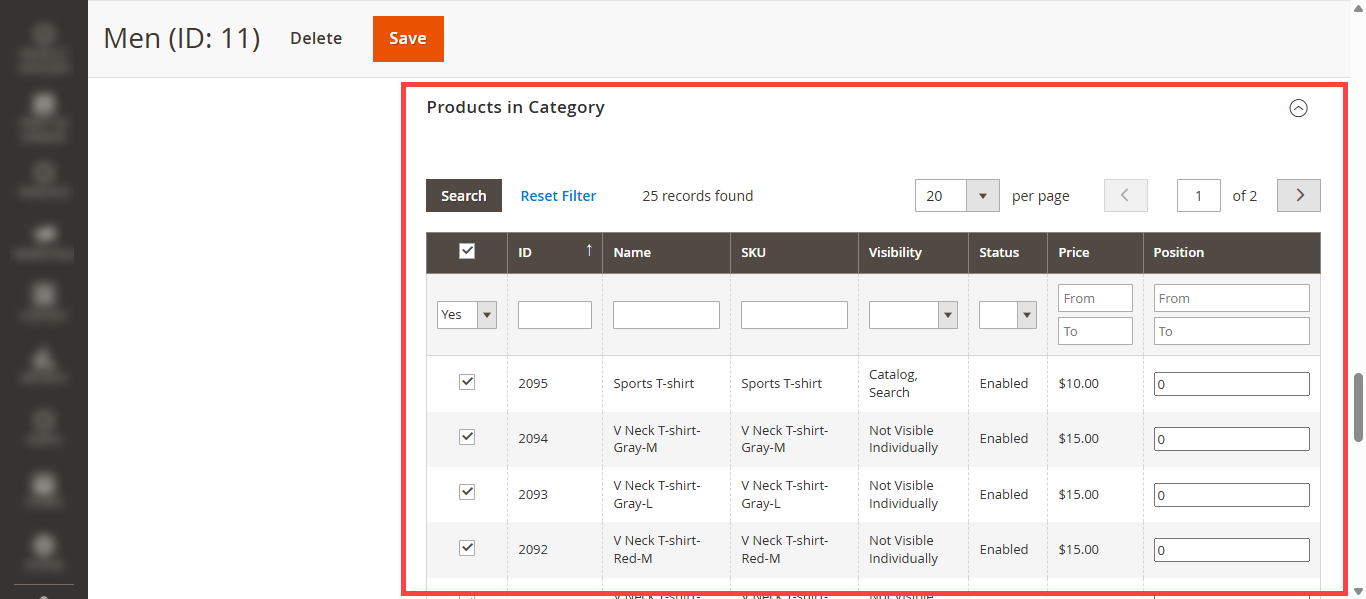
Product In Category
Select the products you want to add to the category. [7]
These products will be displayed on the category page based on the configured settings. After all the configuration, click on save button save category.
Product Creation
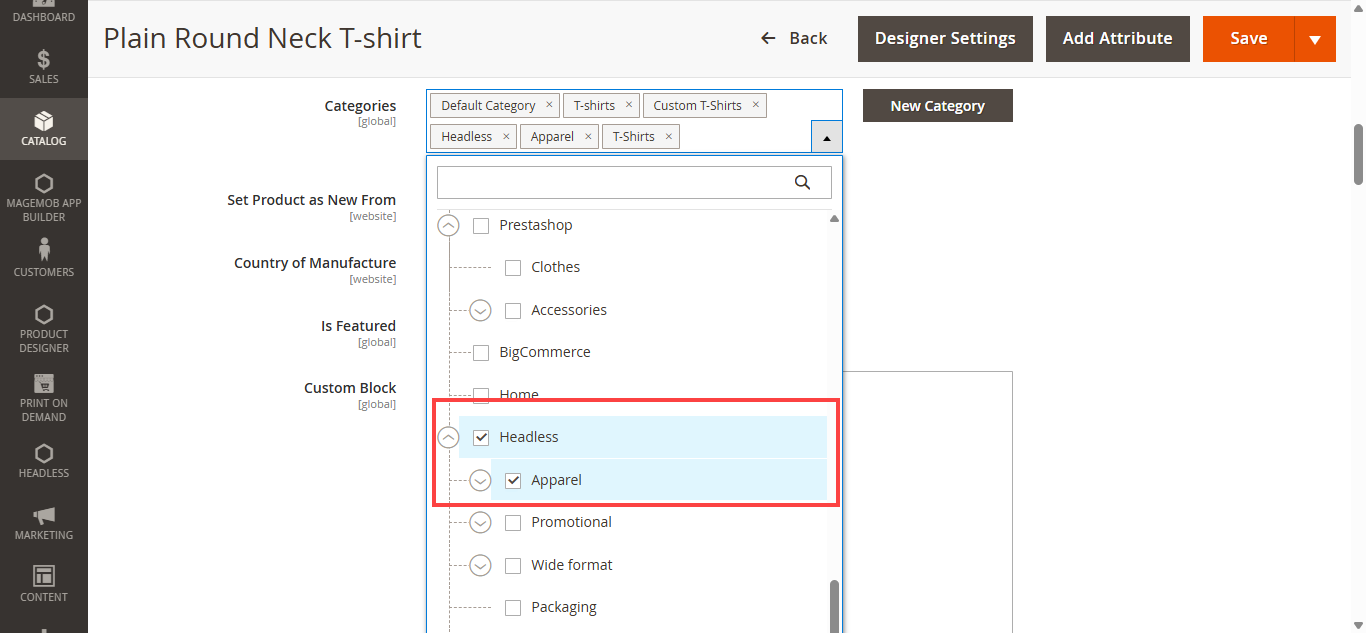
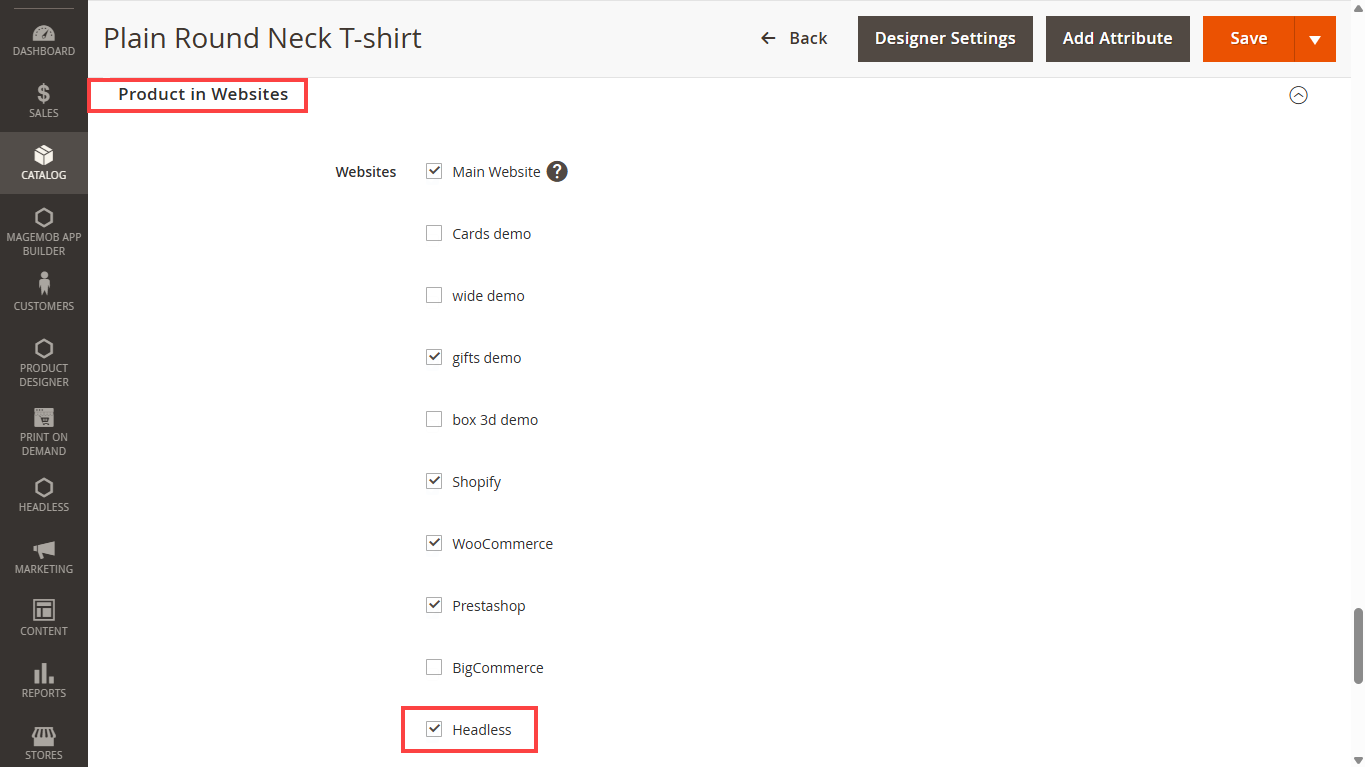
To add a product to the Headless store, navigate to Catalog > Products and select the product you want to configure. Begin by assigning the product to the appropriate Headless Store Category in the Categories section. Assigning the correct category ensures that the product is displayed in the corresponding category on the Headless storefront. [1]
After the category assignment, scroll to the Product in Websites section and enable the Headless Store option. This action associates the product with the Headless website scope and makes it eligible for display on the Headless front end. Once all configurations are completed, click Save. The product will become visible in the selected category on the Headless storefront after the configuration is saved. [2]
Note : Supports only Simple and Configurable products. Virtual products are not supported.
Headless Cache Flush
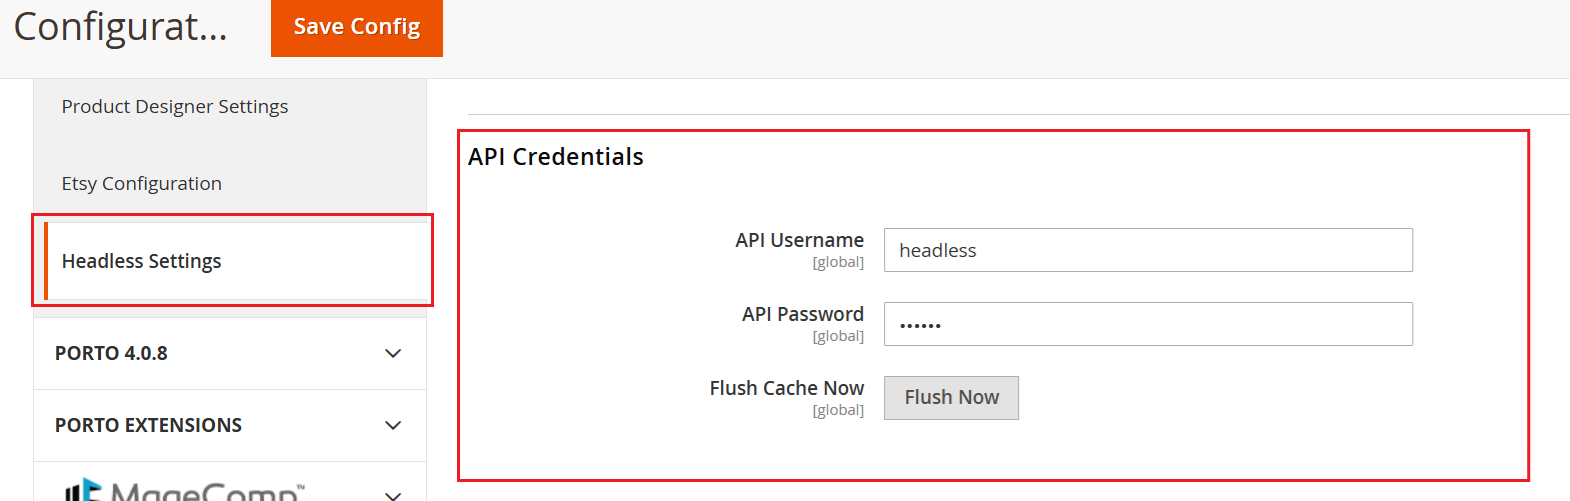
Headless utilizes cache to enhance performance, so you must clear the cache after modifying categories, logos, or links. If the changes you’ve made from the admin panel don’t appear on the frontend, ensure the headless cache has been flushed from the Admin > Menu > Stores > Configurations > Headless Settings > API. [1]
Slider
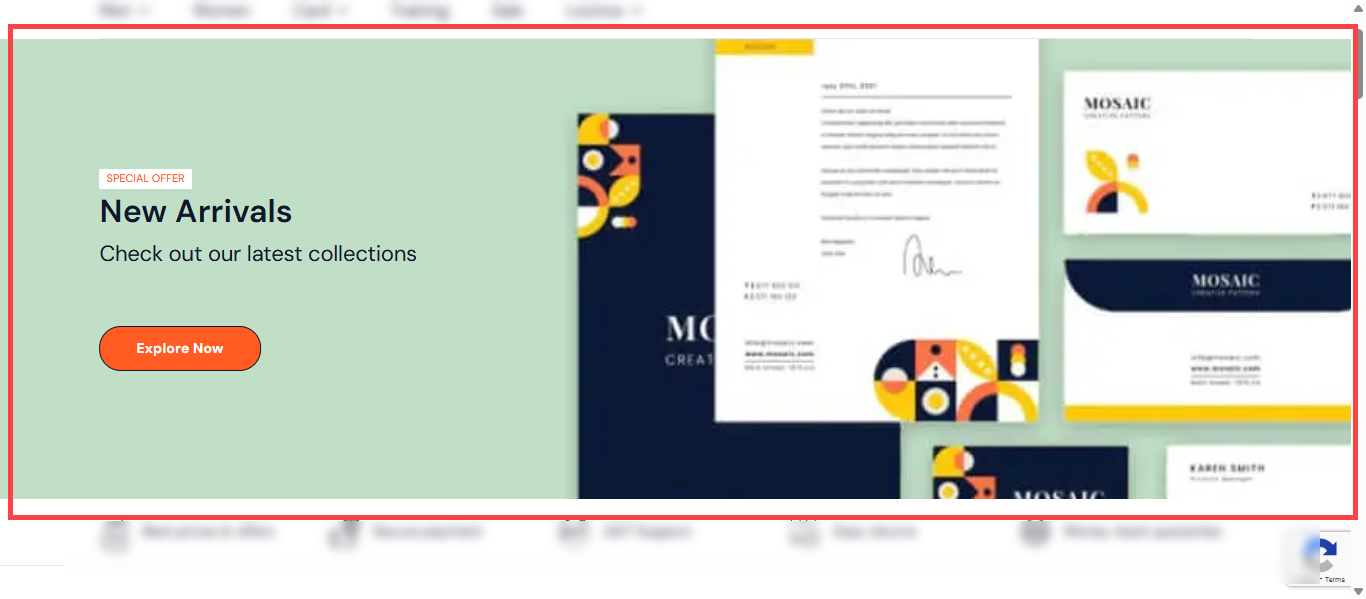
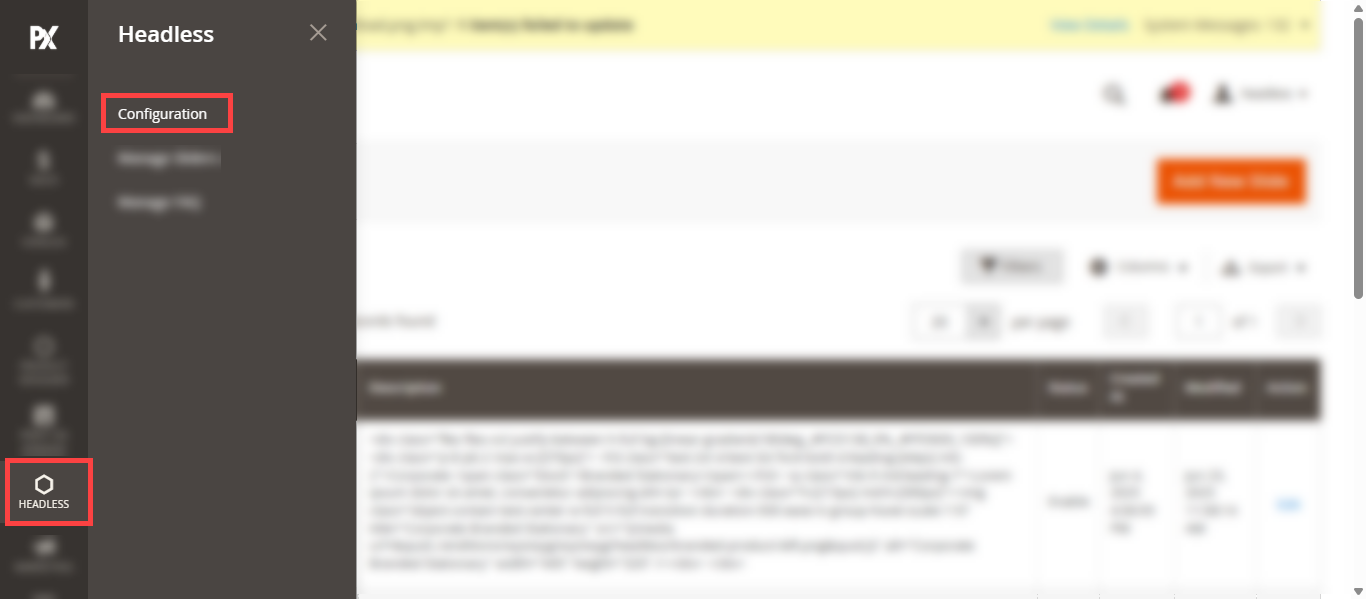
To add a slider, navigate to Headless > Manage Slide. Here, the admin can view the list of existing slides.[2]
To add the new slider click on the Add New Slider button. This action will redirect the Admin to the New Slide Page.
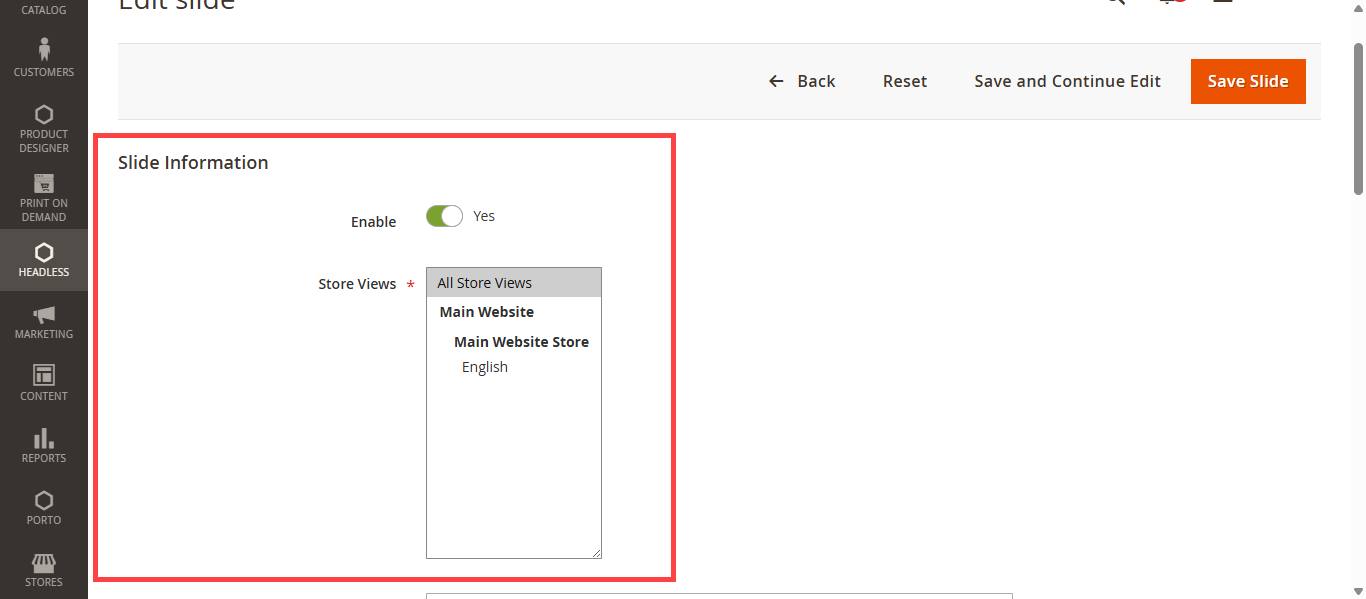
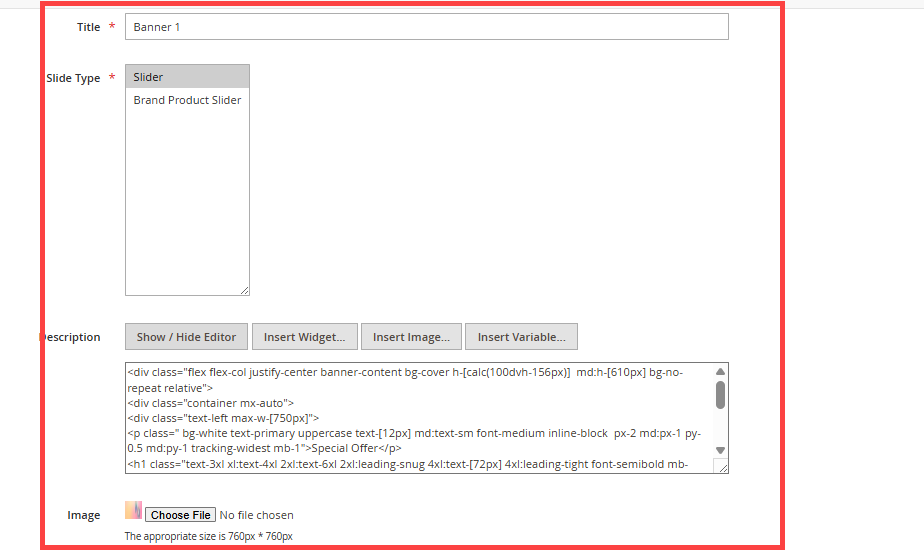
In the Slide Information section, configure the following fields to add a new slide:[3][4]
– Enable Slide: Set to Yes to enable the slide.
– Store View: Select the store view where the slide should be visible.
– Title: Enter the title for the slide.
– Slide Type: Select the slide type from Slider or Brand Product Slider.
– Description: Enter the description for the slide. Also the image path will be added here.
After all the configuration click on Save Slide button to save the slide.
Home page
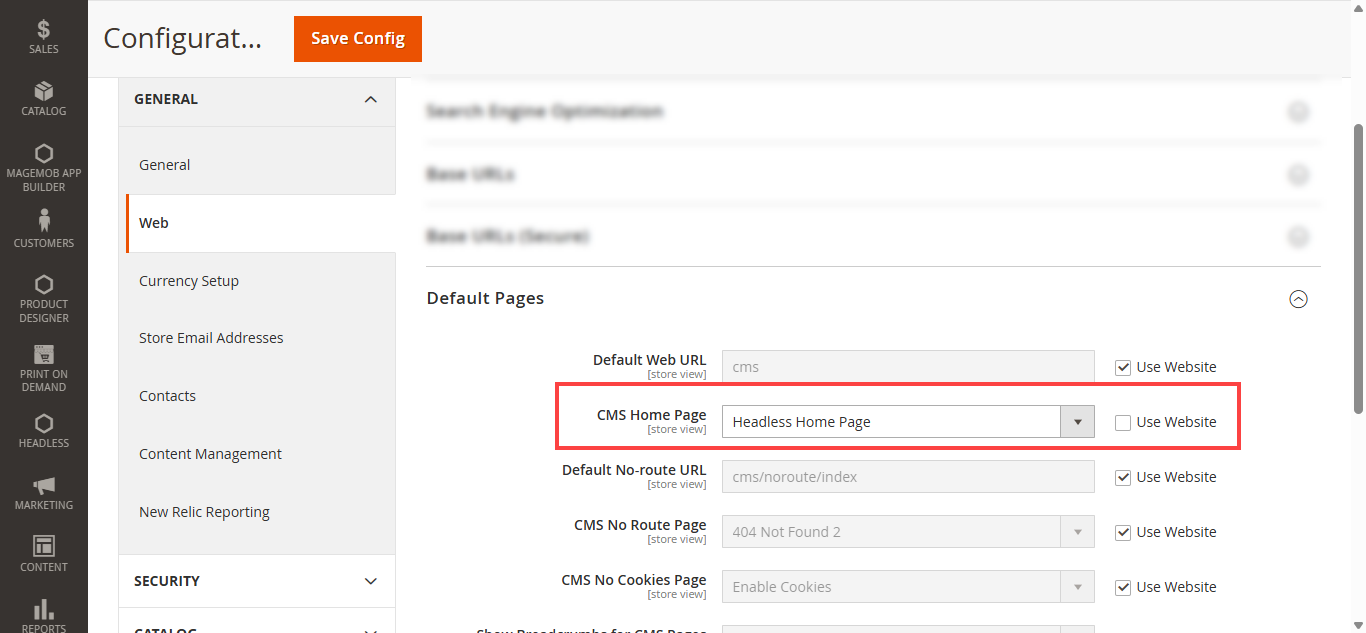
To set the Home Page for the headless store, navigate to Store > Configuration > General > Web. In the Default Pages section, select the CMS Page configured for the Headless Home Page and save the configuration.
Note: Ensure that the scope is set to Headless when configuring Headless-specific settings. This is required in a multi-website setup where one website is running on Headless and another is using the Magento storefront. [1]
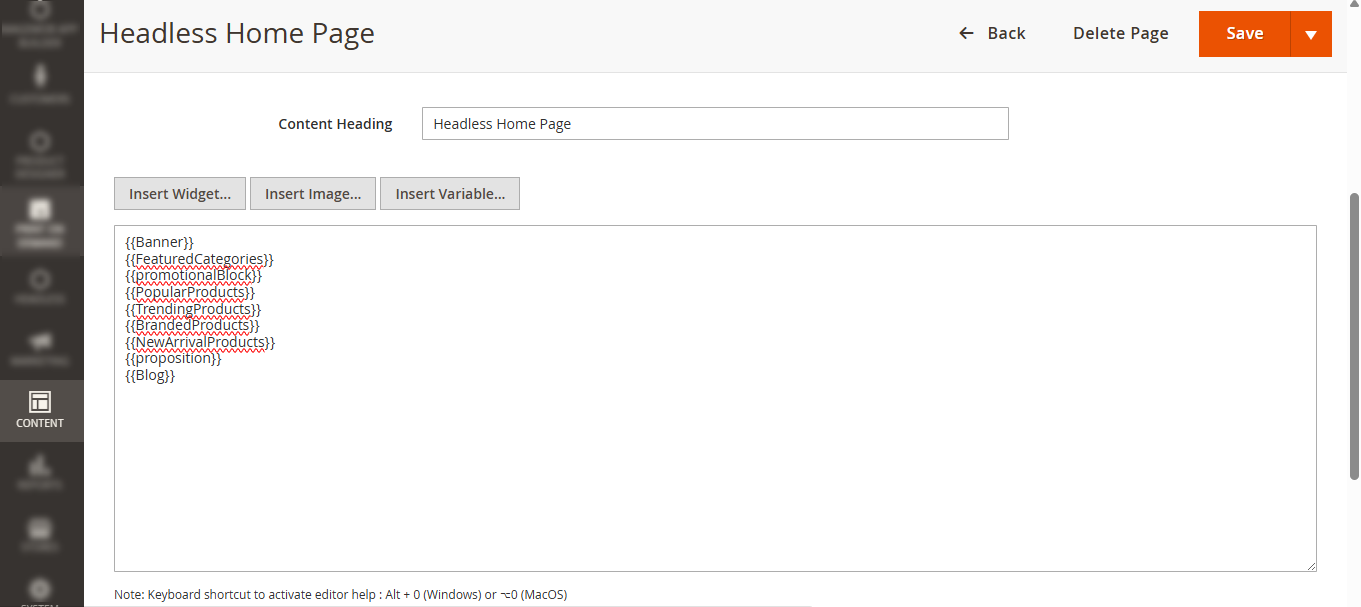
Now to configure the Home Page content, navigate to Content > Pages > Headless Home Page. [2]
Within this CMS page, the Admin can manage and update the content displayed on the Home Page of the portal. Use the content given below :
{{Banner}}
{{FeaturedCategories}}
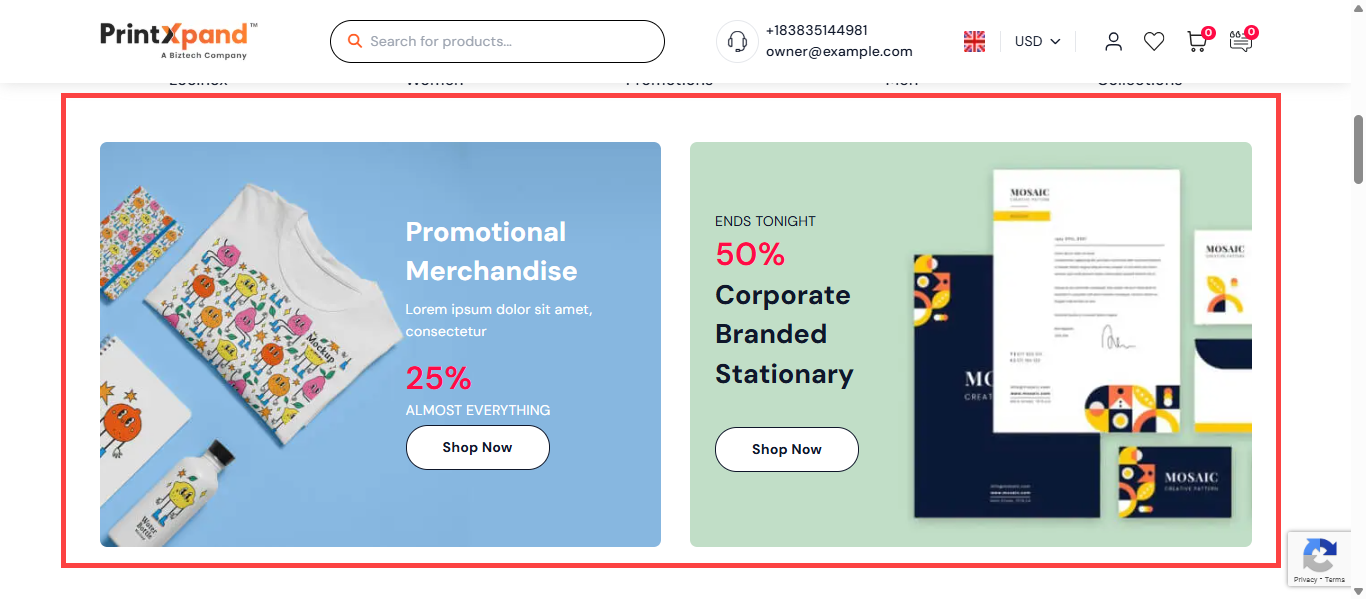
{{promotionalBlock}}
{{PopularProducts}}
{{TrendingProducts}}
{{BrandedProducts}}
{{NewArrivalProducts}}
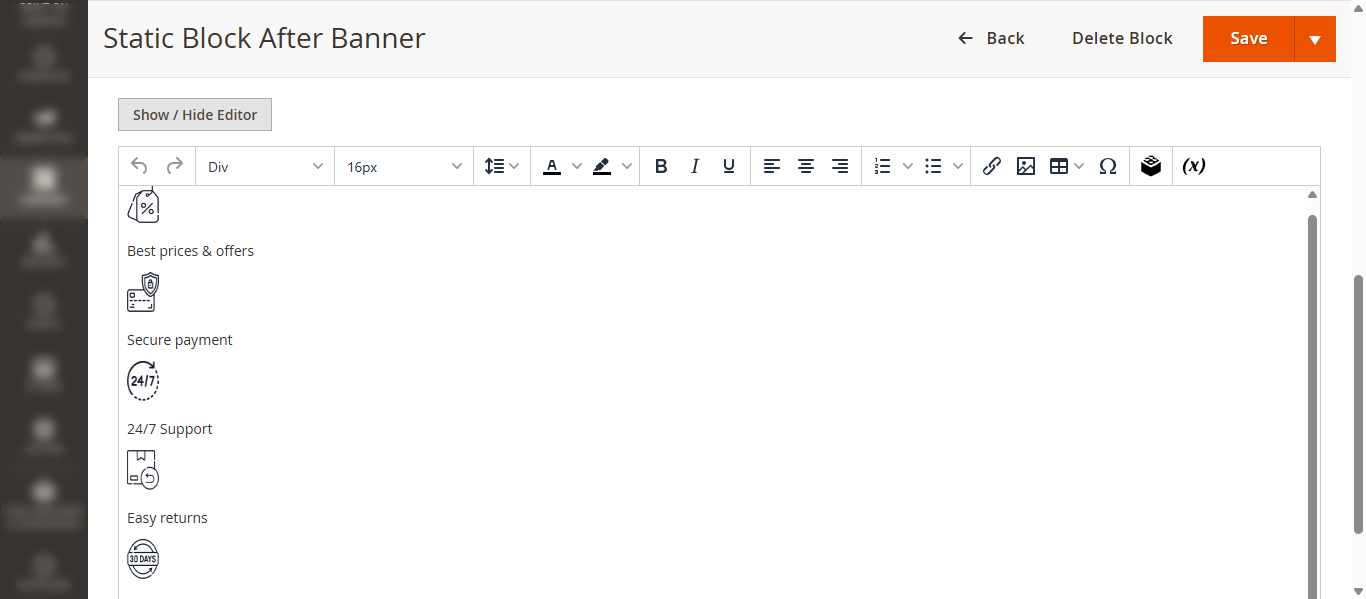
{{proposition}}
{{Blog}}
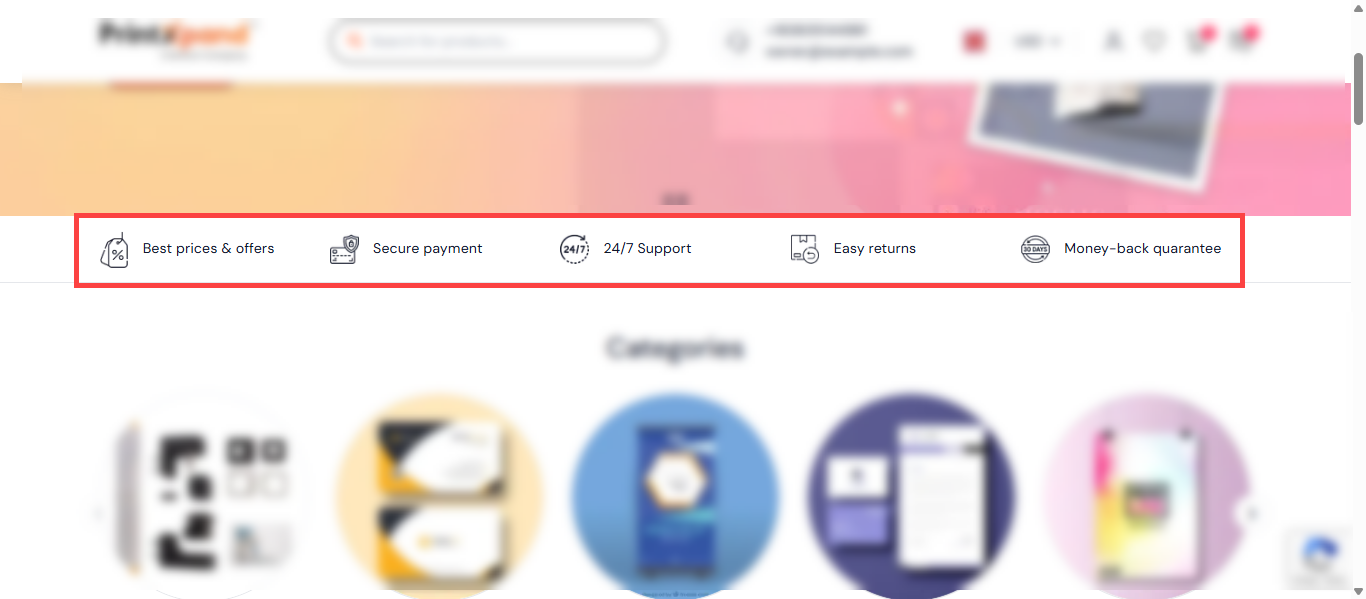
New Block (Banner)
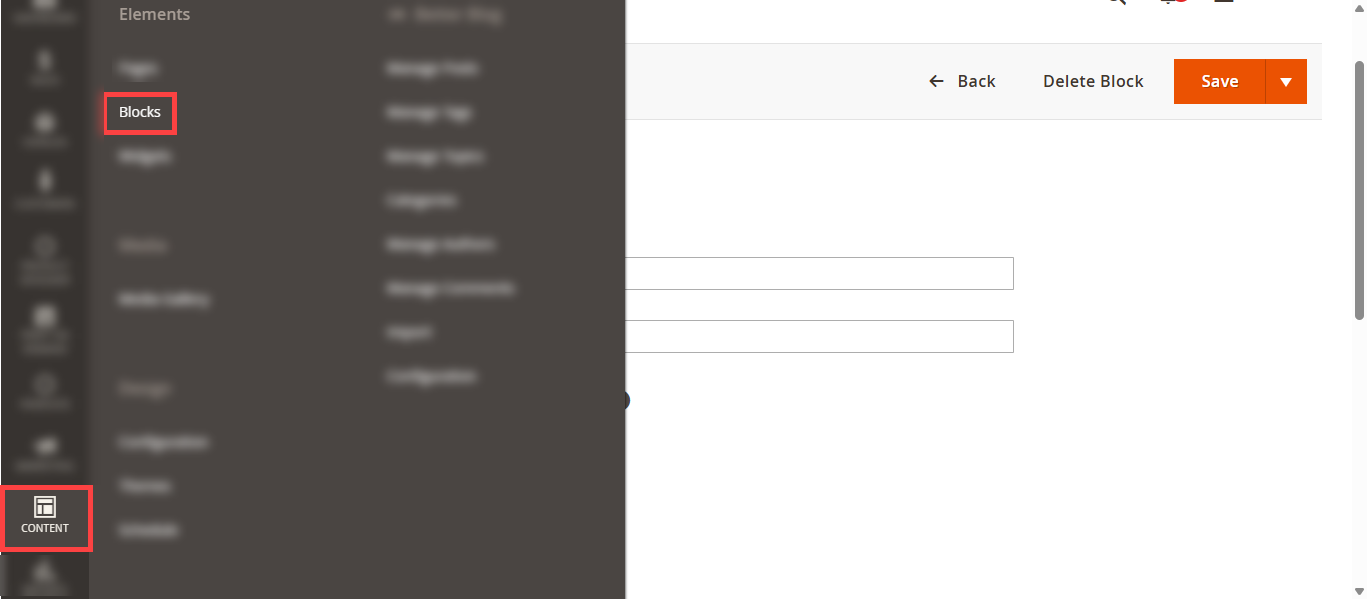
To add a static block to the home page, navigate to Content > Blocks. All existing blocks are listed in this section.[2]
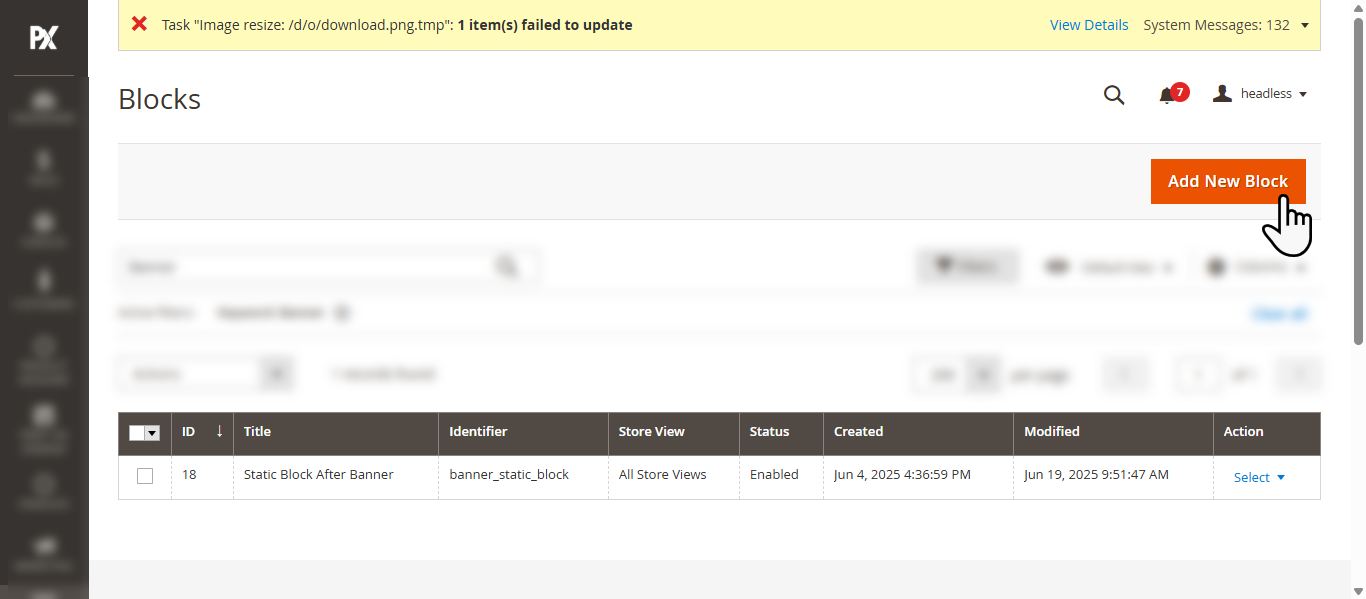
To add a new Block click on the Add New Block button. This action will redirect the admin to the New Block page. [3]
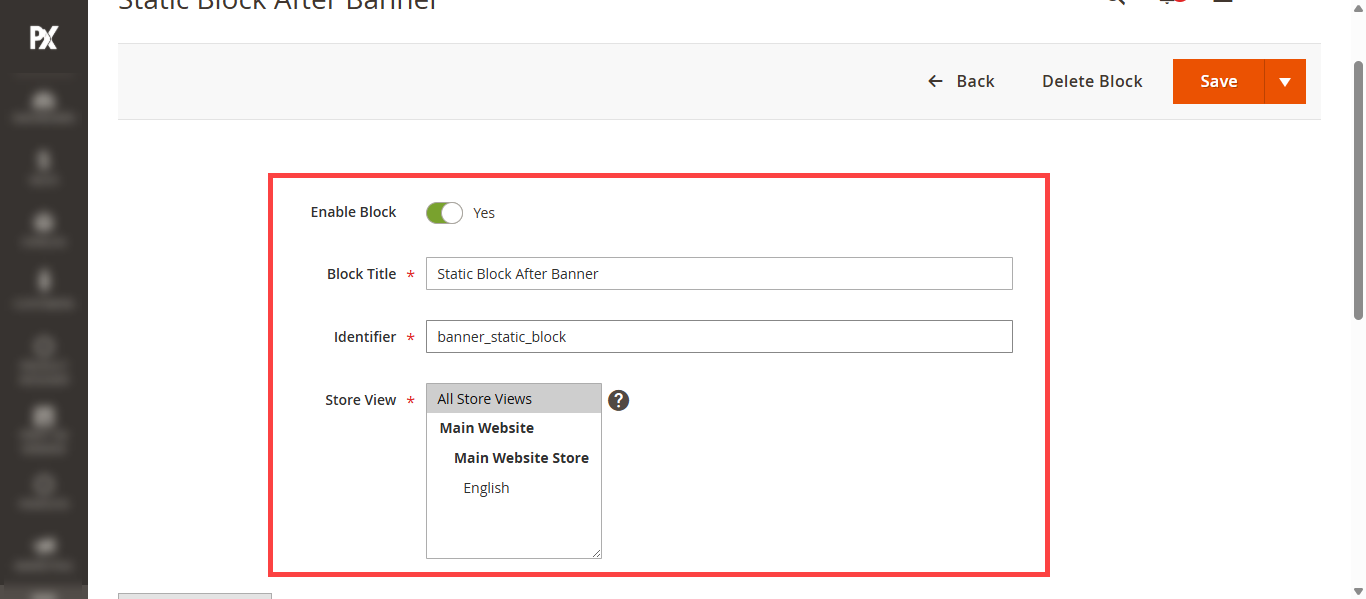
Configure the following fields to add a block: [4][5]
– Block Title: Enter the title of the block.
– Identifier: Enter a unique identifier for the block.
– Store View: Select the store views where the block should be visible.
– Description: Enter the block description.
After all the configuration click on save button to Save block.
Features Categories Block
To add categories to the Featured Categories block, navigate to Catalog > Categories and select the category you want to feature. Now in the category configuration, enable the Is Featured on Home Page field. [1]
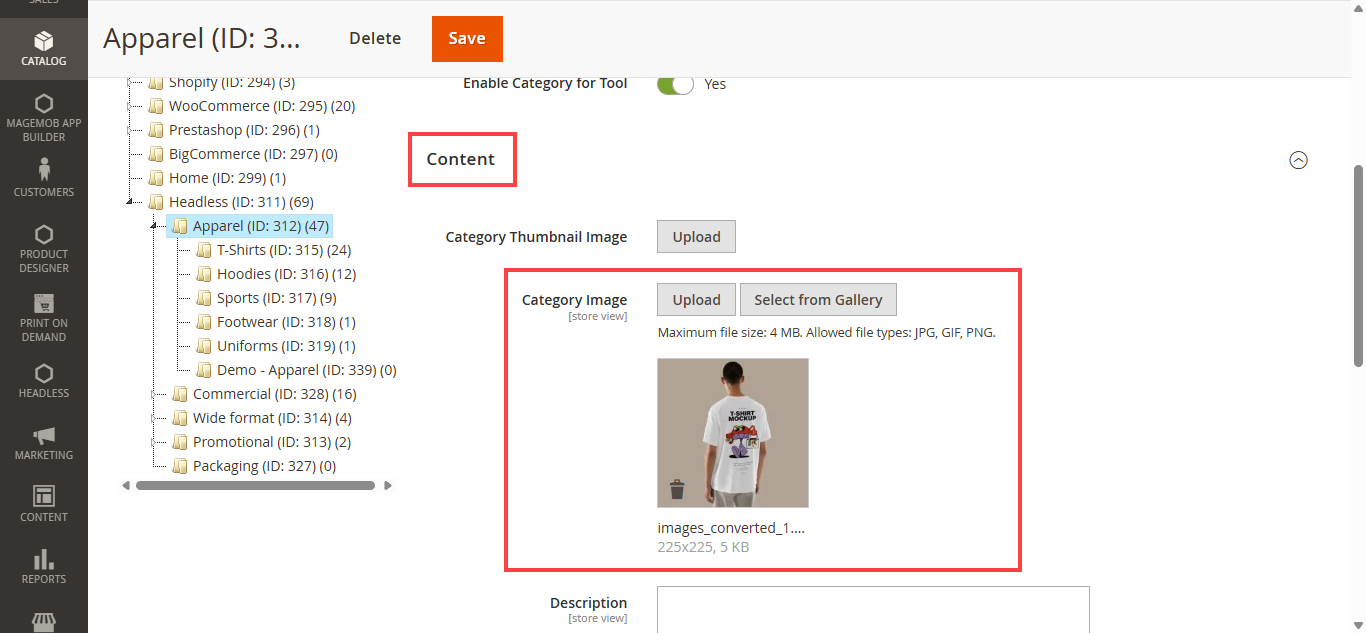
To configure the category image, navigate to the Content section and upload the Category Image in the designated field. The admin can either upload an image from the device or select one from the gallery. [2]
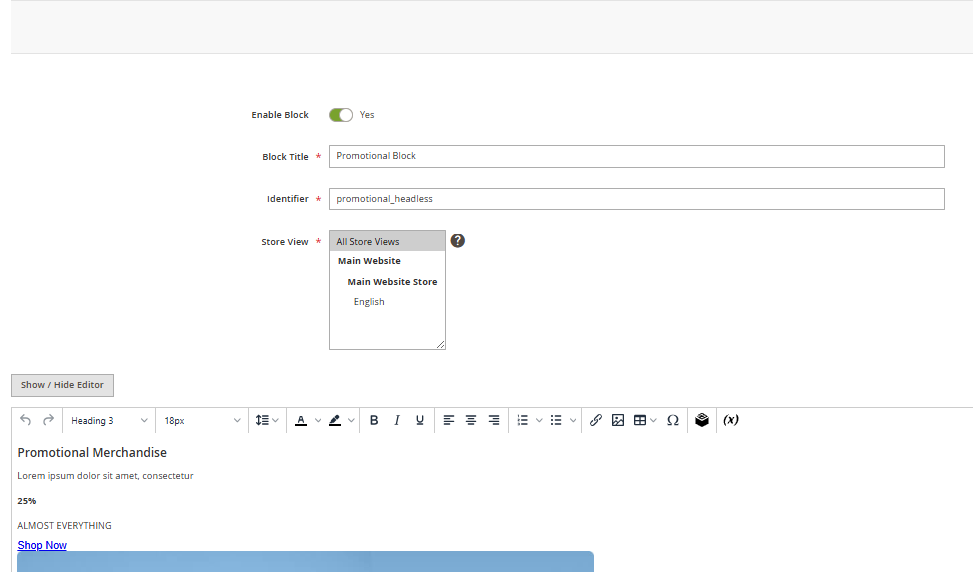
Promotional headless Block
In the Block module, add a block with the name promotional_headless. Configure it as per your requirements and add it to the home page layout block. [2]
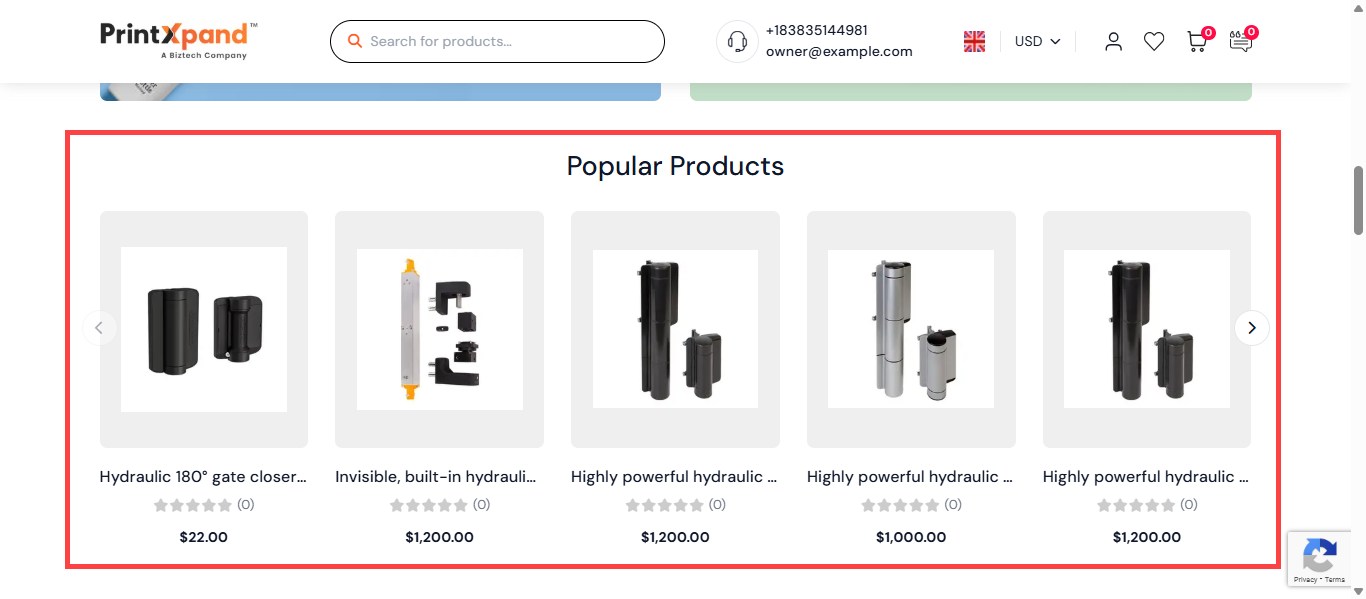
Popular Products Block
This section will be displayed by default based on the Best Seller product collection.
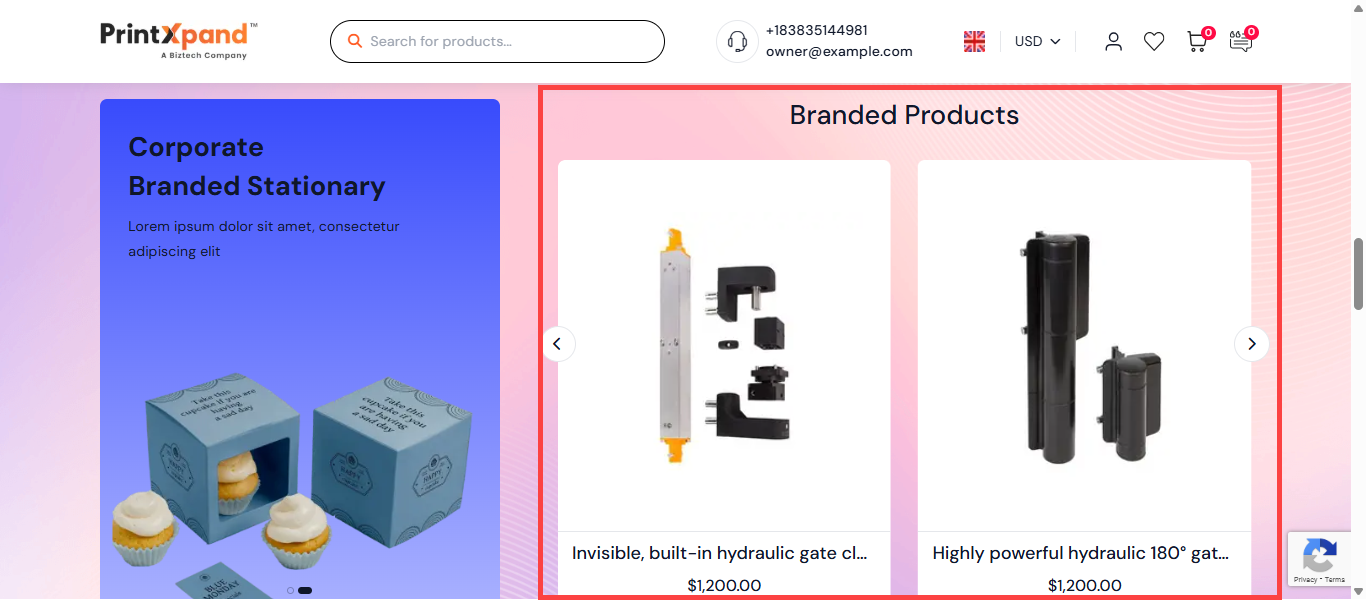
Branded Products
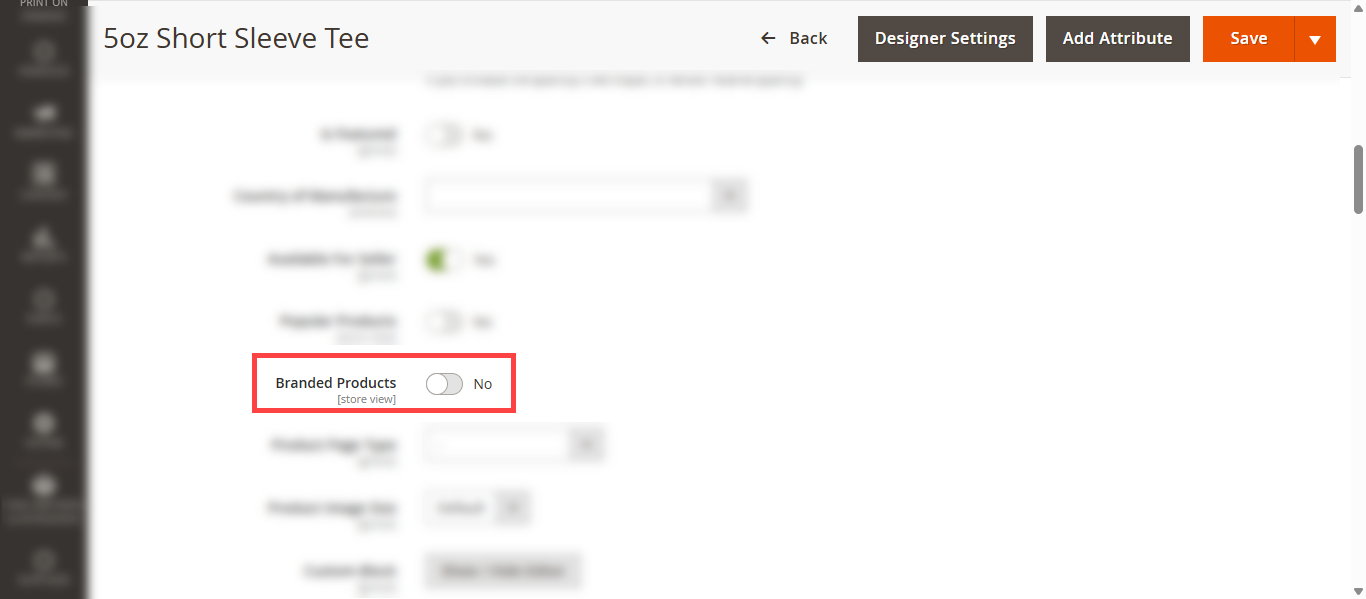
To add a product to the Branded Products block, navigate to Catalog > Products > Product Configuration. On the product configuration page, set the Branded Products field to Yes. [2]
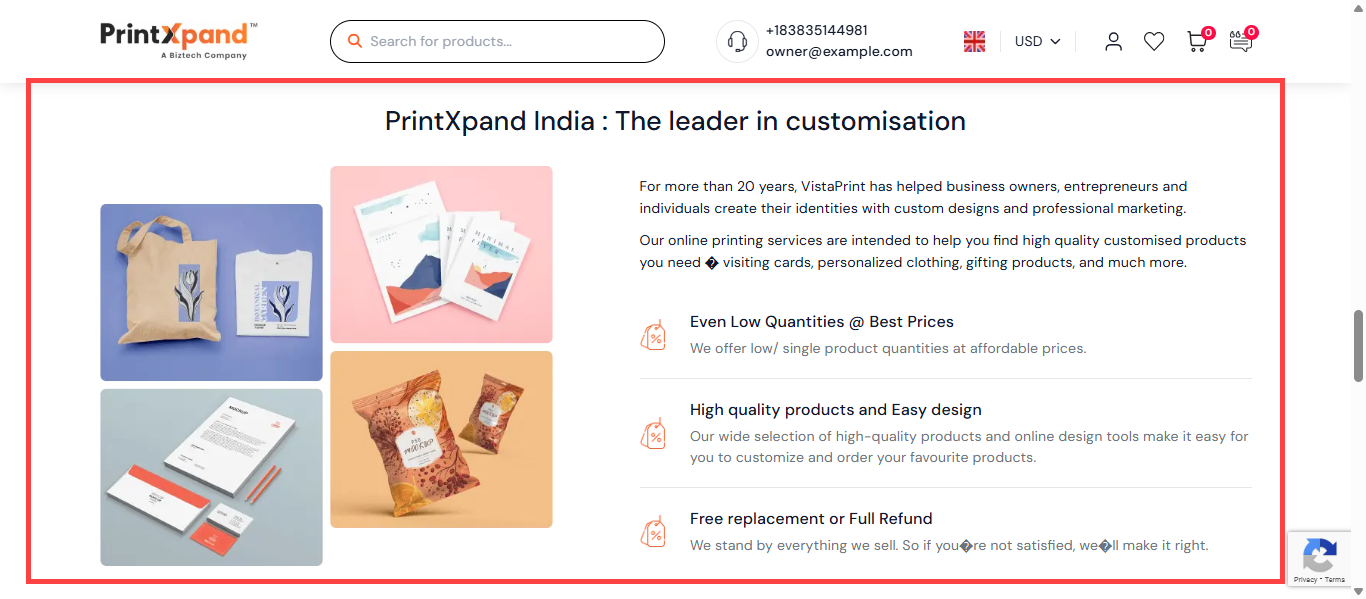
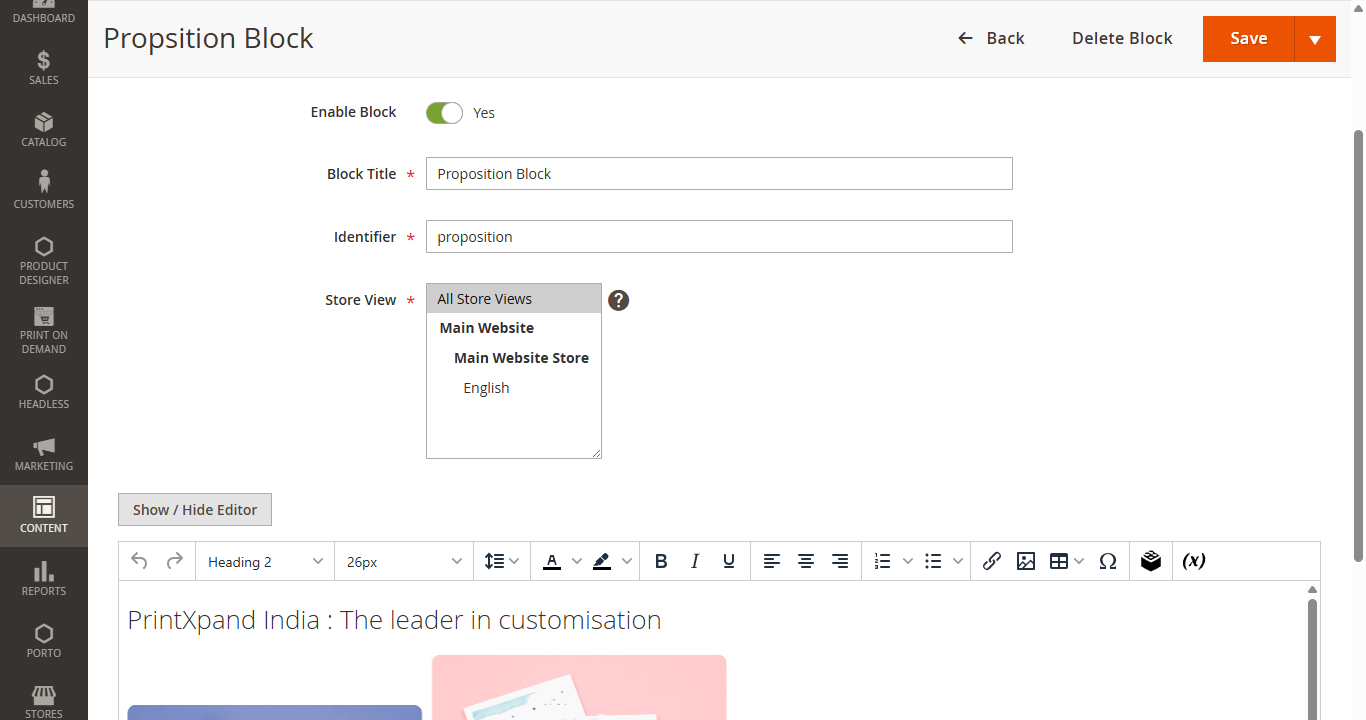
Proposition Block
To add a similar block, create a new block named Proposition Block under Content > Blocks. Configure the block as per your requirements. [2]
New Arrival Products Block
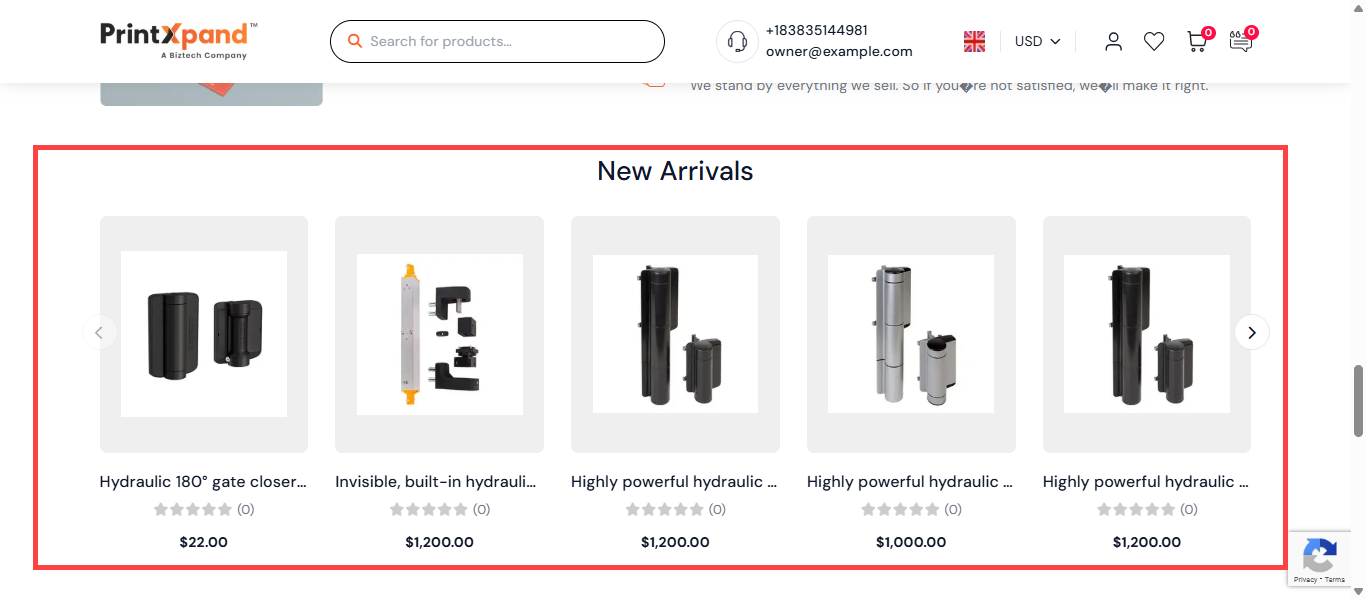
All newly added products are displayed here by default.
Blog
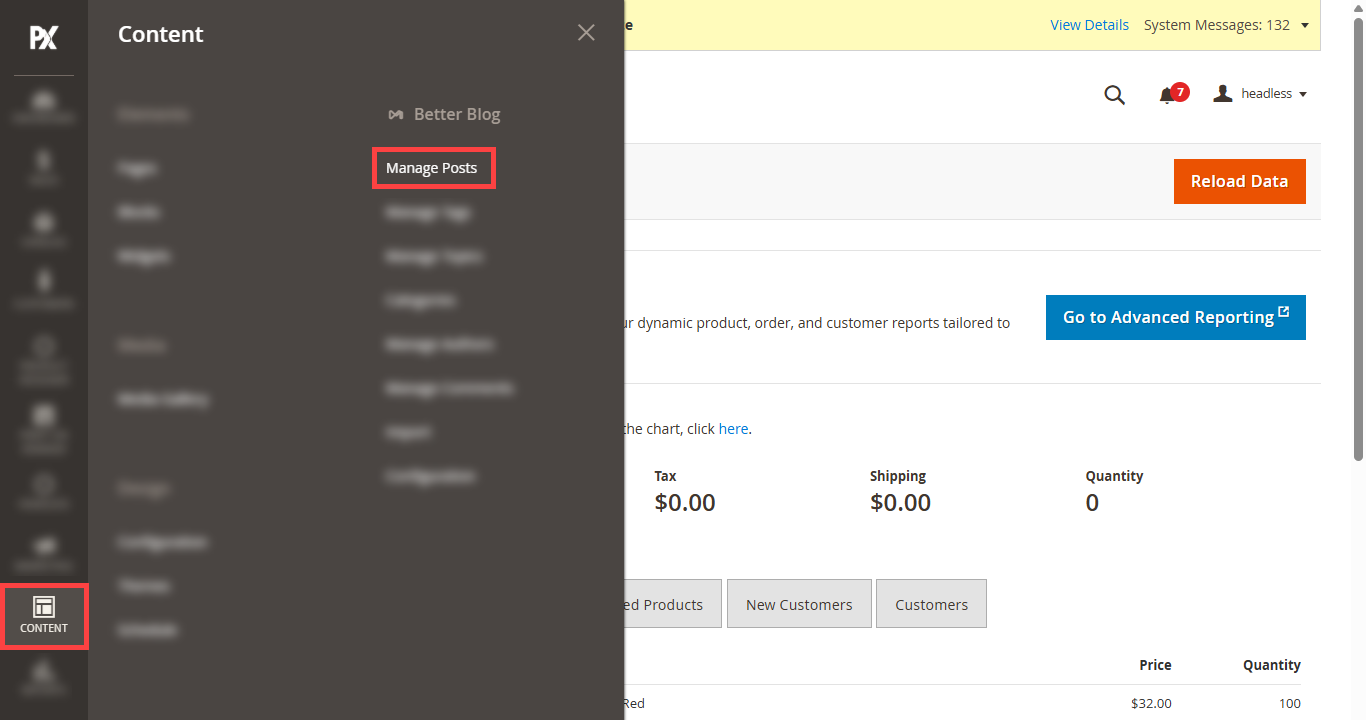
To add a blog, navigate to Content > Better Blog > Manage Posts. This section displays a list view of all published blog posts. [2]
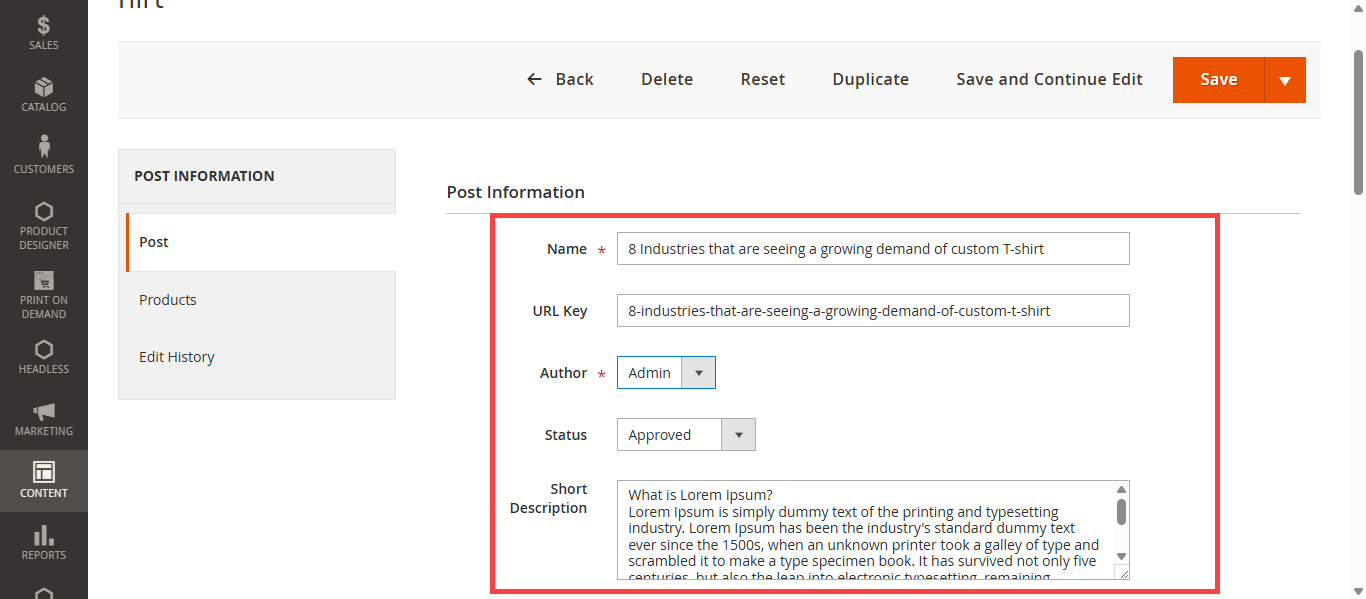
To create a new post, click the Add New Post button. This will redirect you to the Add Post page. In the Post Information section, enter the Blog Name, URL Key, Author, set the Status, and provide a Short Description.[3]
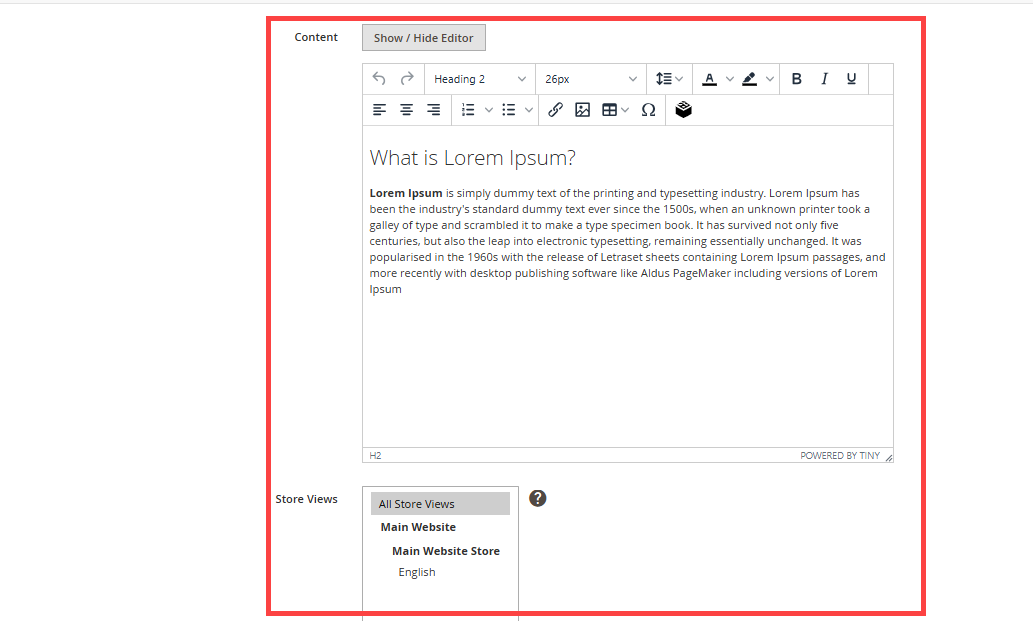
Now, enter the content in the Content field and select the Store View where the blog should be visible.[4]
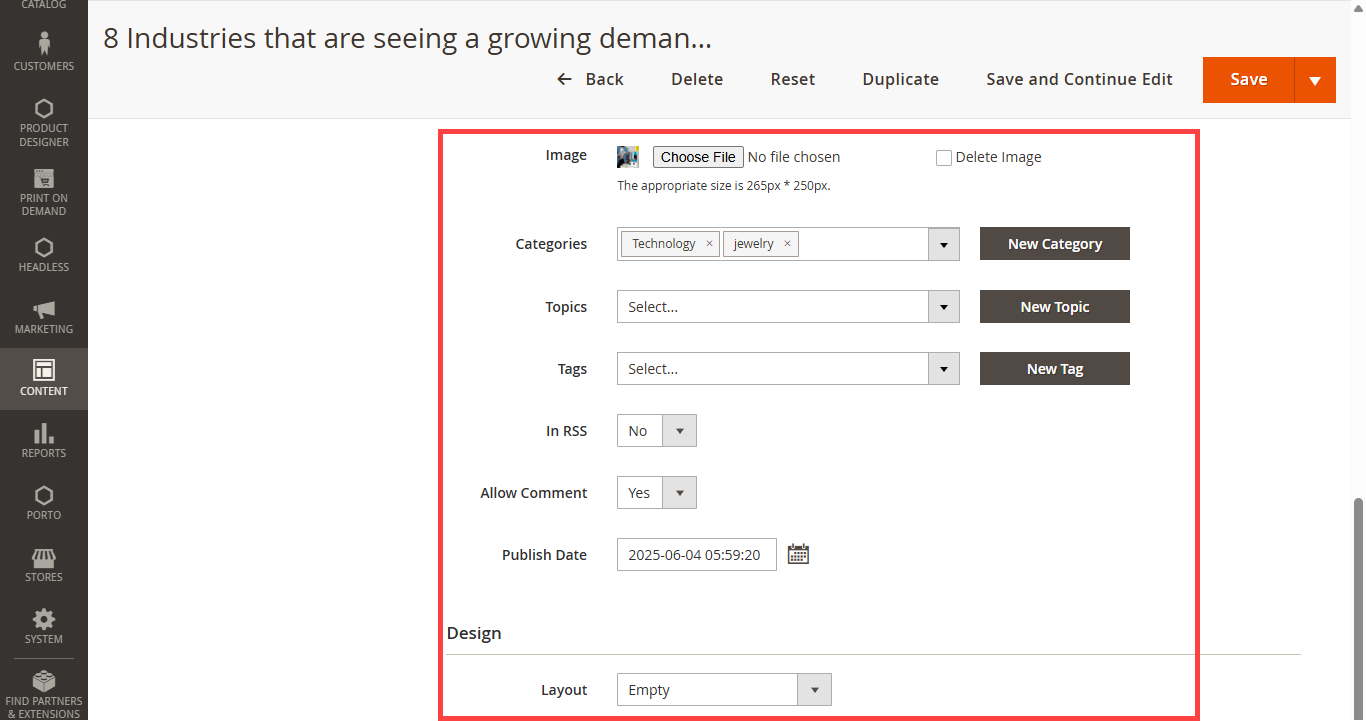
Next, configure the following fields:[5]
– Categories: Assign one or more categories to the blog post.
– Topics: Select the appropriate topic from the dropdown menu.
– Tags: Select relevant tags from the dropdown menu.
– In RSS: Set to Yes to include the post in the RSS feed for structured content updates.
– Allow Comment: Set to Yes to enable commenting on the post.
– Publish Date: Specify the publish date using the provided dropdown.
– Layout: Select the preferred design layout from the dropdown menu.
Click the Save button to save the post after completing all configurations.

Footer
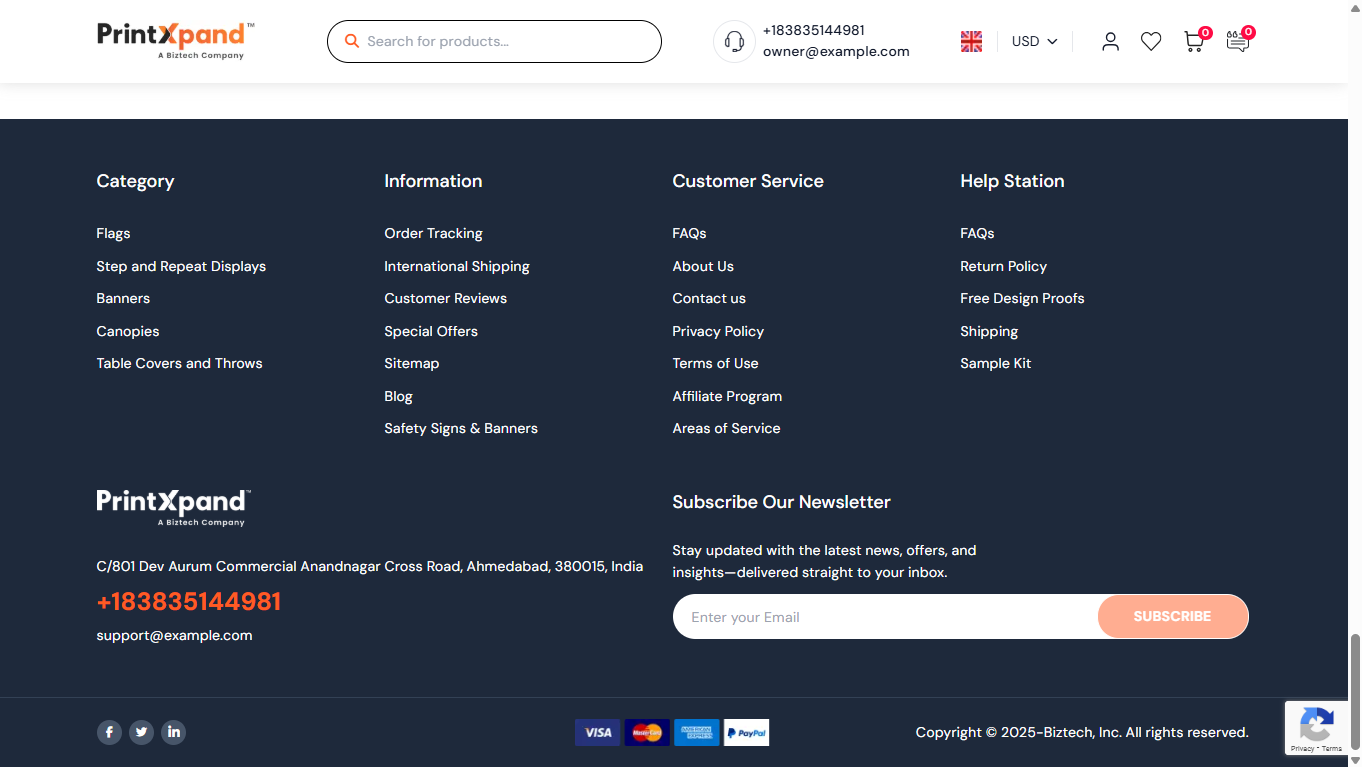
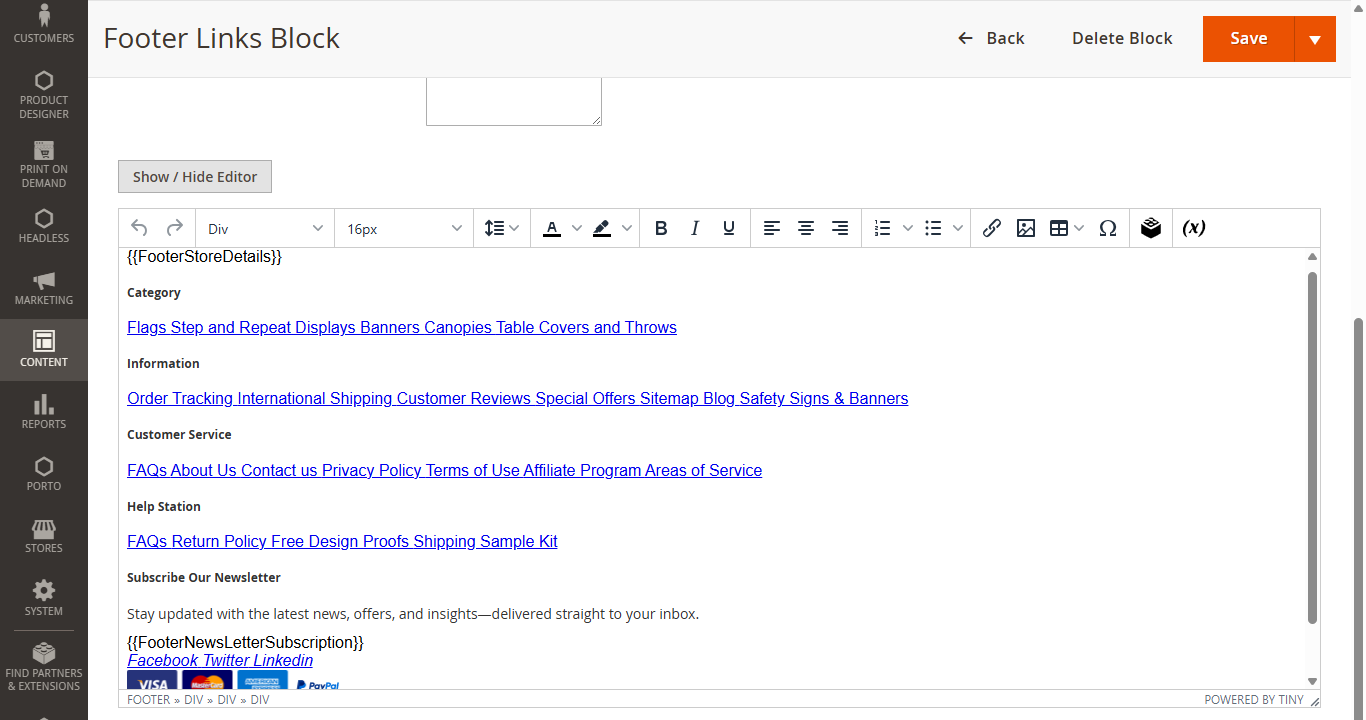
To add the Category, Information, Customer Service, and Help Station sections in the footer, first configure a footer block in Static Blocks. After configuring the block, add the hyperlinks for all relevant categories within the footer block content. [2]
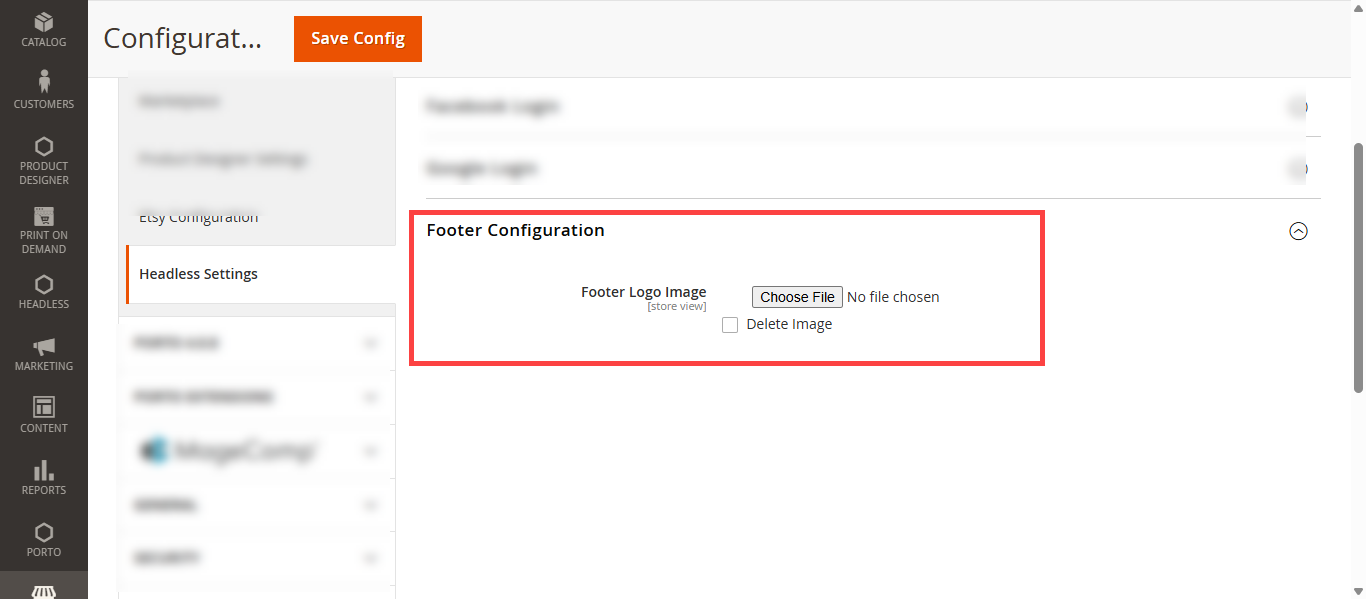
To add the footer image navigate to Store > Configuration > Headless > Headless. Here in the Footer Configuration section upload the footer image. [3]
Headless Activation
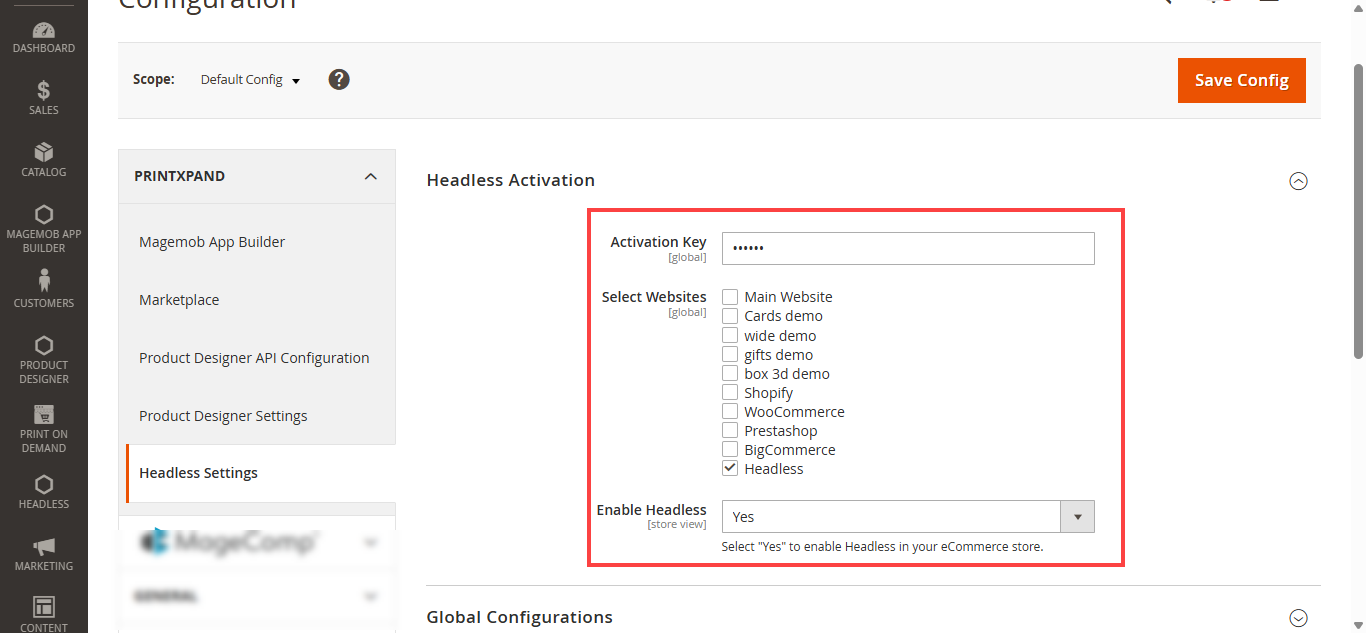
In the Headless Activation Key section, enter the activation key to initiate the Headless Store setup. After the key is validated, choose the website where the Headless feature should be applied and Select Yes to enable Headless in your Store.[1]
Global Configurations
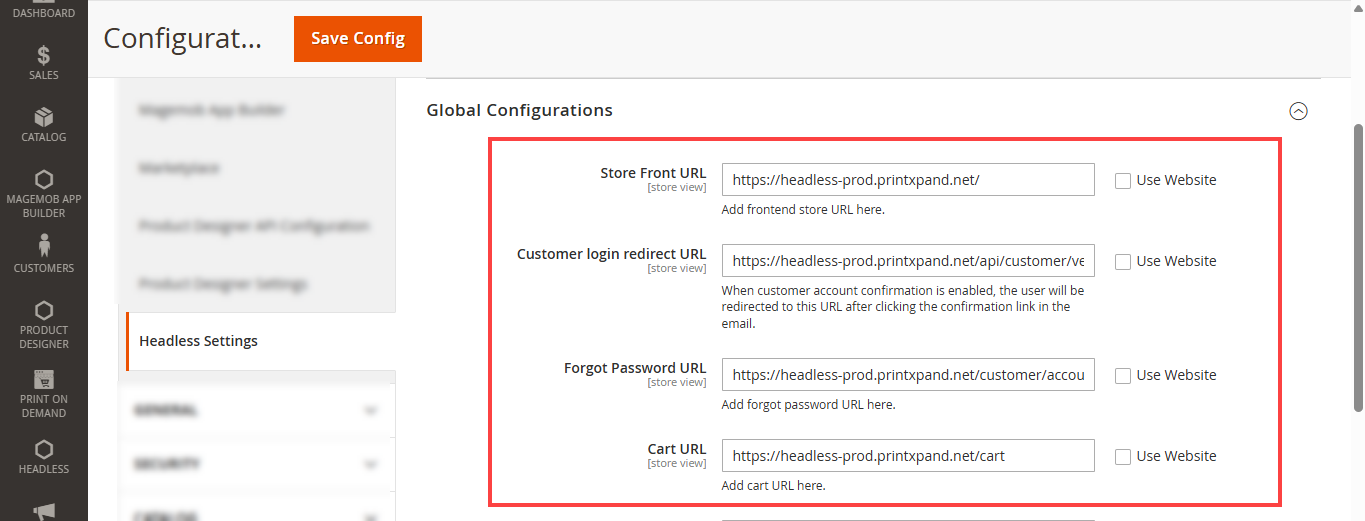
In the Global configurations section configure following sections: [1]
– Customer Login Redirect URL: Specify the URL where customers will be redirected after confirming their account via the email confirmation link.
– Forgot Password URL: Provide the URL for the password reset page.
– Cart URL: Enter the URL for the cart page.
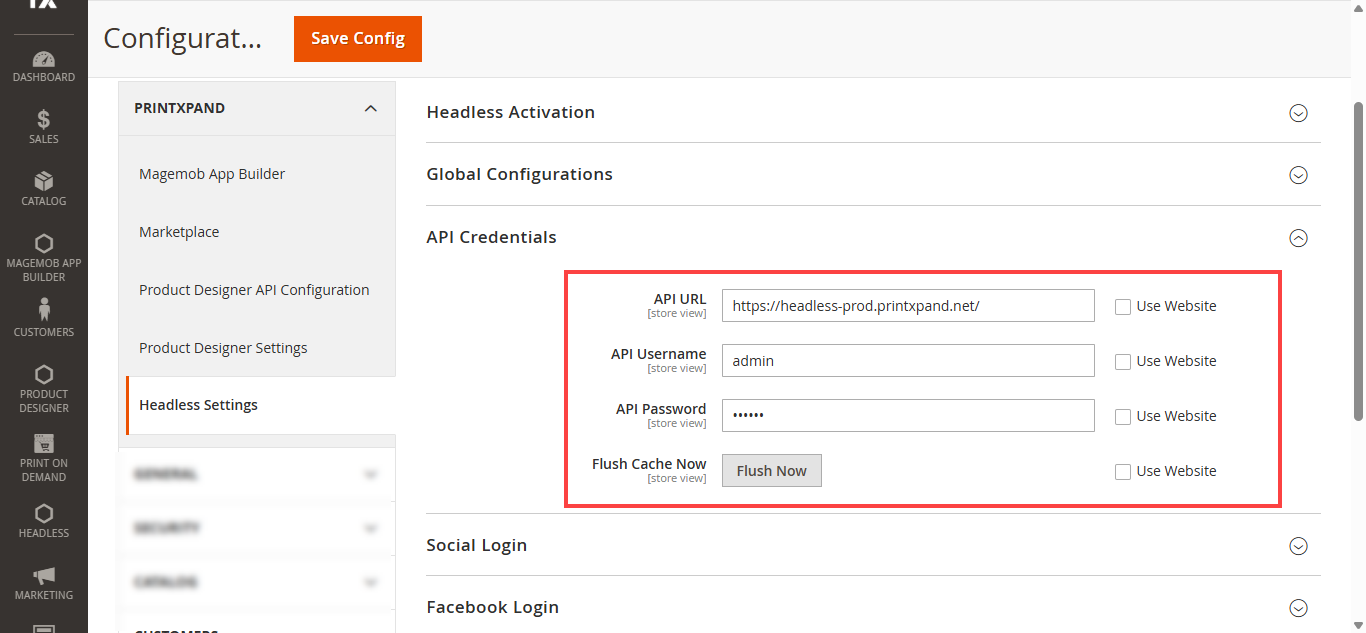
API Credentials
Configure the API configuration for the Headless Store Front. Configure the Following field: [1]
– Flush Cache Now: Headless utilizes cache to enhance performance, so you must clear the cache after modifying categories, logos, or links. If the changes you’ve made from the admin panel don’t appear on the frontend, ensure the headless cache has been flushed.
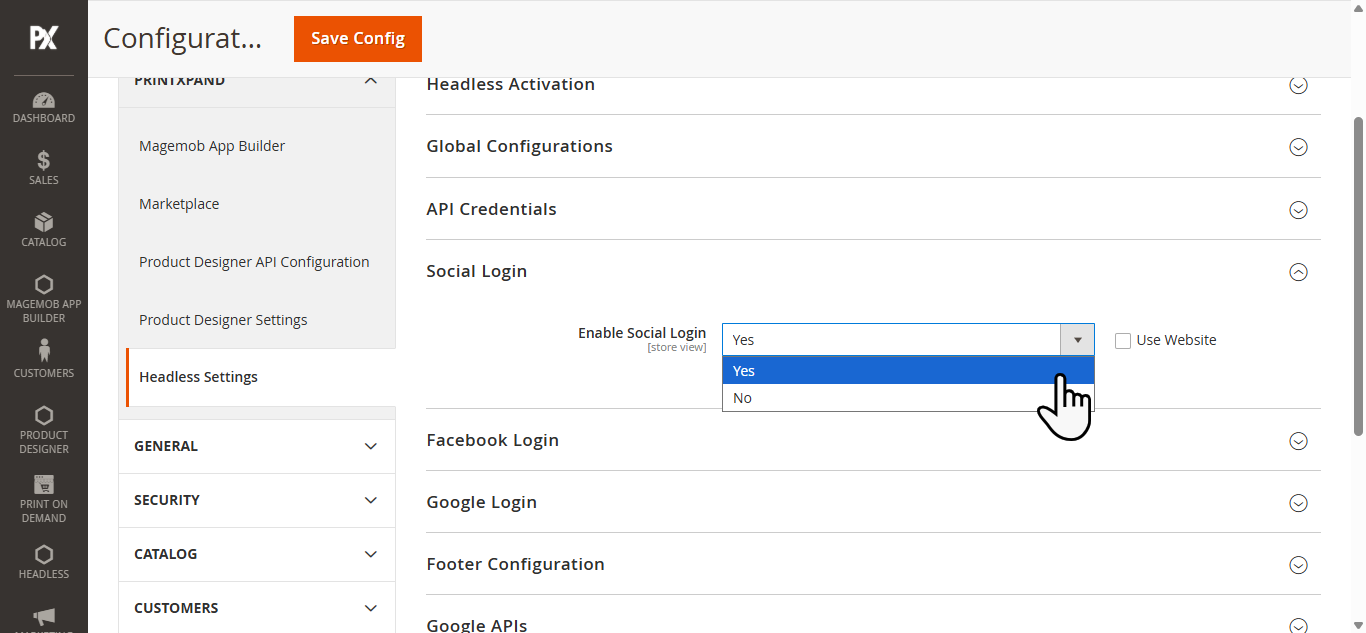
Social login
To enable the social login for the Store front select Yes form the Dropdown to enable the Social media login. [1]
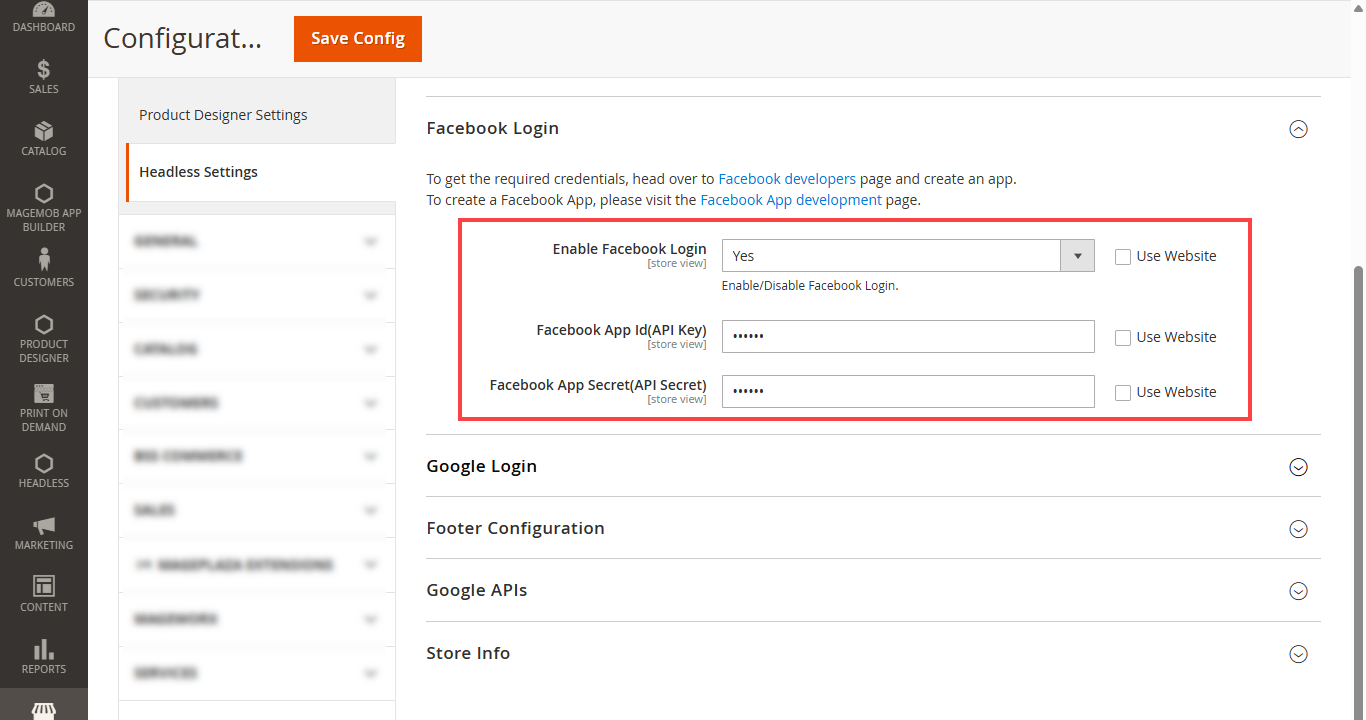
Facebook login
To enable the login via Facebook the following fields: [1]
– Enable Facebook Login: Set this option to Yes to activate Facebook login.
– Facebook App ID (API Key): Enter the Facebook App ID.
– Facebook App Secret (API Secret): Enter the Facebook App Secret key.
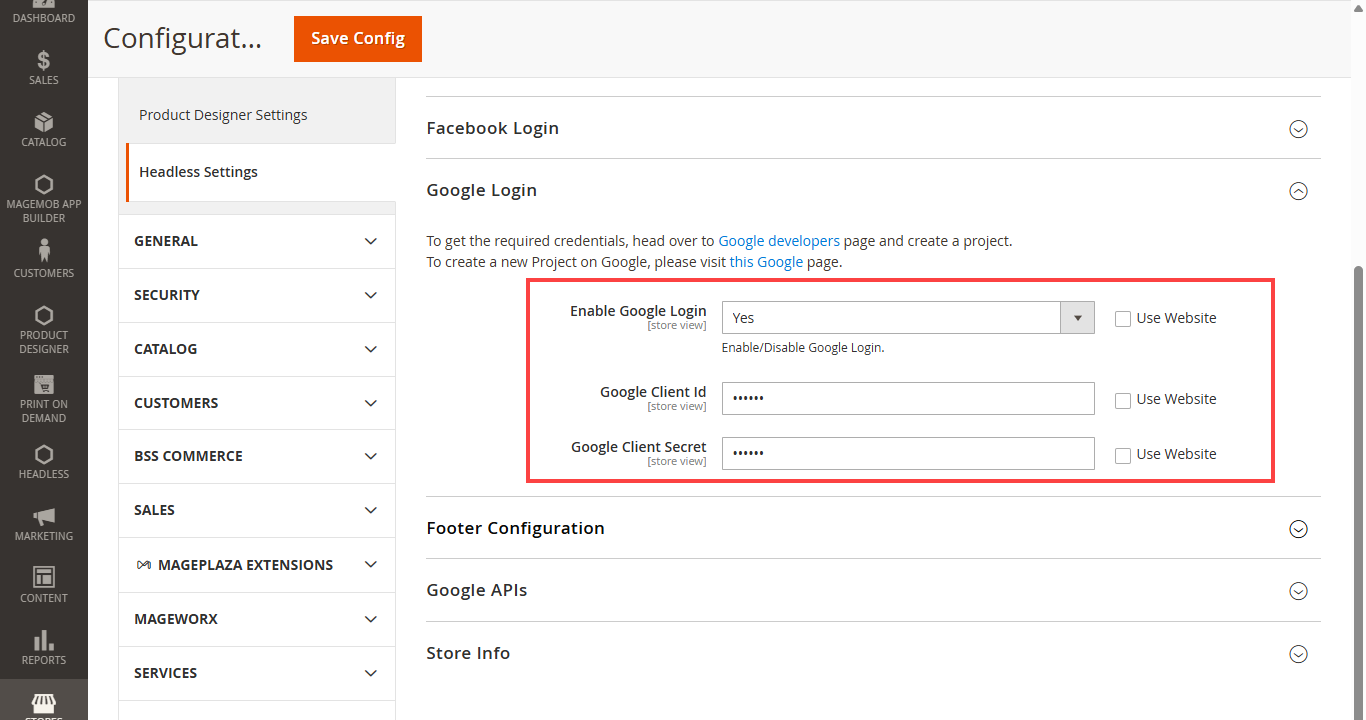
Google Login
To enable the login via Facebook the following fields: [1]
– Enable Google Login: Set this option to Yes to enable Google login.
– Google Client ID: Enter the Google Client ID.
– Google Client Secret: Enter the Google Client Secret key
Footer Configuration
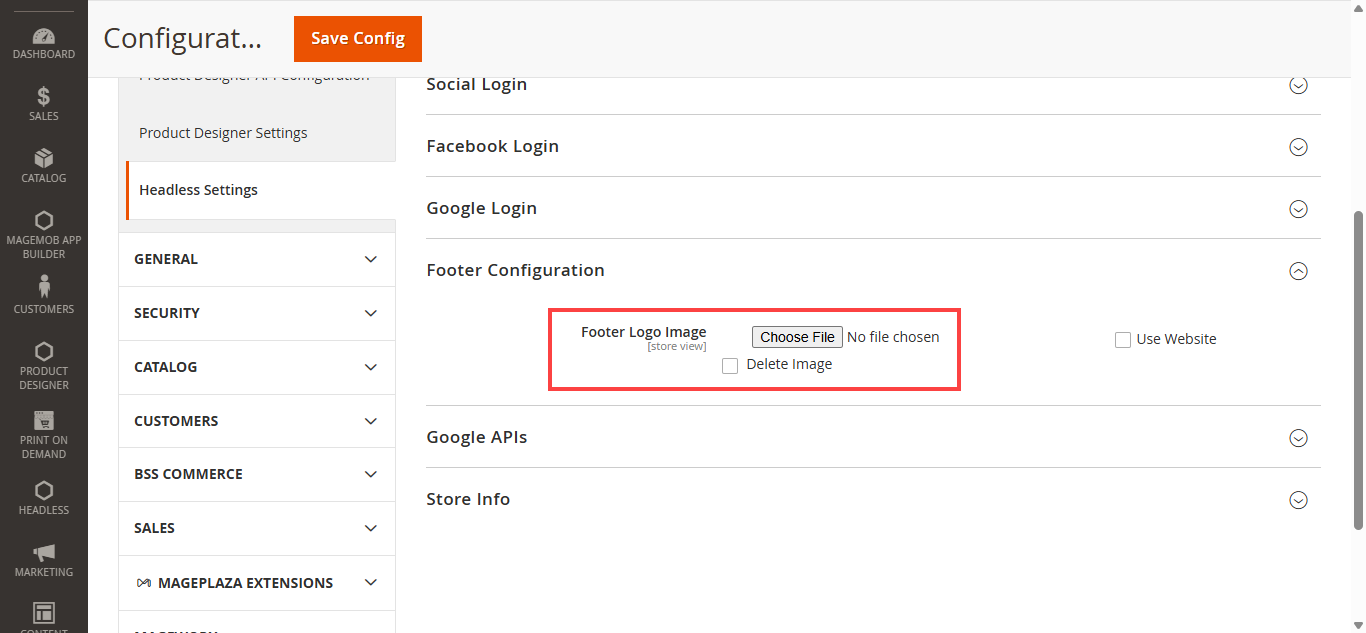
In the Footer Configuration section, the admin can upload a logo that will appear in the footer of the Headless storefront. To delete the existing footer logo, select the Delete Image checkbox and save the configuration. [1]
Google APIs
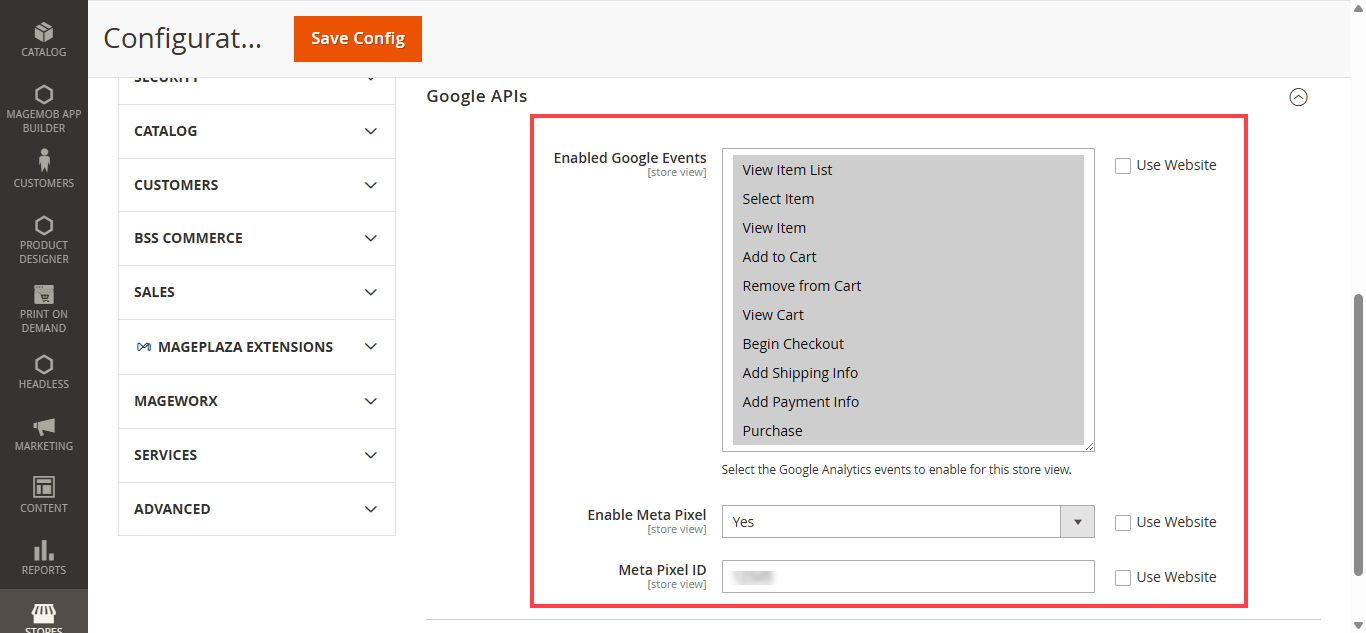
In the Google APIs section, the administrator can select the Google Analytics events to enable for the store view. The administrator can also enable the Meta Pixel, which tracks visitor actions, measures ad performance, and generates custom audiences for targeted advertising.[1]
Store Information
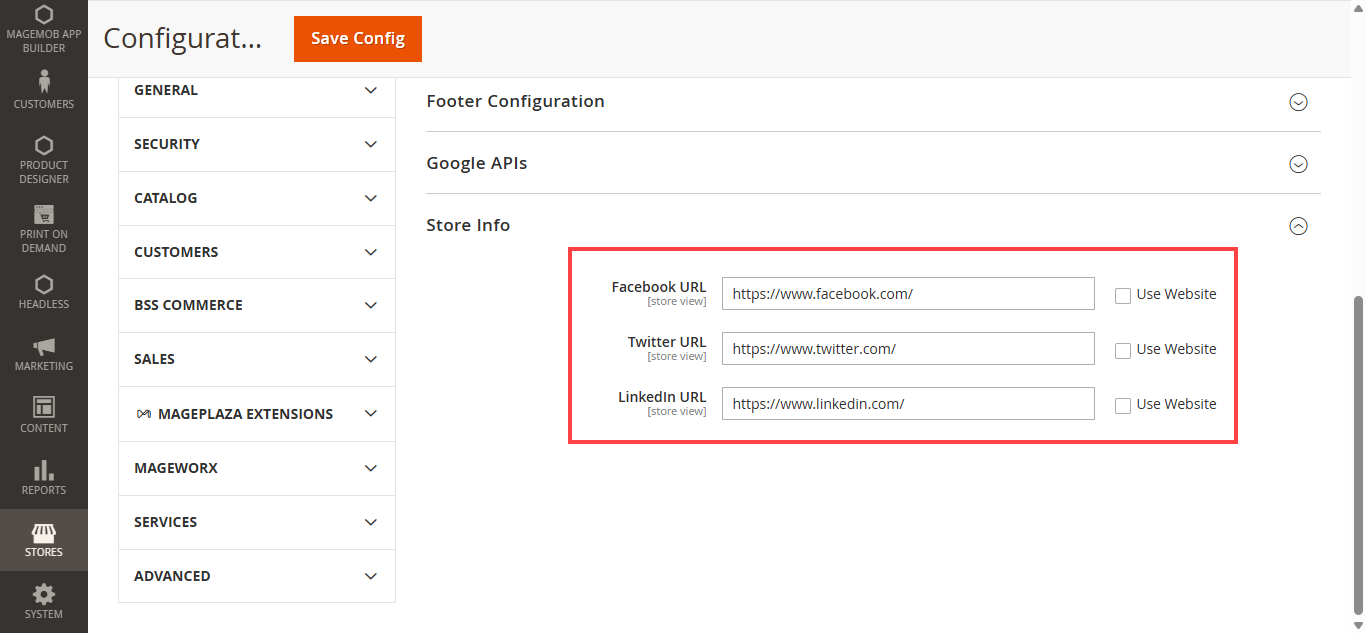
In the Store Information section, the administrator can add the URLs for the Facebook, Twitter, and LinkedIn pages.[1]
Note: For online payments during checkout, only PayPal Express integration is supported.