Manage Safe, Cut, Bleed Lines
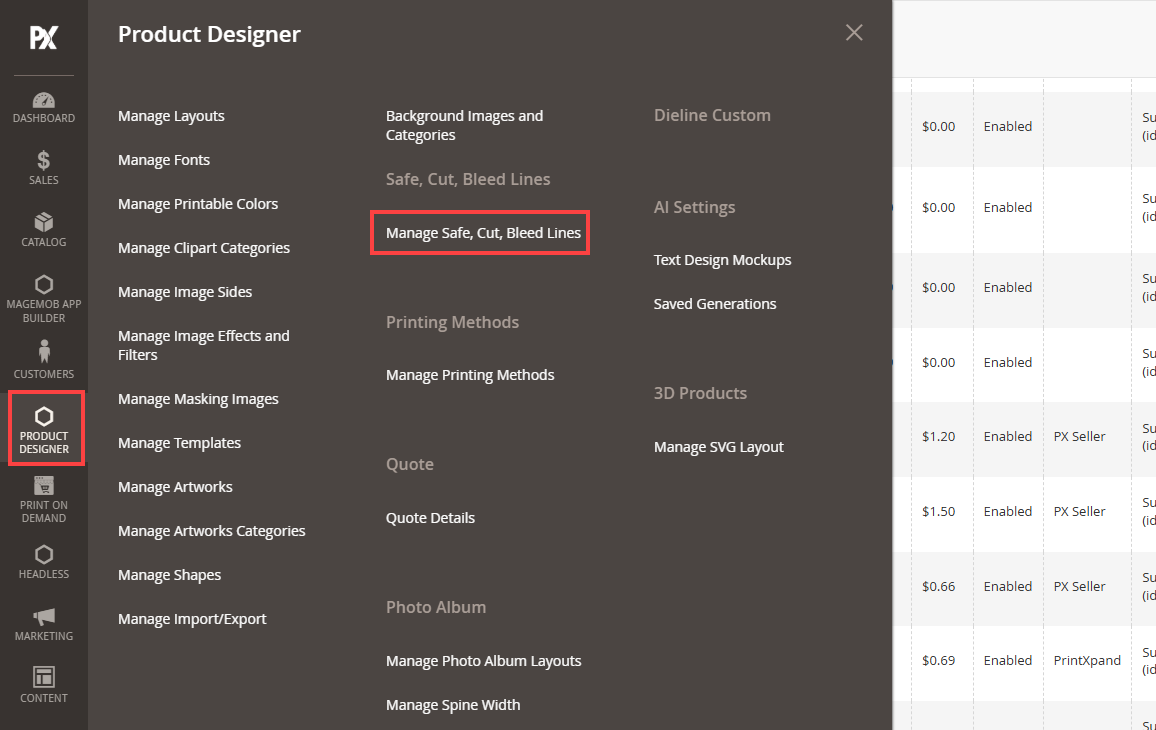
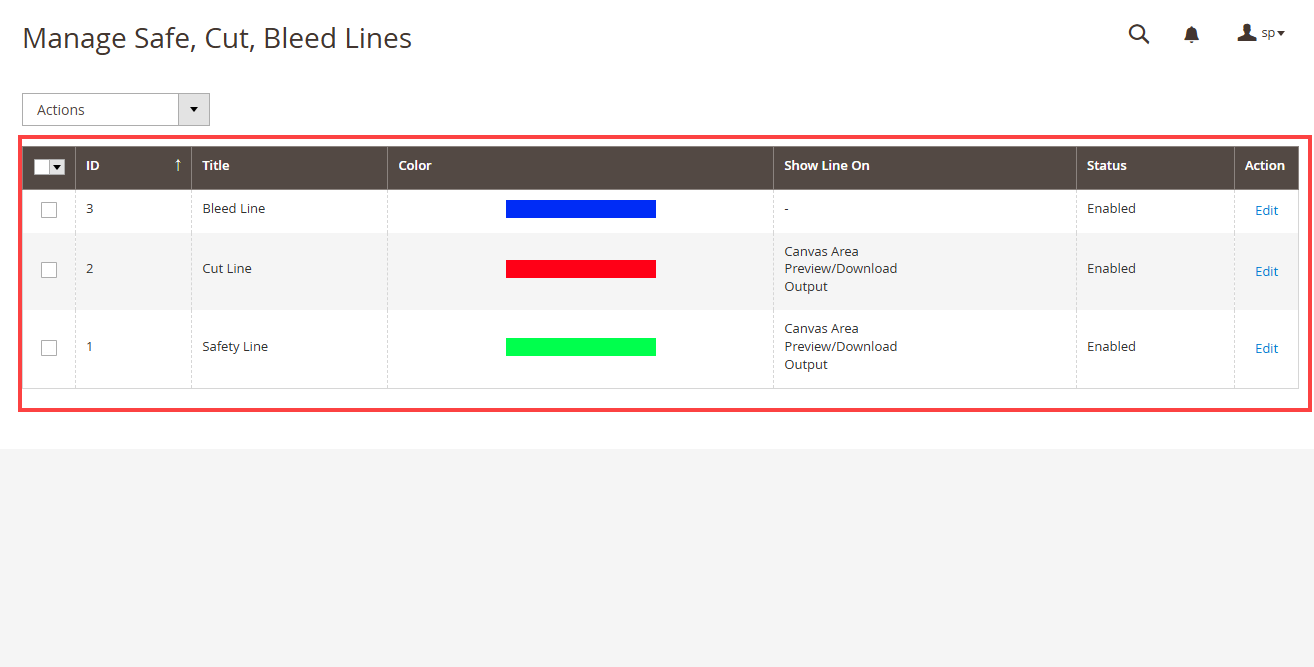
Navigate to Product Designer -> Manage Safe, Cut Bleed Lines. [1]
By clicking on it, by default, you will get Bleed Line, Cut Line, and Safety Line in the grid view. From the grid view, you will see the details like selected color for the lines, the line will be shown on, and status. [2]
Now, by clicking on the Edit option under the ‘Action’ column, you will edit the details of the lines.
Bleed Line [1]
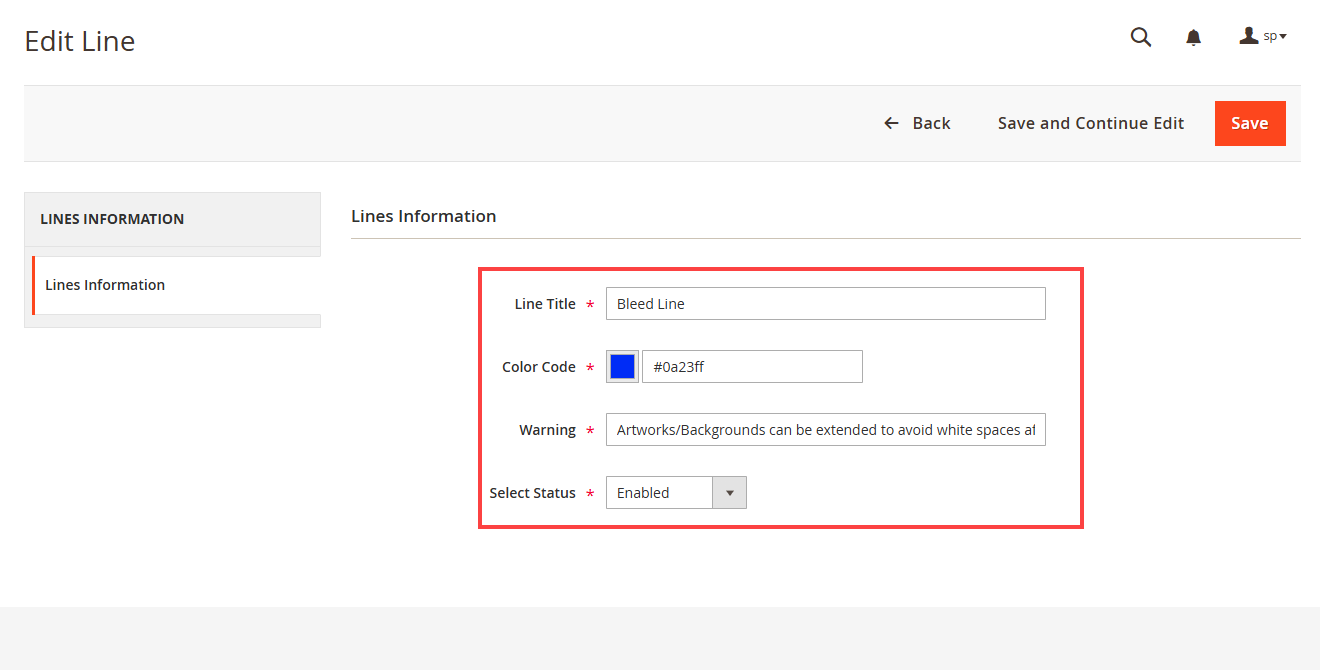
By clicking on the ‘Edit’ option, you can edit the Line Title & Line Color (Color Code) for the Bleed Line.Enter the warning message and set status. ‘Line Title’ will appear in the designer area with the selected Color Code for the Bleed Line. You can select the color using the custom color picker tool.
Click on the “Save” button to save the changes for the Bleed Line.
Cut & Safety Lines [2]
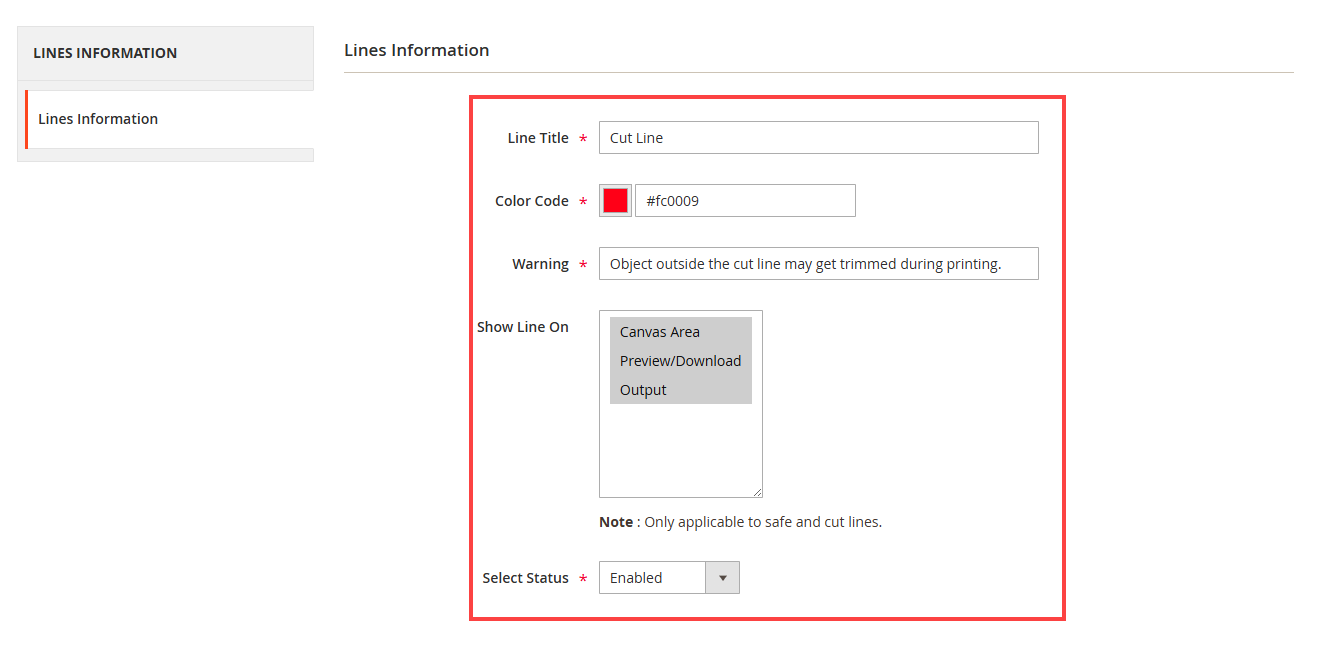
Similarly, you can edit the Cut Line and Safety Line as well. You can change the following details for the Cut & Safety Lines:
– Line Title: Edit the title of the line that will show on the designer area.
– Color Code: Choose the color for the line to display in the designer area. A custom color picker is provided to choose the color.
– Warning: You can add the instructive message for the Cut & Safety lines individually. The customer will see the tooltip icon on the specific lines to display the Warning message.
– Show line on Preview Download: You need to select the Canvas Area to display the line forPreview/Download and Output.
– Select Status: You can enable/disable the line as per need.
Click on the “Save” button to save the changes of the line (Cut and Safety line individually.)
After the ‘Bleed Safe Line’ configuration, you need to configure the “Bleed Line & Safe Line” for a specific product from the product detail page.
Product Level Configuration
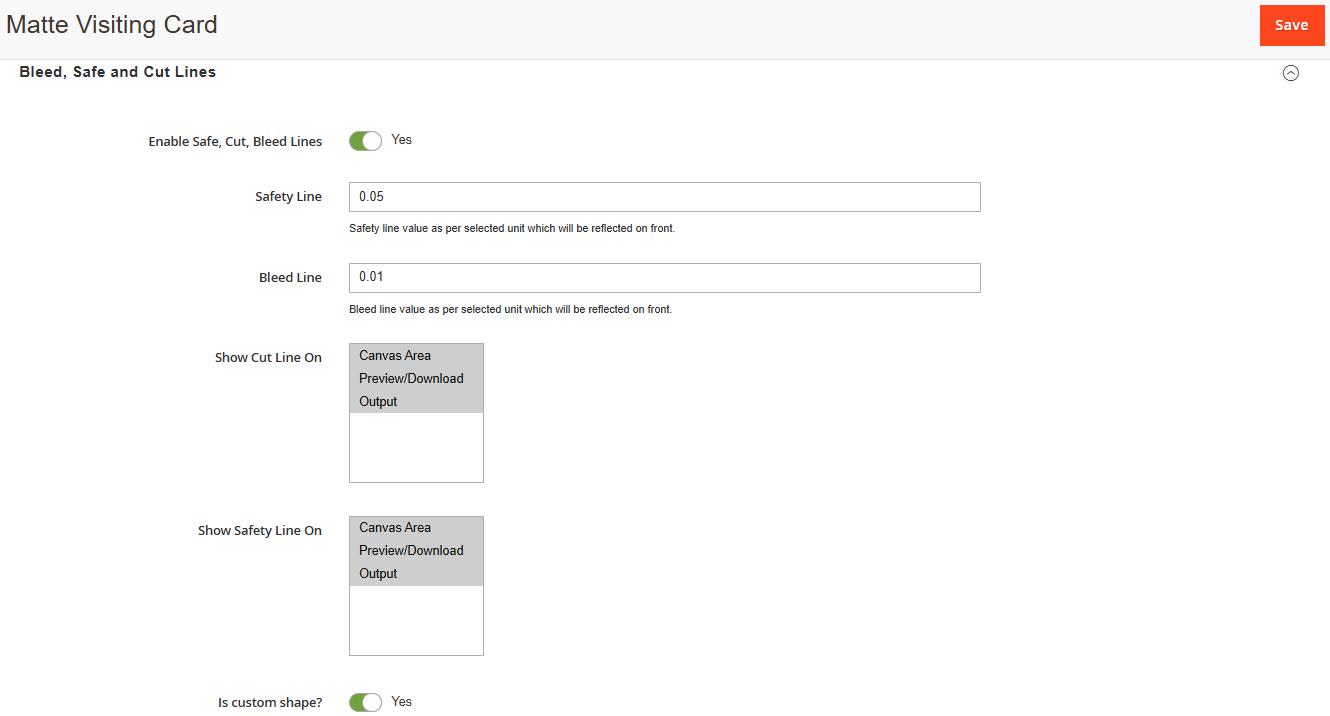
Navigate to the Product details page for which you want to set the Bleed area. By scrolling down on the product details page, you will find the Product Designer option. Under the Product Designer options, you will see the Bleed, Safe, Cut Line option to configure the lines at the product level. [1]
Configure the following options to display the Bleed, Safe, Cut Lines on the product designer area:
– Enable Safe, Cut, Bleed Lines: You can enable/disable this option at the product level
– Safety Line: Insert the value (dimension) for Safety Line.
– Bleed Line: Insert the value (dimension) for Safety Line.
Note: The unit of the inserted values for Safety & Bleed lines will be considered as selected in the “Bleed, Safe Line Units” dropdown.
Note: Although most printers have their own requirements when printing business cards, for a standard size business card, you should have about 6mm (0.25 inches) of bleed dimension in your business card design.
– Show Cut Line On: Select the options to display the Cut Line on Canvas Area, Preview/Download, and Output.
– Show Safety Line On: Select the options where to display the Safety Line on Canvas Area, Preview/Download, and Output.
Is custom shape?
You can enable the Safe, Cut, and Bleed lines for the custom shapes as well. By enabling the “Is custom shape?” option, the customers will get the lines for the Custom shapes as well.
Note: The custom shape must be an SVG file, only then the safe, cut & bleed lines will be displayed for that shape.
Frontend View
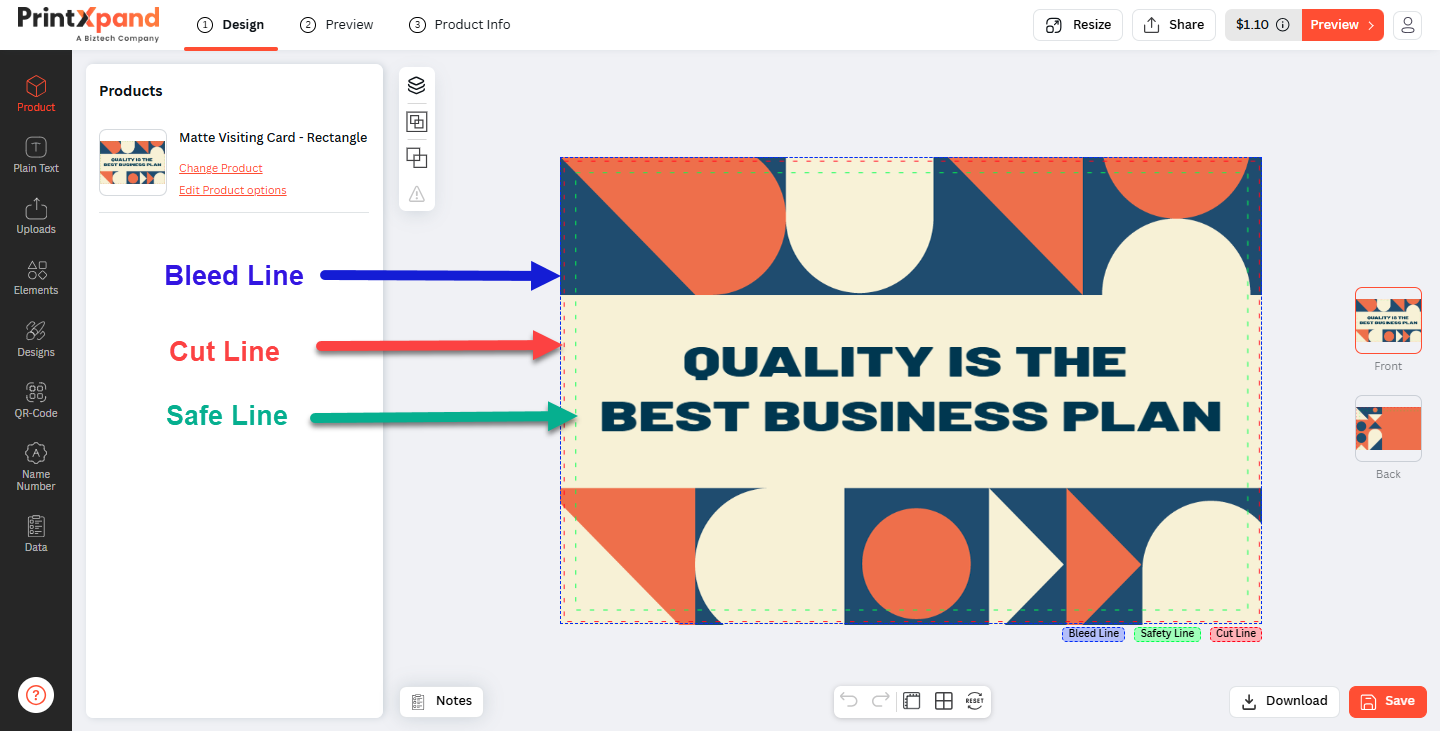
After configuration from the designer tool backend and at the product level, the design tool enables the Bleed Lines, Cut Lines, and Safety Lines on the canvas of the designing area. [1]
Here, the customers will see the color of all the lines as the color chosen from the designer tool configuration. The customers will see the lines in the design area, product preview, and downloaded file selected from the Manage Safe, Cut, Bleed Lines from the designer tool configuration.
The Bleed line can be seen at the end of the designer area.
The card printers do not always cut perfectly straight. Therefore, having a Bleed area is important if you have artwork that extends to the edge of the business card. That way, if the printer cuts the card slightly outside the desired cut line, you will not have an uneven white spacing on the edges.
The Cutline (Trim line) is indicated in the middle where the business card printer targets the cut and removes the over-printed part and gives the finishing.
The Safety Line is a margin inside from the cut line where all text & images/logos must be contained. If you design outside of the safety line, you risk having the content trimmed off in the cutting process. You must design your card under the Safe line.
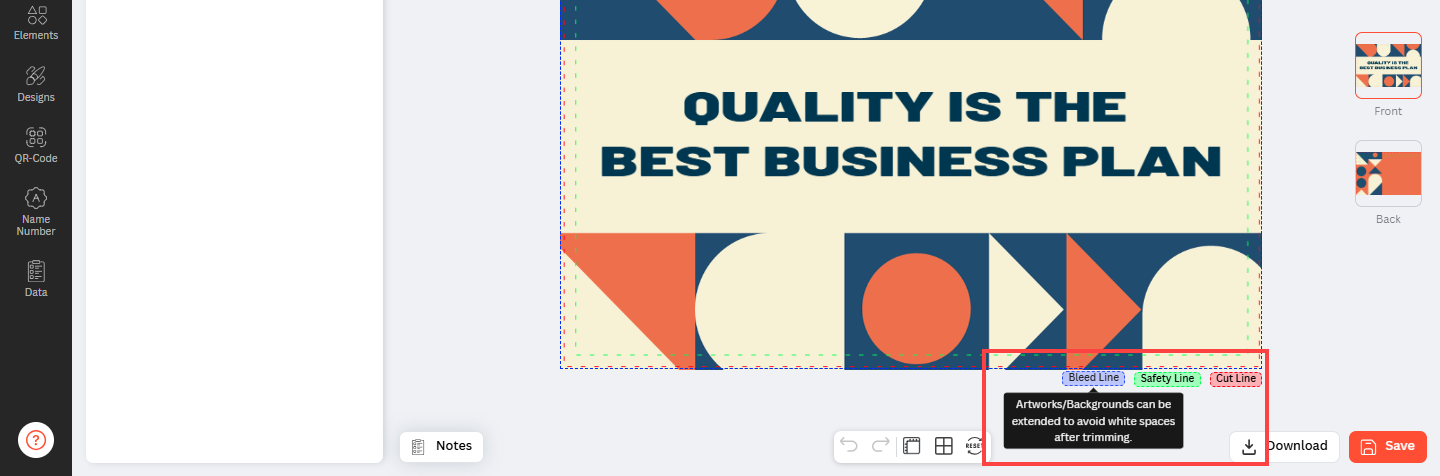
The customers will see the Warning (Instructive message) for all the lines that are edited from the designer tool backend. The customer can see the Line names by clicking on it, the customers can read the message.[2]
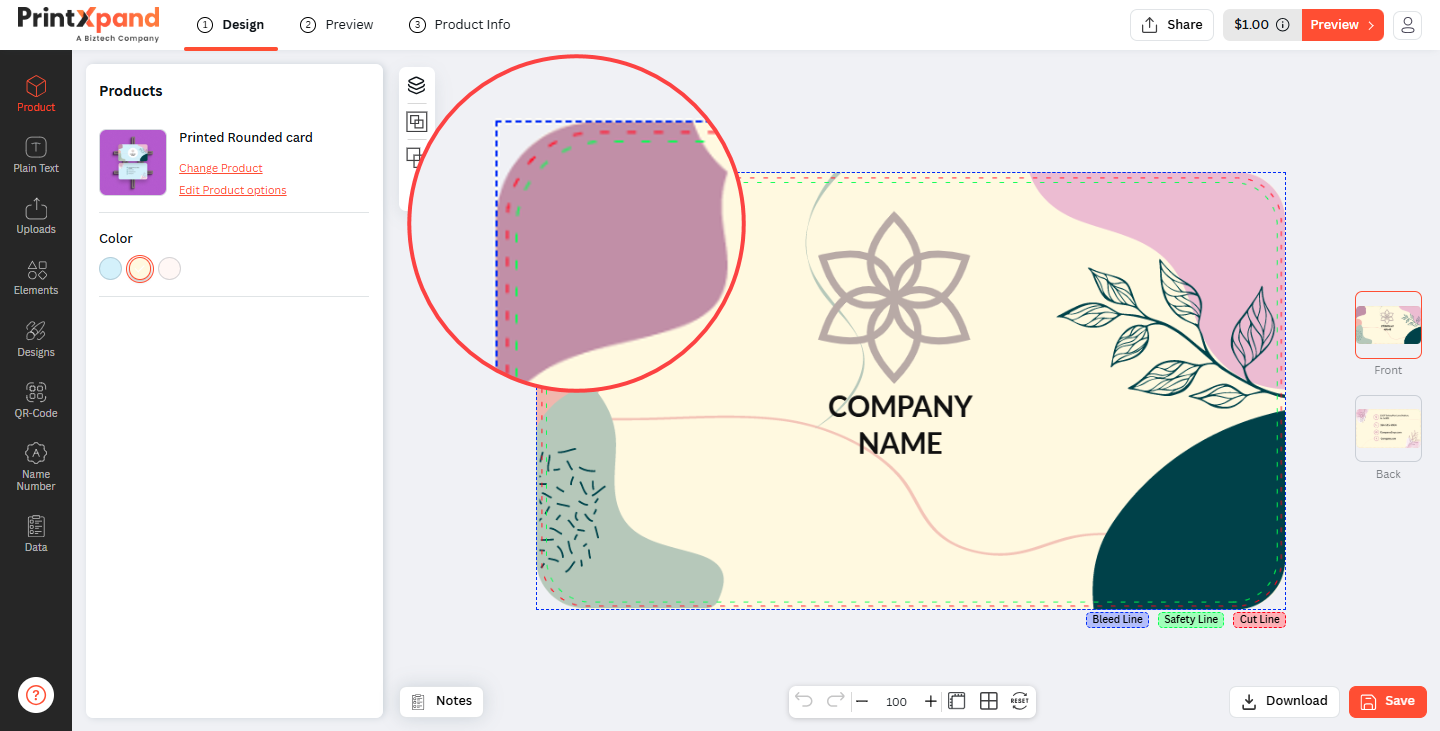
If you have enabled the option to display the lines for the Custom shapes for the specific product, your customers will get the beheld, cut, and safety lines in the custom shape as well.
The shape must be in SVG format with path objects there in SVG. [3]