Manage Layout
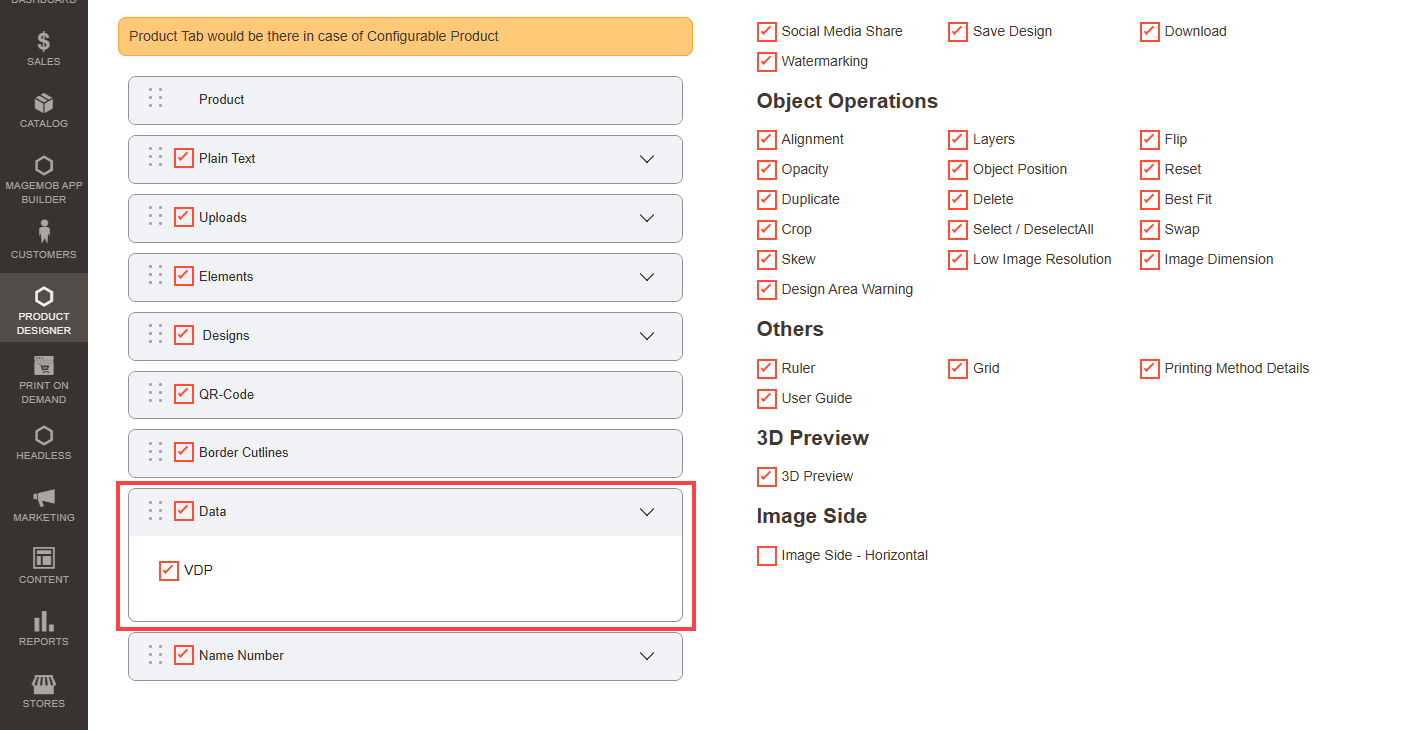
Firstly, you need to enable the feature by navigating to Product Designer → Manage Layouts, you will get the list of various layouts. Open the layout in Edit mode.
Now, enable the VDP field in the Data tab and click on the Save button to save the configuration.[1]
Now it’s time to assign the VDP field while creating the templates.
VDP Fields for Existing Templates
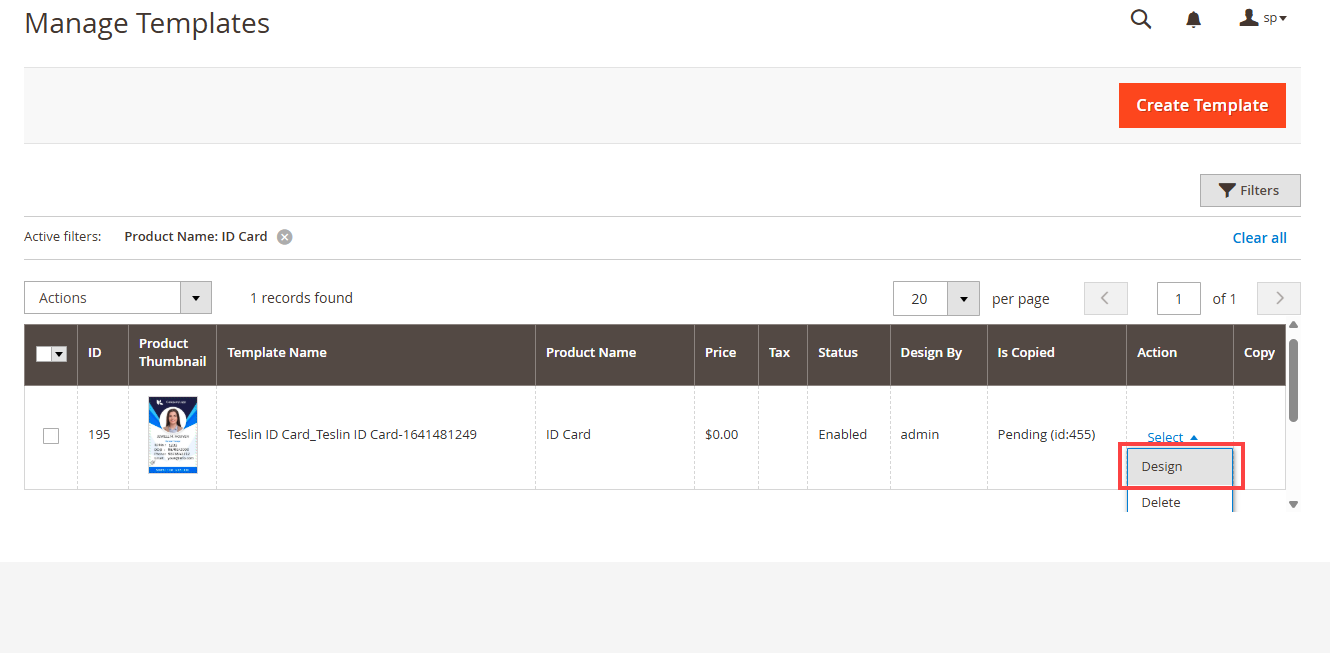
Navigate to Product Designer → Manage Templates, you will get the list of created templates. Now open the template in Design mode. [1]
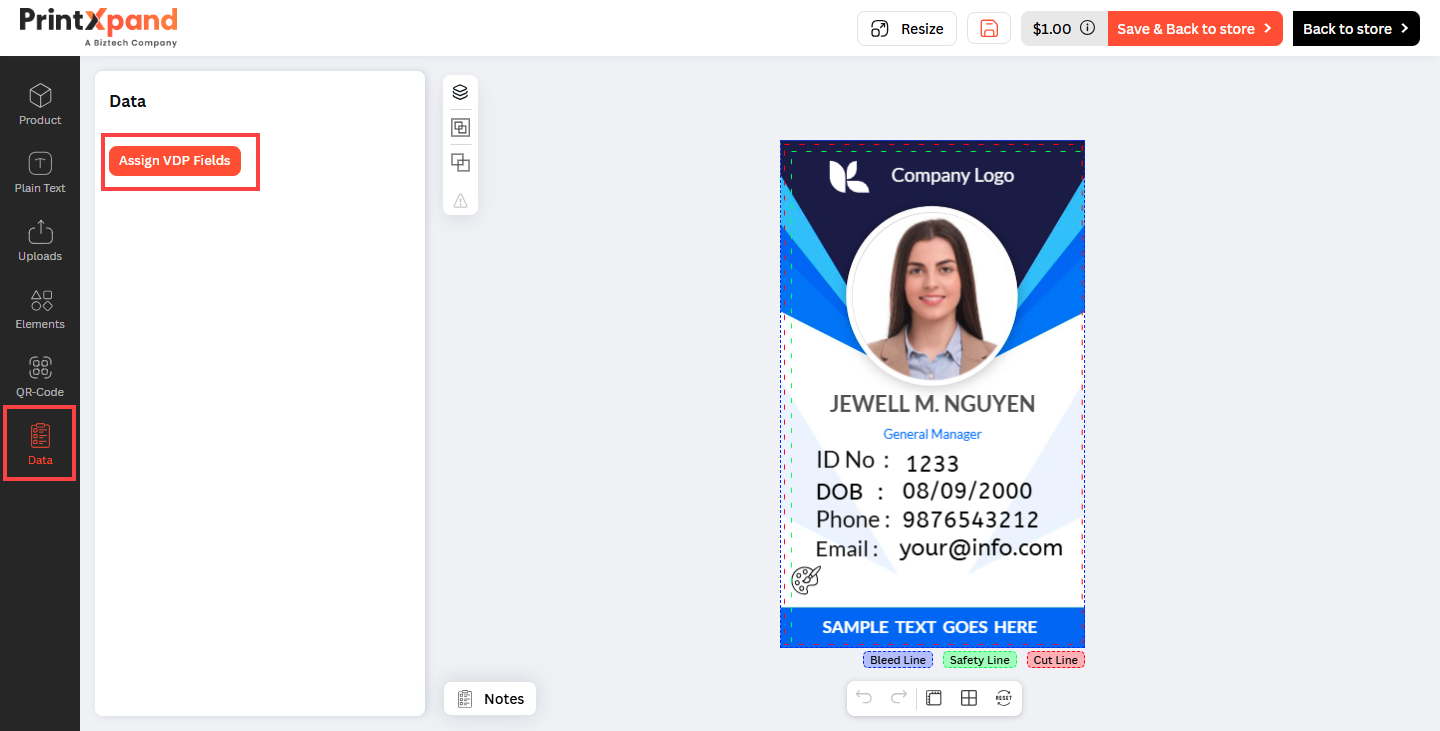
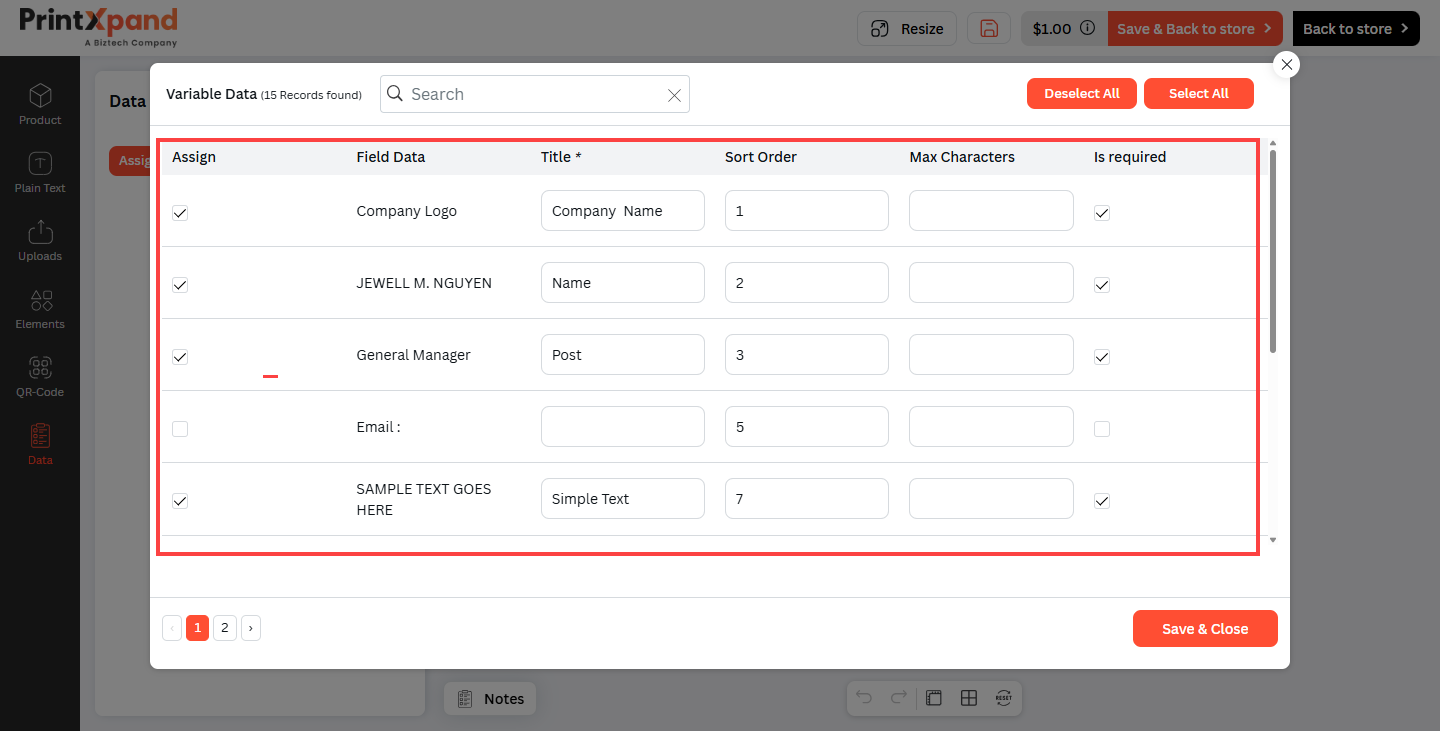
You will get the Assign VDP fields button, by clicking on the Data tab. Once you click on the button, you will get the Assign, Field Data, Title, Short Order, Max Character and Is Required fields.[2]
Enter the Title for the Field Data and assign it if you want to keep it customizable for your customers. For example, if the Name field data has been assigned as VDP fields, then your customers will be able to enter the respective name in the Name field. [3]
You can Select and Deselect all at once.
After assigning the VDP fields, click on the Save & Close button to save it.
New Template
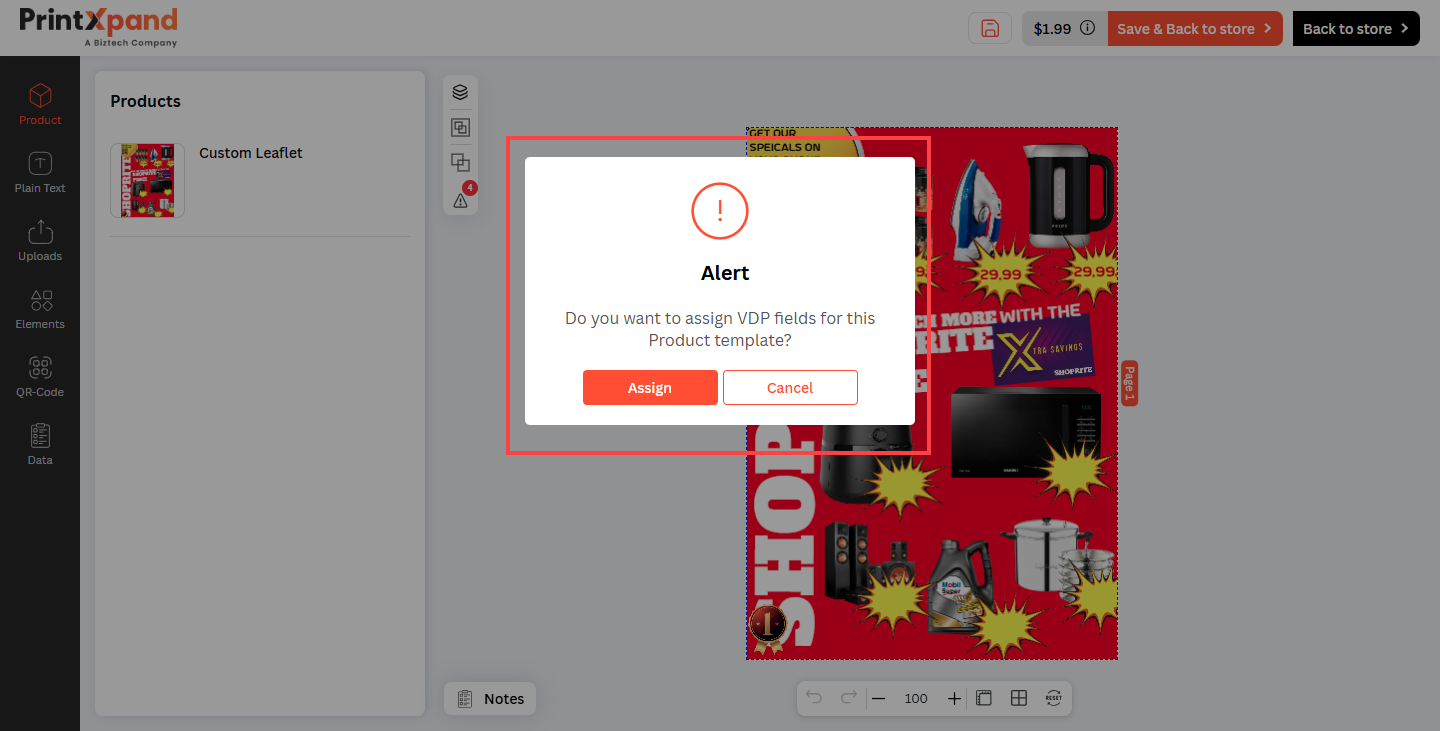
If you haven’t assigned any VDP field to the template then it will show an Alert message. Click on Assign to redirect to the VDP fields panel to assign the VDP Fields like below or click on the Cancel button to save the template without VDP fields. [1]
Frontend View
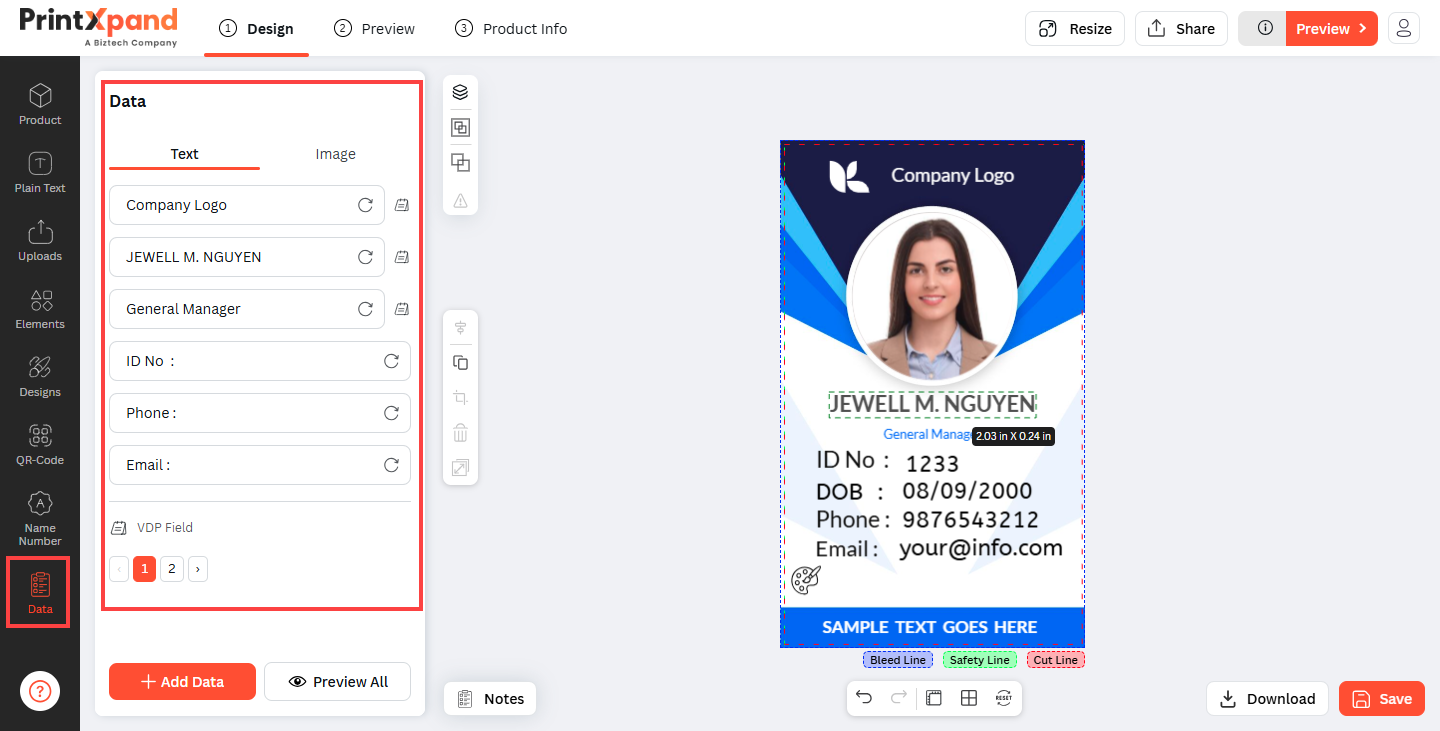
Now in the front store, once all the configurations are done, open the ID card product and navigate to the Data section in the left tab where the VDP data is available. [1]
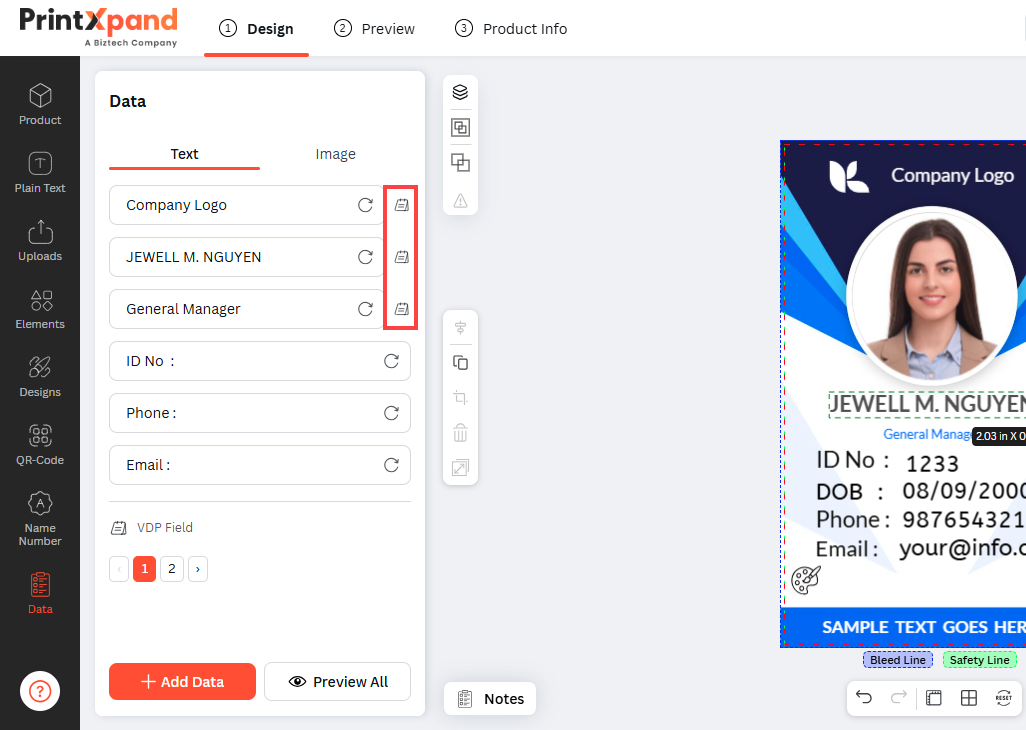
In the data section a VDP icon will be visible beside the VDP field.[2]
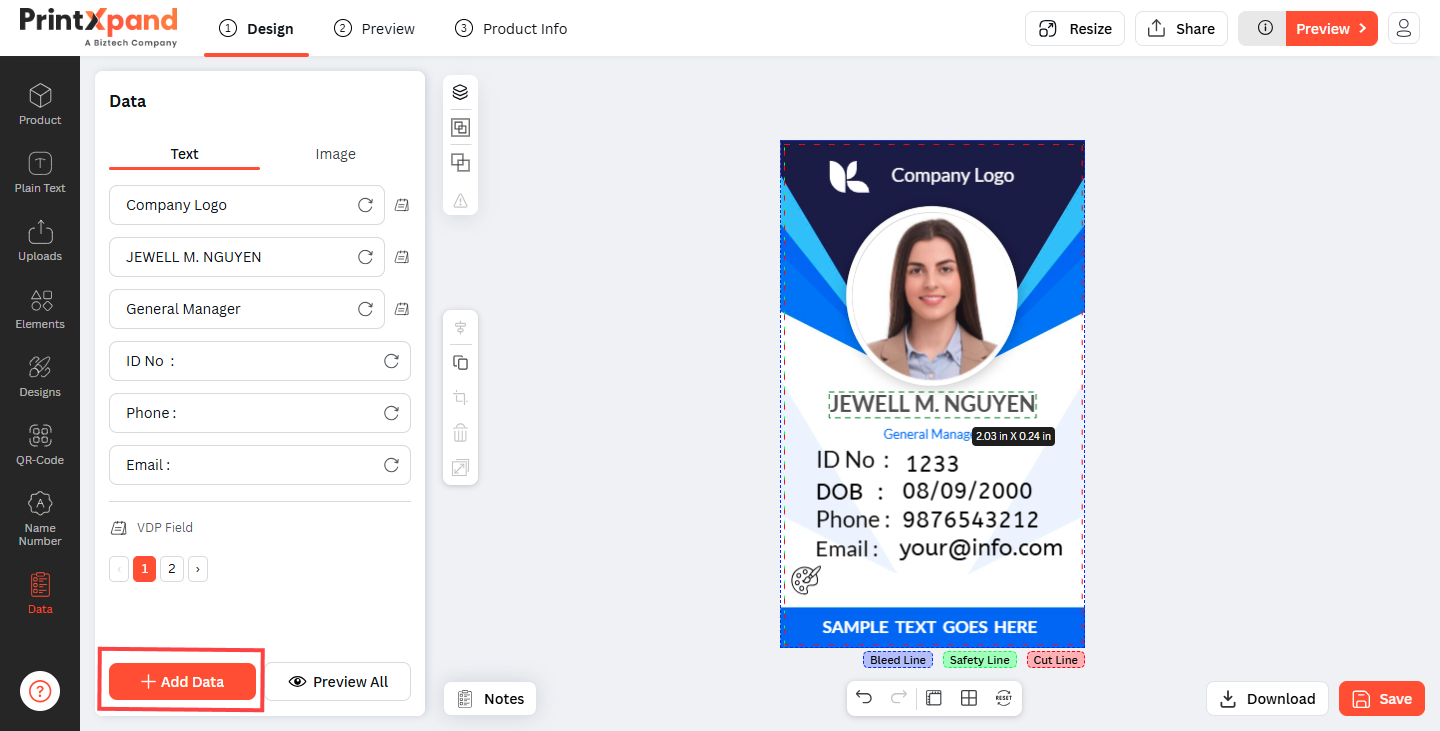
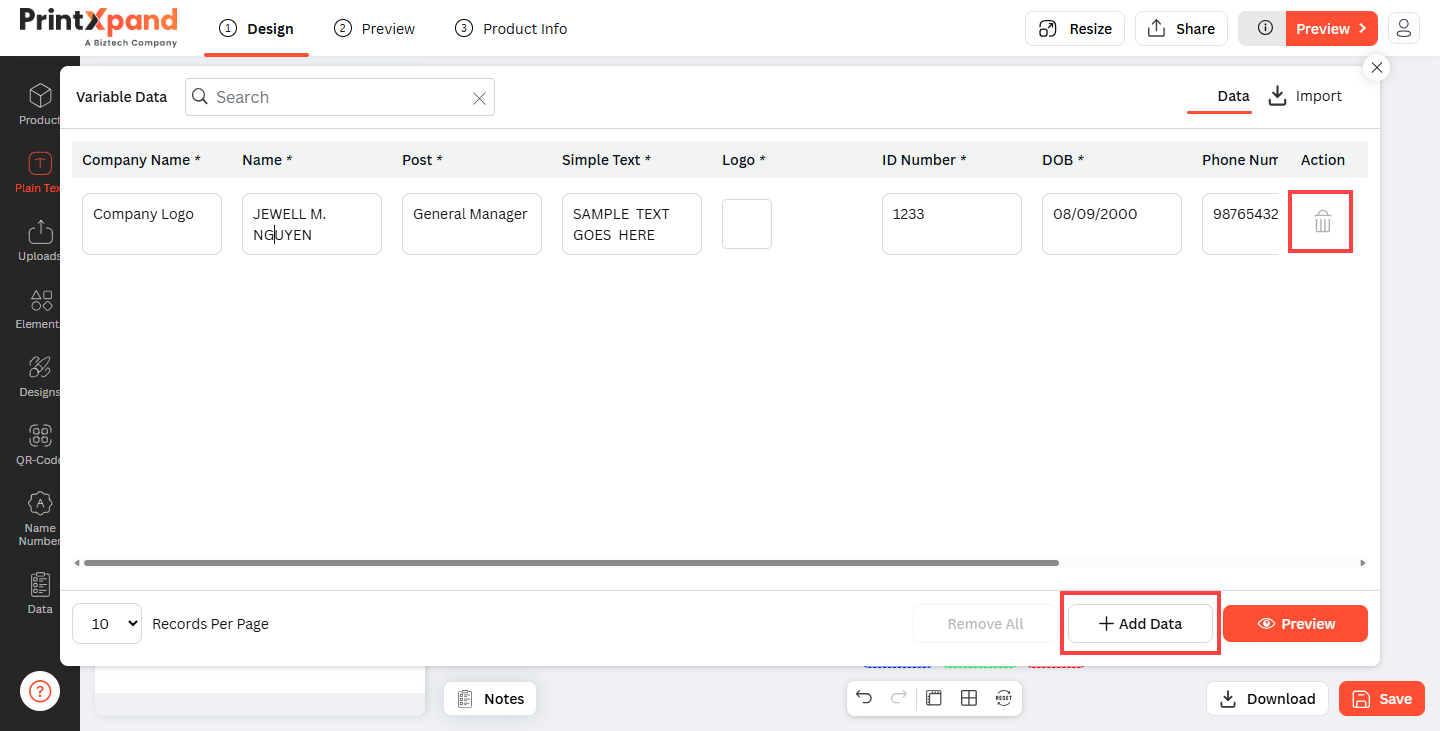
From the Data section your customer can add records. By clicking on the Add Data button a pop up will appear. [3]
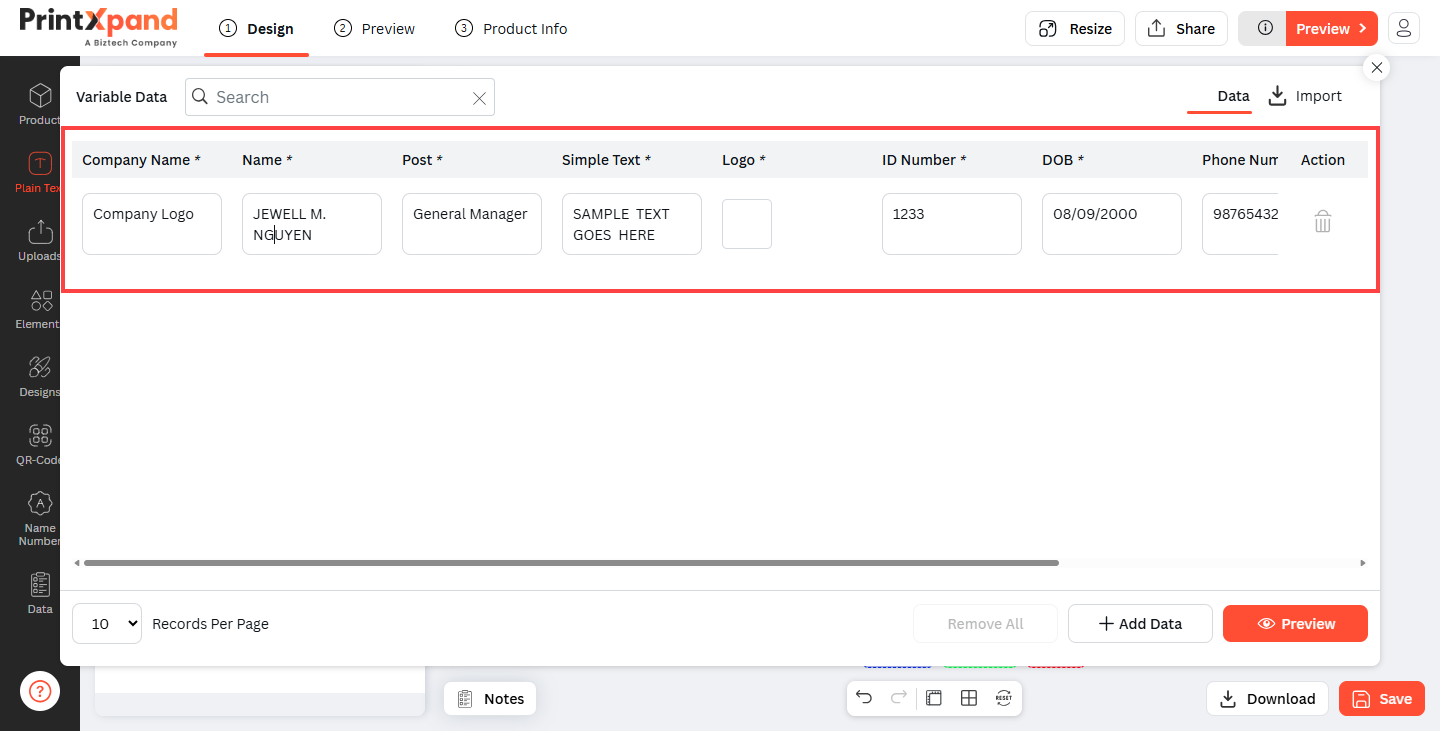
There are various fields in this pop-up where your customers can add the details by clicking on any column customer can add the fields data. Certain fields that are set to be mandatory are represented with the black asterisk beside the title. [4]
Here more records can be added through the Add Data button. Also, one can delete these records by clicking on the Delete icon in the Action column. [5]
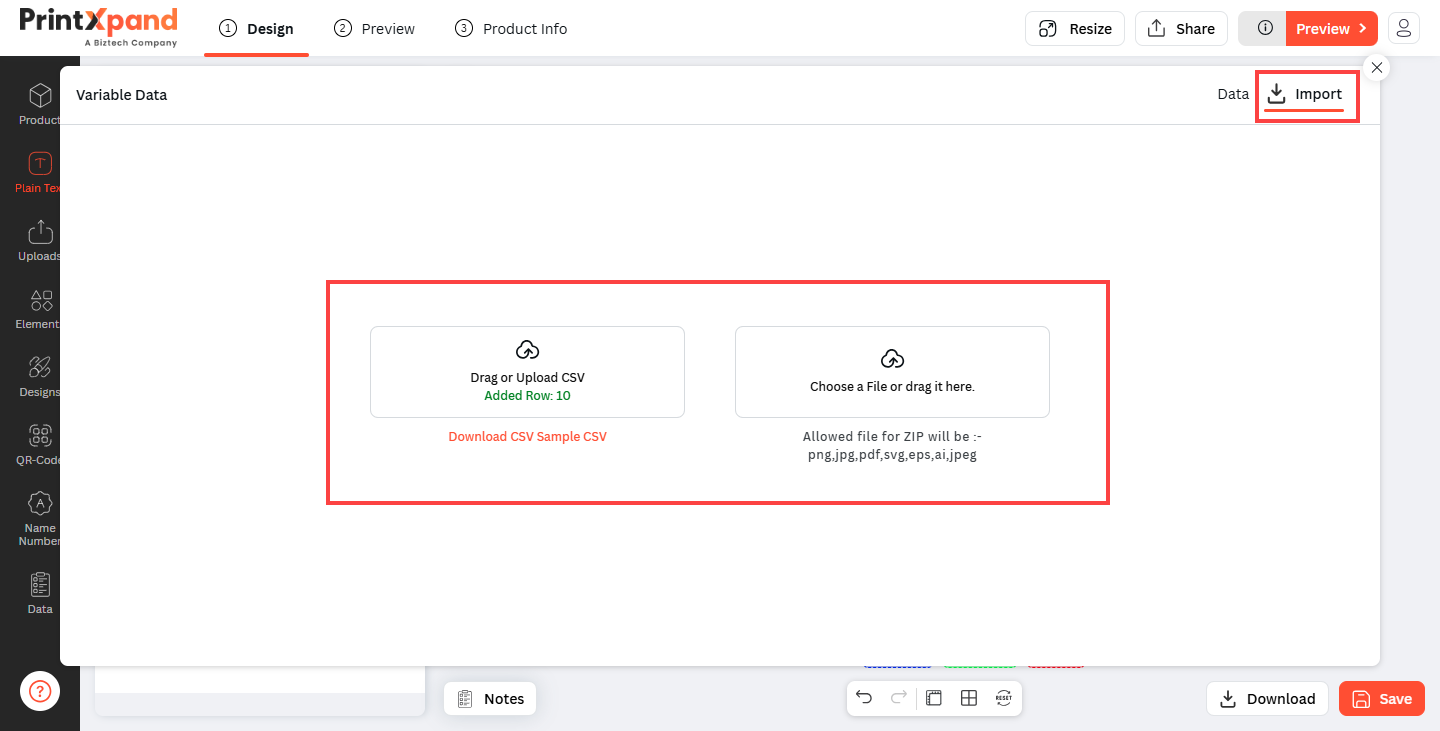
You can upload the ZIP and CSV files through the highlighted section.
Note : Zip file should be uploaded before uploading CSV file.
Note : Those file types that are mentioned can only be uploaded.
There is Choose a Import section, from where your customers will be able to upload a Zip file.
In order to upload a CSV file where all the details of the entries are present, click on the Drag or Upload CSV. If needed a sample CSV file can be downloaded by clicking on the Sample CSV. [6]
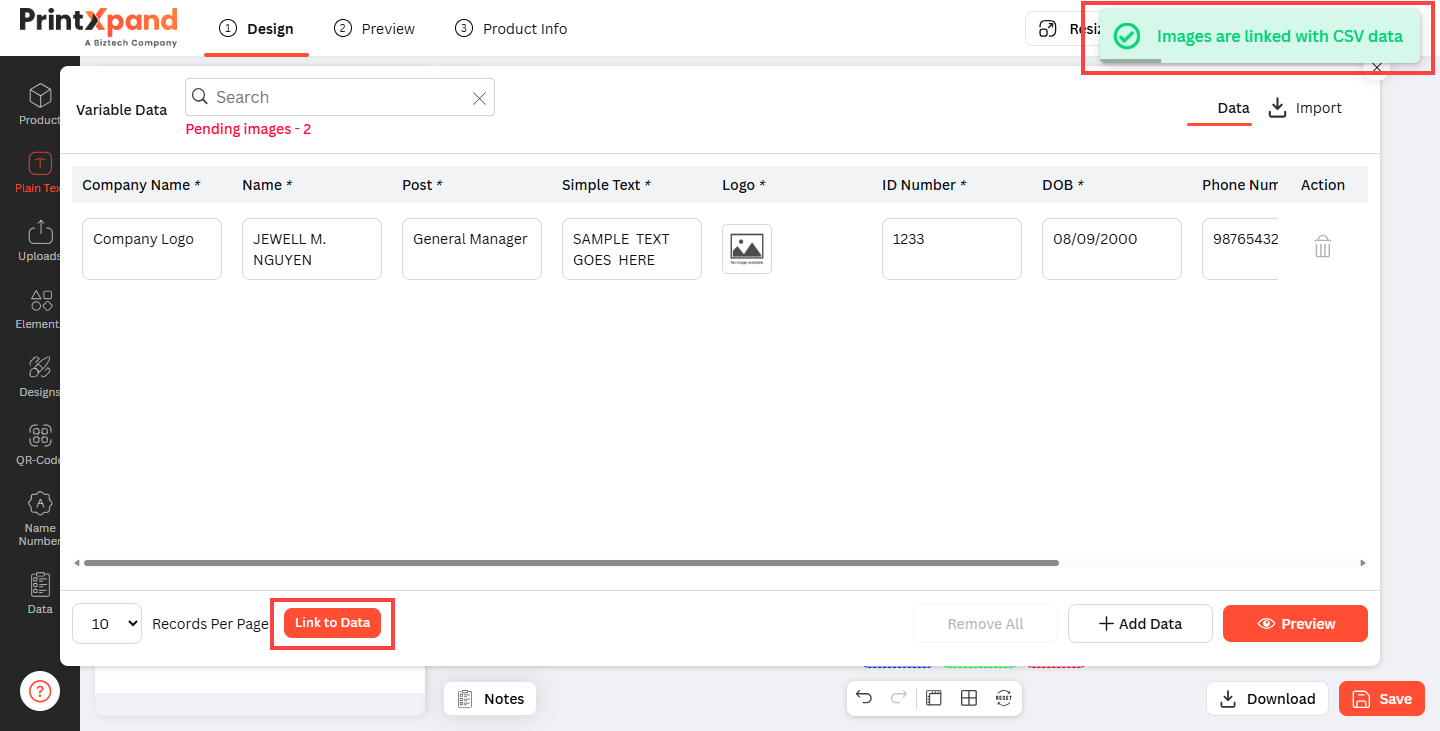
After the CSV files are uploaded, link them to the records, in order to display them in the ID Cards and by doing so, a toast message will appear stating that the linking was successful. [7]
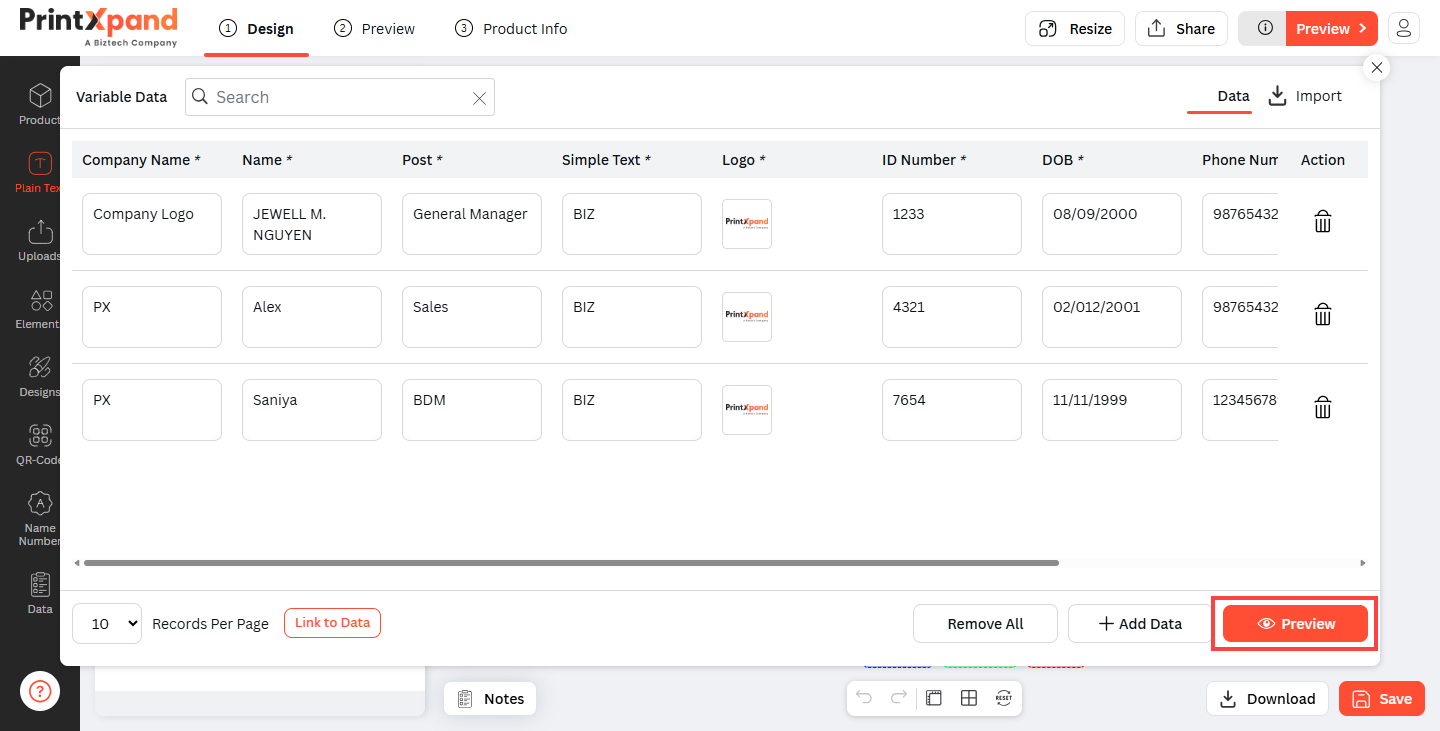
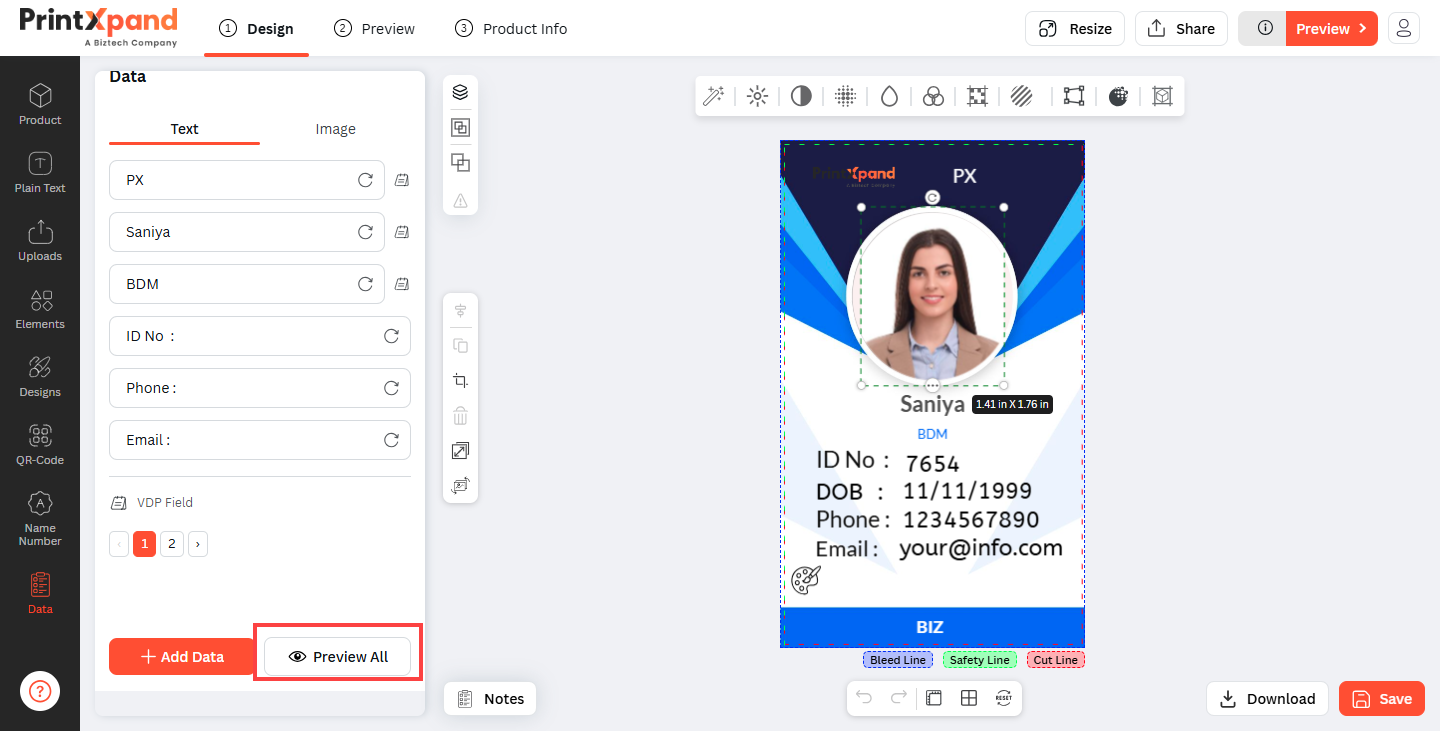
Preview All button provides your customer with the view of the ID Cards along with all the entered data. [8]
Now in order to save the records click on Save & Close.
Your customers can also view the ID cards as per the records they have entered by clicking on the Preview All button beside the VDP data. [9]