Product Level Configuration
To enable the RFQ (Request for Quote) option for a product in PrintXpand Designer Tool 4.0, follow the steps below:
Navigate to Product Design Settings
Go to Product → Catalog → Design Settings and open the configuration page for the required product.
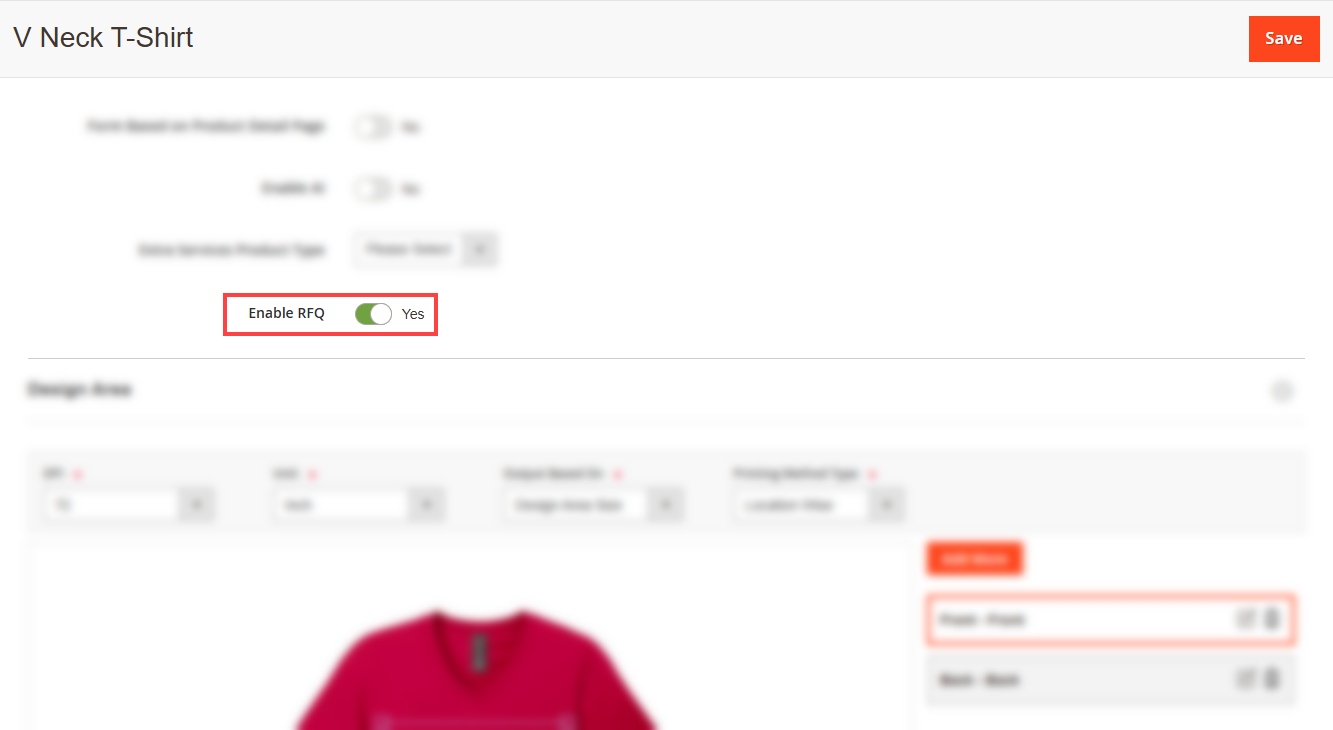
Enable the RFQ Option [1]
In the Designer Settings section, locate the Enable RFQ toggle and switch it ON. Enabling this option will set the product as an RFQ-enabled product, allowing quote request option on PDP page.
Configure the Designer Area
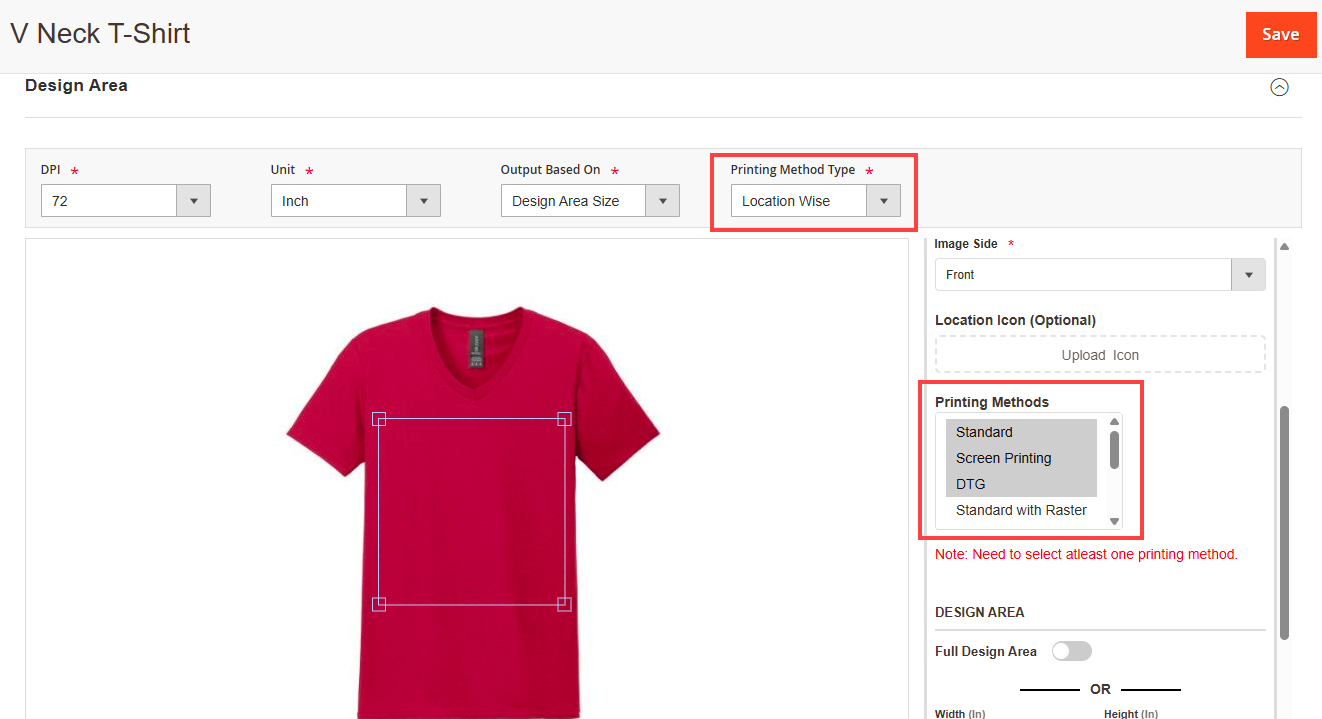
Scroll to the Designer Area section and select the Printing Method Type as Location Wise. After selecting this option, configure the design area according to the preferred printing methods for the product. [2]
Once the design area and printing method settings are configured, click the Save button to apply and store the changes.
Note: To use the RFQ feature, the Printing Method Type must be set to Location Wise. The RFQ functionality does not work with the Global Printing Type, so ensure the correct printing method is selected during configuration.
After completing these steps, the RFQ feature will be successfully enabled for the product. The product will now support quote requests, which can then be processed through the storefront.
Frontend View
Go to the Product Detail Page and select the required product configuration such as size, color, or other available options. [3]
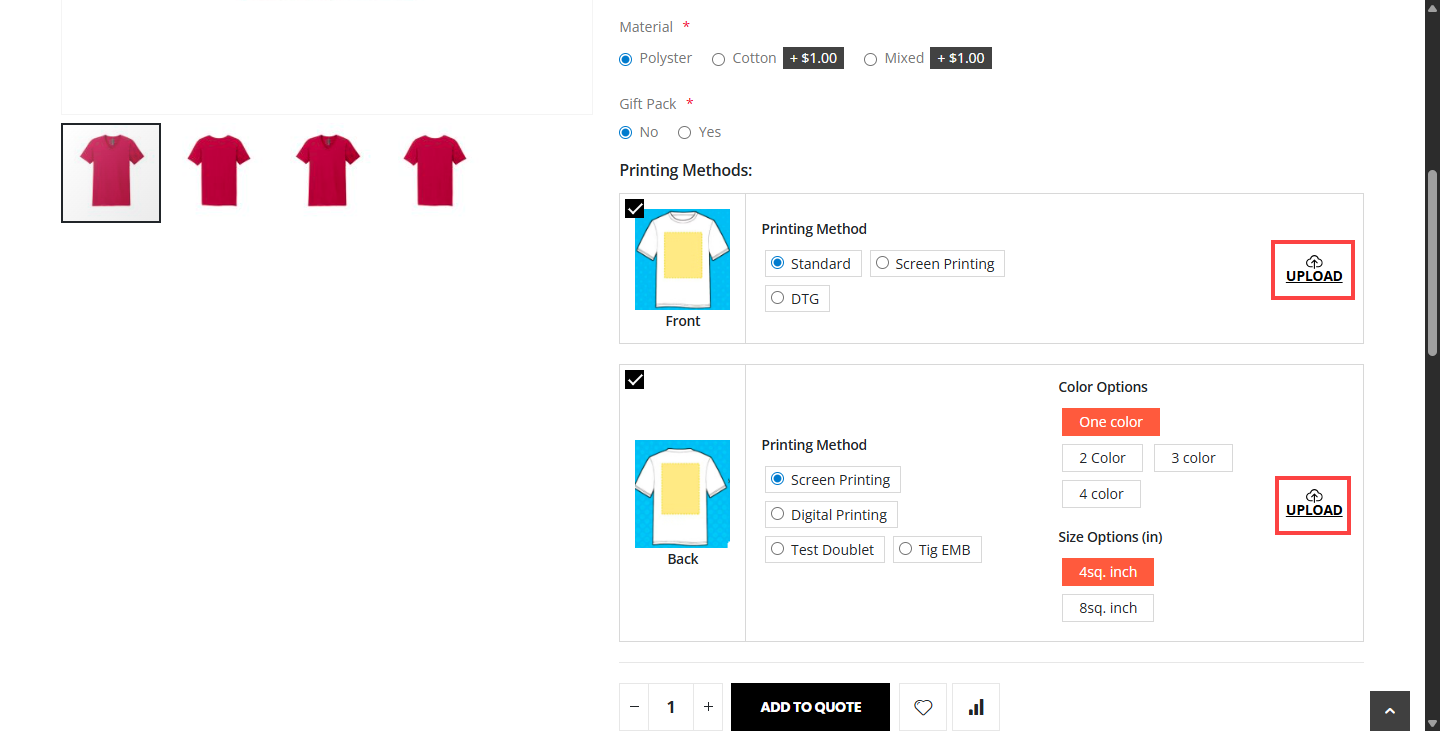
After selecting the configuration, the Printing Method section will appear. Choose your preferred printing location on the product where you want the design to appear (for example: front, back, sleeve, or other available areas) and the printing method based on how you want your design to be applied to the product.
Once the location is selected, the Upload Design option will become visible.
Click Upload Design and upload your preferred design file or logo image that you want to print on the selected location.
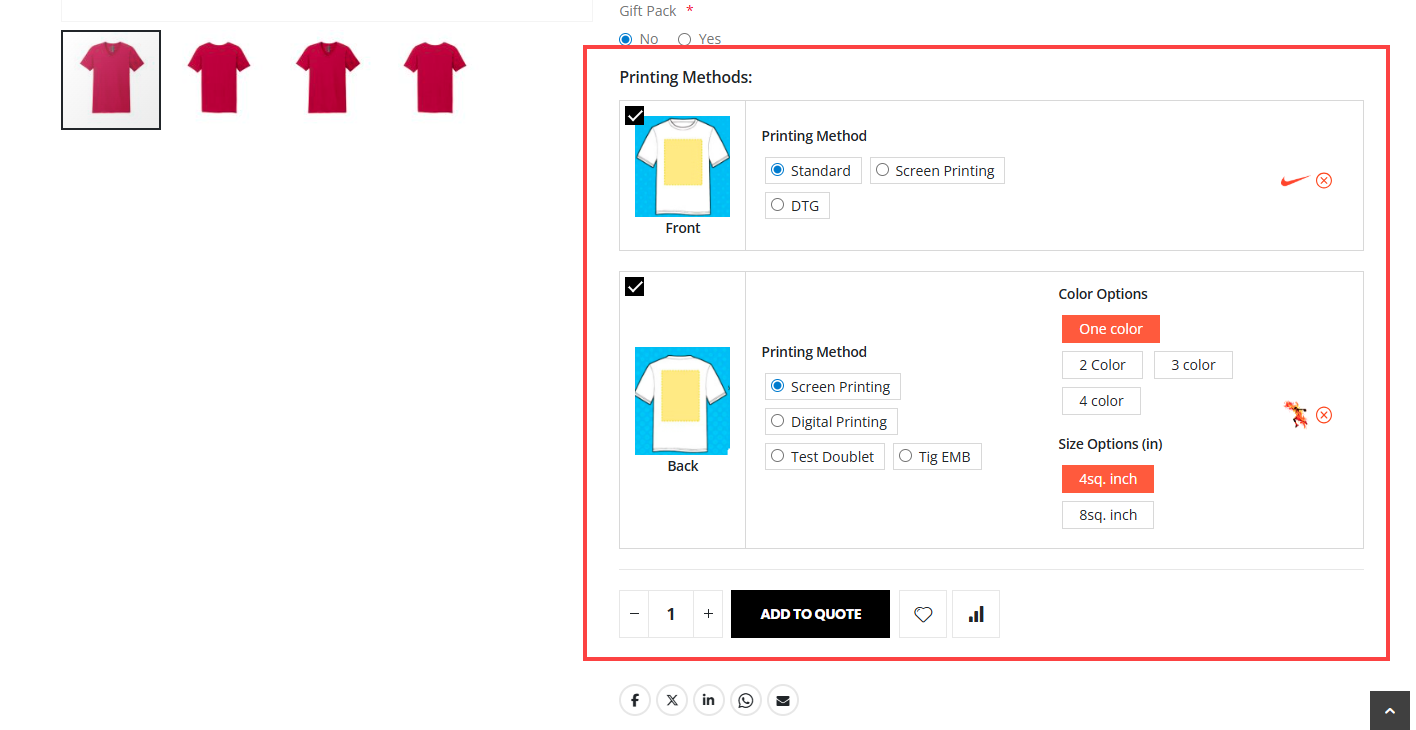
The uploaded image will be visible on the PDP, review the selected printing method, location, and uploaded design, then proceed to submit your RFQ (Request for Quotation). [4]
After selecting the required product options and customization, click on the Add to Quote button to proceed with your request.
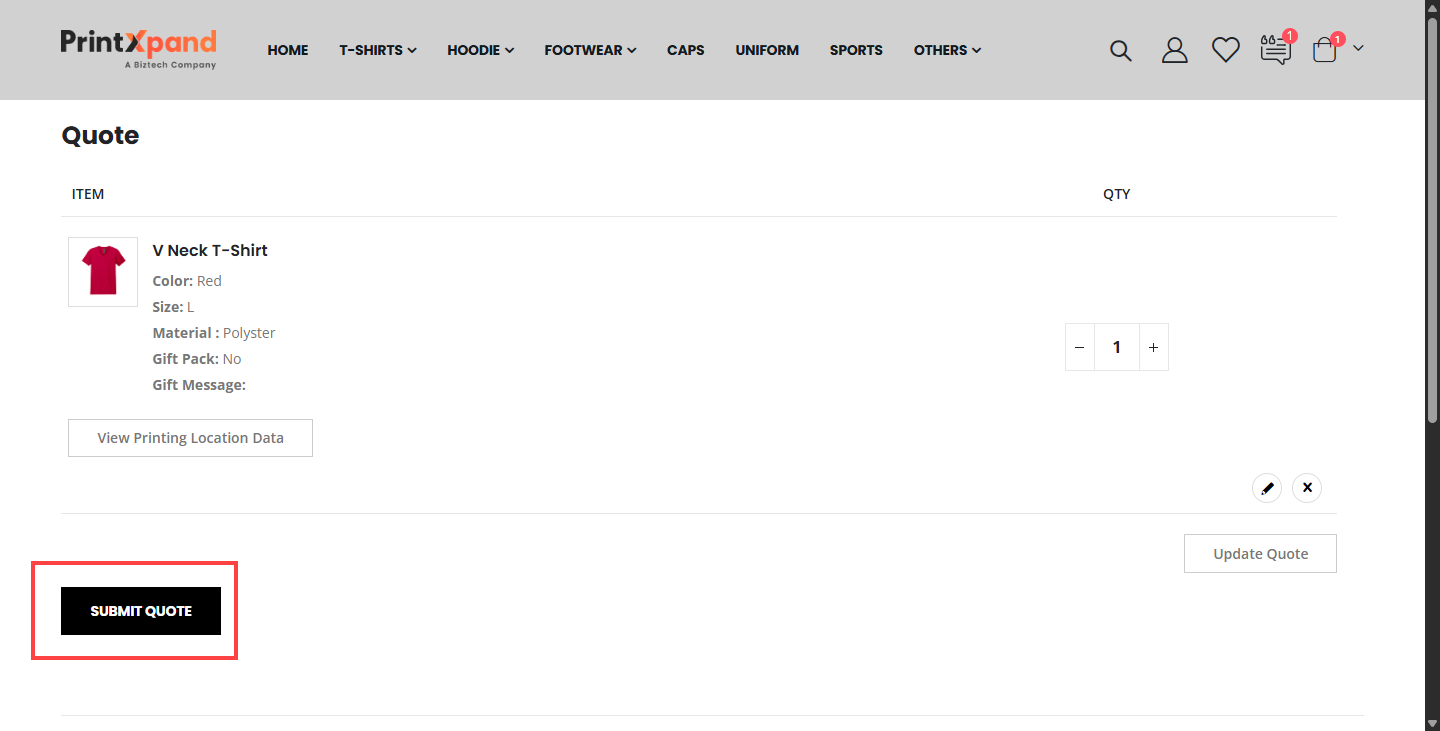
You will be redirected to the Quote Page, where you can review the selected product details, quantity, and customization information before submitting the request. [5]
Once you have reviewed all the details, click on the Submit Quote button to send your request.
Your quote request will be submitted successfully, and the supplier will review your requirements and provide a quotation.
Customers can track the progress and check any updates related to their request in the My Quotation section.
In My Quotations, you can view the quote status, supplier responses, and further actions related to your submitted request.
Sales Orders
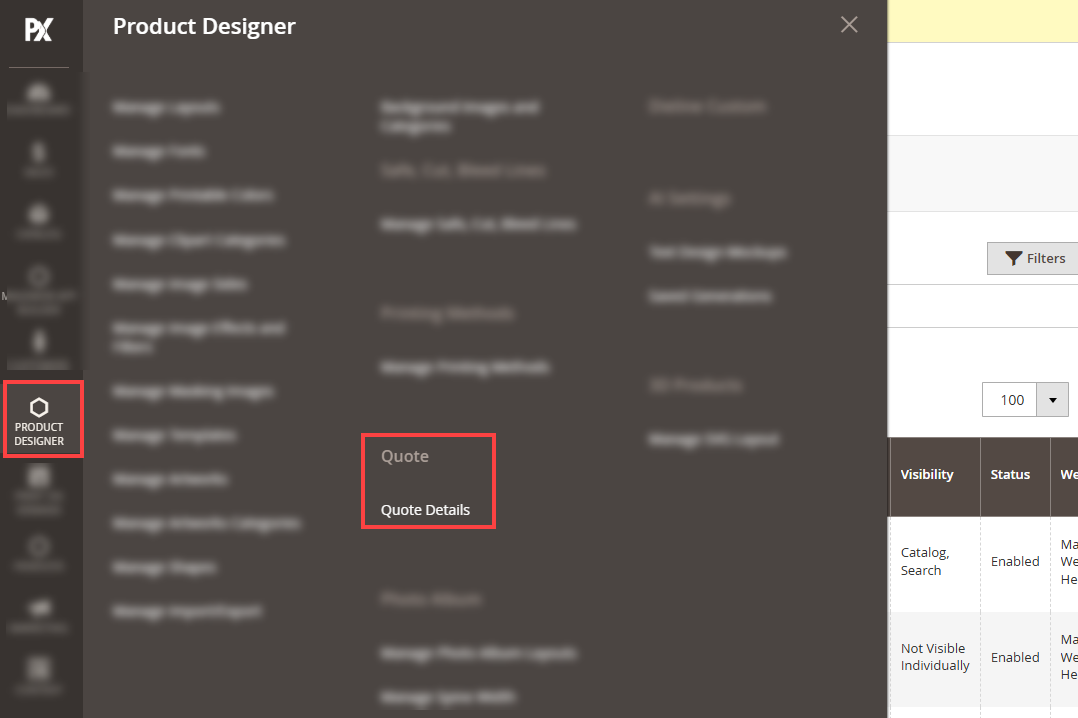
Once the Quote is submitted by your customers, you can view it by navigating to the Product Designer ➤ Quote Details, you will land on the listing page of the Quotation. [6]
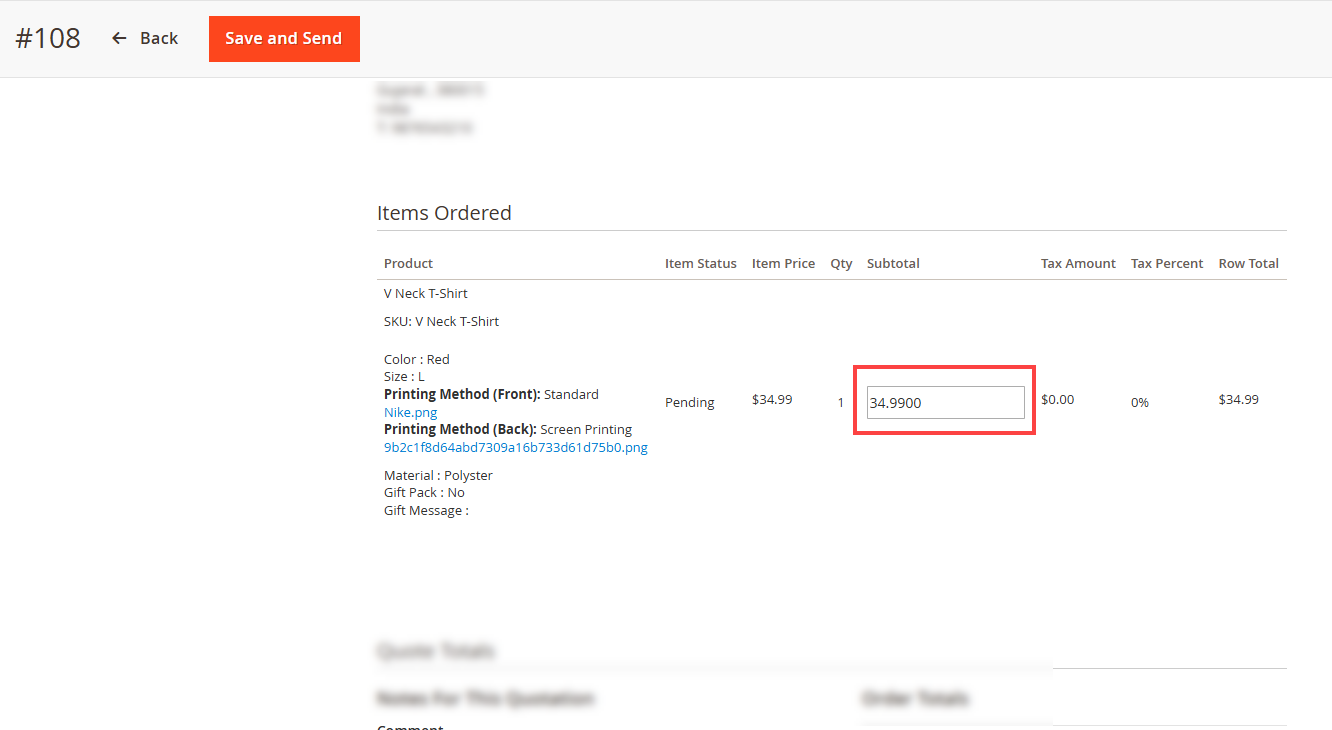
Click on the View button to open the quote and navigate to the Quote Details page. Scroll to the Items Ordered section to review the selected printing method, printing location, and uploaded design provided by the customer.
Enter the price in the Subtotal field and click Save and Send. The submitted price will be reflected in the My Quotation module on the customer side. [7]
The quotation price will be sent to the customer, where they can review the proposal and choose to either Confirm and Checkout the quote or Reject the proposal based on their requirements.
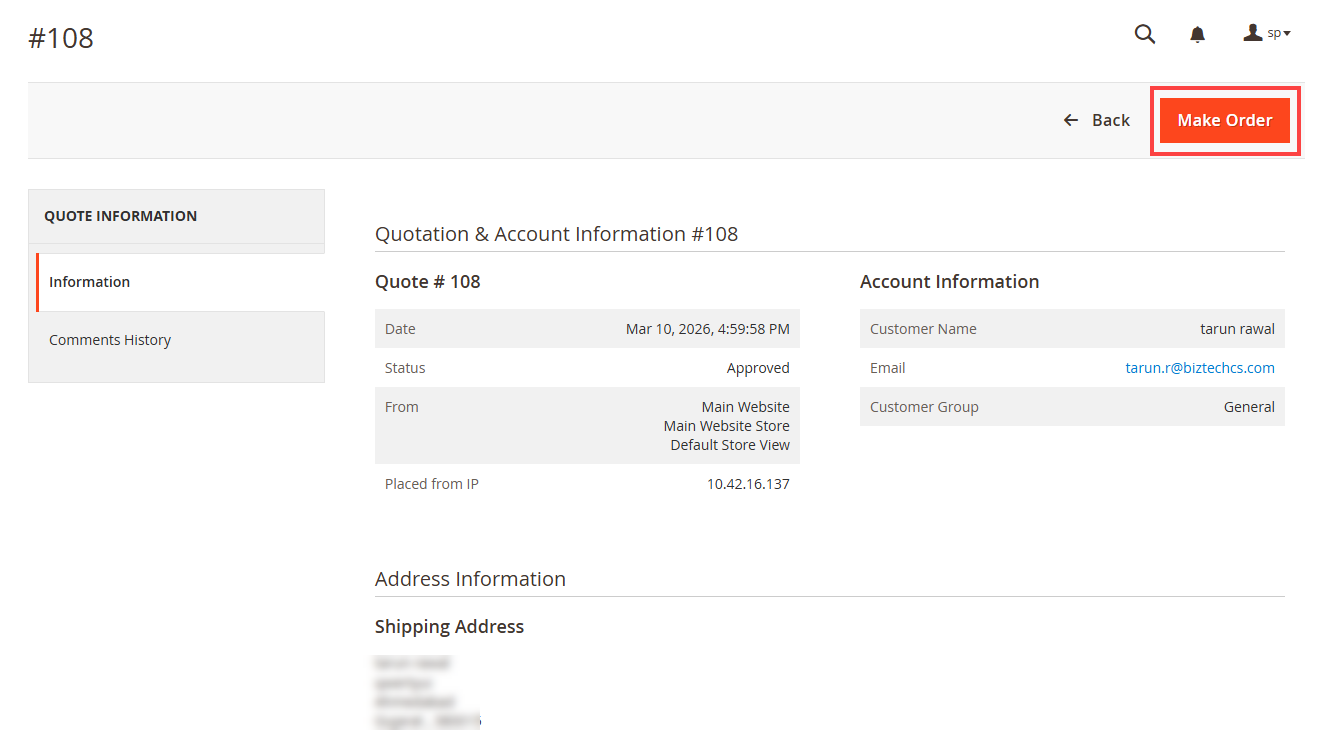
If the customer accepts the quotation, the Make Order button will appear on the admin side; clicking this button will convert the quote into an order, and the order details will then be visible in the Orders module for further processing. The customer got the order confirmation mail. [8]