Store Configuration
To use the AI services you first have to connect with the AI feature. To connect Navigate to Store > Configurations > Product Designer Settings.
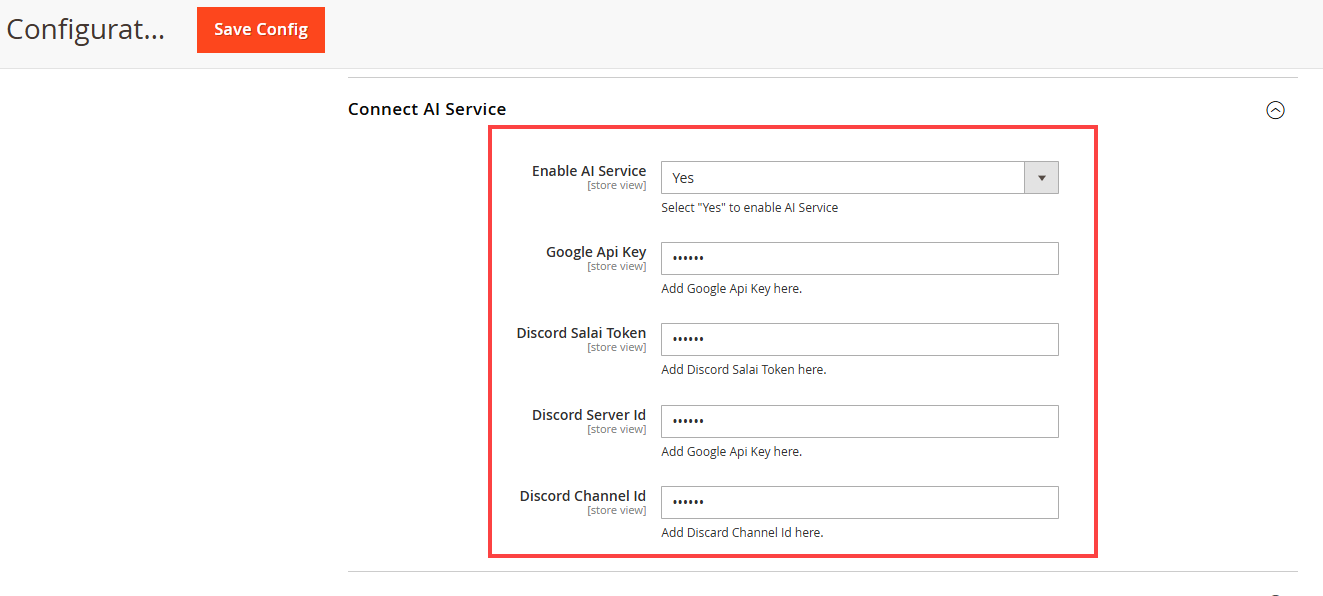
In the Product Designer Settings, scroll down to the Connect AI Service section. First, enable the AI Service option, then fill in the following details:
Google API Key: Enter your Google API key for AI functionality.
Discord Salai Token: Enter your Discord token.
Discord Server ID: Enter the Server ID used for AI integration.
Discord Channel ID: Enter the Discord Channel ID
After entering all the required details, click the Get Token button. The process may take a few seconds to complete.
Click the save button after configurations.
Saved Generations
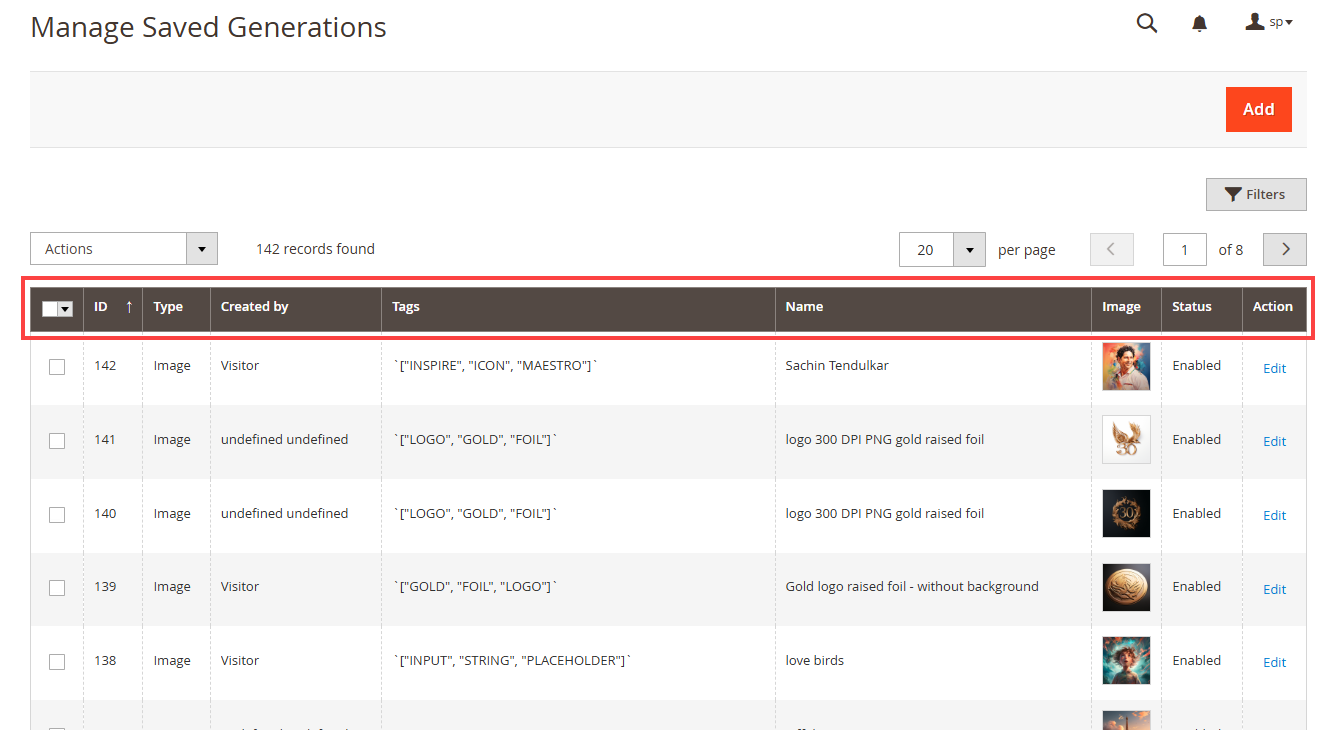
To view saved image generations of customers, navigate to Product Designer > AI Settings > Saved Generations. Here, the admin can view a list of saved AI-generated images. [2]
The table consists of ID, Type, Created By, Tags, Name, Image, Status and Action column.
Product Level Configuration
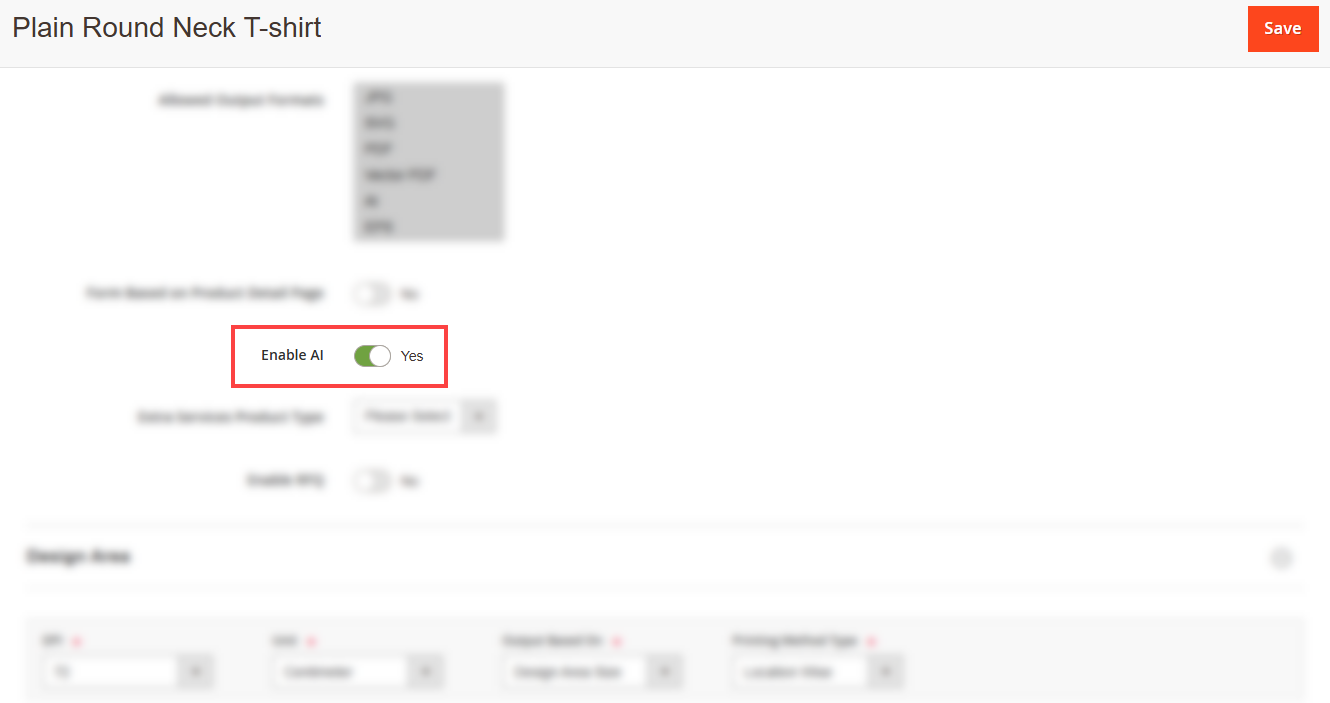
Now, navigate to Catalog > Products. Open the Designer Settings of the desired product, then locate the Enable AI Service toggle. Switch it on to enable AI functionality for that specific product.
AI image feature is configured for the following product now lets see how it works on store-front.[3]
Frontend View
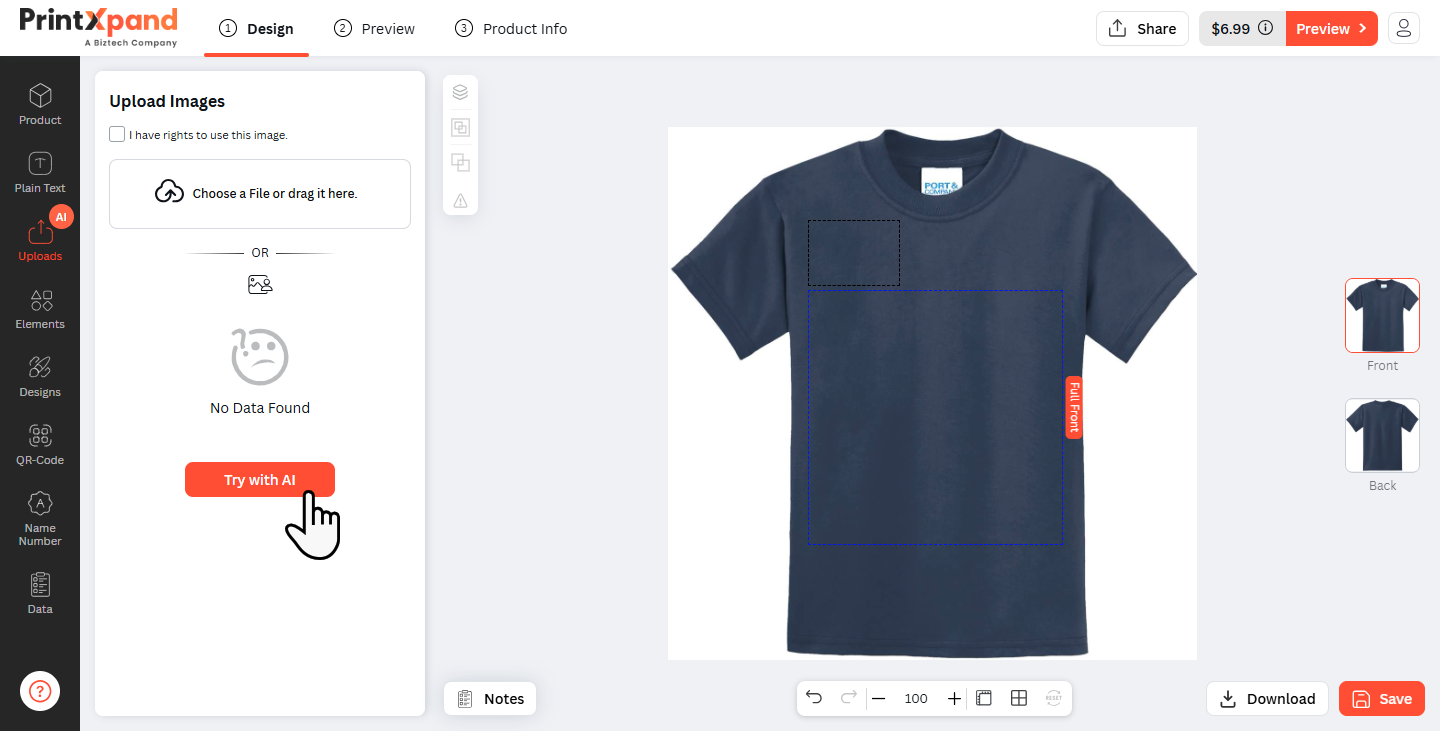
To generate an image, navigate to the Designer Explorer and click on the Upload Tab. Then, click the Try with AI button.[4]
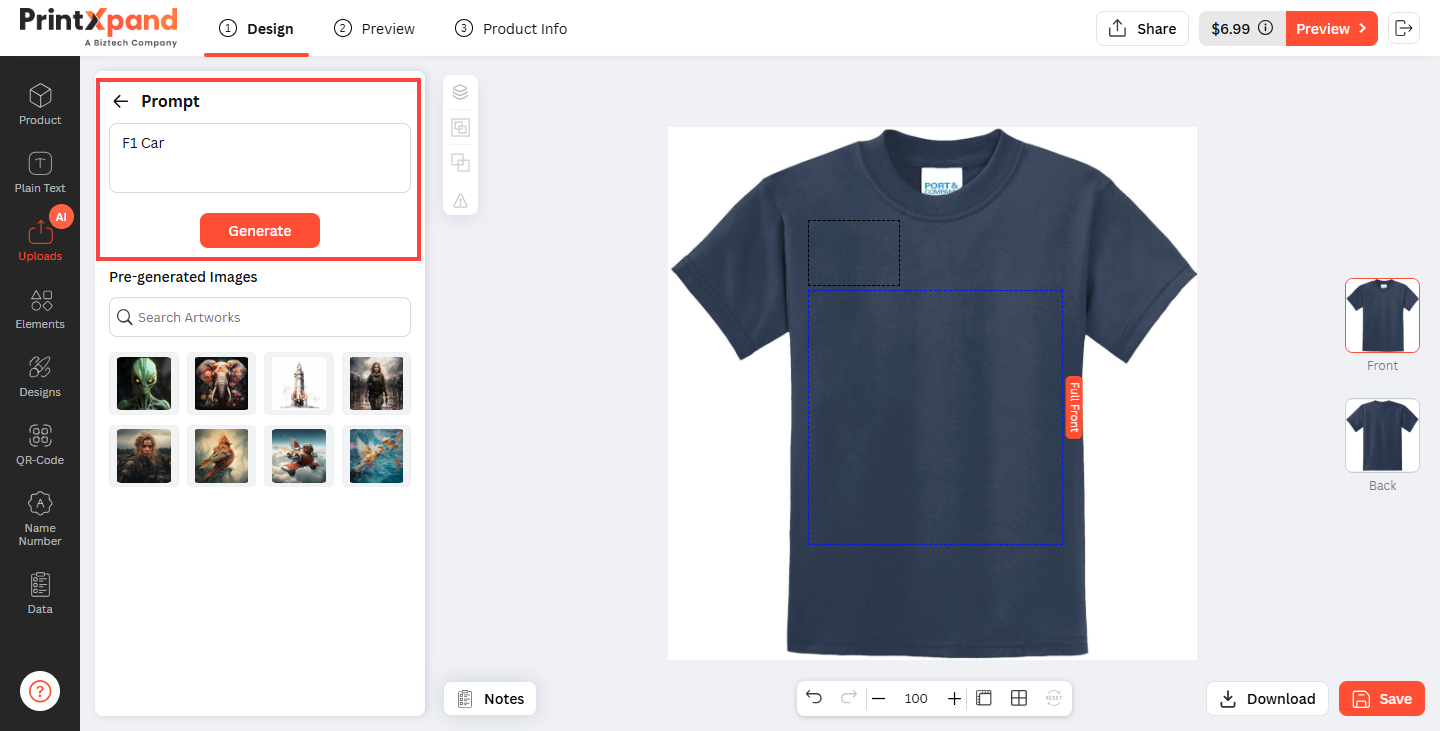
Enter your prompt and click Generate. The image generation process begins.[5]
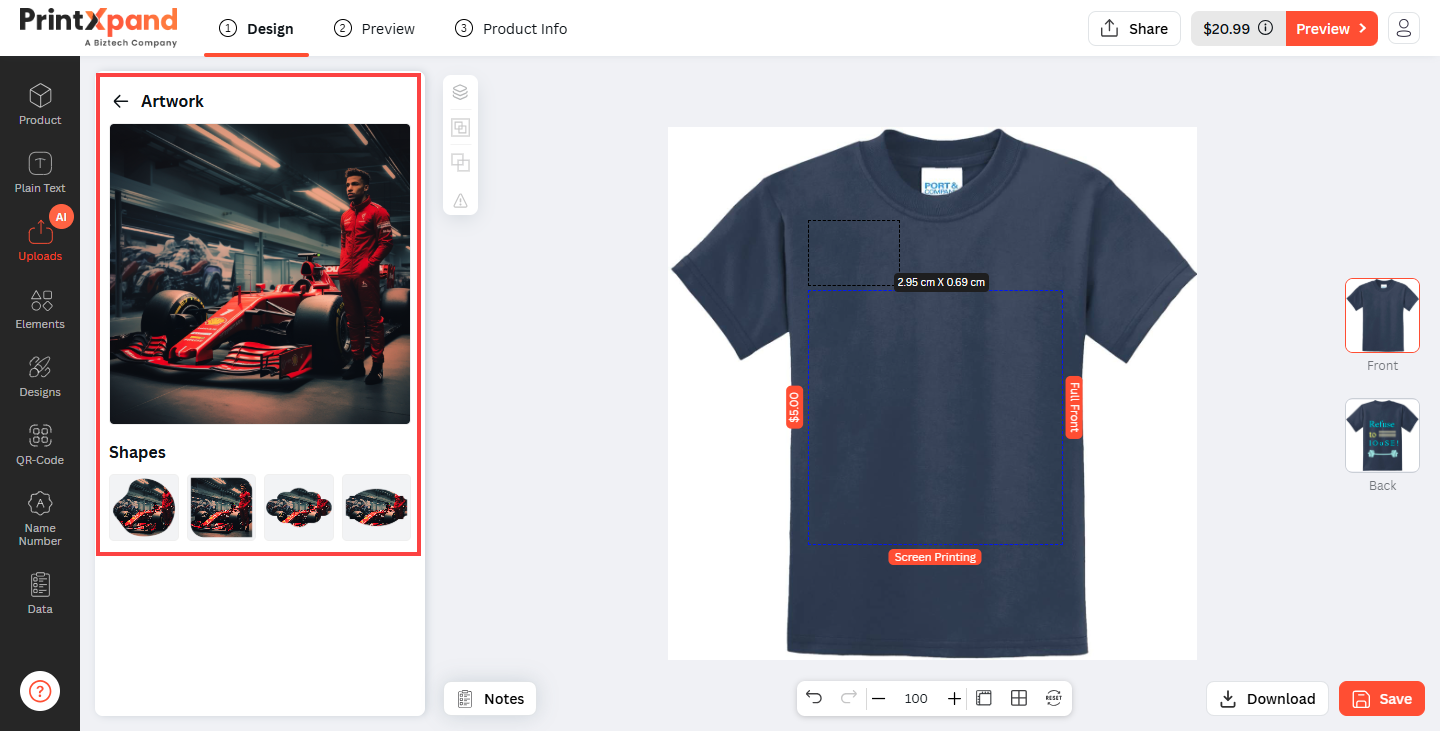
Once the AI-generated images appear, browse through the variations and click on the desired image to add it to your design.
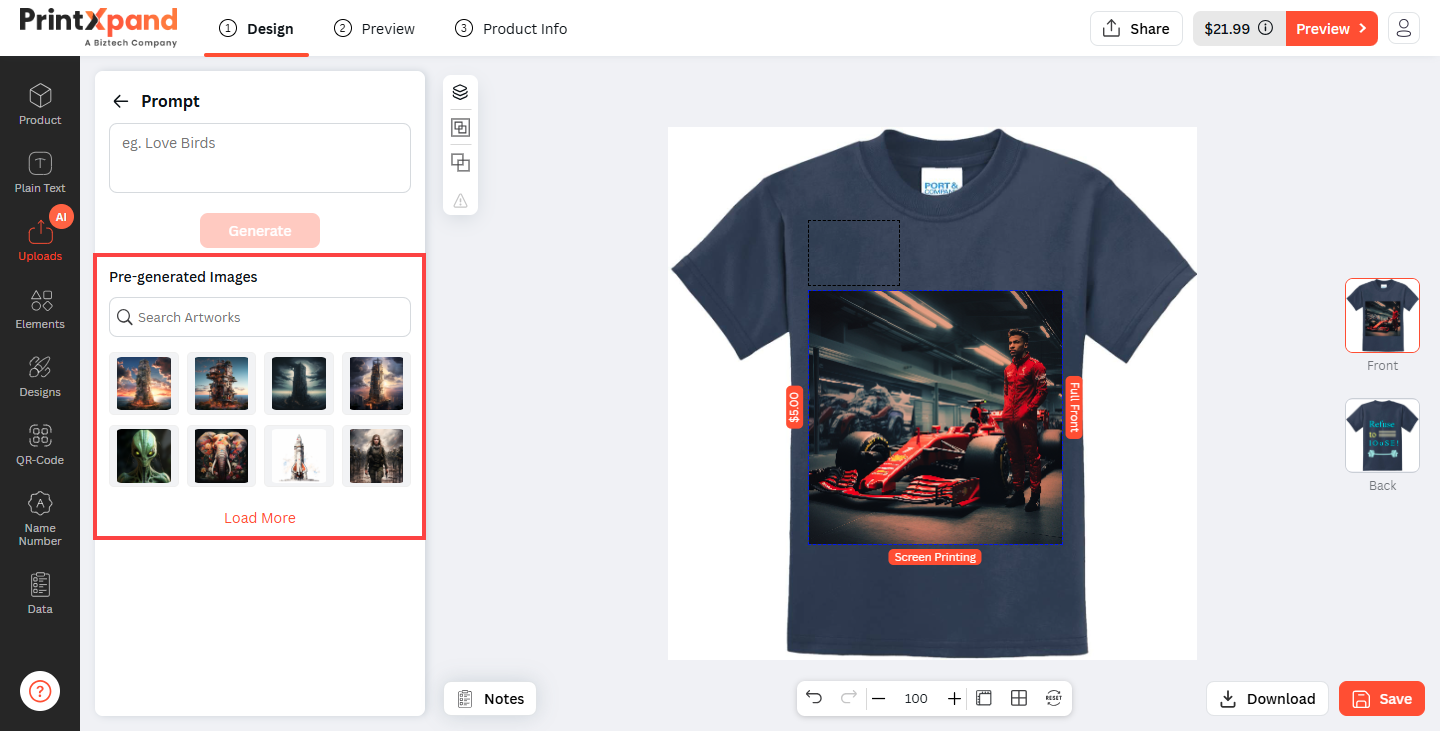
After image selection, customers can directly add images to the canvas or add with the Shapes enabled by the admin for AI images from the backend. [6]
All the pre-generated images are visible in the Pre-generated images section and customers can search the images from the Search bar. [7]