Backend Configuration
You can manage the ready-made fonts to allow the customers to select the Font style to design any text elements. You can select the default values at the store level.
Pre-requisite
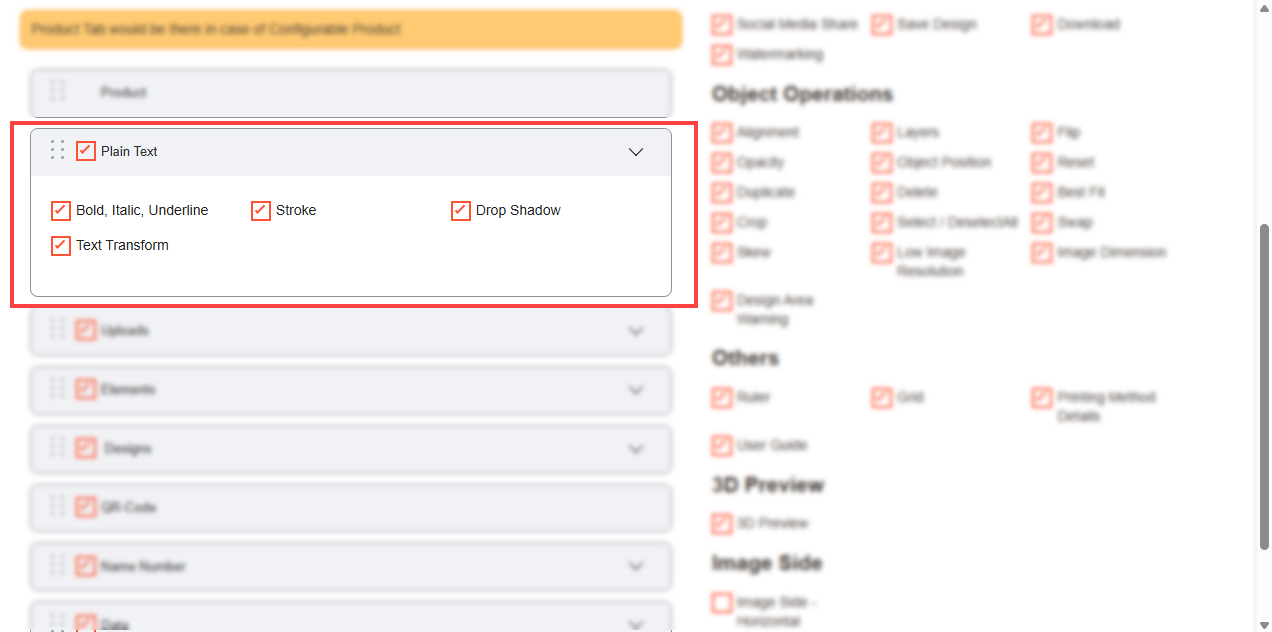
You have to enable the Plain Text tab in the Product Designer ➤ Manage Layouts. You will land on the listing page of the layouts. Now open the layout in Edit mode and enable the Plain Text functionality.[1]
Manage Font
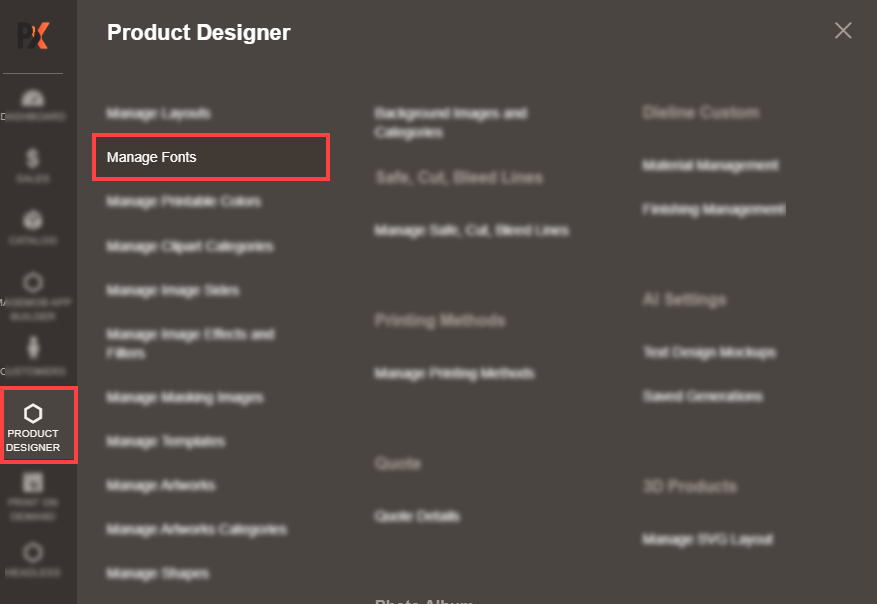
First, you must add and manage the different font styles to allow the customers to design the product using the text object. For that, go to the Product Designer → Manage Font. [2]
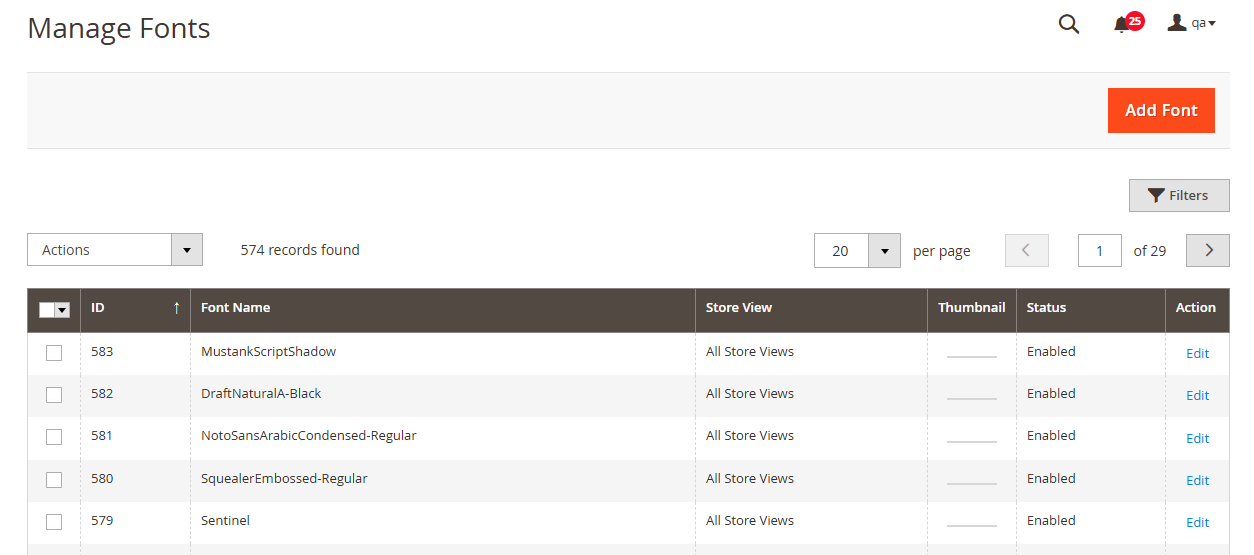
You will navigate to the listing page of the Fonts. You will see the Font details like Id, Font Label, Font Image (if available), Status, and Actions. [3]
You will get the pre-loaded Fonts to allow customers to design the text elements using these fonts. You can edit the Fonts and manage accordingly.
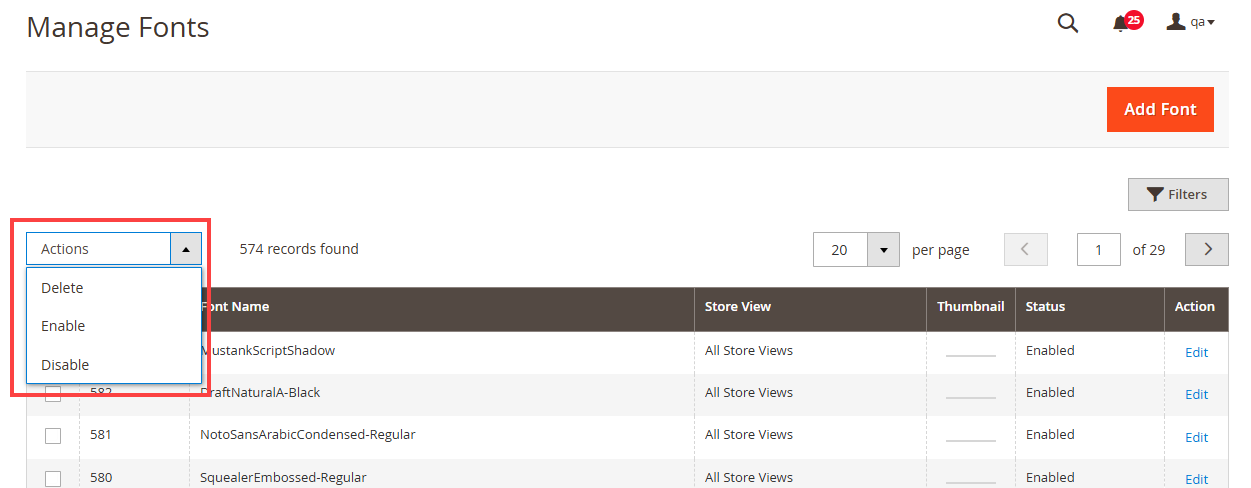
If you want to ‘Delete’ any Font, select the Font and click on the ‘Delete’ option from the ‘Actions’ dropdown list. A confirmation pop-up will appear after you click on the ‘Delete’ option. Select “OK” to perform the delete action.
Similarly, you can change the font status to Enable / Disable from the ‘Actions’ dropdown list. [4]
Add Font
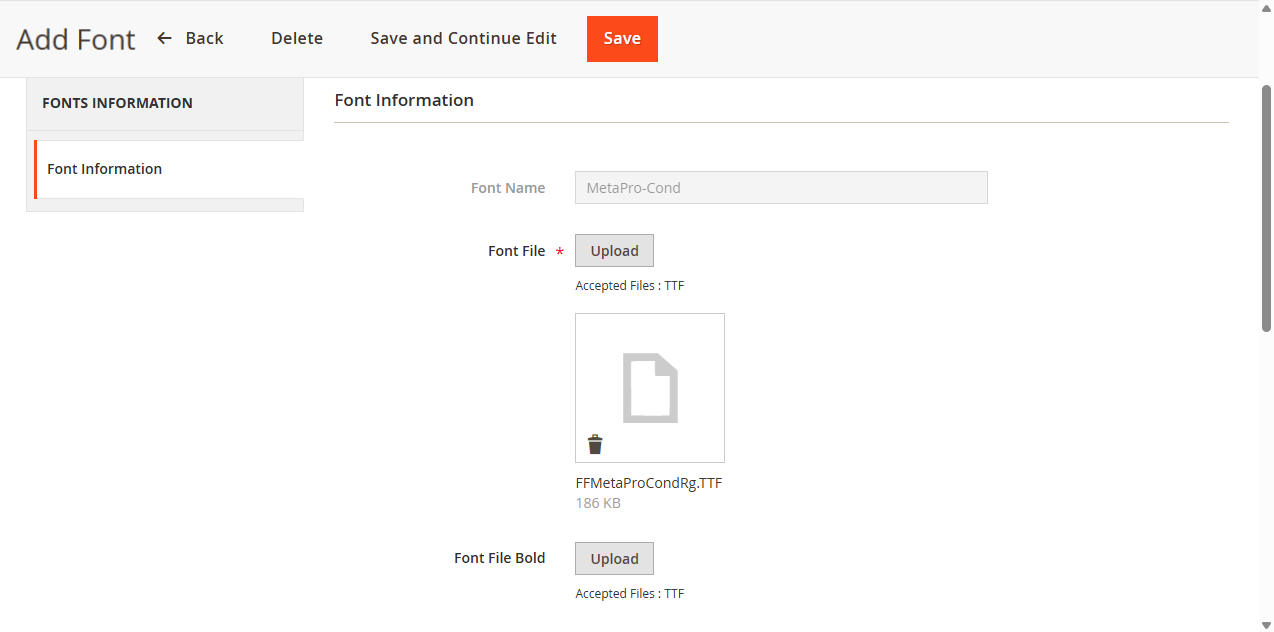
If you want to add the new font then click on the “Add Font” button and insert the following information. [5]
Font Name: Here the name of the font will be displayed from the uploaded font file.
Font File: Upload the font file.
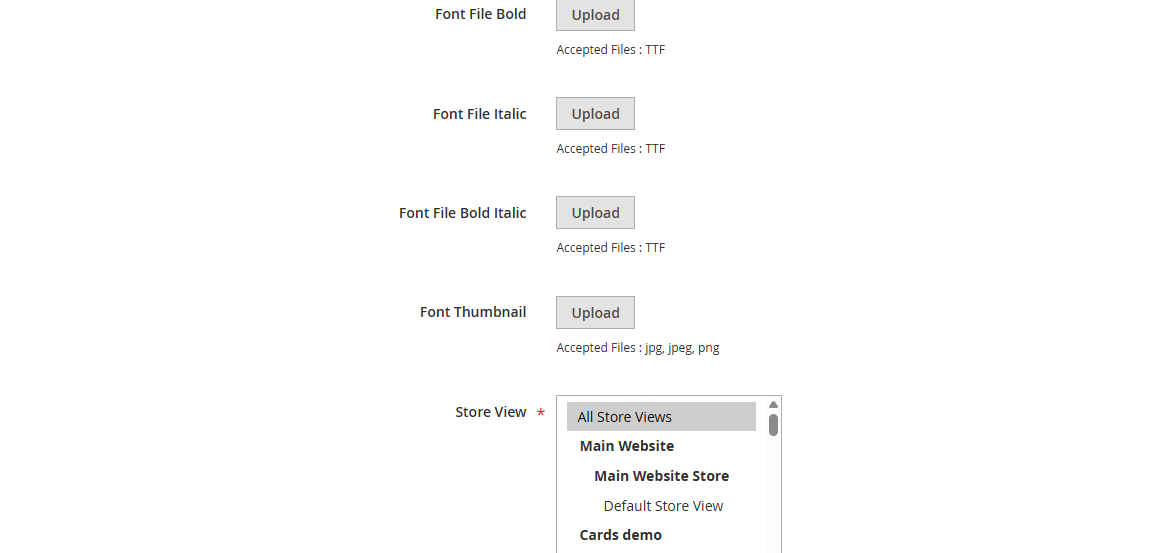
Font File Bold: Upload the font file with the Bold styling.
Font File Italic: Upload the font file with the Italic styling.
Font File Bold Italic: Upload the font file with the Bold & Italic Styling.
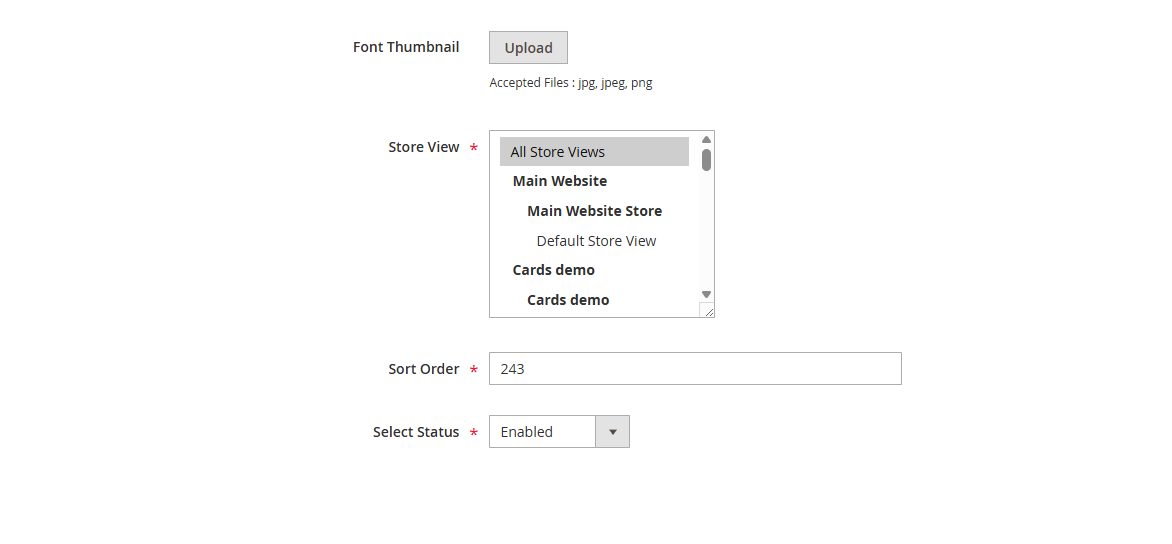
Font Thumbnail: Upload the image to be shown as a thumbnail. [6]
Store Views: Select the store views in which you want to add this font.
Sort Order: Insert the number on which you want to display this font on the front end.
Select Status: You can Enable or Disable the font from here. [7]
After adding the details for the font, click on the Save button.
Note :
If you have uploaded the above files then only you will get the output of fonts in the different stylings else you will get it in the simple form.
Also, if Bold and Italic files are not uploaded then the Bold & Italic functionality on the product designer tool will be disabled.
Frontend View
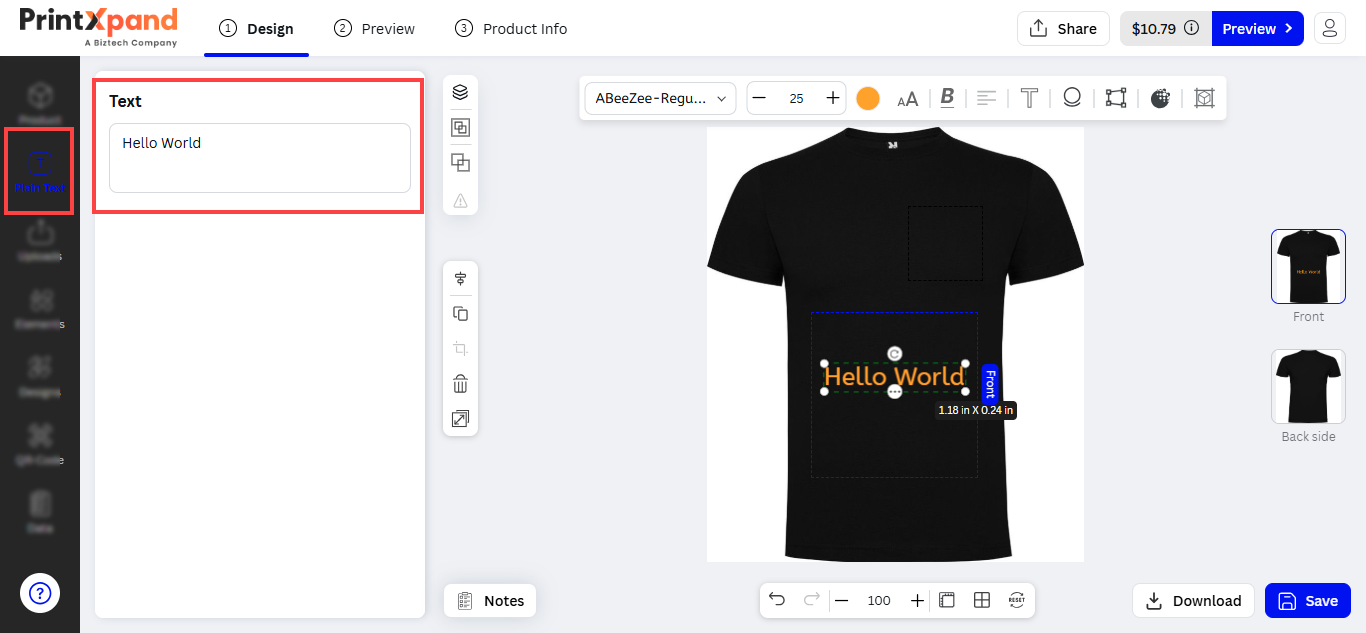
After managing the Font and configuring the default settings from the backend configuration, the customers will get the Text options to add to design the products. The customers can add the text objects by clicking on the Plain Text tab from the “Designing Explorer” panel.
The customers can insert the text which they want to add to the product design. When the customers insert a text, they will see the text object as per the default settings from the “Text Configurations” at the store level. [8]
Select another Font Style
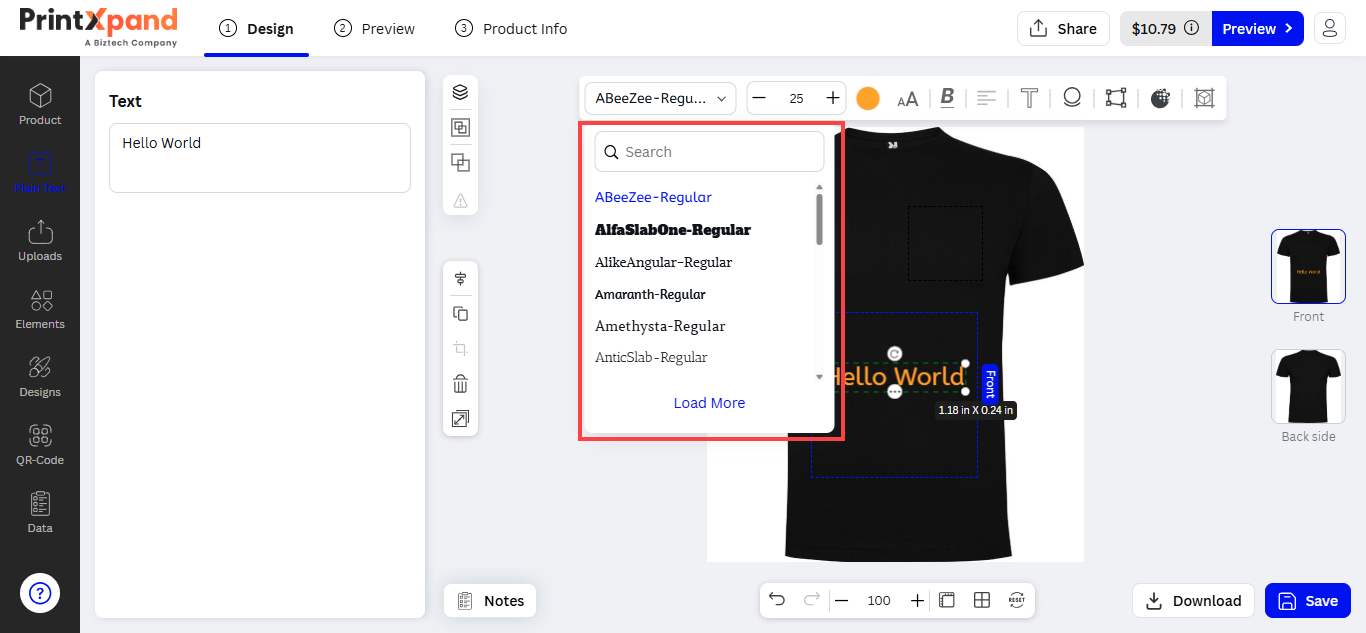
The customers can select the desired font style from the pre-loaded “Font Style” selection. The customers will get the “Font Style” as they have added. [9]
The customers can also search for the specific font style by inserting the text label.
Text Limits
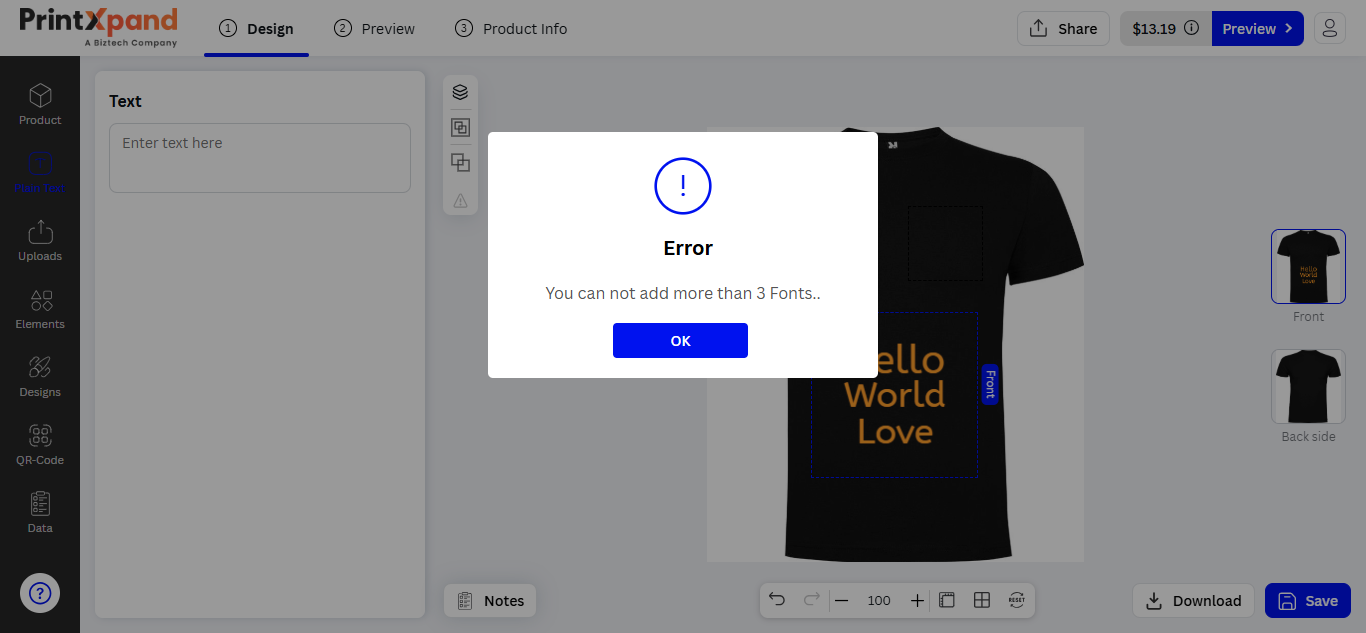
The customers can insert the Text until the text limit has exceeded. The customers will get an Alert message on exceeding the configured Text limit.[10]
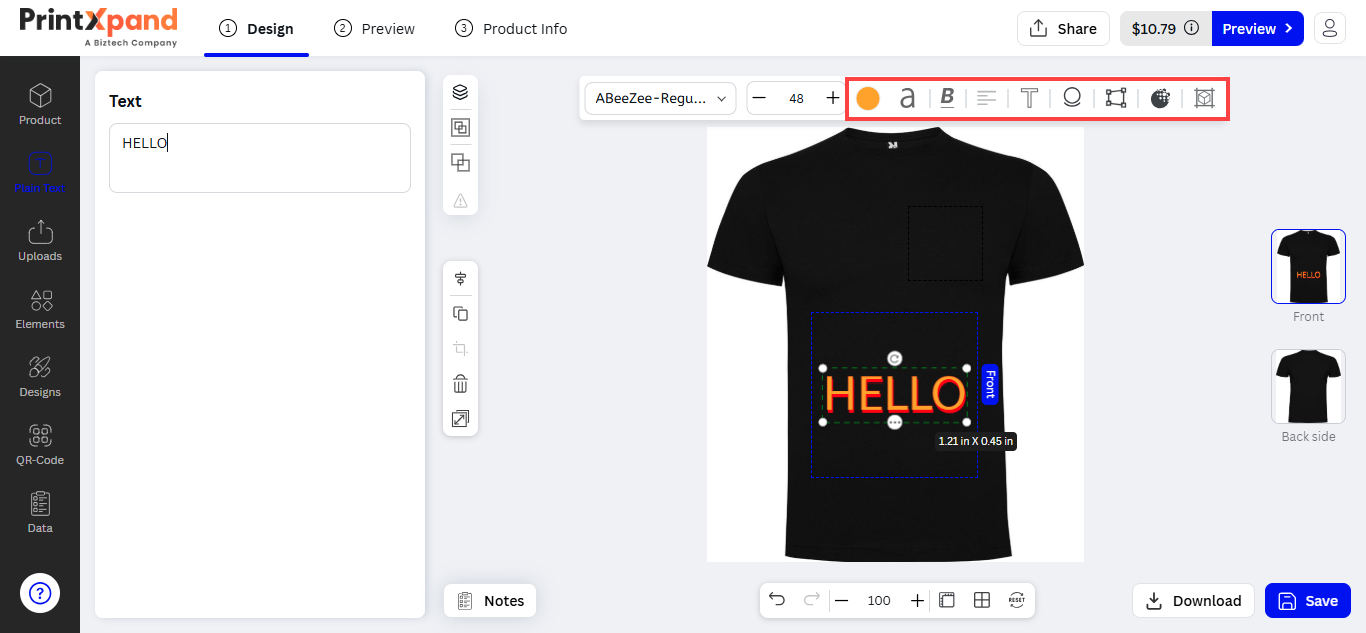
After inserting the text, the customers can see the designer tool in the sub-menu. The customers can customize the Font Size, Style, Color, and text alignment.
Text Properties [11]
The customers can use the text properties to edit and apply the effects for the text objects.
Customers can edit the text in Bold, Italic, and Underline.
Customers can adjust the Text alignments to Left, Center, Right, and Justify.
Stroke: To add the outline text effect of a particular color on the text.
Drop Shadow: To adjust the text-shadow effects horizontally (X-offset) & vertically (Y-offset) on the text.
Skew: To give horizontal or vertical italicized effects to the Text in the product design.
Opacity: To adjust the opacity (transparency) of the text.
Note: If the opacity is 0, your customers can still select the object.
Object Position: To change X-Y coordinates for positioning (Horizontal-Vertical) in the product design.
Note: PrintXpand4.0 Designer Tool provides 300+ preloaded Font effects. If you want to add and manage your custom fonts, you need to purchase our Font Manage-Addon.