Backend Configuration
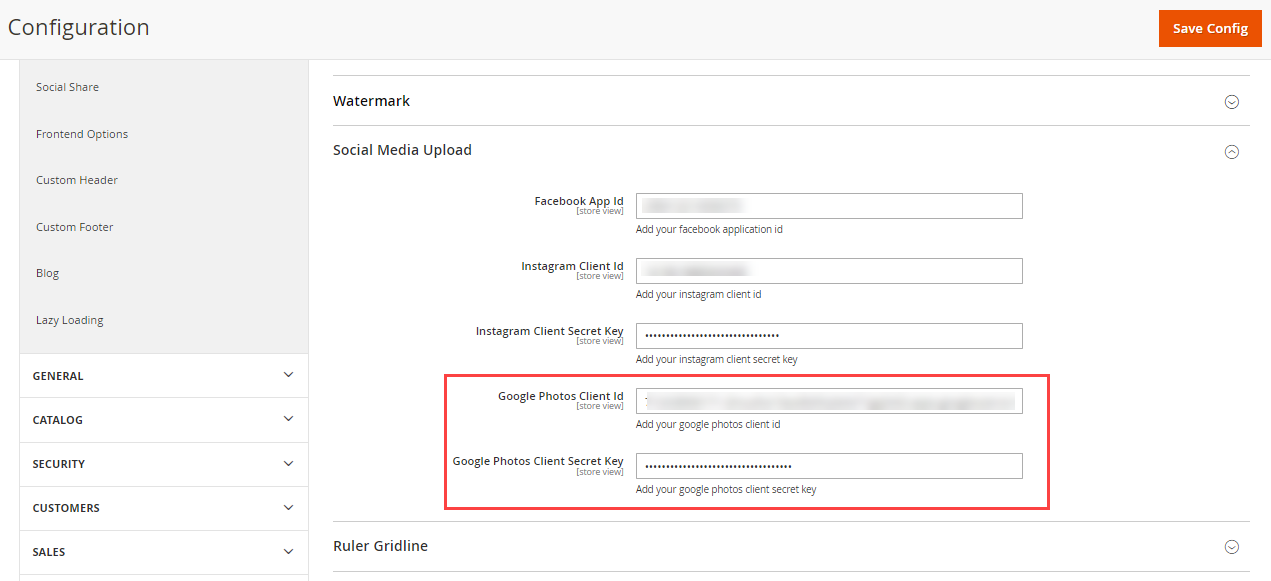
To set social media configuration from the Backend, go to Stores → Configuration → Social Media Upload. The Social Media Image Upload configurations are shown below:
– Facebook App Id: Insert your Facebook application Id.
– Instagram Client Id: Insert your Instagram client Id.
– Instagram Client Secret Key: Insert your Instagram Client Secret key.
– Google Photos Client ID: Insert the Google Photos Client ID.
– Google Photos Client Secret Key: Insert the Google Photos Client Secret Key.
After inserting the Keys & IDs, click on the Save button to apply the changes to the online store.
Frontend View
Once you configure the IDs and Secret Keys for the social media platforms at the store level, only then the customers will get the option to upload the images from their social media profiles.
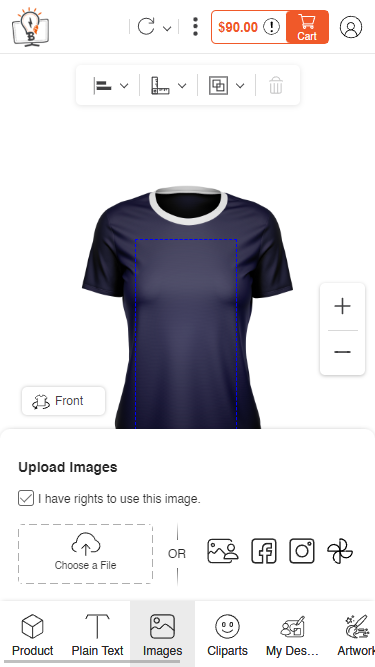
The customers will see the Social Media options in the sub-panel of the “Images”. The customers will get the ‘Facebook’, ‘Instagram’, and ‘Google Photos’ icons under the “Upload Images” sub-tab.
By clicking on any social media icon, the customers need to log in with their own credentials to get the images from the social media platform in product designing. The customers will have a Customer Login (your online store login) other than social media platform.
Your customer has to open the product in the Designer Tool and navigate to Images in order to upload images from the google photos. [1]
Here in the Images section you can either upload images through various files or through social media. To upload images from Google Photos you have to click on the Google Photos icon. [2]
By clicking on this icon, a pop-up will appear, through which you will be directed to your Google Account. [3]
When you login to your account, those images which are added to the album of your google photos will automatically be uploaded into the tab. [4]
In Google Photos, create an album in the Album folder. [5]
After the image is uploaded onto the product, there is a tab on the right side that contains Image Filters and Image Effects. You can edit the image according to your requirement from there. [6]
Price Details & Add to Cart
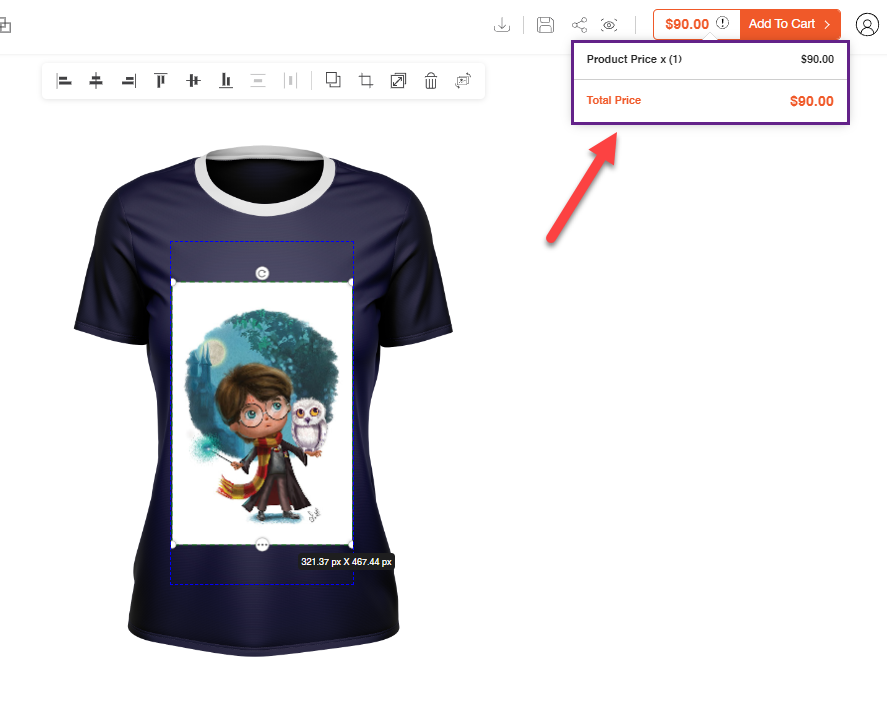
The customers will see the pricing details once they tap on the (!) icon beside the Add to Cart button. The customers will be charged as per the pricing set from the backend. [1]
Add To Cart
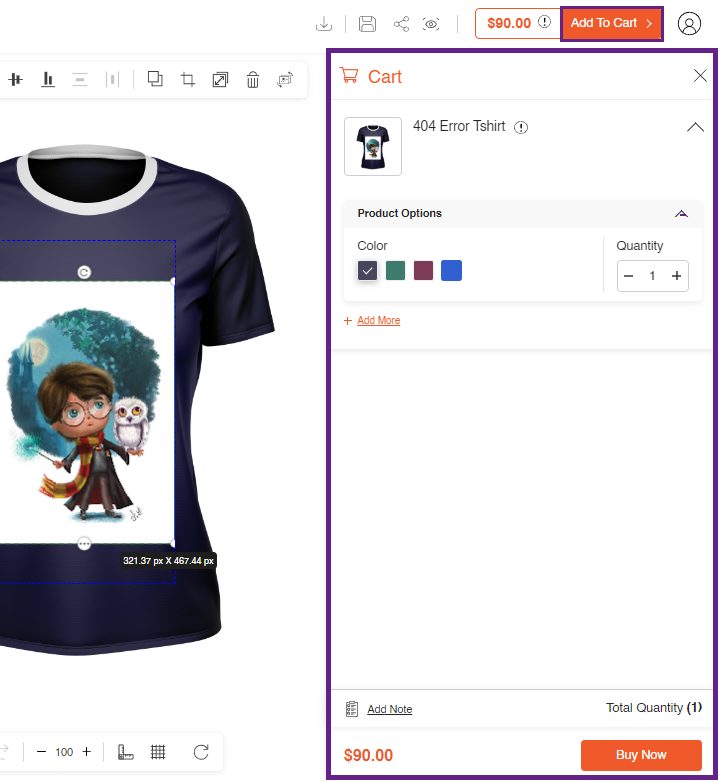
Once the image is uploaded and customized, the customer proceeds with the order and clicks on Add To Cart then details such as product details and price details will be displayed in the panel on the right side.
Your customers can add more products by clicking on the Add More option. Also, they can delete a particular Product Options section by clicking on the Delete icon.
Color and Quantity of the products are displayed and you can change them from here as well. Total Quantity is also provided. By clicking on Buy Now, your customers will land on the Shopping Cart page. [2]
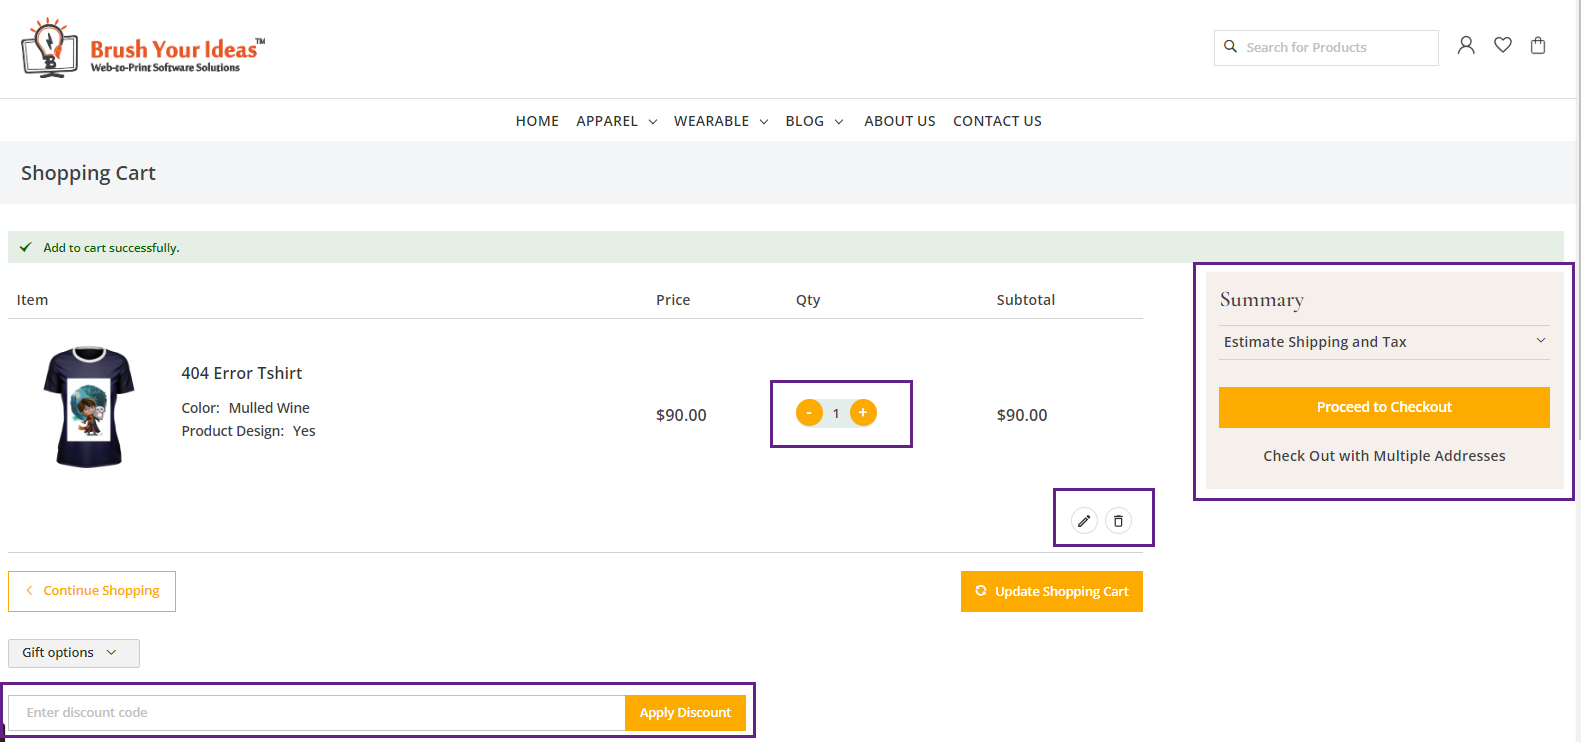
The shopping cart page displays such details : Item, Price, Quantity and Subtotal. The Summary section contains Estimate Shipping and Tax.
Here, your customers can Edit the quantity of the product and also can delete the item. You can apply discount code if you have any.
To proceed with the checkout process click on Proceed to Checkout.[3]
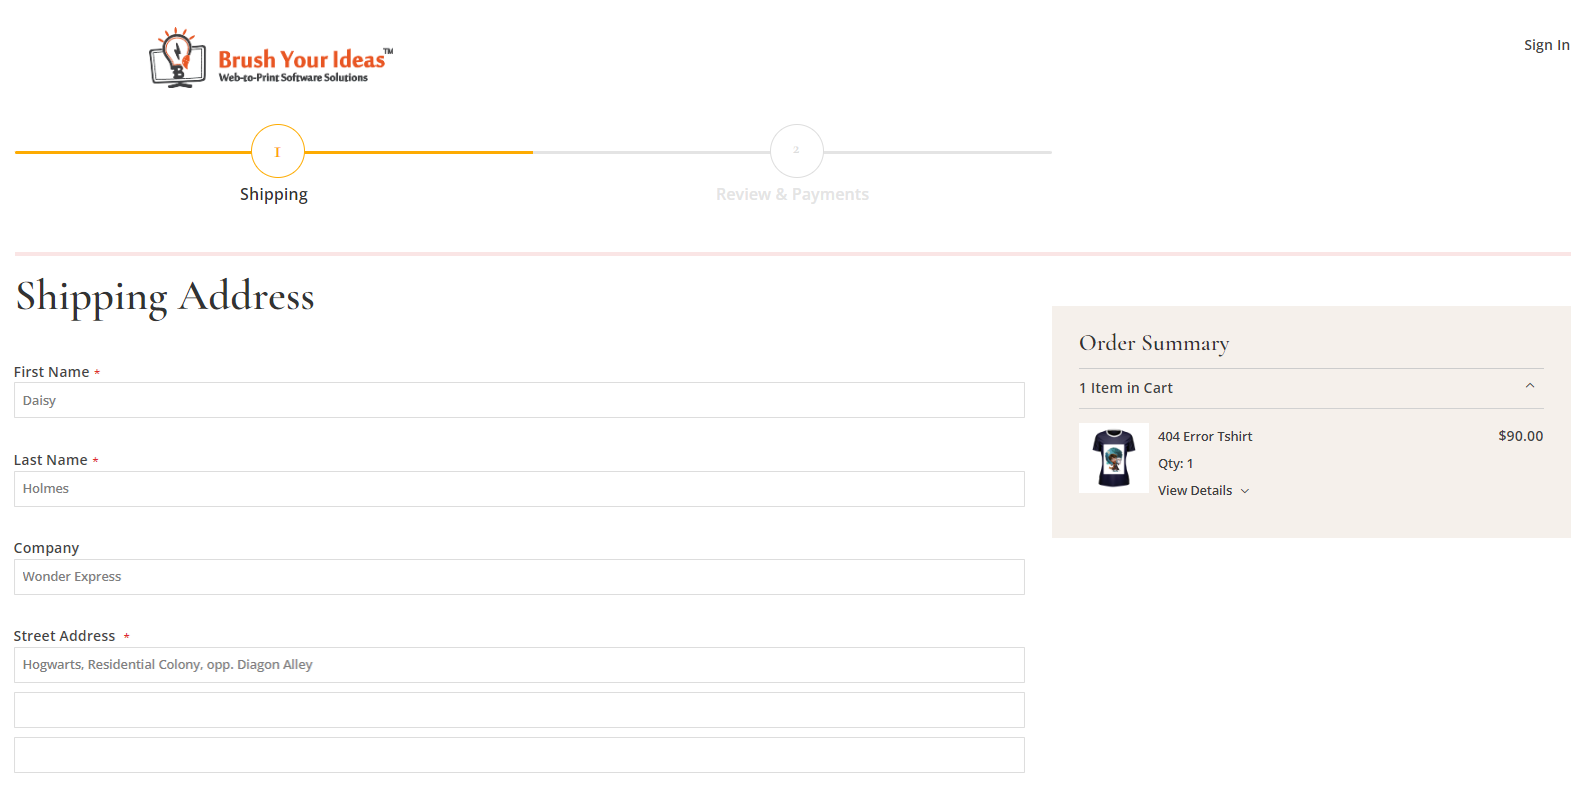
Proceed to Checkout takes the customer to the Shipping page where they have to enter the Address onto which the product has to be delivered. If the address is already entered then select the required address and go to Shipping Methods.
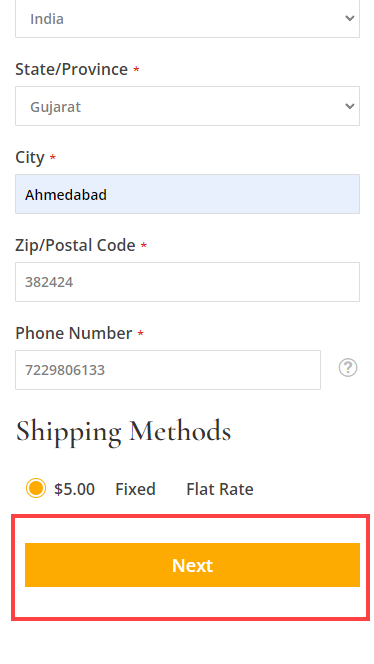
Enter all the required information, if a new address has to be entered and also do select Shipping Method and then click on Next. [4][5]
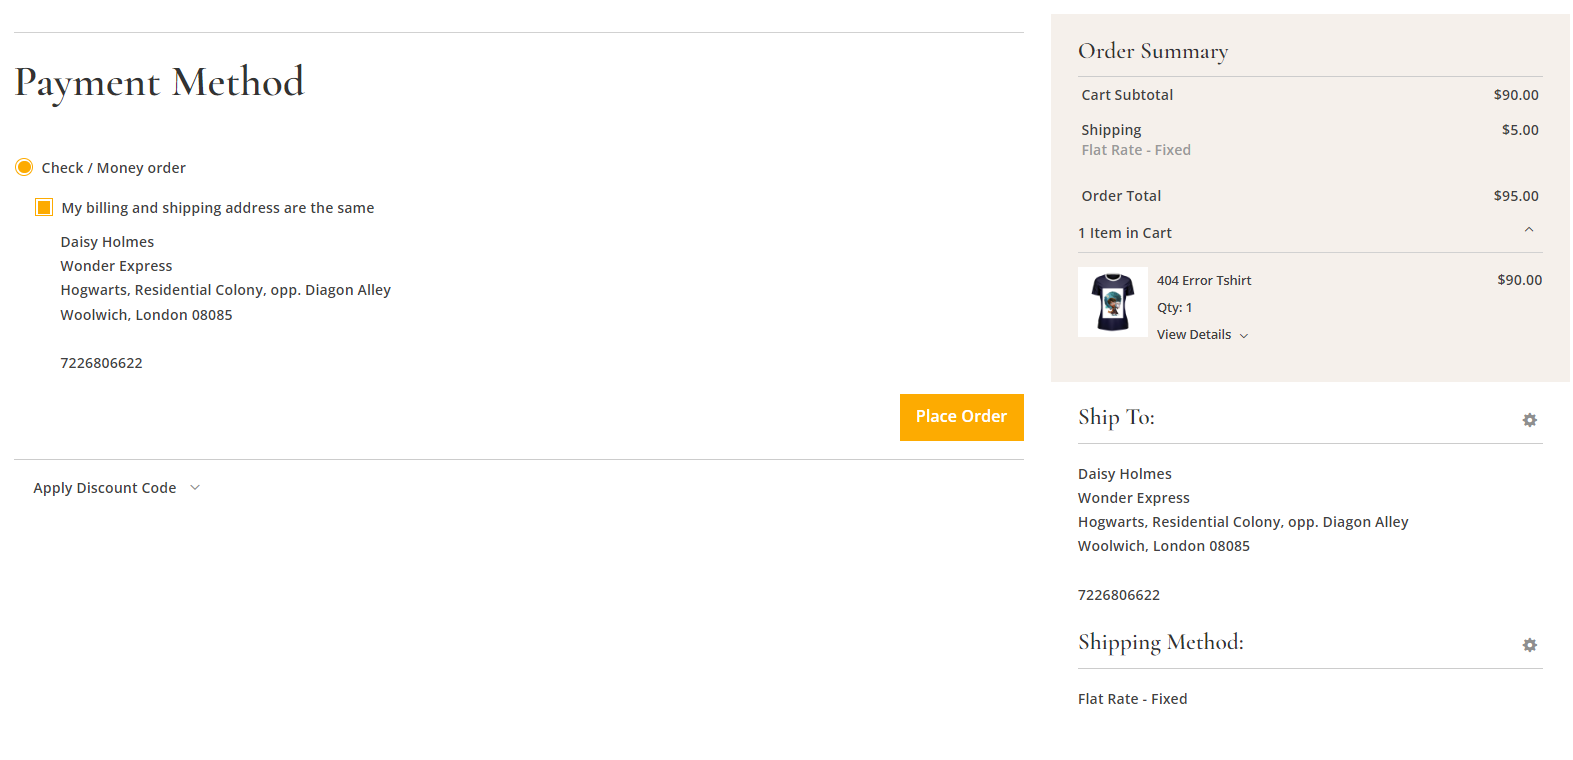
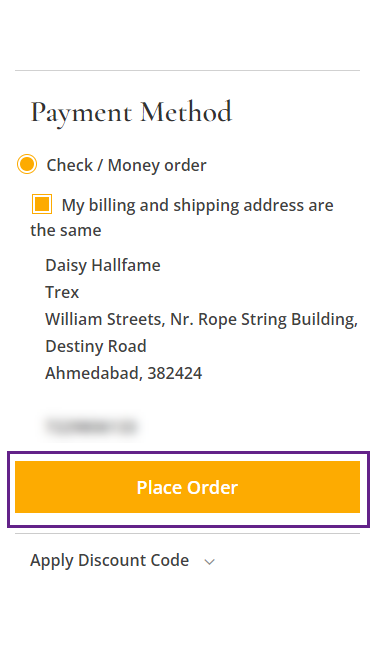
The next step is to select the Payment Method. Select among the given options, view the details of the product summary, apply discount code if applicable, and then click on Place Order. [6]
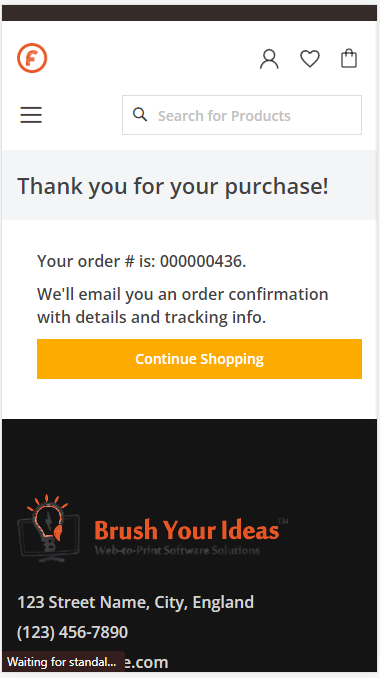
By clicking on Place Order the order gets placed and a Thank you message is displayed along with the Order Number and an option to print the receipt. [7]
Responsive
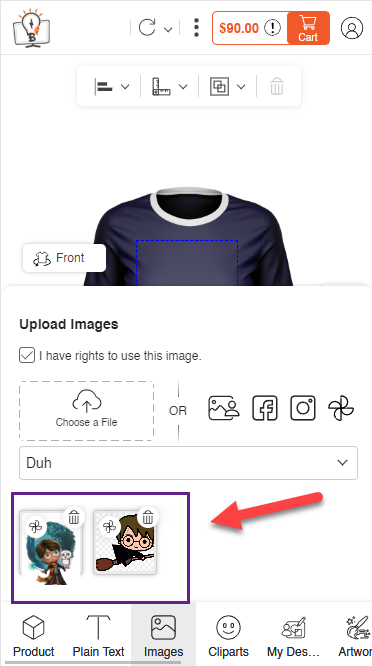
Your customer has to open the product in the Designer Tool and navigate to the Images tab in order to upload images from the google photos. [1]
Here in the Images section, you can either upload images through various files or through social media. To upload images from Google Photos you have to click on the Google Photos icon. [2]
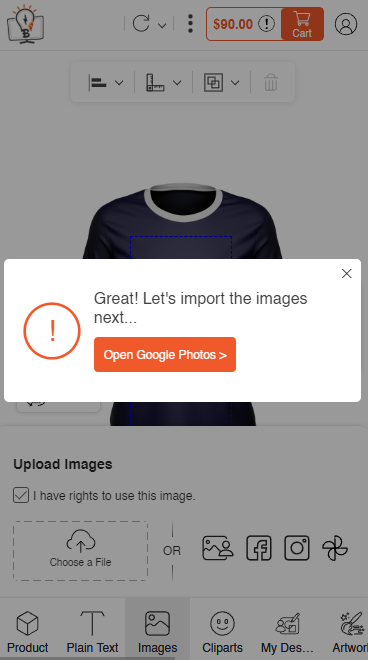
By clicking on this icon, a pop-up will appear, through which you will be directed to your Google Account. [3]
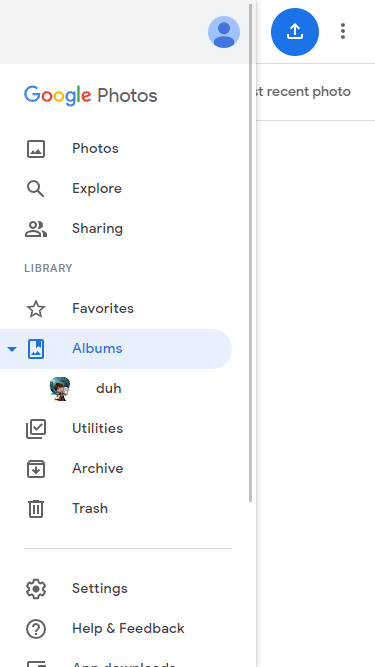
When you login to your account, those images which are added in the album of your google photos will automatically be uploaded into the tab. [4]
In Google Photos, create an album in the Album folder. [5][6]
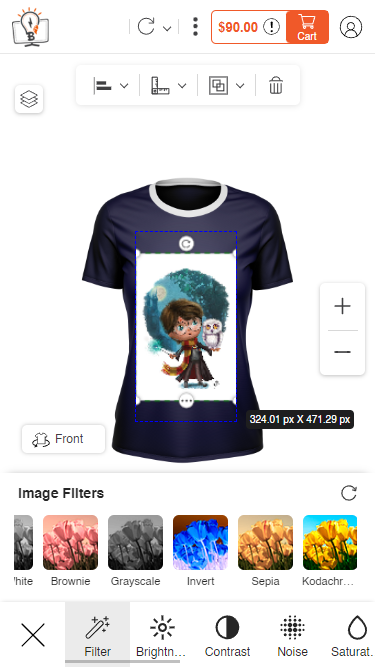
After the image is uploaded onto the product, you can apply Image Filters and Image Effects. The Image Filters and Image effects are displayed below. [7]
Price Details & Add to Cart
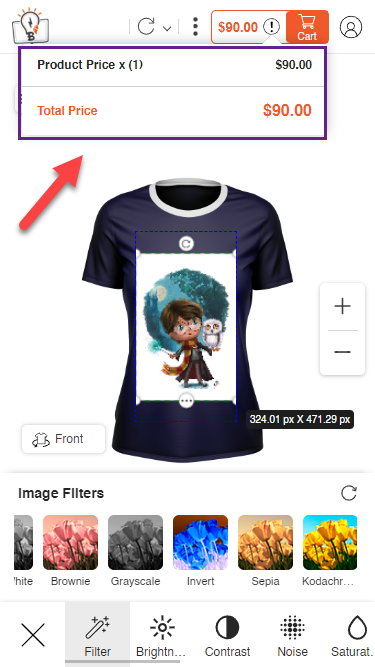
The customers will see the pricing details once they tap on the (!) icon beside the Add to Cart button . The customers will be charged as per the pricing set from the backend. [1]
Add To Cart
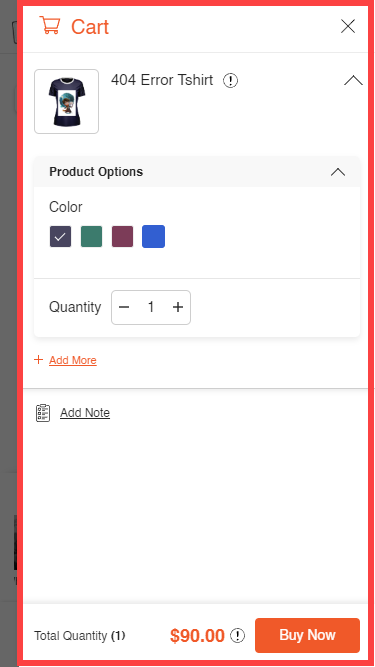
Once the image is uploaded and customized, the customer proceeds with the order and clicks on Add To Cart then, details such as product details and price details are displayed.
Your customers can add more products by clicking on the Add More option. Also they can delete a particular Product Options section by clicking on the Delete icon.
Color and Quantity of the products are displayed and you can change them from here as well. Total Quantity is also provided. By clicking on Buy Now, your customers will land on the Shopping Cart page. [2]
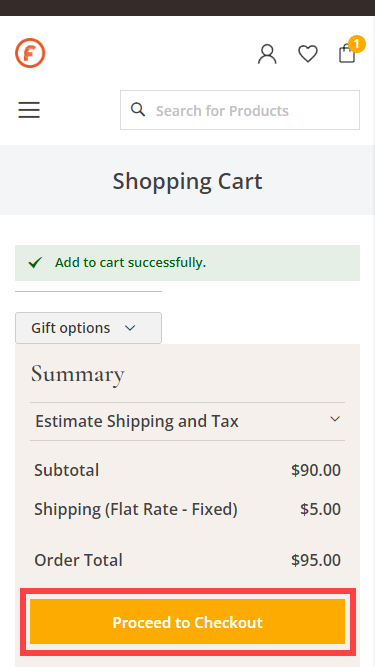
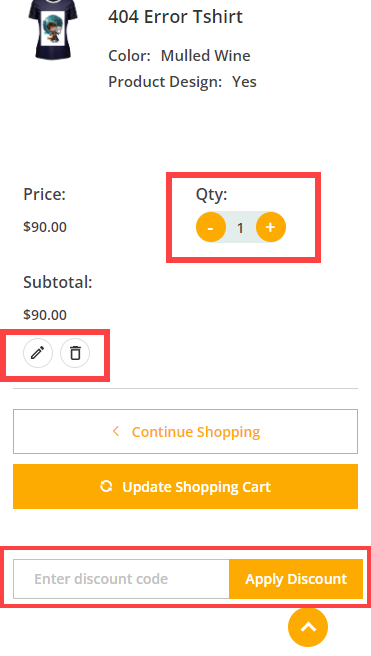
The shopping cart page displays such details : Item, Price, Quantity and Subtotal. The Summary section contains Estimate Shipping and Tax.
Here, your customers can Edit the quantity of the product and also can delete the item. You can apply discount code if you have any.
To proceed with the checkout process click on Proceed to Checkout. [3][4]
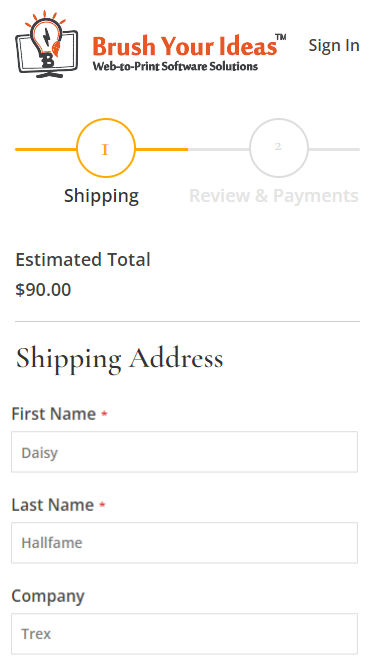
Proceed to Checkout takes the customer to the Shipping page where they have to enter the Address onto which the product has to be delivered. If the address is already entered then select the required address and go to Shipping Methods.
Enter all the required information, if a new address has to be entered and also do select Shipping Method and then click on Next. [5][6]
The next step is to select the Payment Method. Select among the given options, view the details of the product summary, apply discount code if applicable and then click on Place Order. [7]
By clicking on Place Order the order gets placed and a Thank you message is displayed along with the Order Number and an option to print the receipt. [8]





SOCIAL MEDIA UPLOAD
A customer can upload memorable images from the Social Media platforms like Facebook & Instagram. For this the ‘Upload’ feature of the PrintXpand 3.0 designer tool allows your customer to upload images from social media.