Vendor Registration
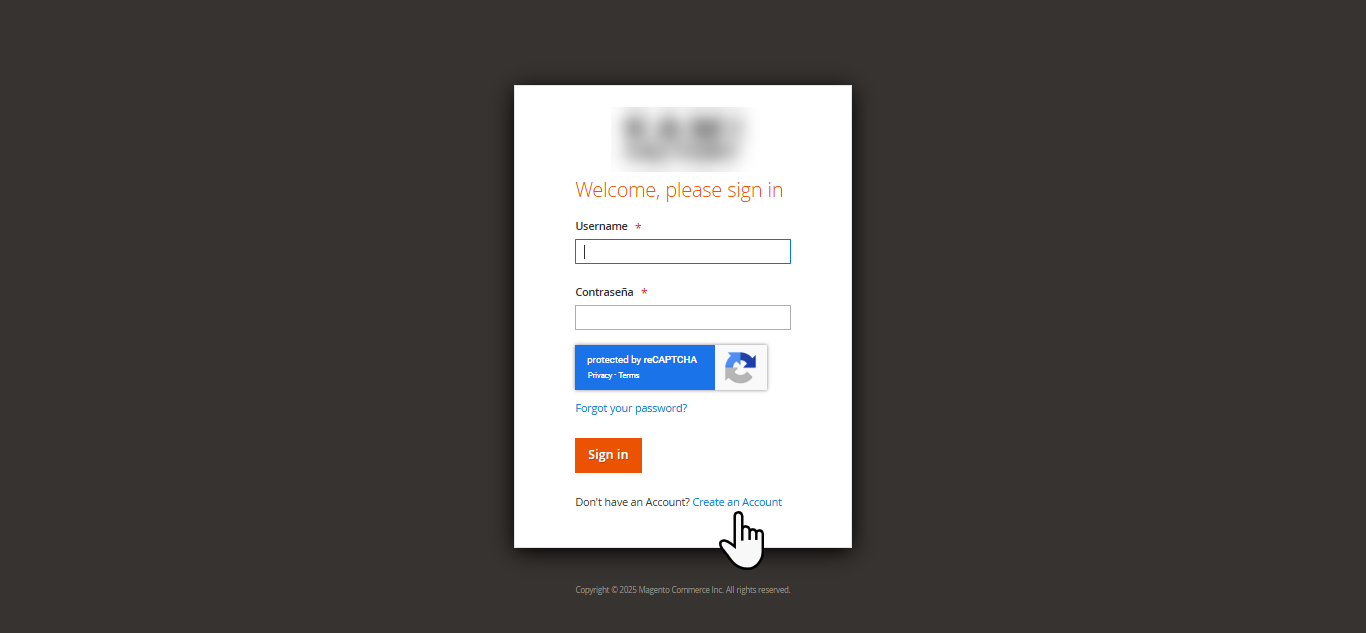
To register in service vendors click on Create An Account option. [1]
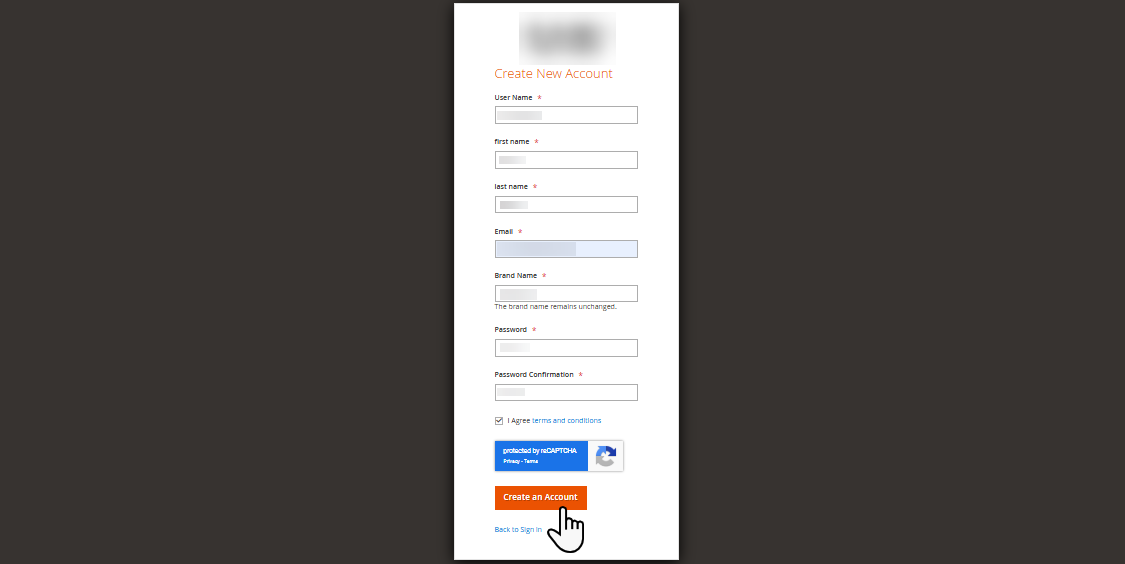
This action redirects the vendor to the Create New Account page, where they must fill in all the mandatory details. [2]
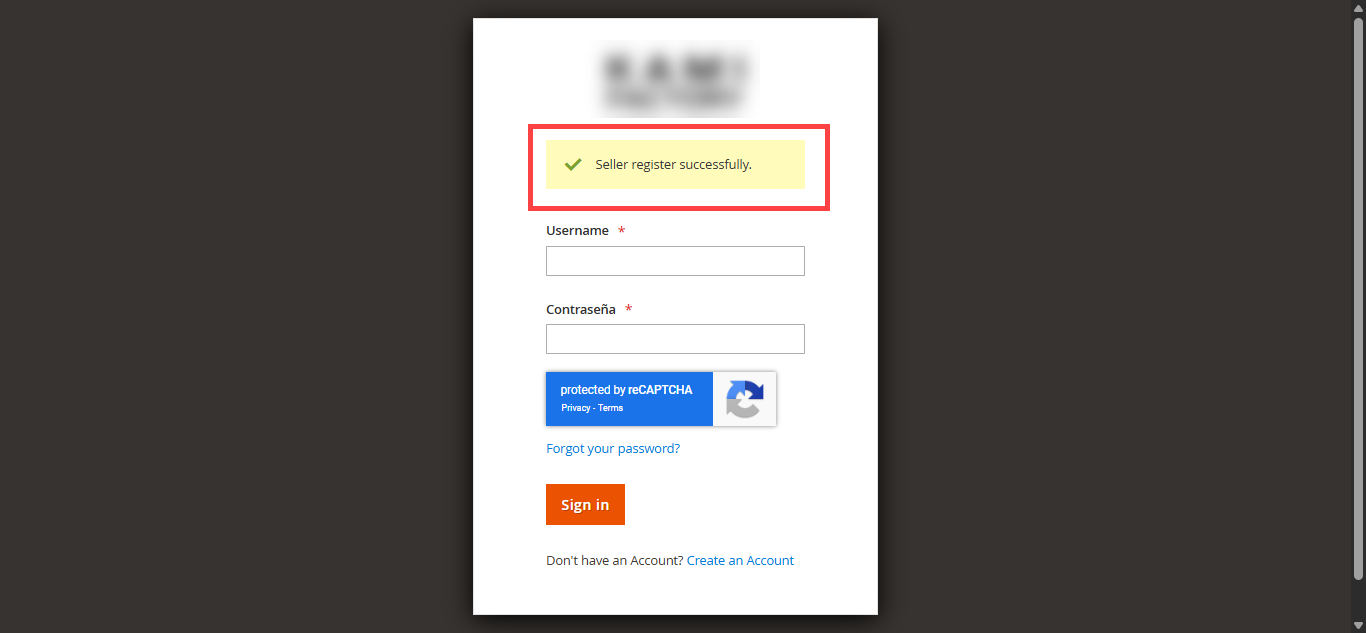
After filling in all the details, click on ‘Create An Account‘. The vendor will be redirected to the login page, and a success message will appear.
If auto approval is set the seller can login directly to the portal. I Manual approval seller needs admin approval for login. [3]
Dashboard
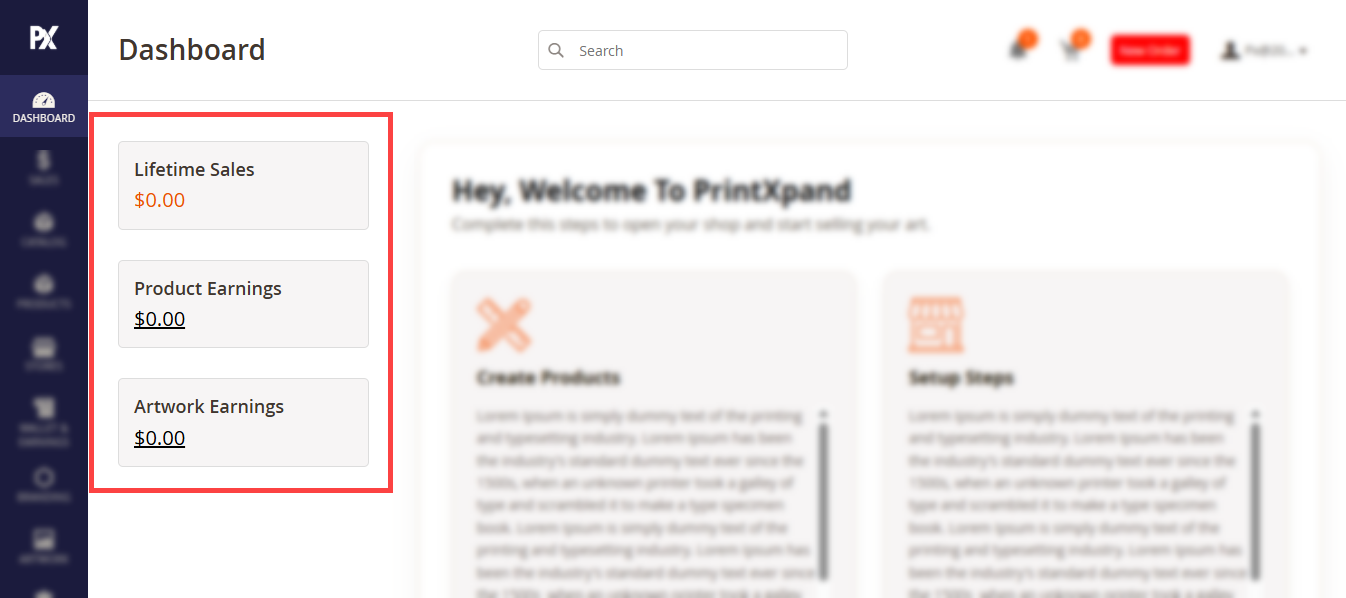
Once logged into their account they will be landing on Dashboard; it consists of seller’s data. To the left, in the form of cards, information regarding ‘Lifetime Earning’, ‘Order Earning’ and ‘Artwork Earning are displayed’. [1]
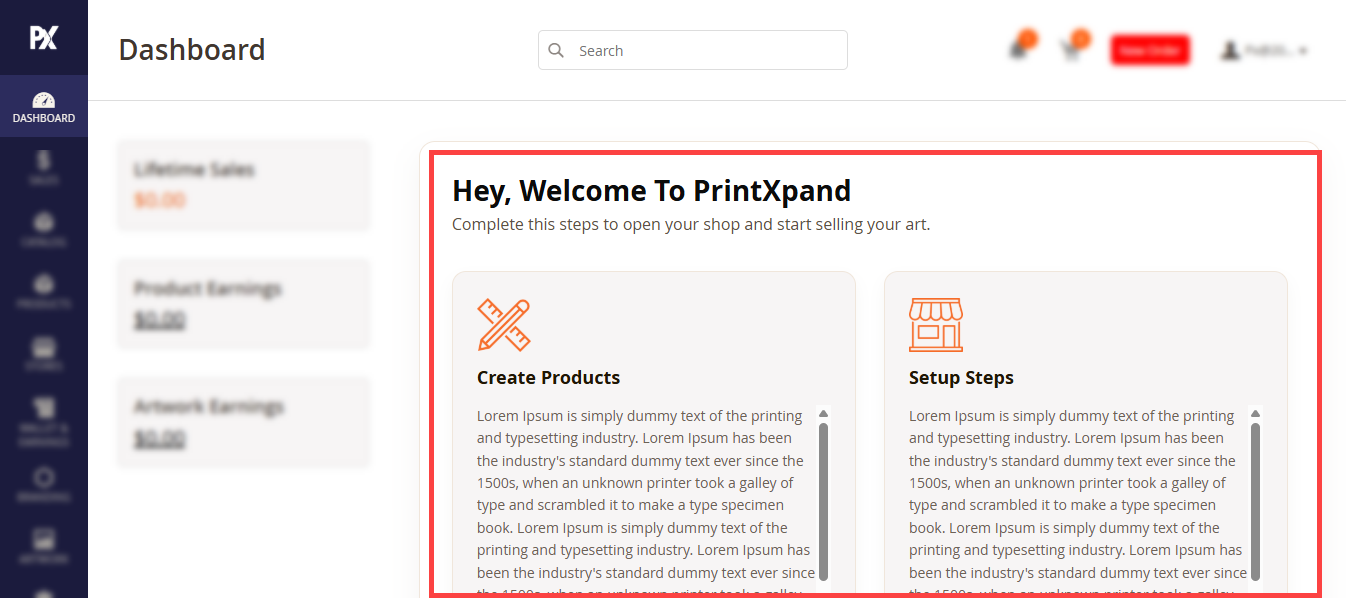
On the right side, the seller can view the dynamic blocks configured by the admin.[2]
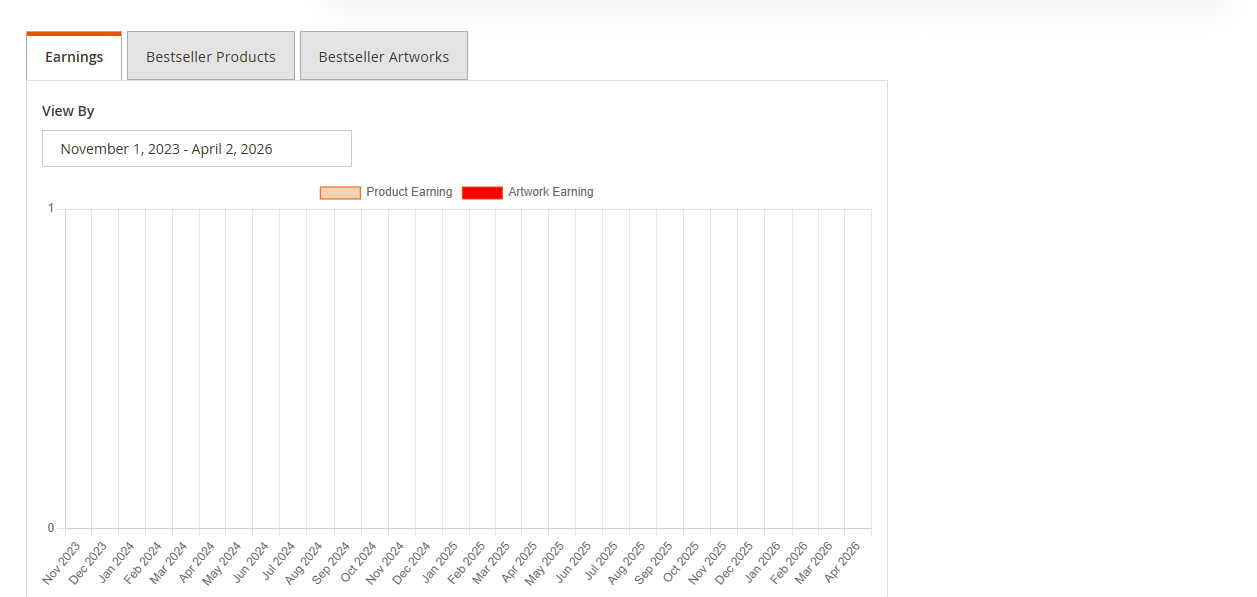
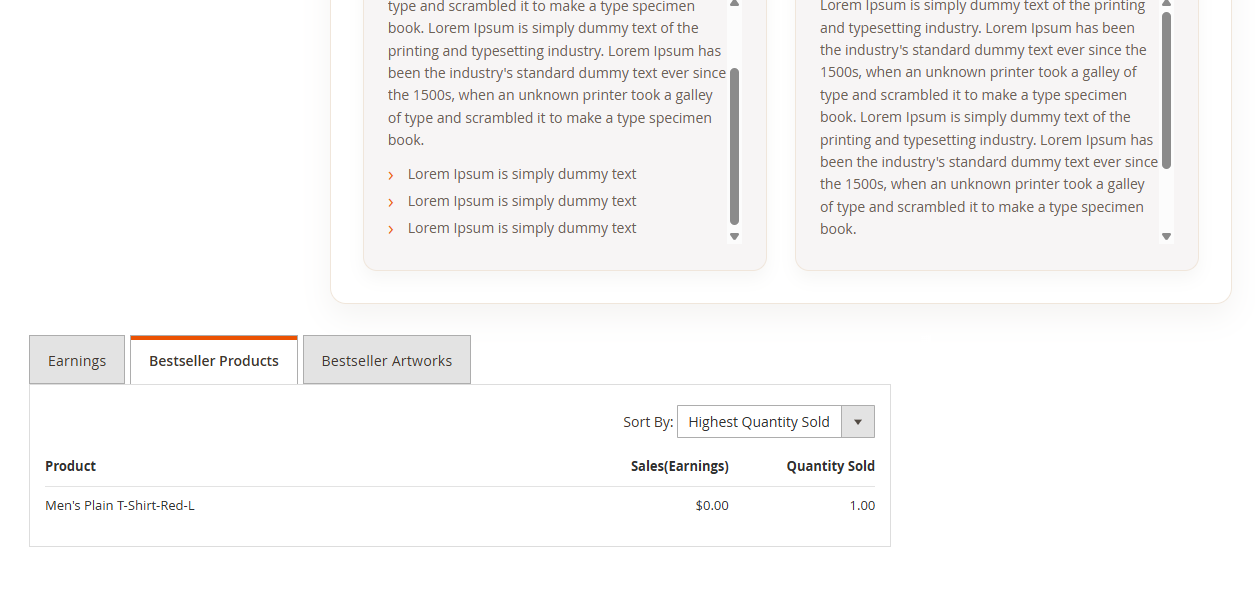
Moreover, there is data such as ‘Earnings’, ‘Bestseller Products’ and ‘Bestseller Artworks’ that are showcased in chart view.
The chart in the Earnings section presents the overall earnings. The product and artwork earnings are highlighted differently and can be filtered as per the preference. [4]
Further, there is the Bestseller Products section, which lists all the bestselling products along with the earnings and the quantities that have been sold. The chart can be sorted as per the ‘Highest Quantity Sold’ as well as according to the ‘Highest Sales’. [3]
Beside, there is the Bestseller Artworks section, that lists all the bestselling artworks along with the earnings and the quantities that have been sold; sort this list either as per the Highest Quantity Sold or Highest Sales.
Account Settings
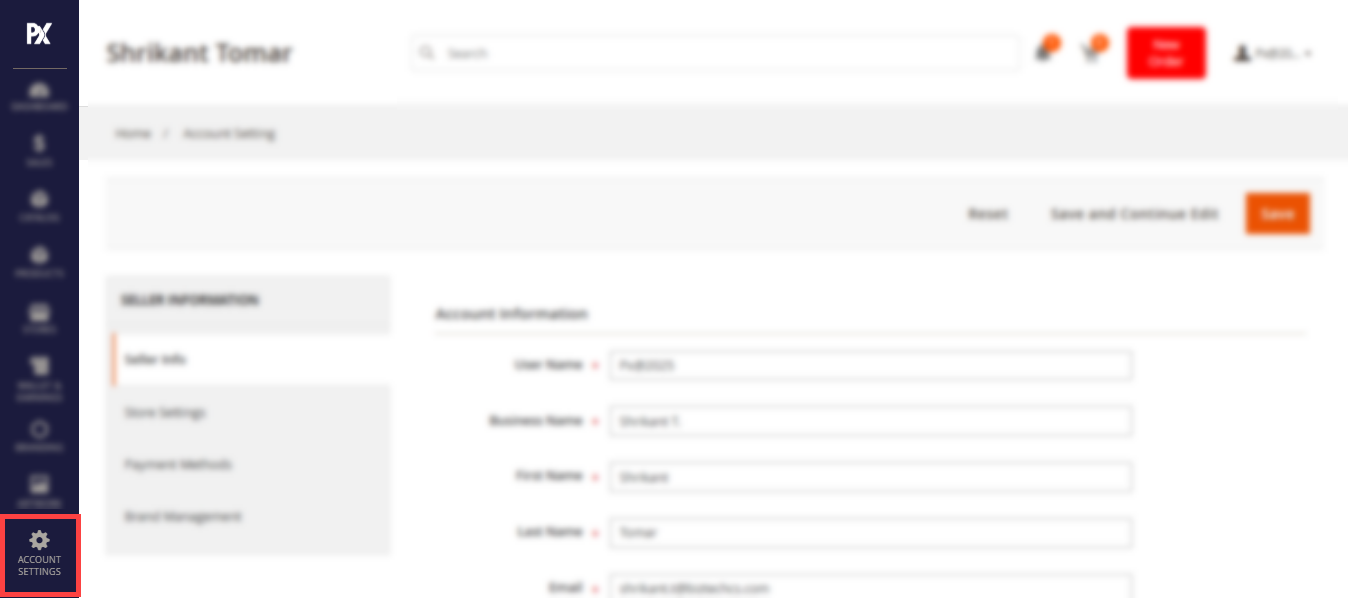
For account configurations, navigate to the Account Settings. [1]
Reseller Info
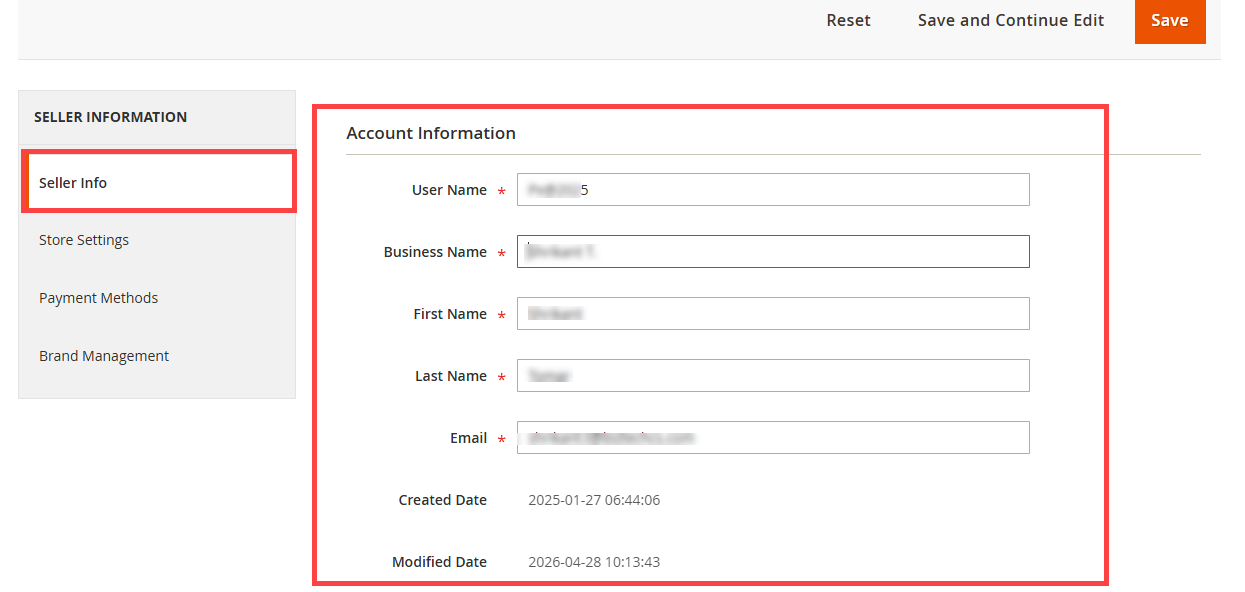
Here the fields like : User Name, Business Name, First Name, Last Name and Email would be pre-filled as they are based on the information the seller has entered while registering their account. These information can be updated as per their preference and accordingly the Modified Date field would be updated. Created Date displays the date on which the account was created.[1]
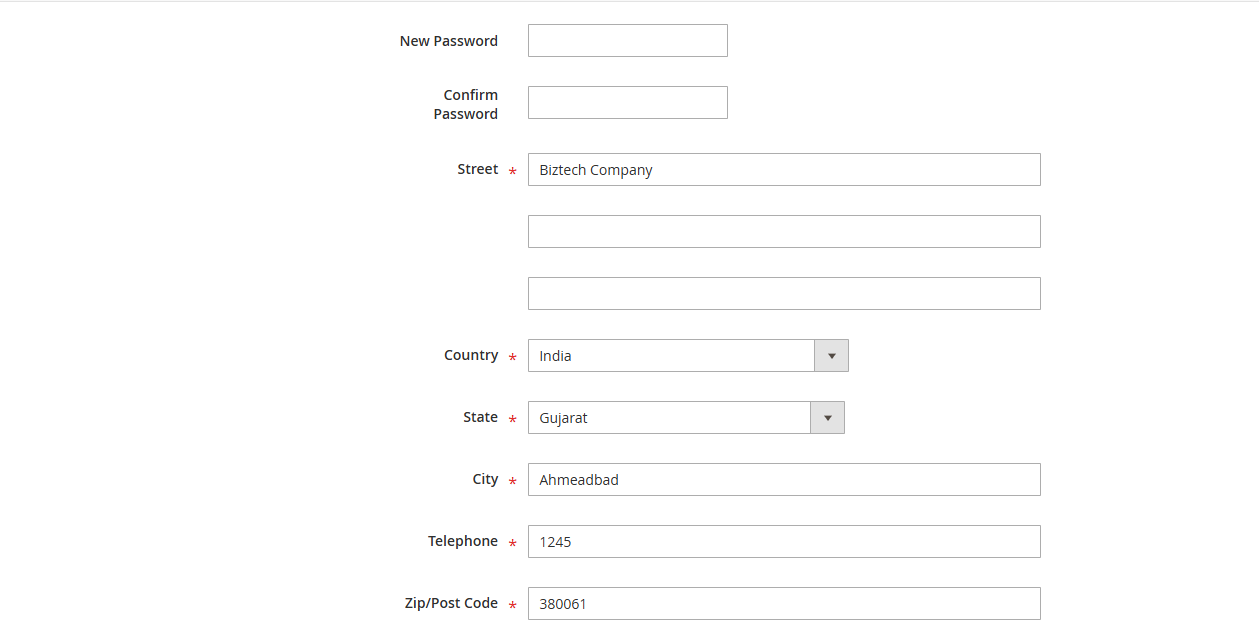
There are further two fields in order to change the password: New Password and Confirm Password. Additionally, resellers can also input the Street, Country, State, Telephone and Zip/Post Code in the respective fields. [2]
Store Settings
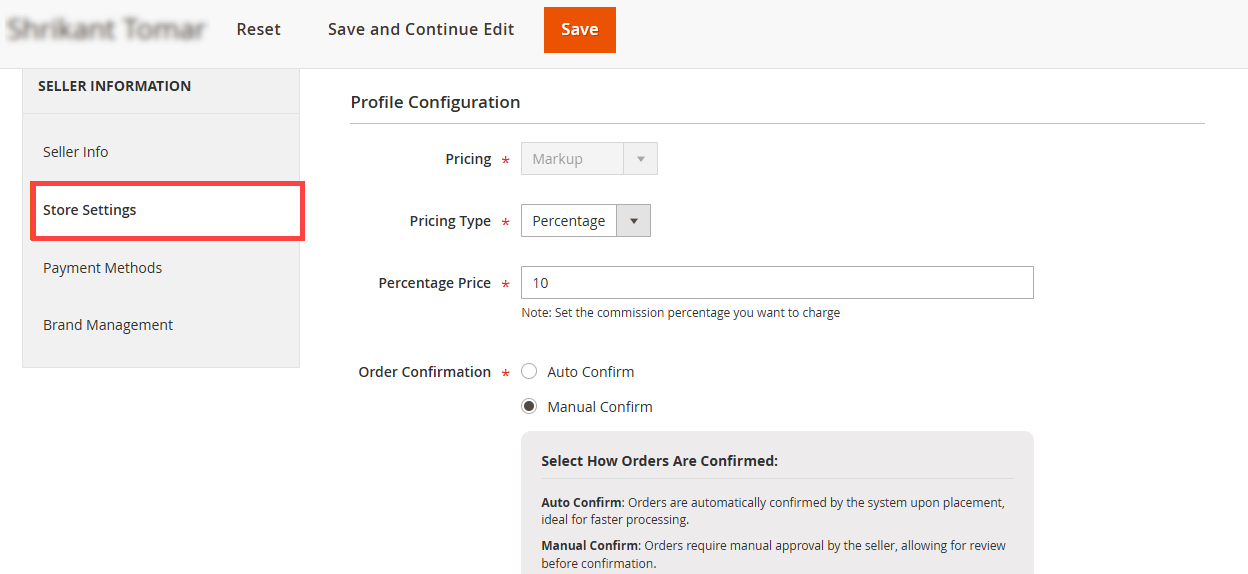
The pricing whether it would be Markup or Commission would be set by the admin and as per that, the fields here would be non-editable respectively. [1]
The set pricing would be mentioned in the Pricing field. Now if Markup pricing is displayed (this option would be selected from the admin side) then in the Pricing Type field there would be options such as : Percentage and Flat.
The proceeding field would be either Percentage Price or Flat Price based on the Pricing Type selection.
The Order Conformation method contains two options Auto Confirm and Manual Confirm. In the Auto Confirm orders are automatically confirmed by the system upon placement, ideal for faster processing and passed to admin. On other hand in the Manual Confirm orders require manual approval by the seller, allowing for review before confirmation.
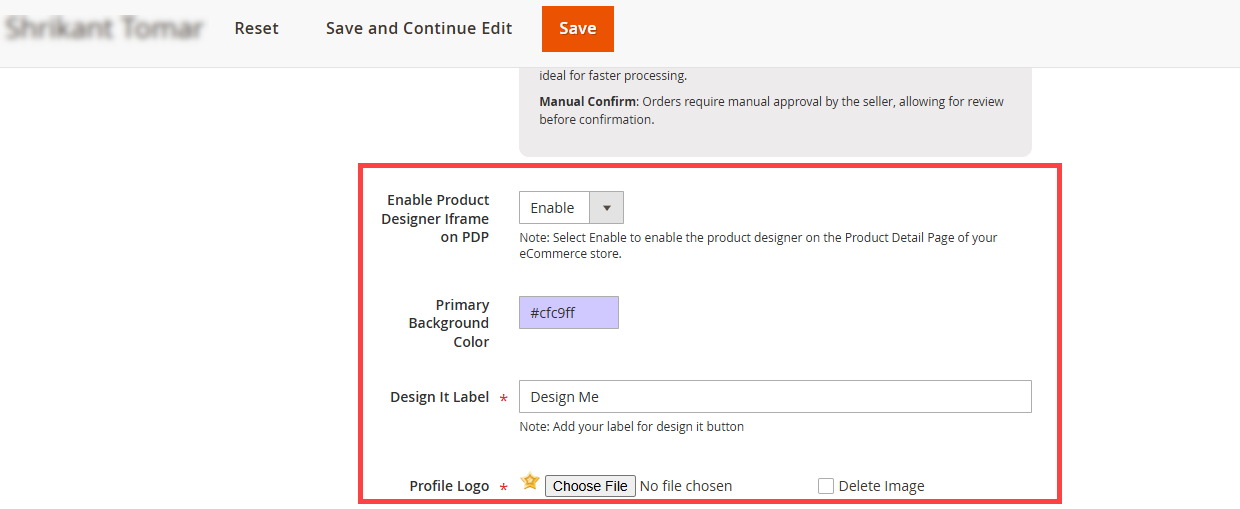
Additionally, the seller can enable the Product Designer iframe on the Product Detail Page (PDP) for the eCommerce store. They can set the primary background color, define the label for the “Design It” button (which will be visible to customers), and upload the store profile logo.[2]
Payment Methods
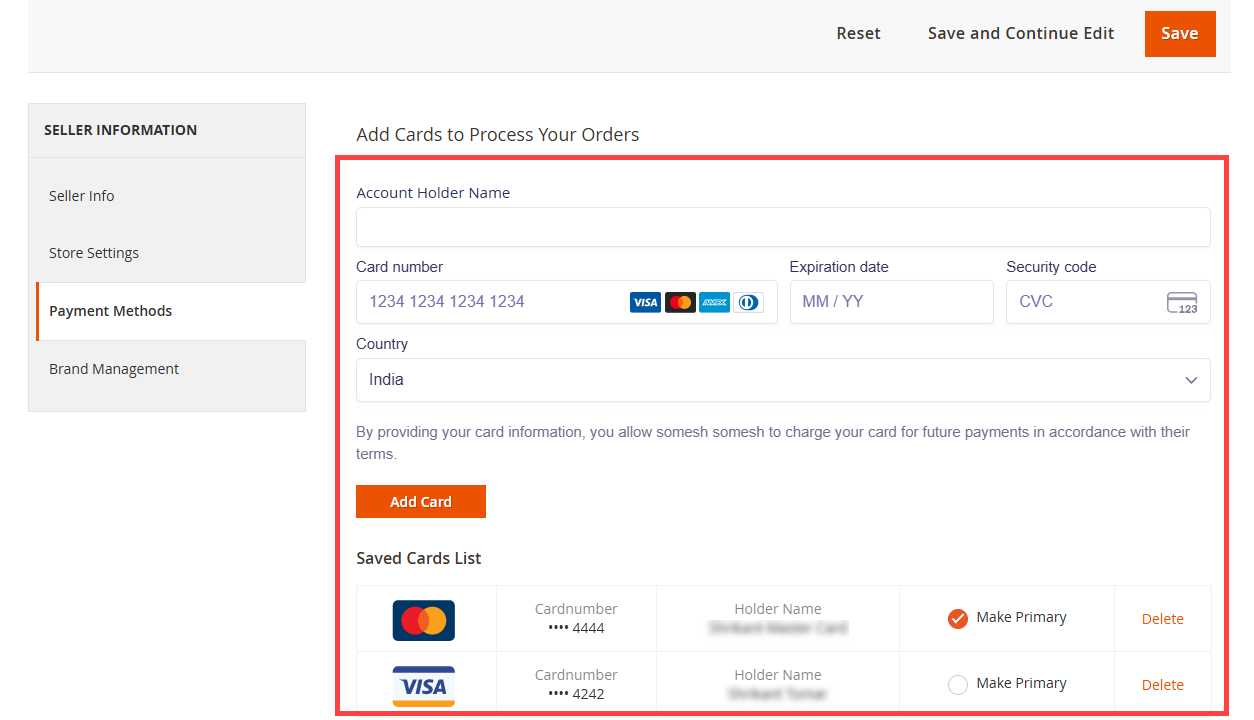
All the details of the card in order to process the orders, should be added here which includes Account Holder Name, Card Number, Expiration, Security code and Country. [1]
Once you add all the appropriate information, to add the card, click on the Add Card button. This card will then be listed below the Saved Card List.
Saved Card List – A list of all the saved cards are listed. If the seller wants to make a card among those, a primary card, then they have to select the respective option, i.e. Make Primary options.
Note: Primary Cards cannot be deleted. This screen is only visible when any payment gateway is Configured.
Brand Management
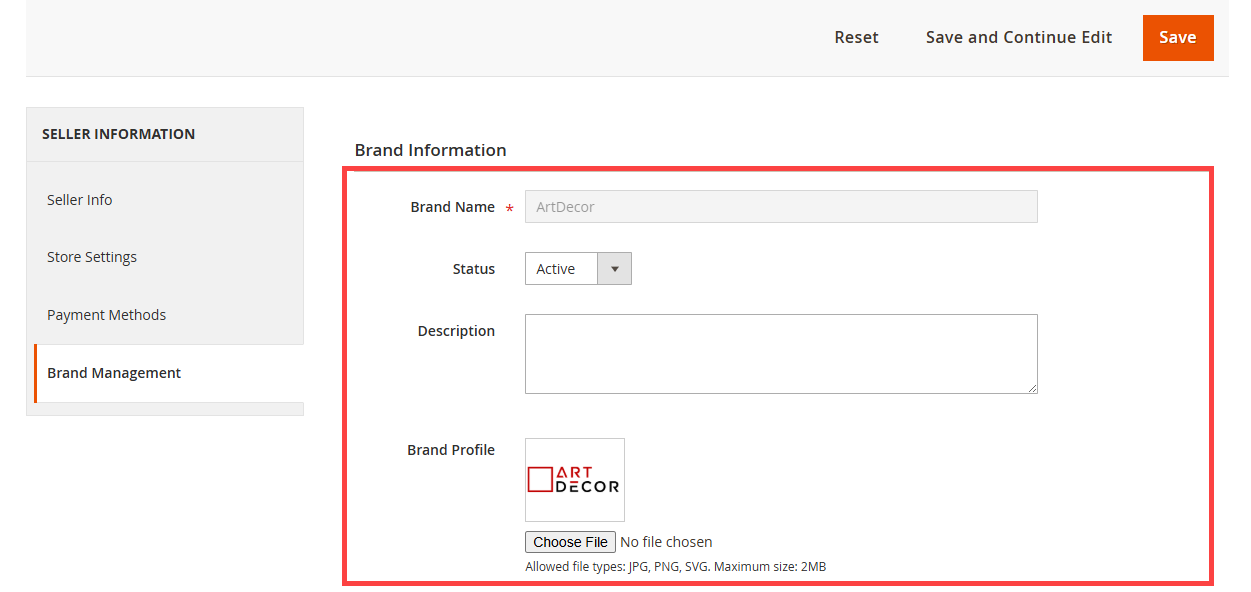
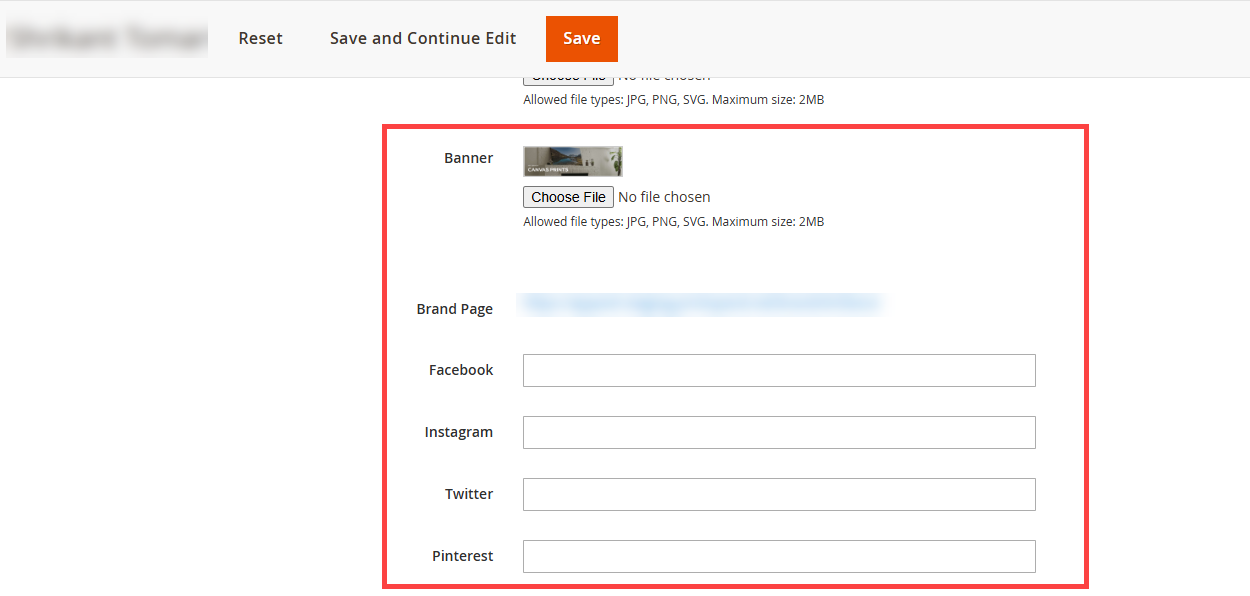
Details about the seller’s brand should be entered in this section. The following fields are displayed here: [1]
Brand Name: Once the seller enters the Brand Name during the account creation, it cannot be changed. Here, the name is in read-only format.
Status: Activate the brand through here.
Description: The brand description can be written here.
Brand Profile: The profile image of the seller’s brand has to be uploaded.
Banner: Upload A banner to depict the brand. [2]
Brand Page: The url of the brand page when clicked upon, the seller would be directed to that particular page.
Facebook: Facebook url of the brand.
Instagram: Instagram url of the brand.
Twitter: Twitter url of the brand.
Pinterest: Pinterest url of the brand.
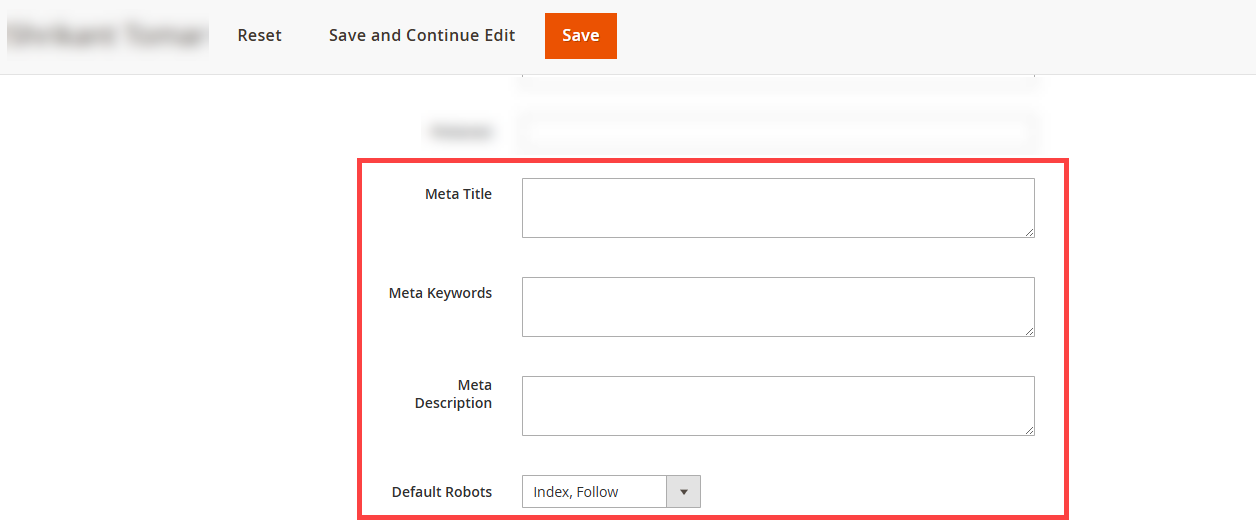
Meta Title, Meta Keywords and Meta Descriptions : The meta title, meta keywords and the meta description respective to the brand should be entered in these fields. [3]
Default Robots: Define how search engines index your site with default robots.txt settings.
Once all the changes have been made, proceed to Save the configurations.
All Stores
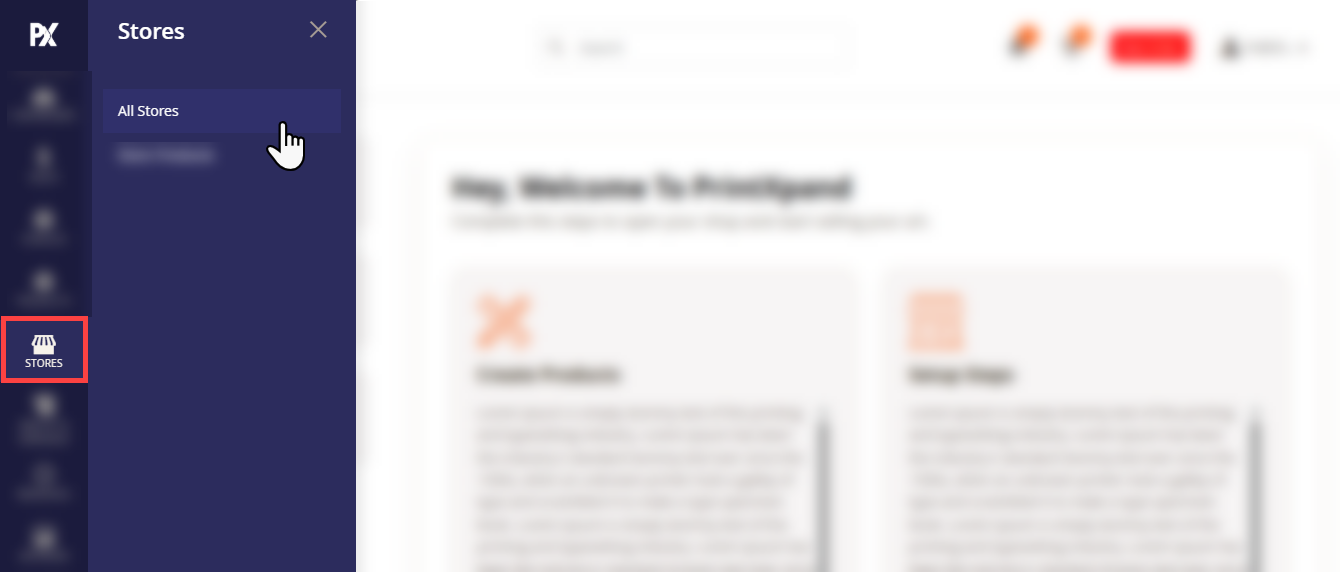
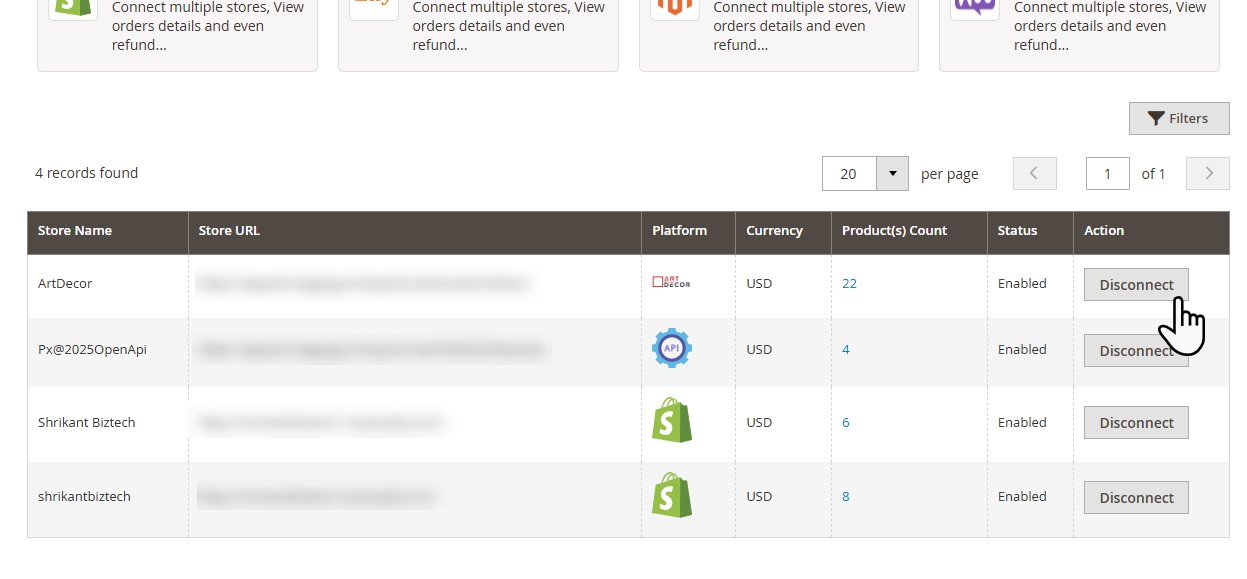
Navigate to Stores -> All Stores. To configure the stores in the seller portal.[1]
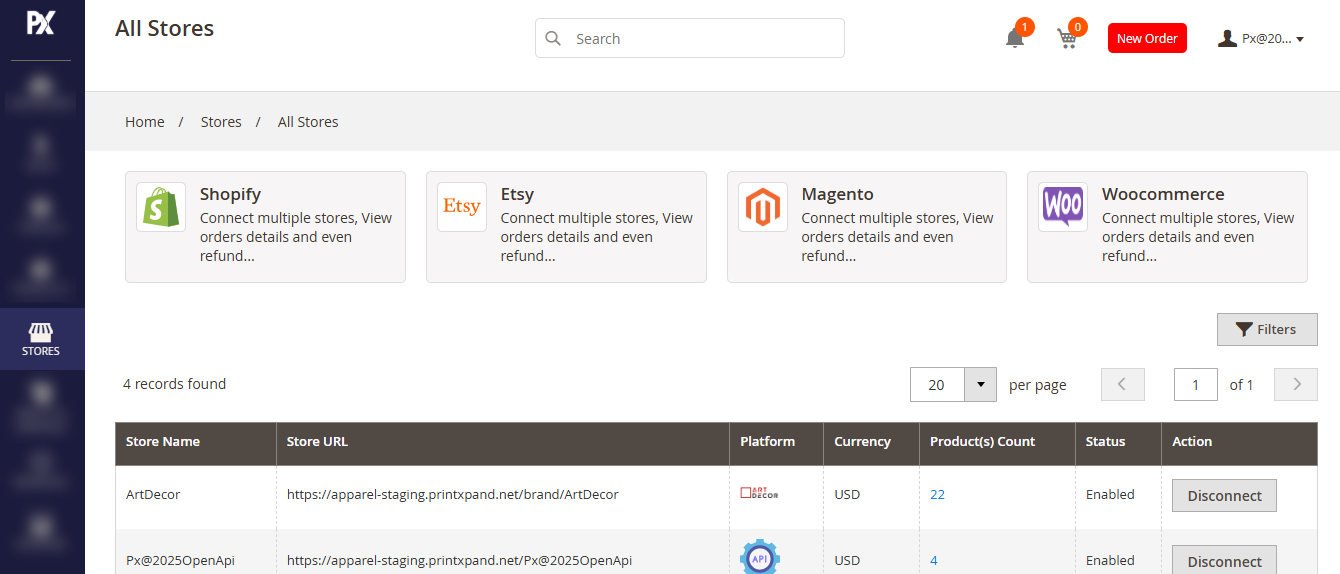
Here various Apps as well as all the connected Stores will be listed. [2]
In the Stores grid, information such as the Store Name, Store URL, Plate form Currency, Products Count, Status and Action.
The Product Count column displays the number of products published on that particular store. Whether the store is enabled or not can be known through the Status column.
To disconnect a particular store, just navigate to the Disconnect button in the Action column.[3]
Shopify
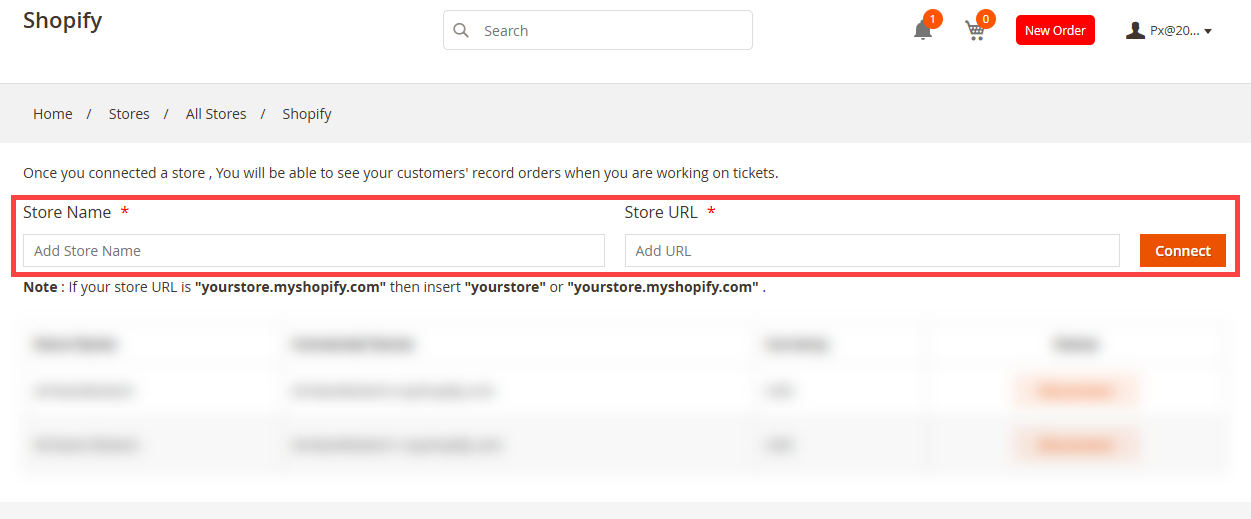
Navigate towards Shopify in order to connect a Shopify store. [1]
Now, to connect a store, initially enter the Store Name and Store URL; then proceed to click on Connect button.
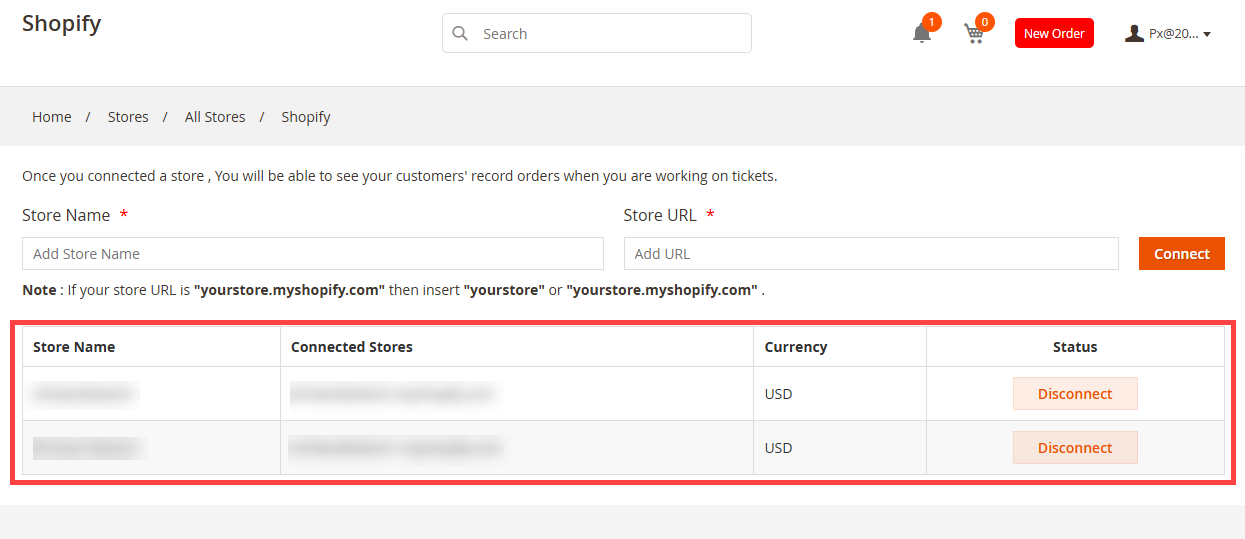
The connected store will be listed onto the grid where the details such as Store Name, Connected Stores, Currency and Status are provided.
The reseller can Connect or Disconnect the store by clicking on the respective button in the Status column.[2]
Woocommerce
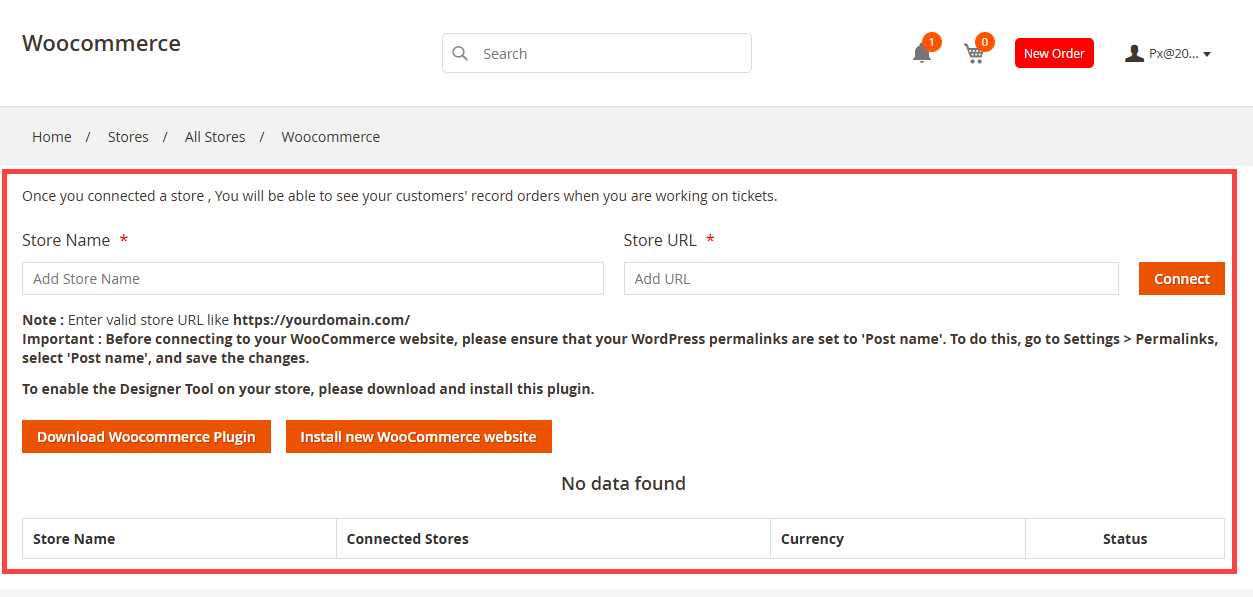
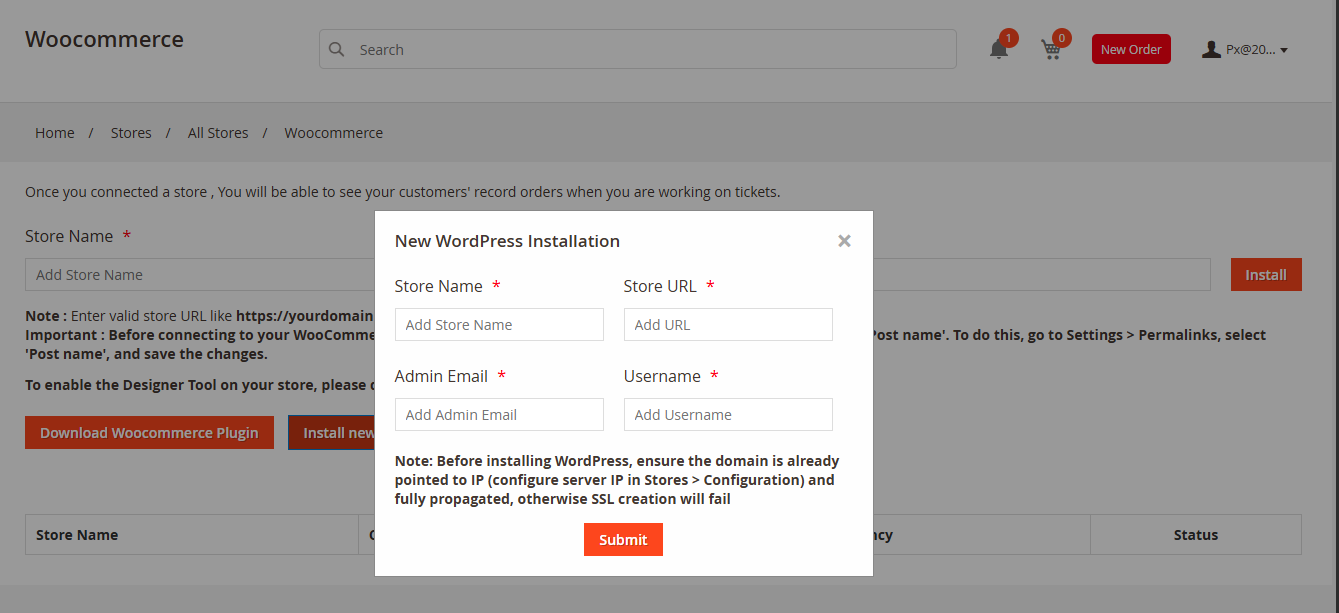
For Woocommerce as well, you need to initially enter the Store Name and Store URL and then proceed to Connect the store. [1]
This will take the reseller to the WooCommerce platform where they need to insert the URL of their store and validate it.
To enable the Designer Tool on your store, please download and install this plugin.
Once the store has been connected, it will be displayed onto the grid.
To download the Woocommerce Plugin click on the “Download Woocommerce Plugin” button this will redirect seller to the plugin download page.
To instal new WooCommerce website click on the “Install new WooCOmmerce website” button this will open a submit request pop-up fill in following details and click on Submit button: [2]
-
- – Store Name
- – Store URL
- – Admin Email
- – Username
Note: Before installing WordPress, ensure the domain is already pointed to IP (configure server IP in Stores > Configuration) and fully propagated, otherwise SSL creation will fail.
Magento
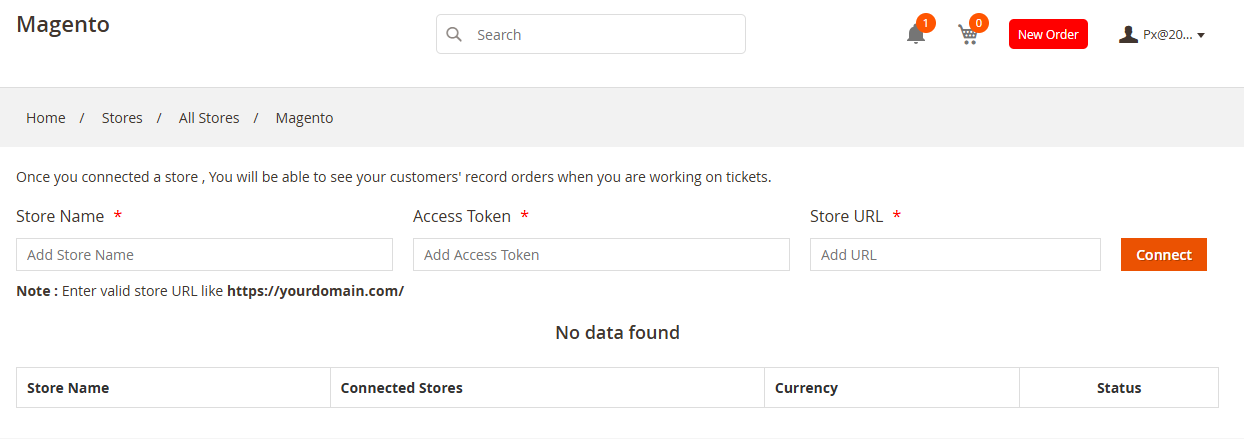
Here the resellers can add Store Name, Access Token and Store URL and to connect click on Connect button. [1]
Once connected, those stores will be listed in the Connected Stores section.
Catalog
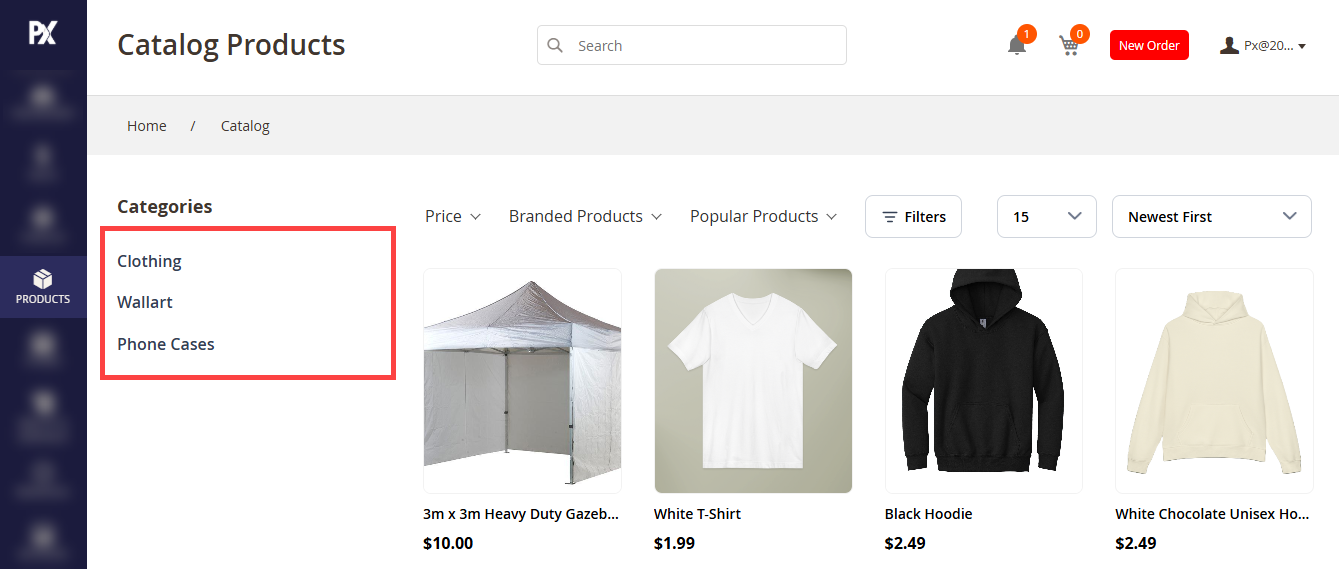
All the admin products will be displayed in this section. List of all the categories will be shown on the left side of the page. When a particular category from the left panel is selected, respective products will be shown onto the right.[1]
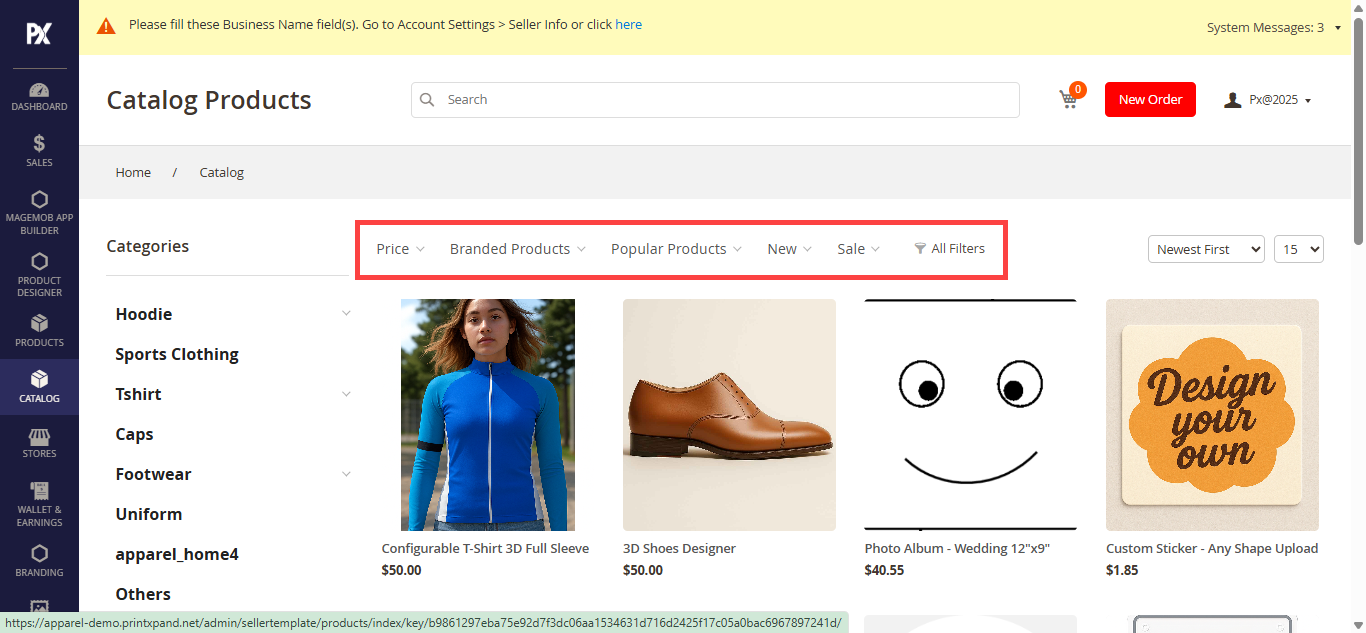
The Reseller can filter products based on Price, Branded Product, Popular Products, New and Sales. If there are more than five filters, a Filters filter is added at the end. [2]
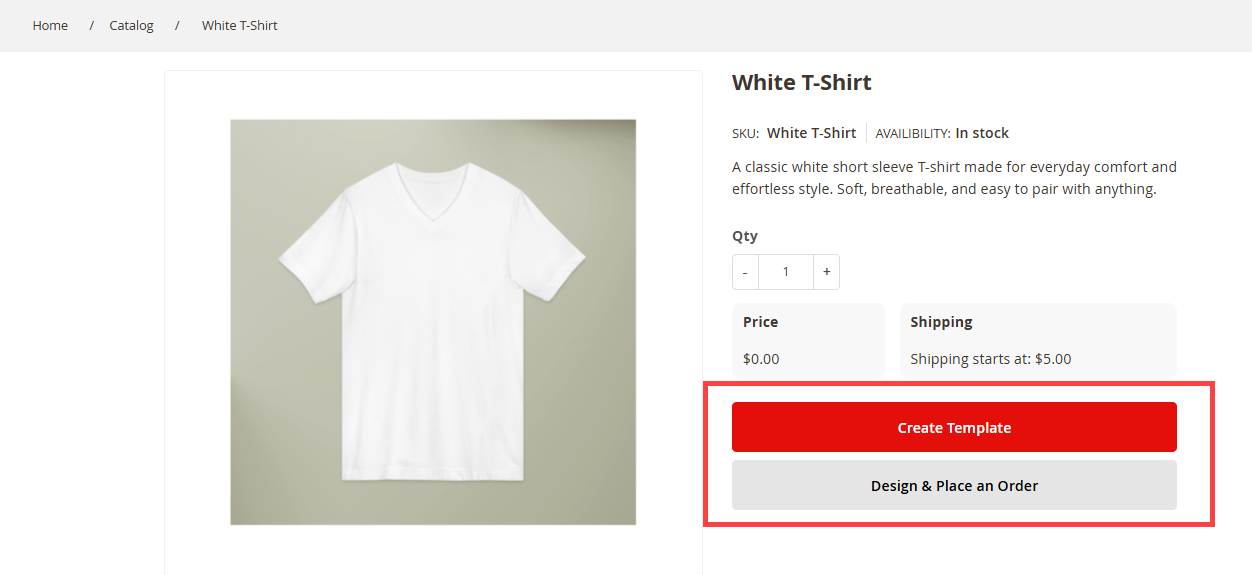
Additionally, to have a detailed view of that product, simply click on the respective product. Here the resellers have two options: Create Template and Design & Order. [3]
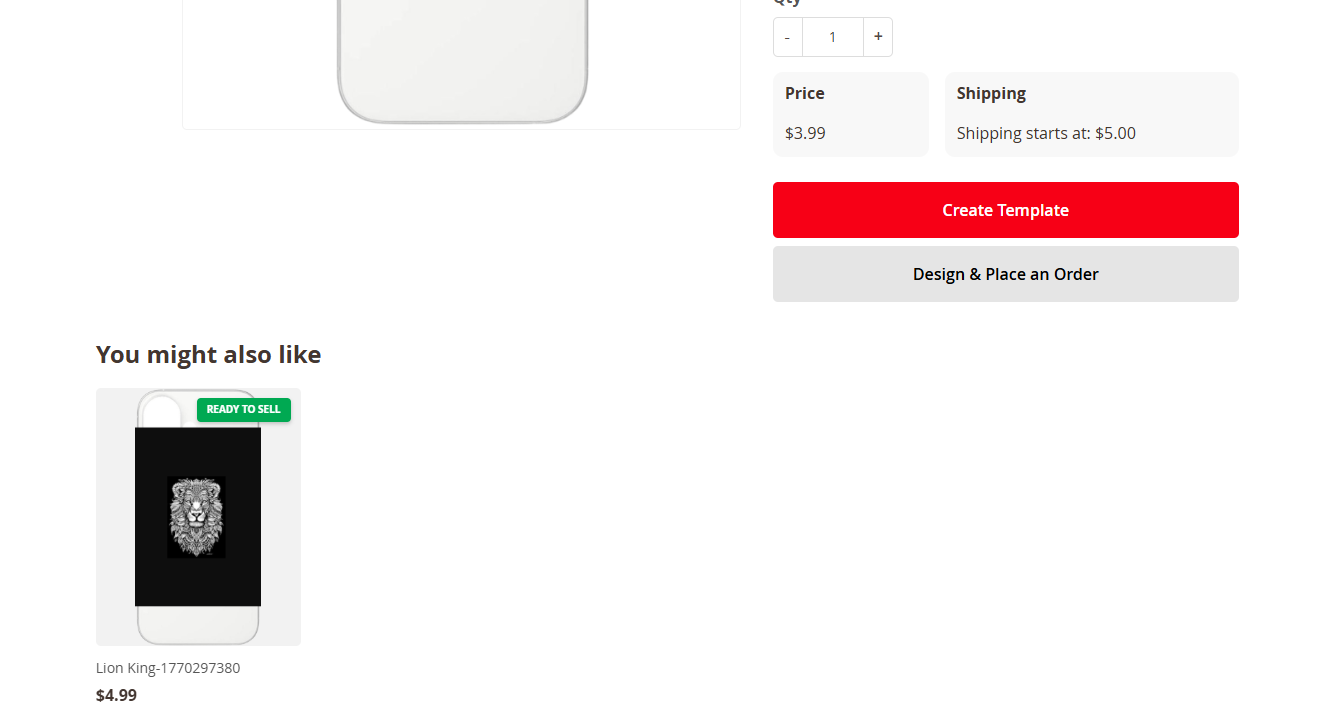
If the Product template already exists it will be listed below on the PDP(Product Detail Page) page. [4]
Product Configuration
These ‘Template’ products are further added in the Template Page and ‘Design & Order’ to place the order from the vendor side.
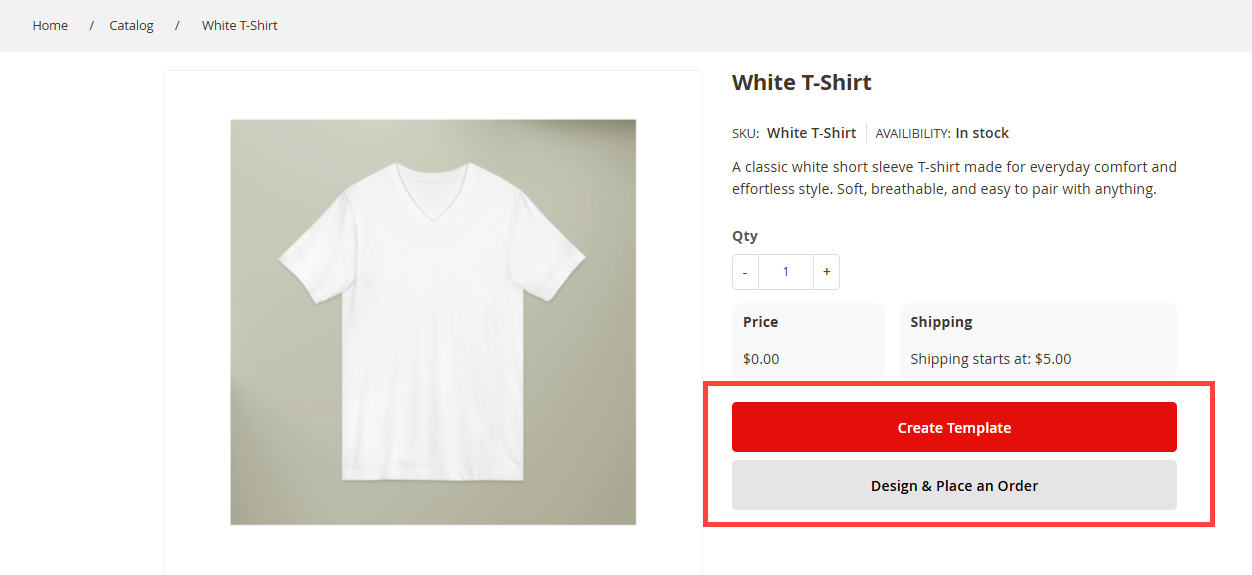
Create Template
By clicking on the ‘Create Template’ button, the user will be redirected to the design tool to design the product. After designing the product, the seller needs to click on the ‘Continue’ to Store button that will redirect the reseller to the Product listing page. If the Reseller wants to discard the design clicks in “Back to Store”. [1]
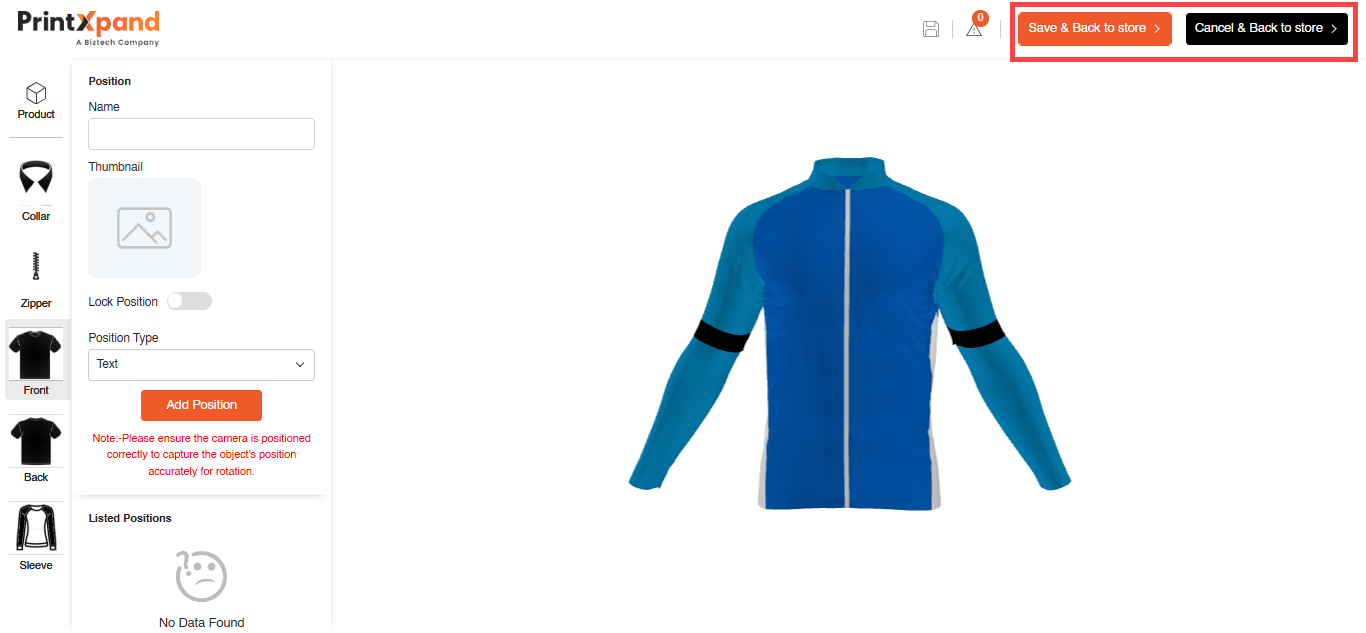
Design & Order
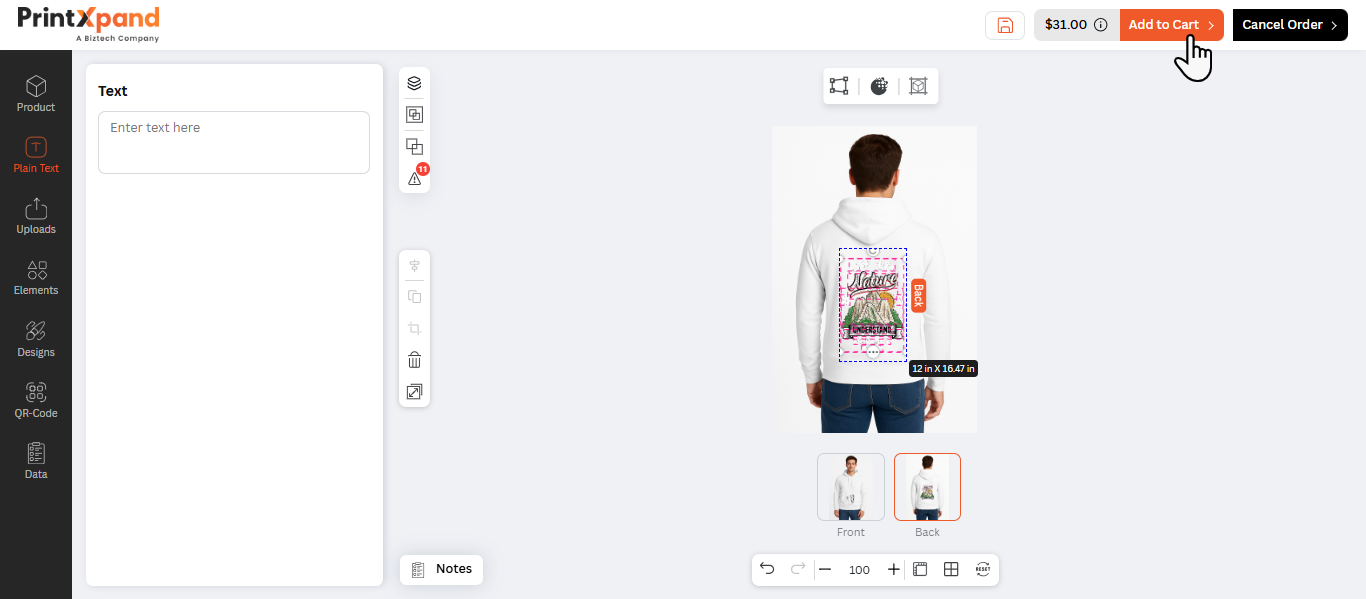
When the reseller clicks Design & Order, the system redirects them to the product design page. On this page, the reseller can customize the product using the available design tools. After completing the design, the reseller clicks Add to Cart to save the design and proceed with the order. A Success pop-up appears by clicking on the Go to Cart button to redirect on the Cart page.[1]
Back Store
If the reseller clicks Back Store, the system redirects them to the product page. The in-progress design is automatically saved as a product.
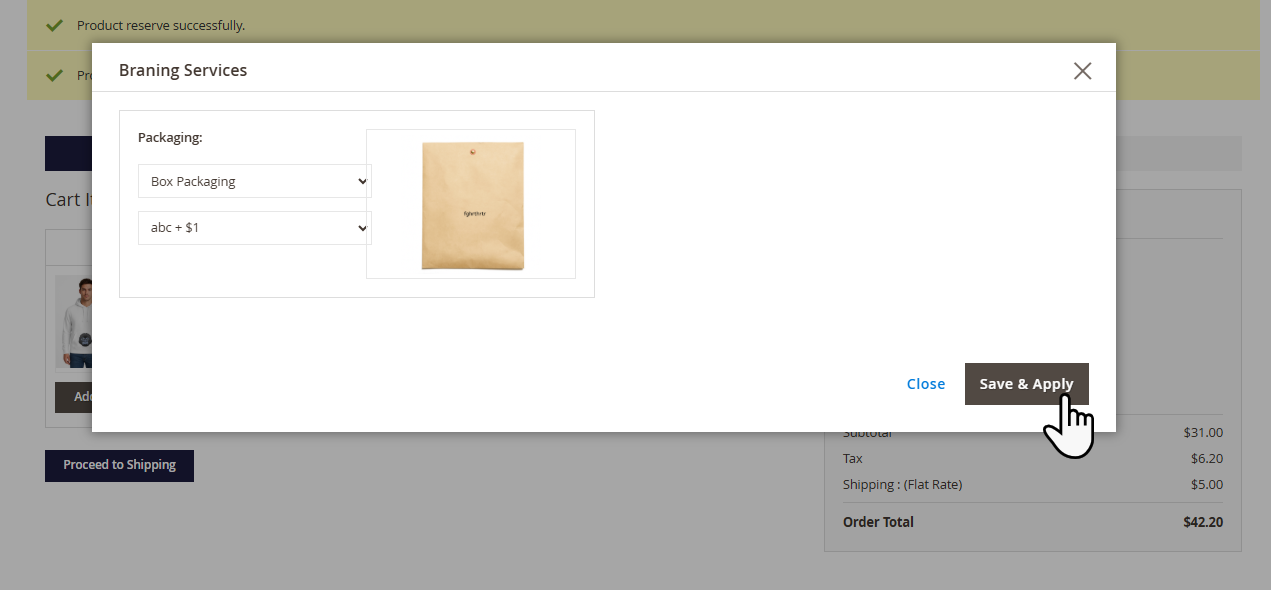
On the Cart page, the reseller can modify only the product quantity and the Branding. To add the branding on the Add Service button a Branding pop-up appears only assigned brandings to the product are visible in the pop-up select branding and click Save & Apply button. [2]
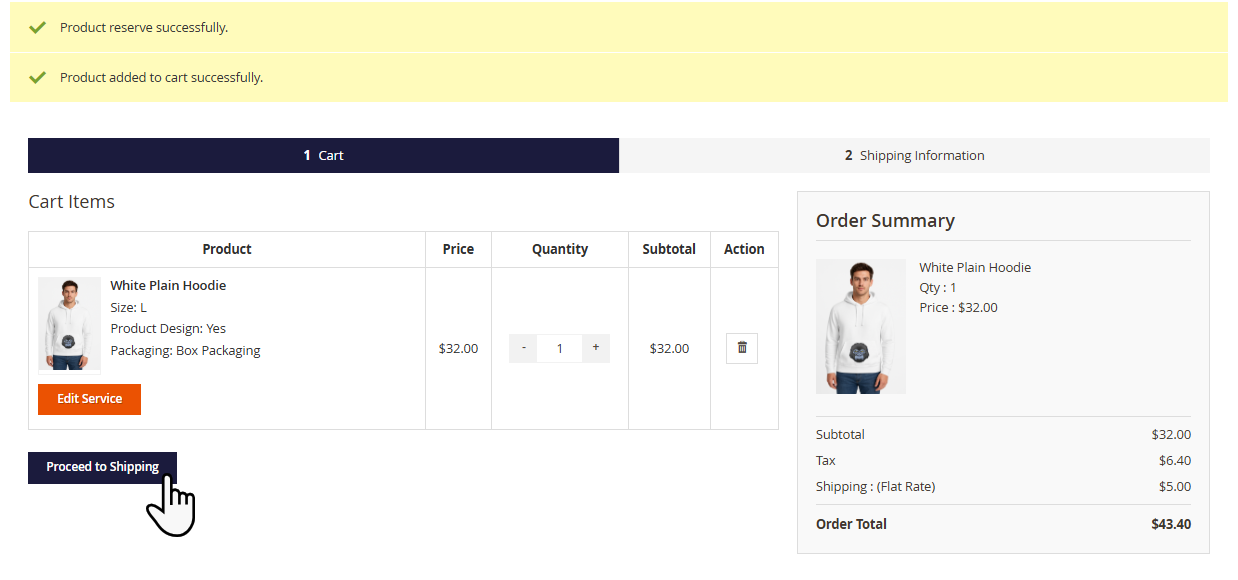
Click Proceed to Shipping to continue with the checkout process. [3]
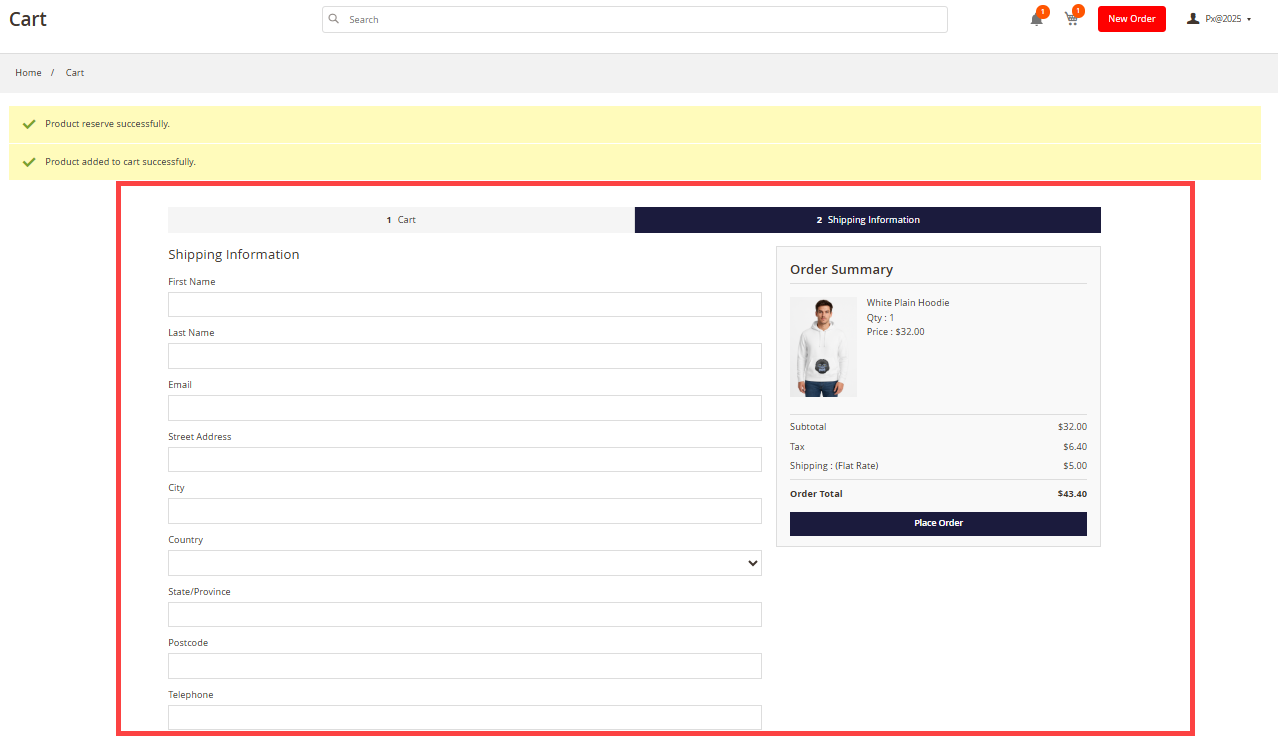
In the Second step resellers have to fill all the shipping details and click on Place Order. [4]
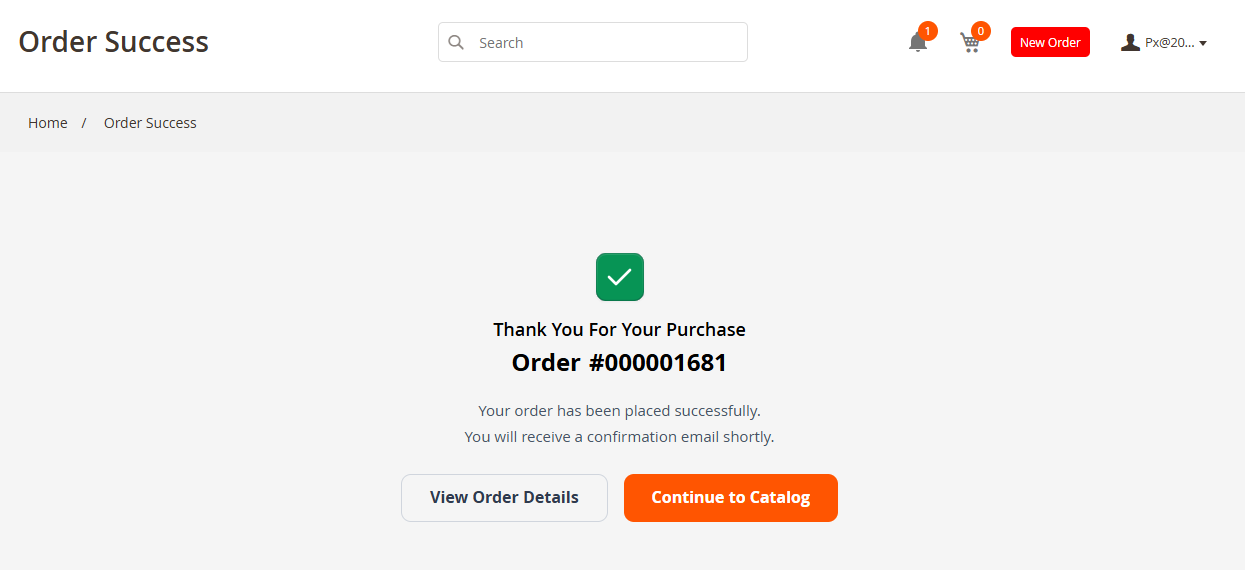
Once the order is placed, the reseller will be redirected to the Order Success page. From there, the seller can click on “View Order Details” to review the order, or select “Continue to Catalog” to be redirected to the catalog page. [5]
Artwork
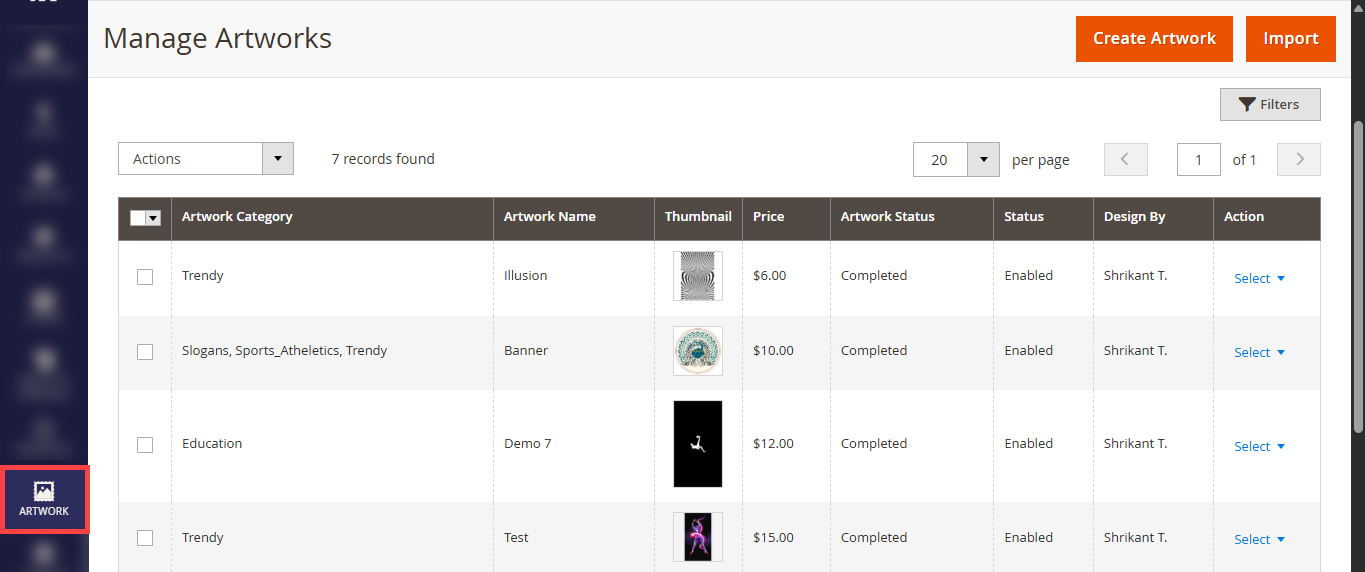
To manage the artwork, navigate to Art Work. This will redirect the vendor to the Manage Artwork page. Here, the vendor can edit existing artwork or create new artwork. [1]
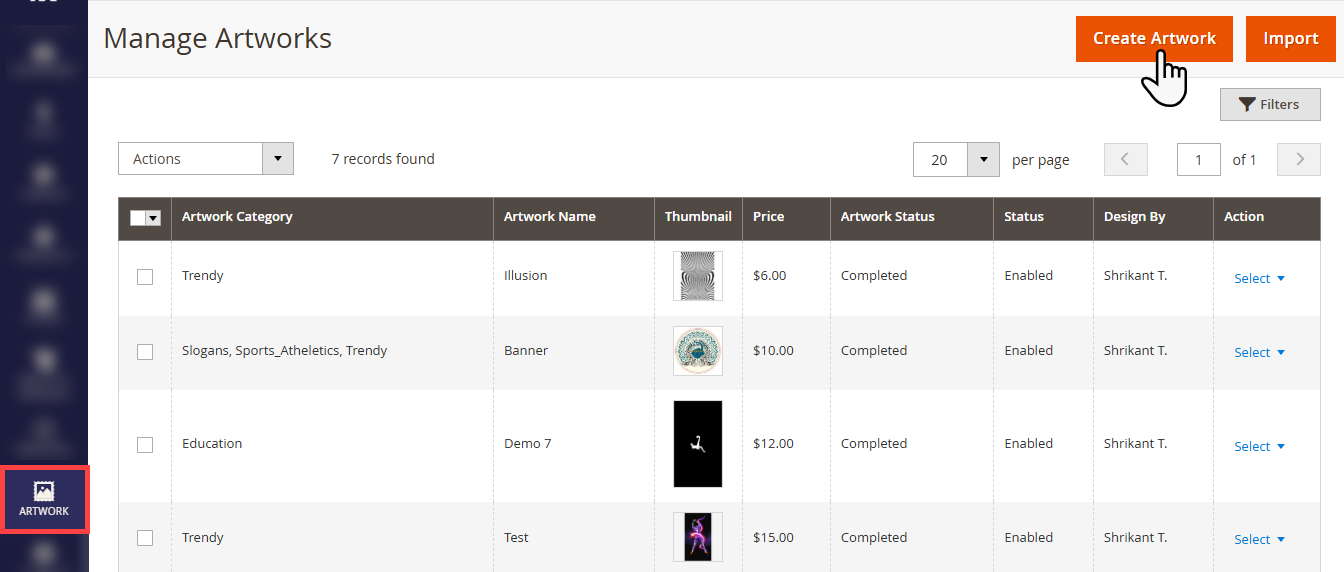
To create the new Artwork click on Create Artwork button this will redirect the vendor to create the artwork page. [2]
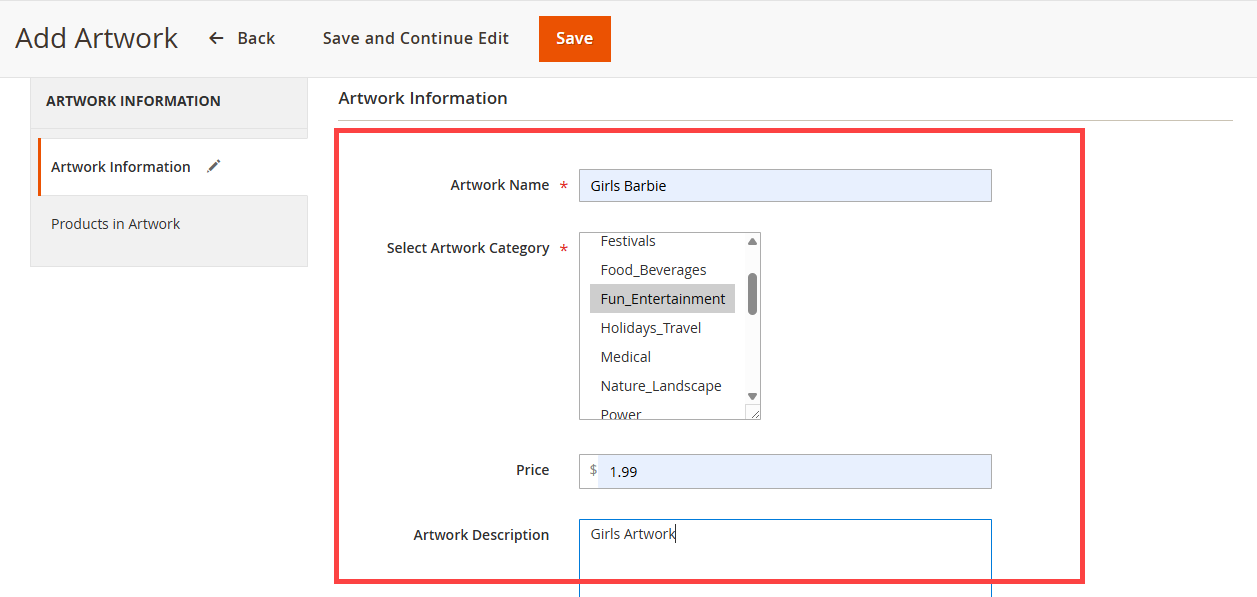
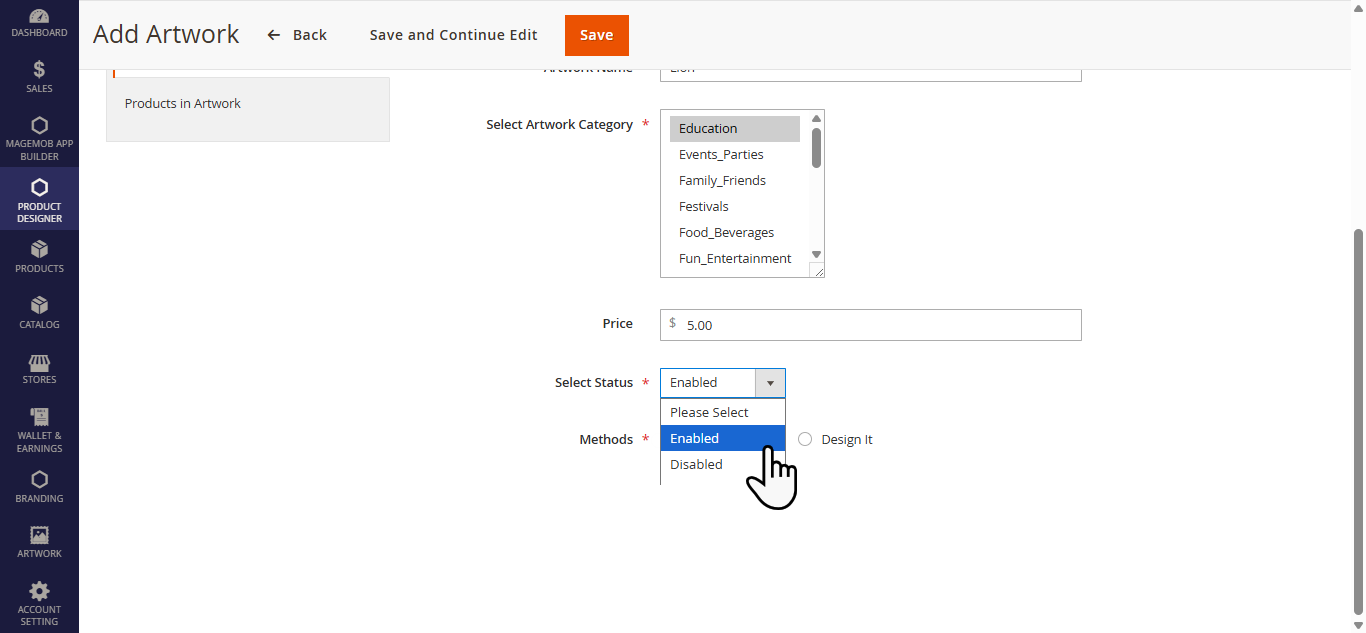
Here, the Vendor can create new artwork by setting the name, category, and price using the ‘Artwork Name,’ ‘Select Artwork Category,’ and ‘Price‘ fields. [3]
Vendors can set the status to Enable and Disable of the artwork from Select status dropdown.[4]
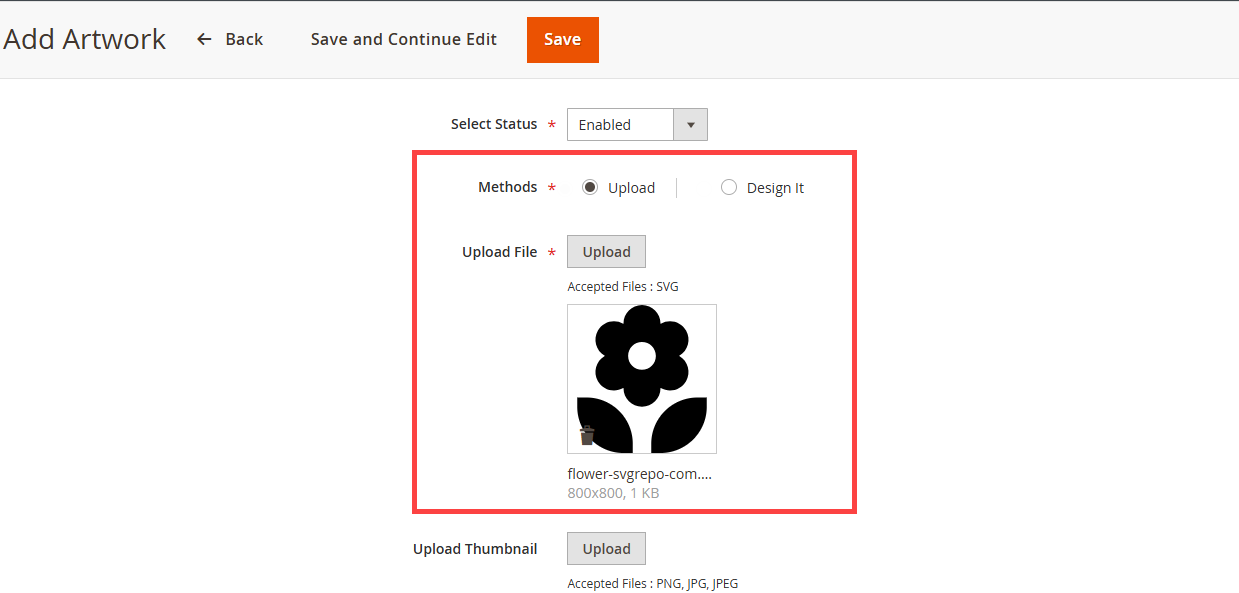
Here vendors have two different methods to upload Artwork Upload and Design it. When the vendor selects the Upload Method, the vendor has to upload the Artwork from the Upload File. [5]
Note: This will only accept the SVG file format.
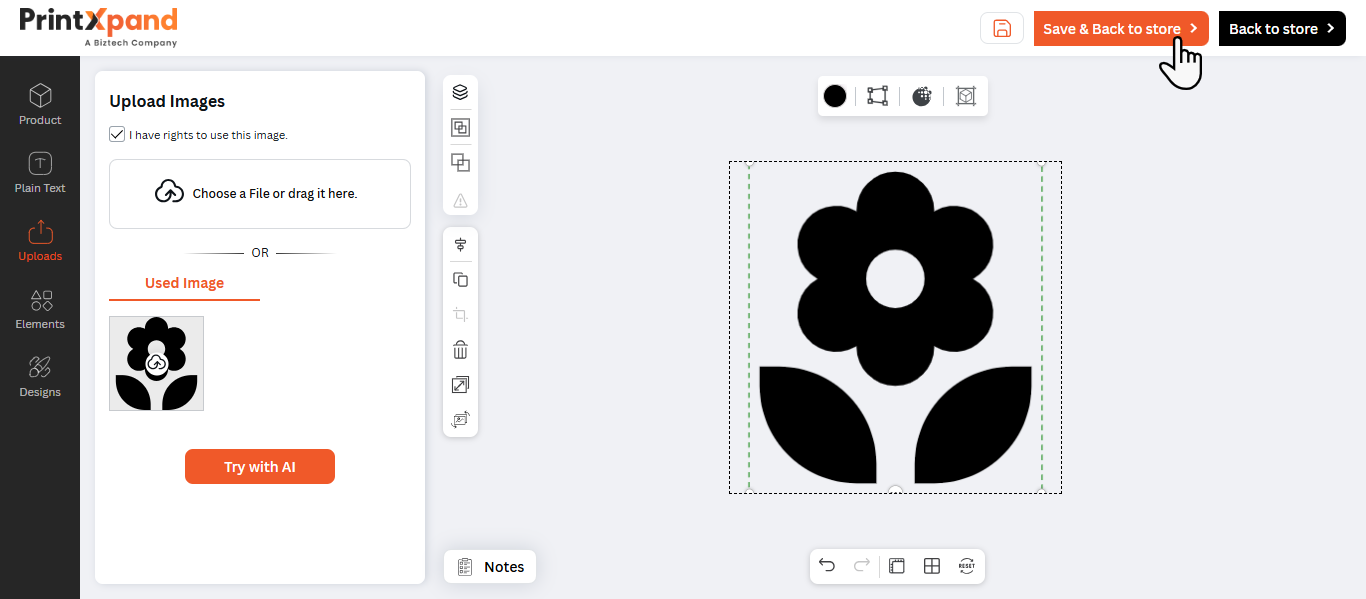
If the vendor selects the ‘Design It‘ method, and clicks on Save and continue Edit they will be redirected to the Designer Tool, where the vendor can design and click on Save & Back to Store the artwork will be saved to the list. [6]
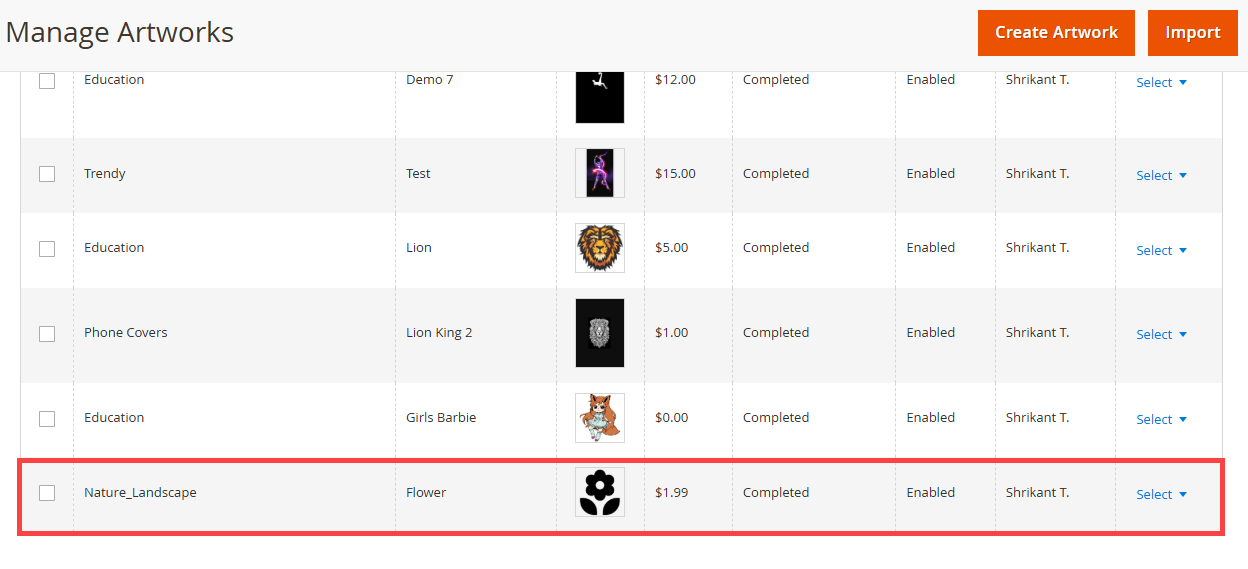
Newly created artwork is added to the list. [7]
Products
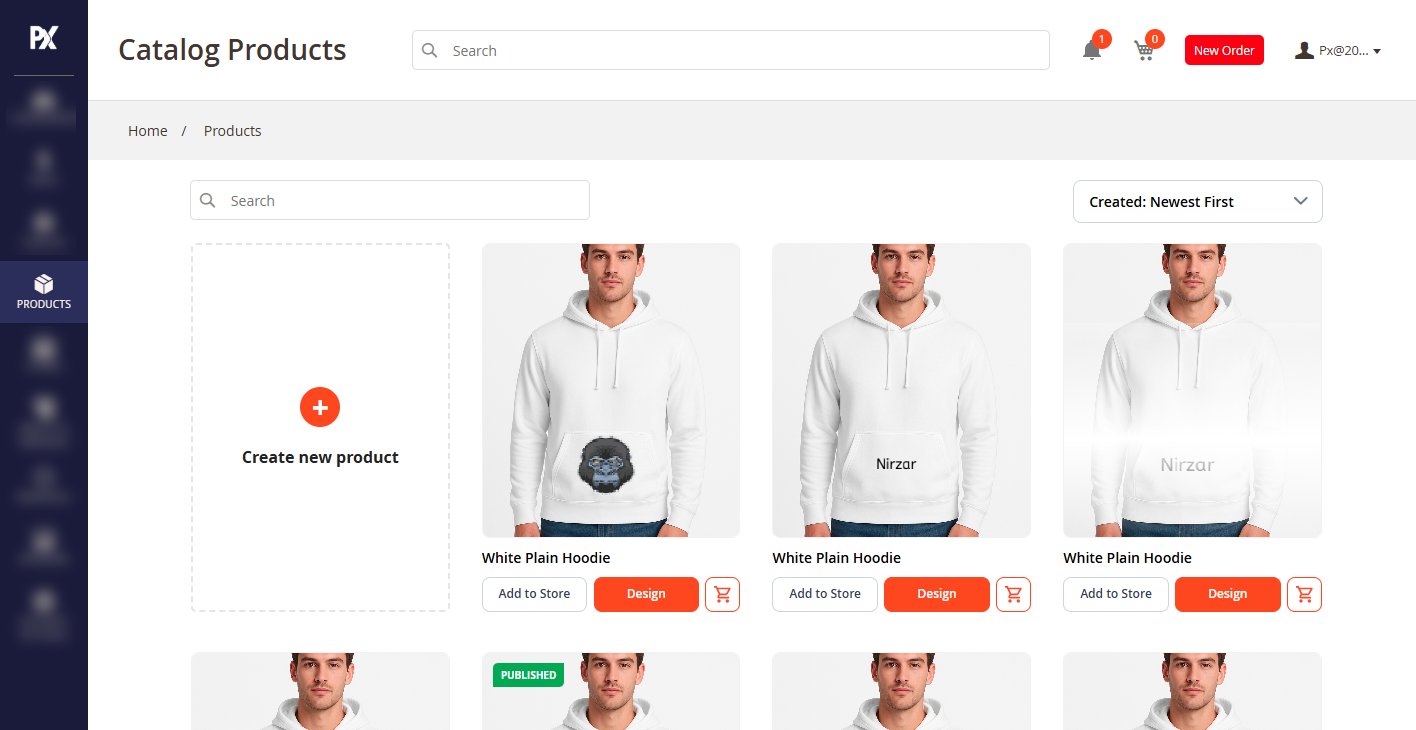
The Products on the left panel, when clicked upon, directs you to the page where all the reserved products are listed. [1]
Product Listing
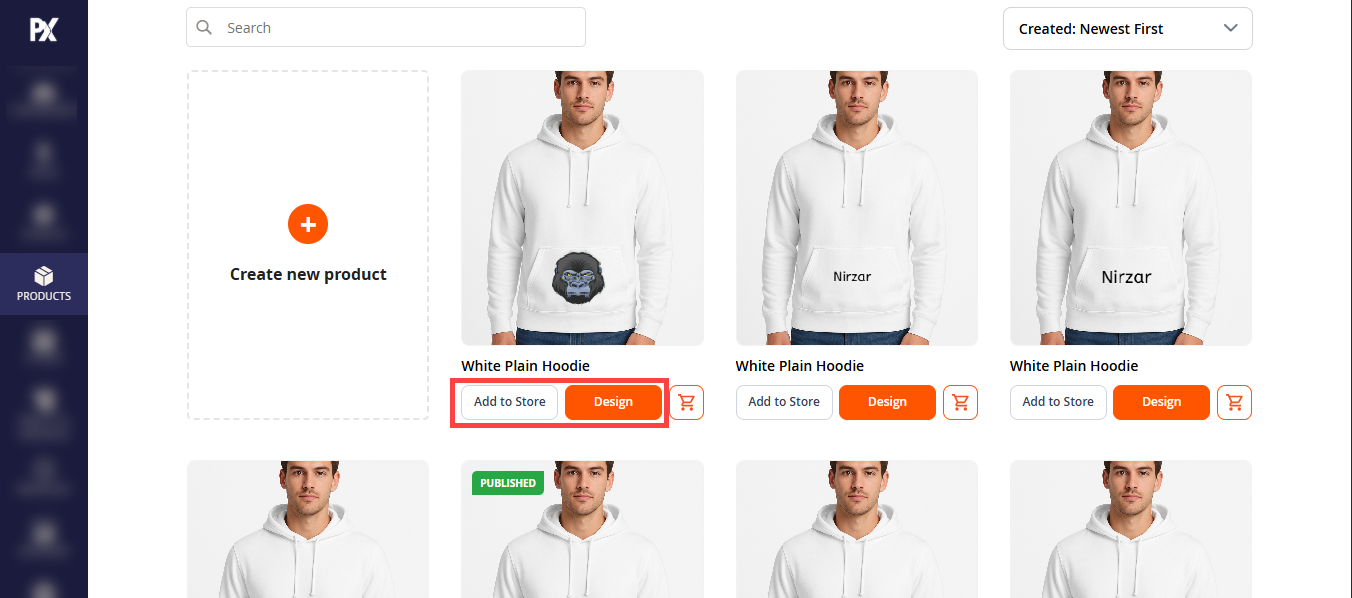
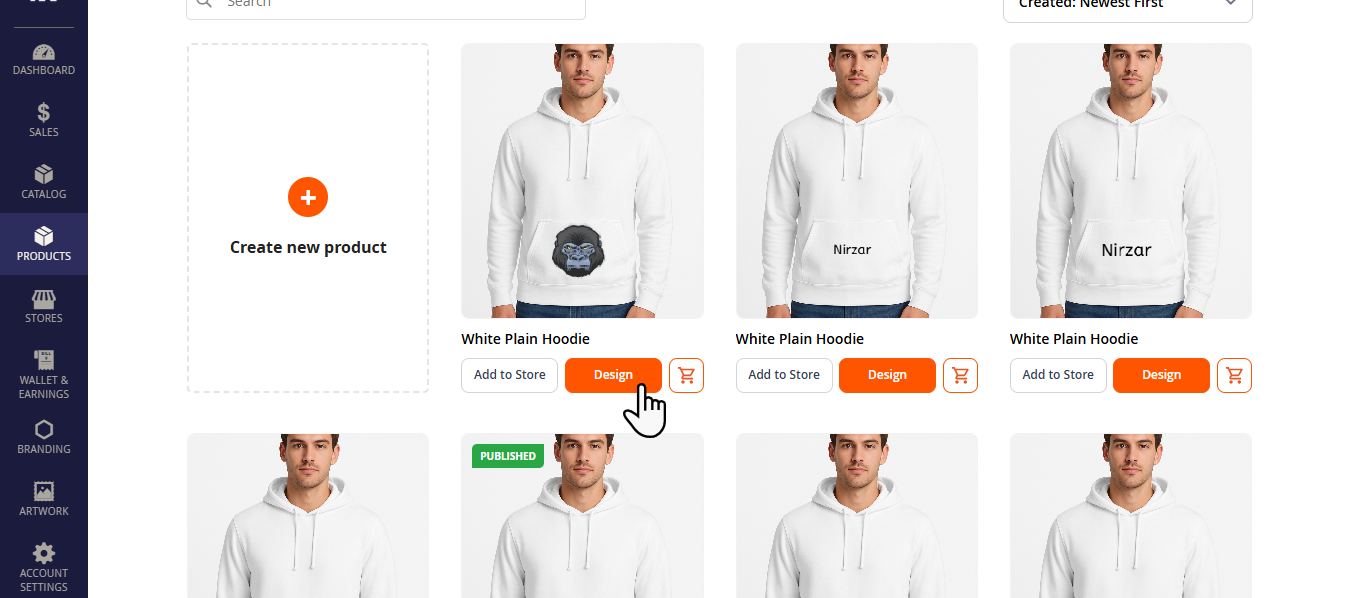
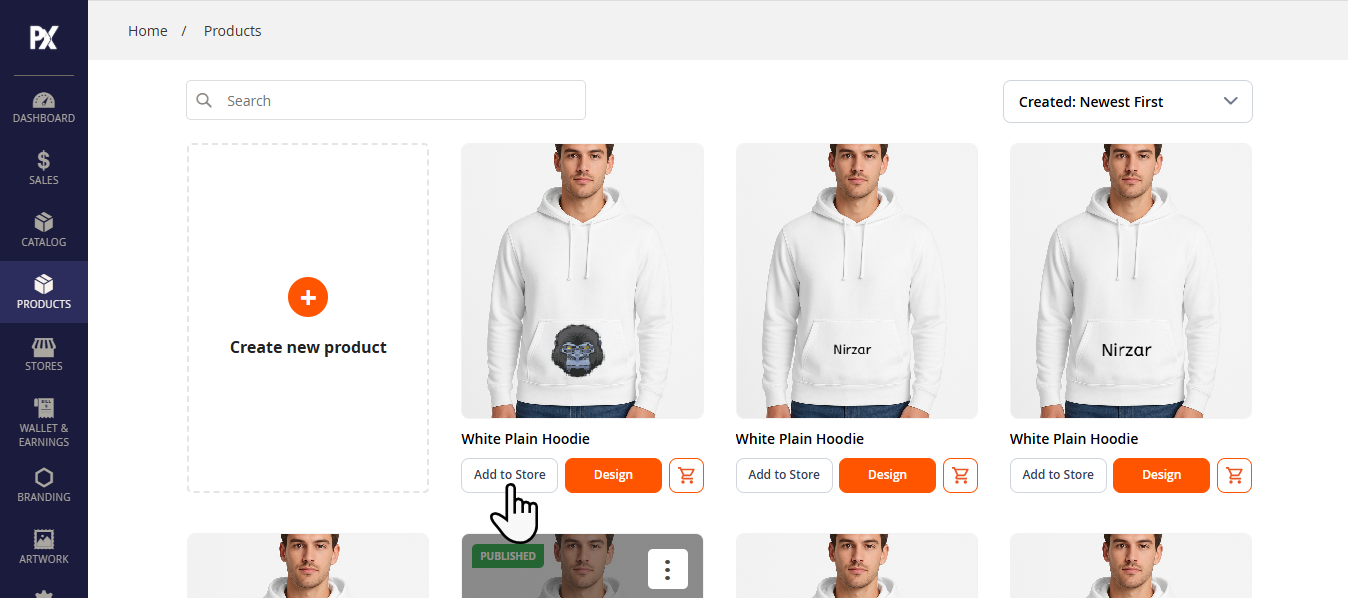
In this list view, the Reseller can see all the listed products. To Design or Publish a product, the Reseller clicks on Add To store or Design.[1]
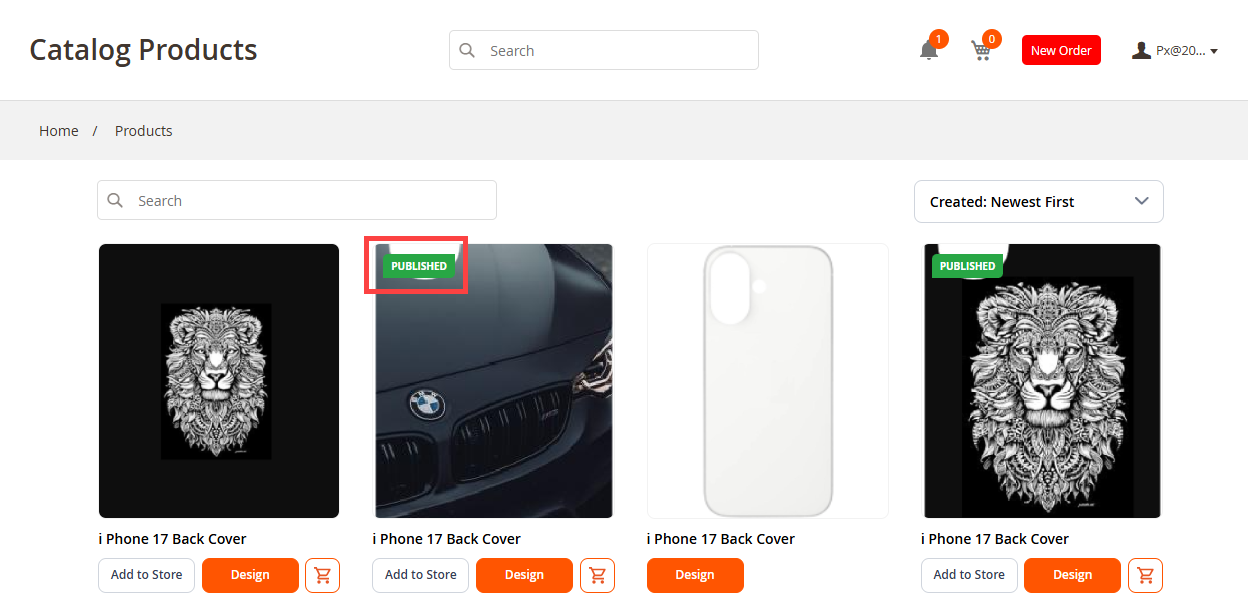
If the Product Is already published a Publish Tag appears on the product. [2]
Copy a Product
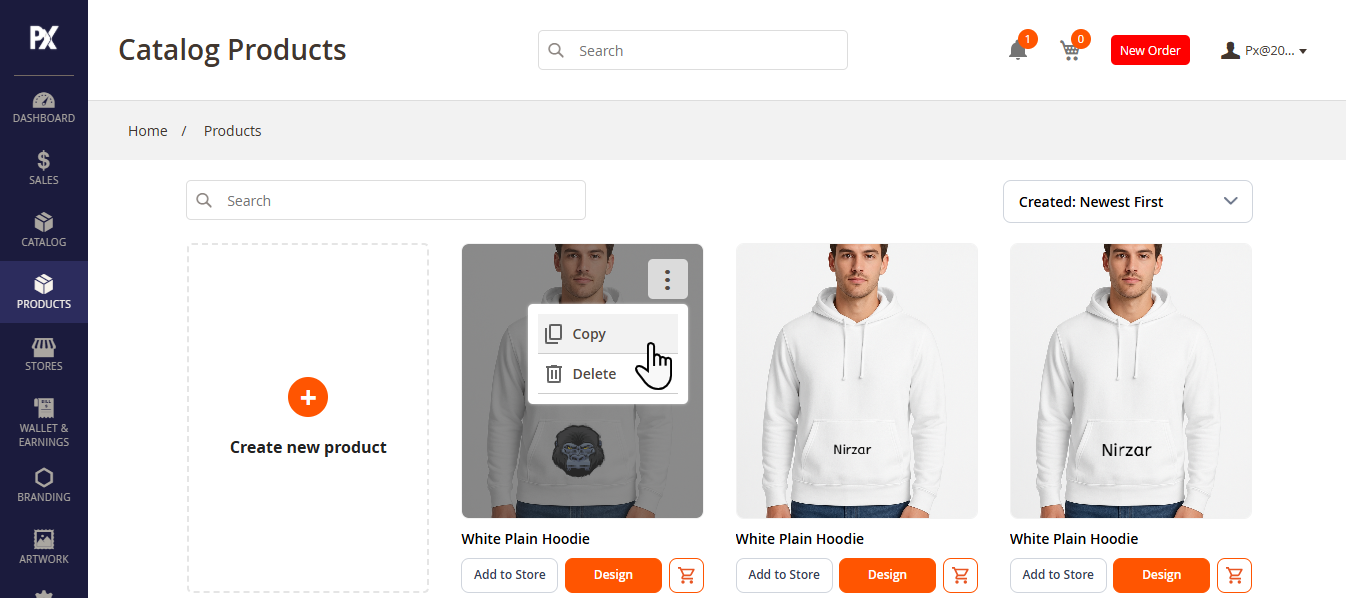
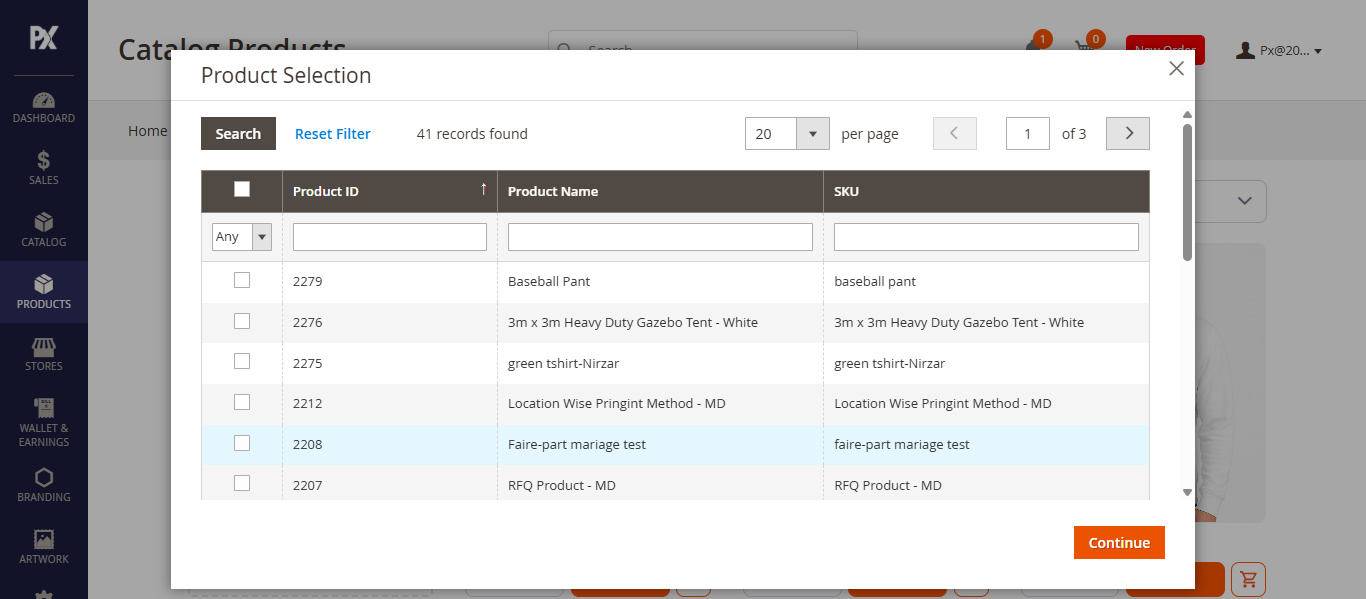
In order to copy a product design, the reseller should click on the three dots and Copy shown. This will showcase a Product Selection pop-up. [1]
The Product Selection pop-up lists the Product Id, Product Name and SKU; the reseller can select their preferred product(s) and proceed to Continue. The newly copied products will be listed onto the grid. [2]
Design a product
The resellers can design a newly reserved product by clicking on the Design button. [1]
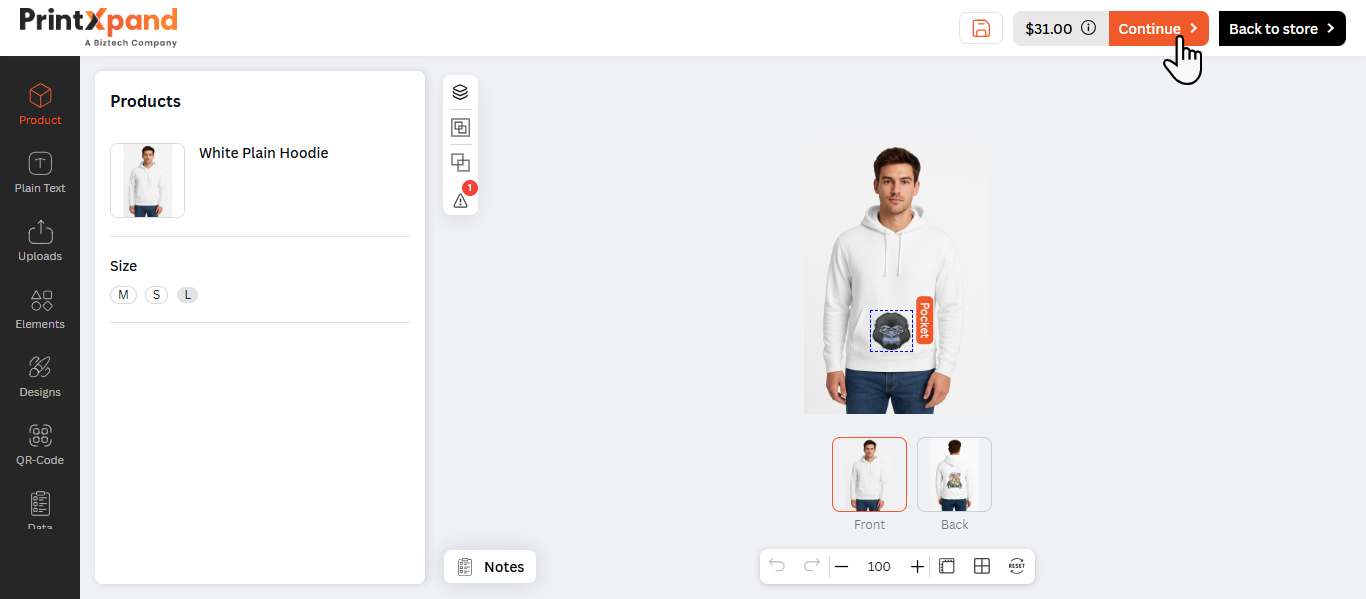
The Design button will redirect the reseller to the product designer tool, where they can design the product and then Continue. This will redirect the reseller to the product page. [2]
Publish a product
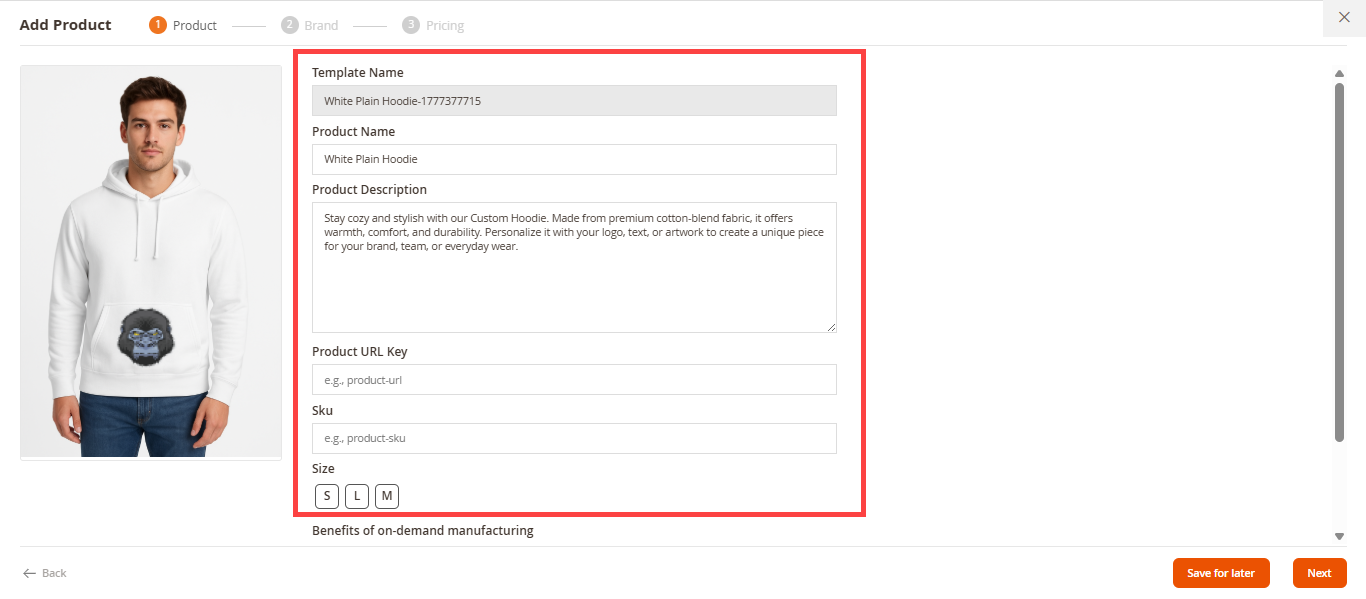
To Publish the product click on the Add to Store button . Clicking on Add to Store will publish the product. This option will be available only for the designed products.[1]
Publishing a product is divided into three steps. In the first step, the reseller can edit the Product Name, Product Description, SKU, Color, and Size. [2]
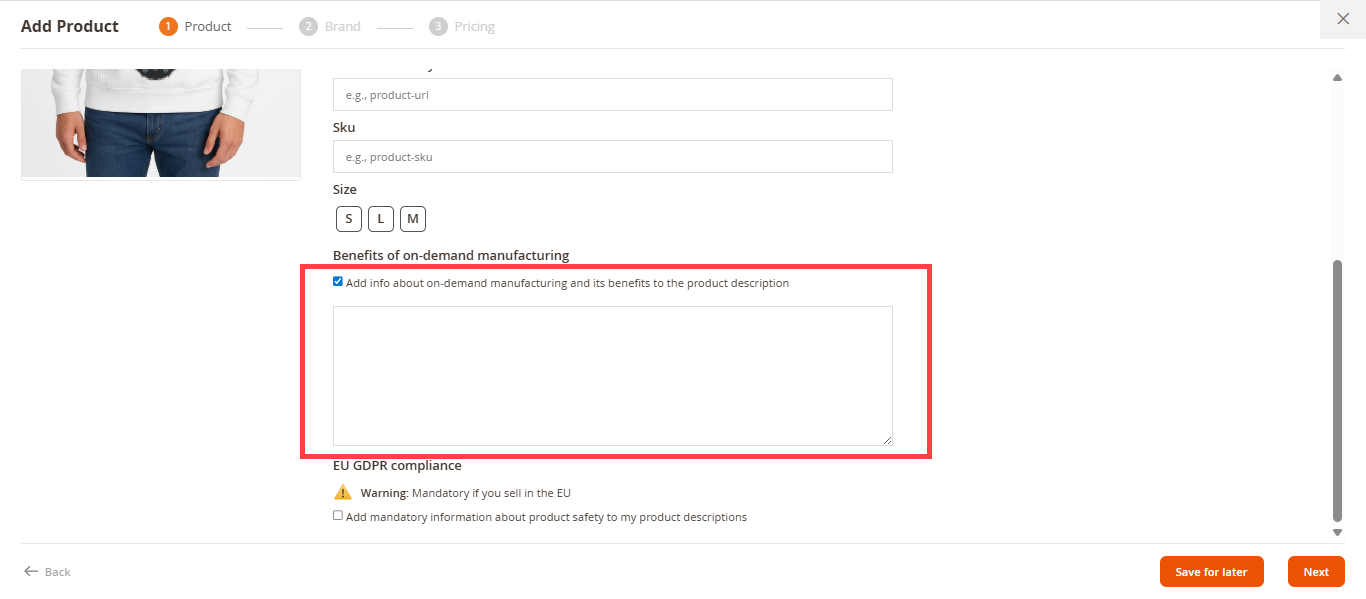
In the Benefits of On-Demand Manufacturing section, select the checkbox Add info about on-demand manufacturing and its benefits to the product description. Then, enter the description in the text field. This information will appear on the Product Detail Page (PDP) along with the standard product description.[3]
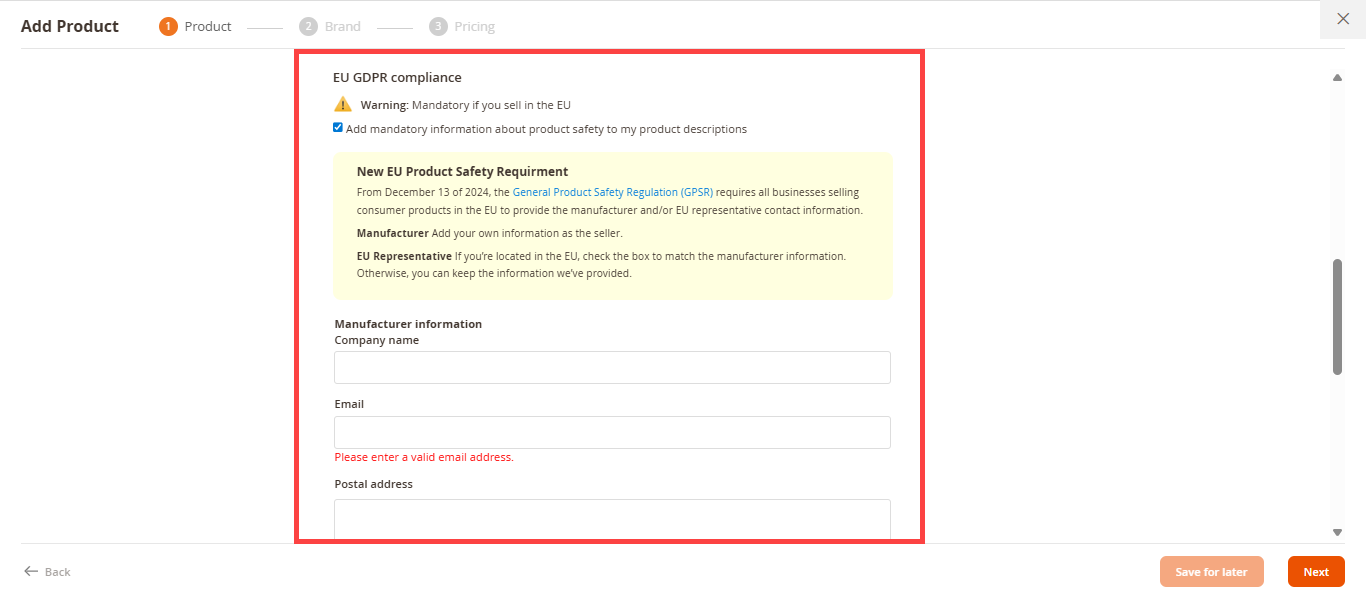
In the EU GDPR Compliance section, select the checkbox Add mandatory information about product safety to my product descriptions to include this information in the Product Description. Enter the Company Name, Email, and Postal Address to add your seller information. [4]
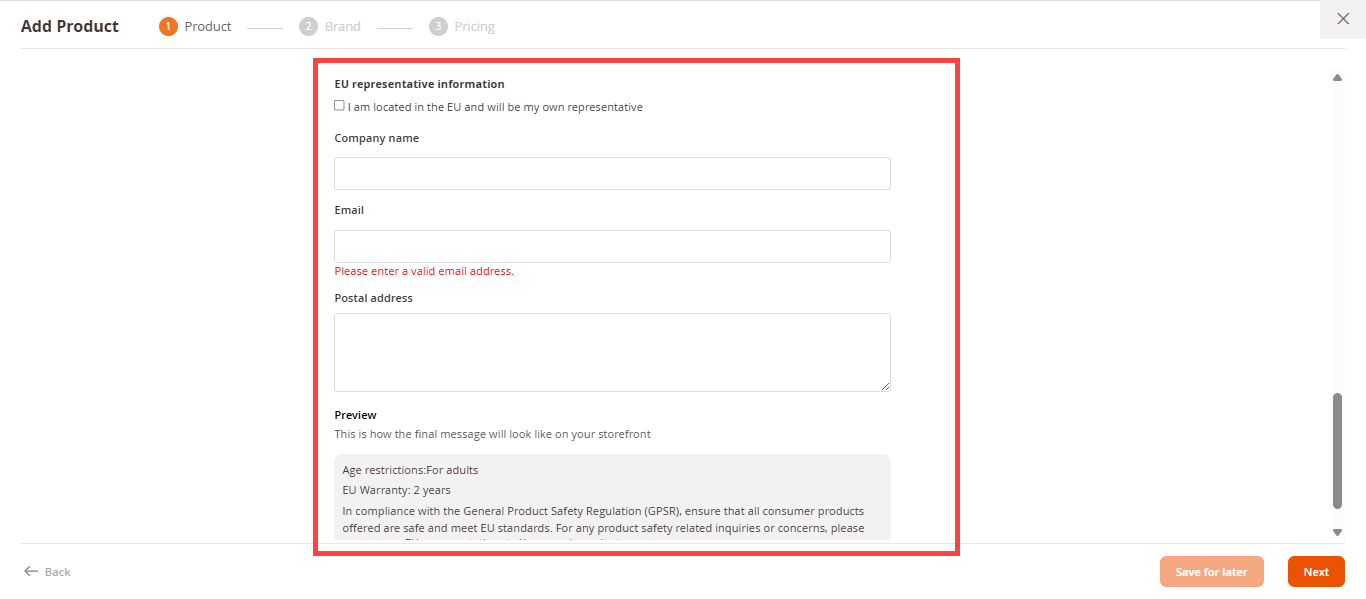
If the seller is located in the EU, select the checkbox I am located in the EU and will be my own representative. Otherwise, fill in the mandatory details (Company Name, Email, and Postal Address) to provide the required seller information. [5]
Note: This information is mandatory for resellers of sales in the EU.
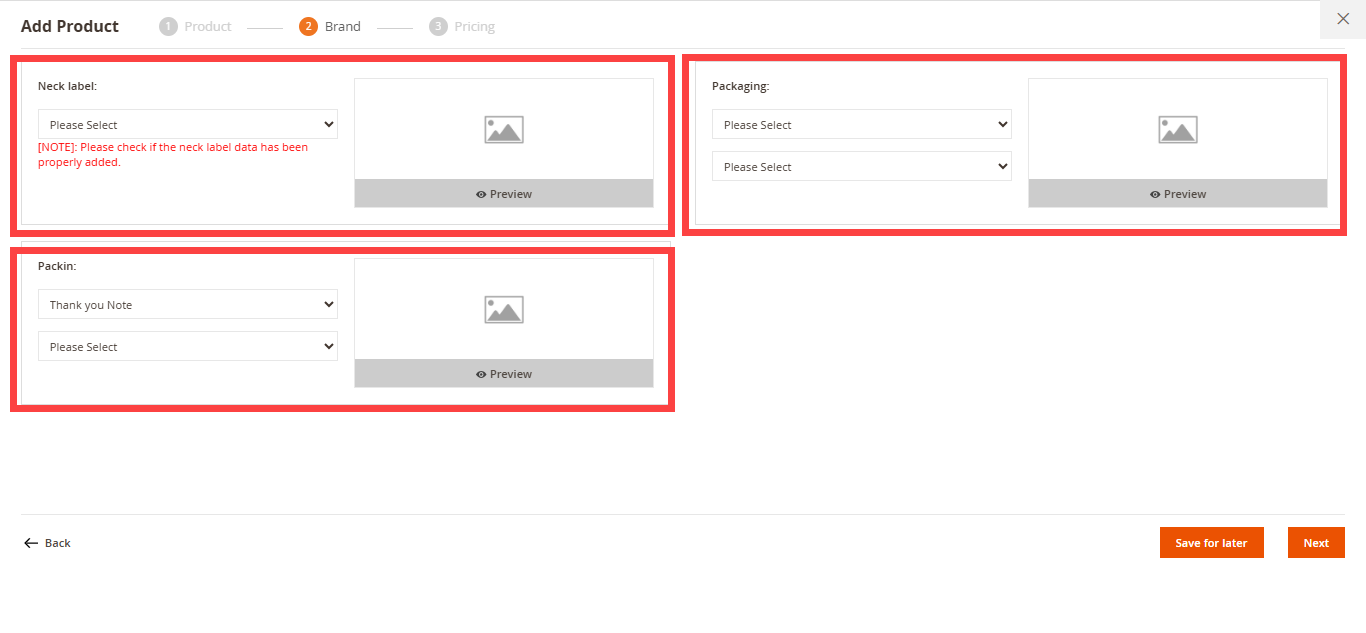
In the second step Brand reseller can set up Neck Label, Packaging and Packing for the product.[6]
Note: This step is dependent on admin configuration.
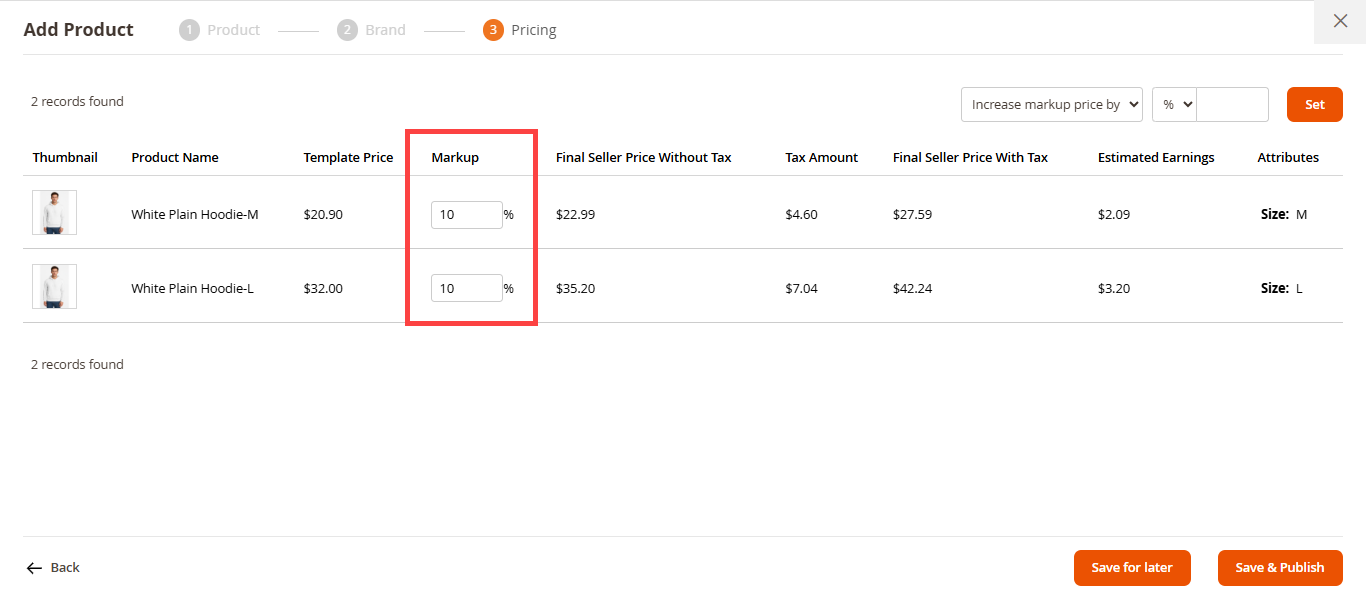
In the third step, under Pricing, the reseller can set up a markup for the product using the Markup column. [7]
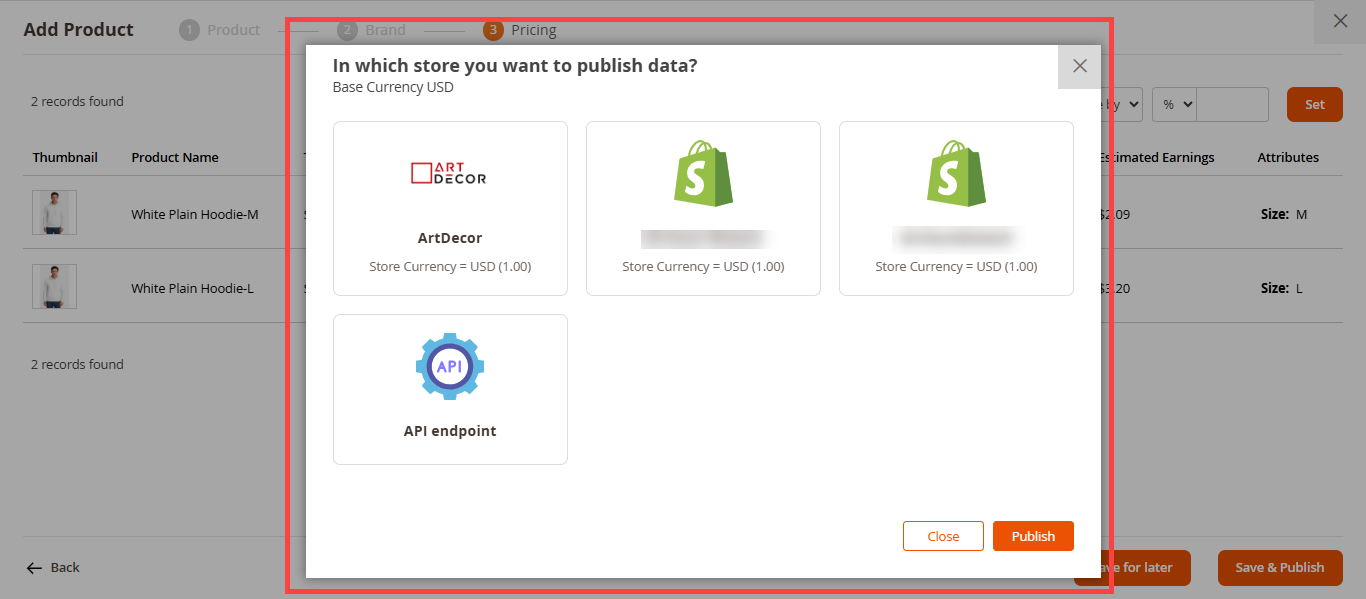
Once all the details have been entered, click the ‘Save For later‘ or ‘Save & Publish‘ button. When the ‘Save & Publish‘ button is clicked, a pop-up will appear to select the store(s) for publishing the product. In this pop-up, the reseller can select multiple stores, and the selected stores will be highlighted. [8]
When the “Save For Later” button is clicked the design will be saved and the admin will be redirected to the Product page.
Delete a product
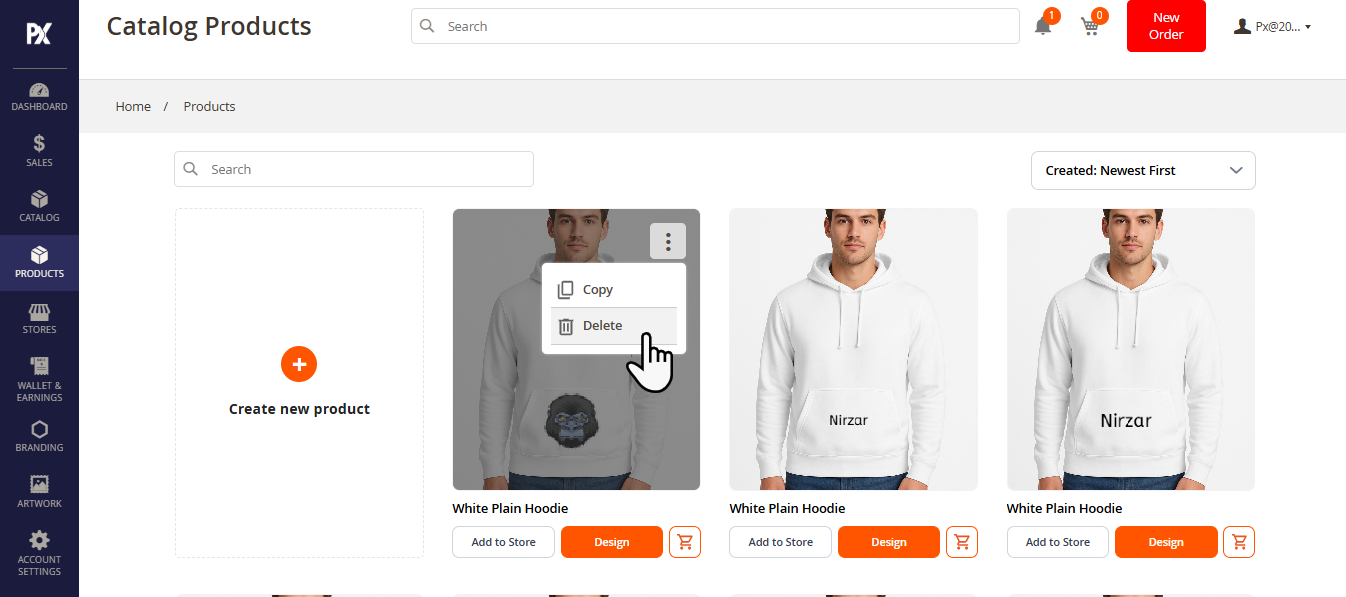
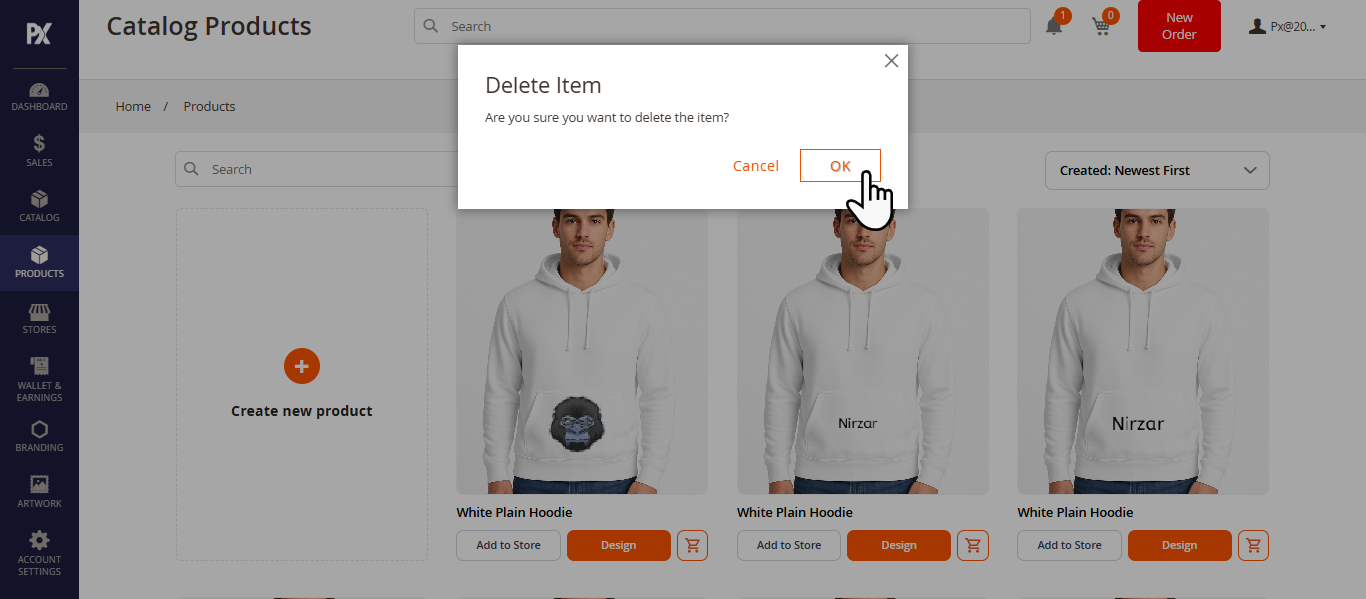
In order to delete a published product, one can hover on the product and click on three dots then click on the Delete button.[1]
A pop-up will be displayed, confirming the deletion. To proceed with the process, click on the OK button. [2]
Orders
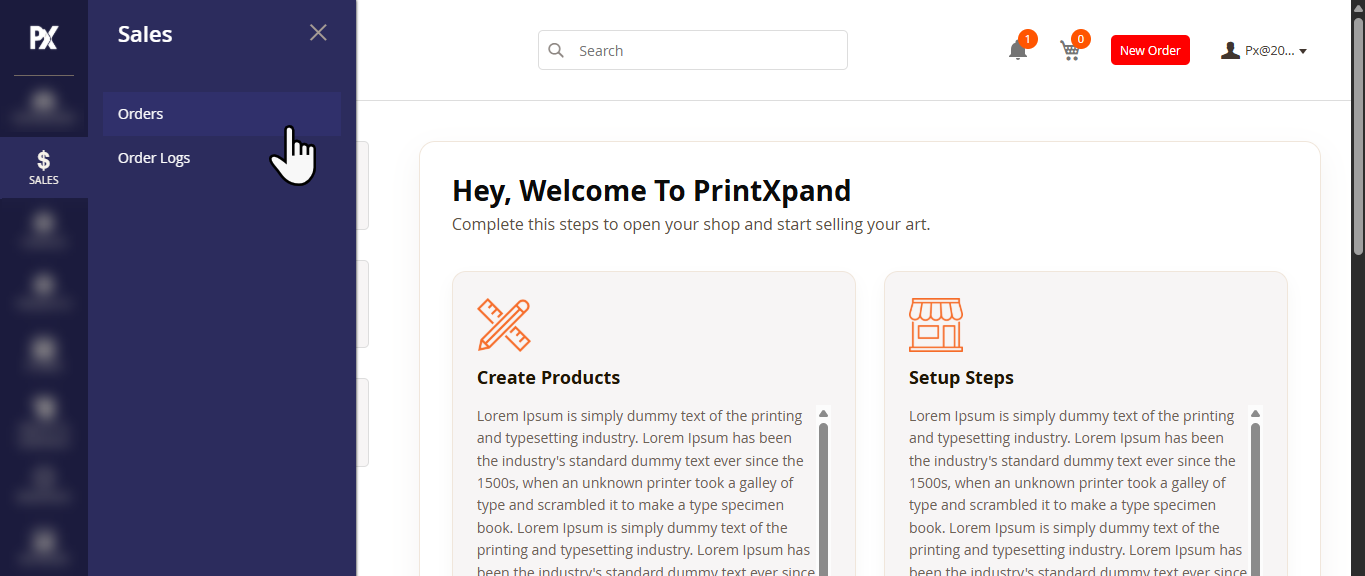
Navigate to Orders by directing towards Sales.[1]
Order Listing
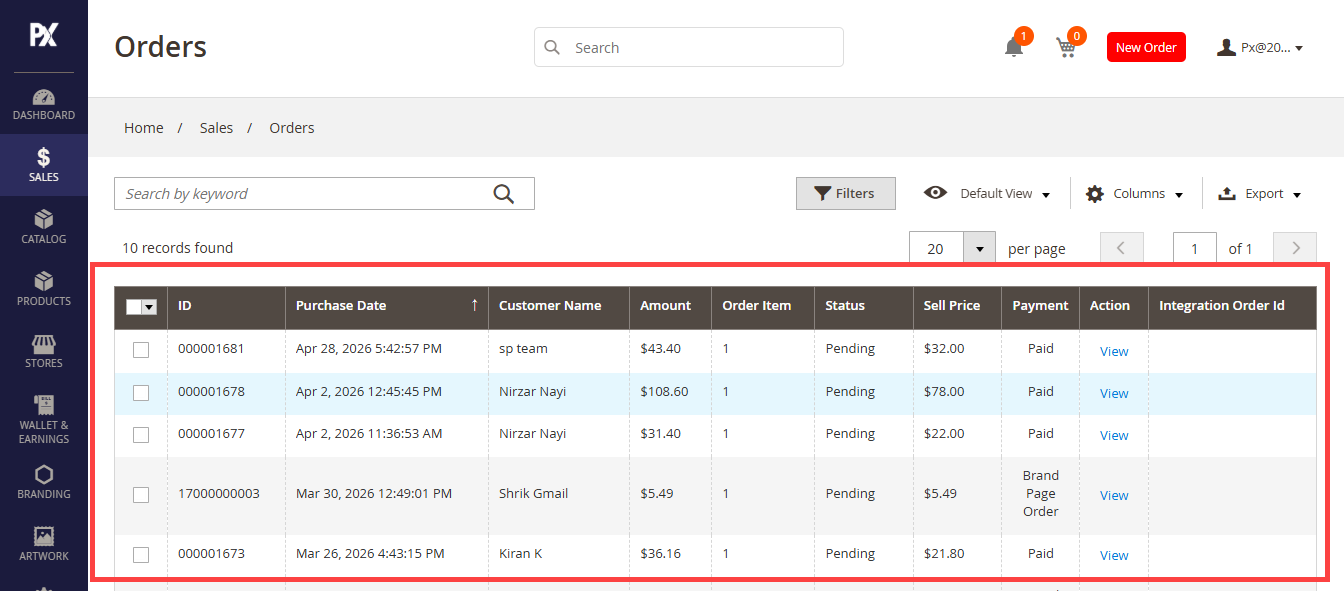
The grid consists of all the placed orders with the information such as Order Id, Purchase Date, Customer Name, Amount, Order Item, Status and many more. The seller can set the columns to be displayed on the grid through Columns. The order listing can further be filtered as per the preferences. Any order can as well be searched by entering the appropriate keyword onto the search bar. [2]
Order Details
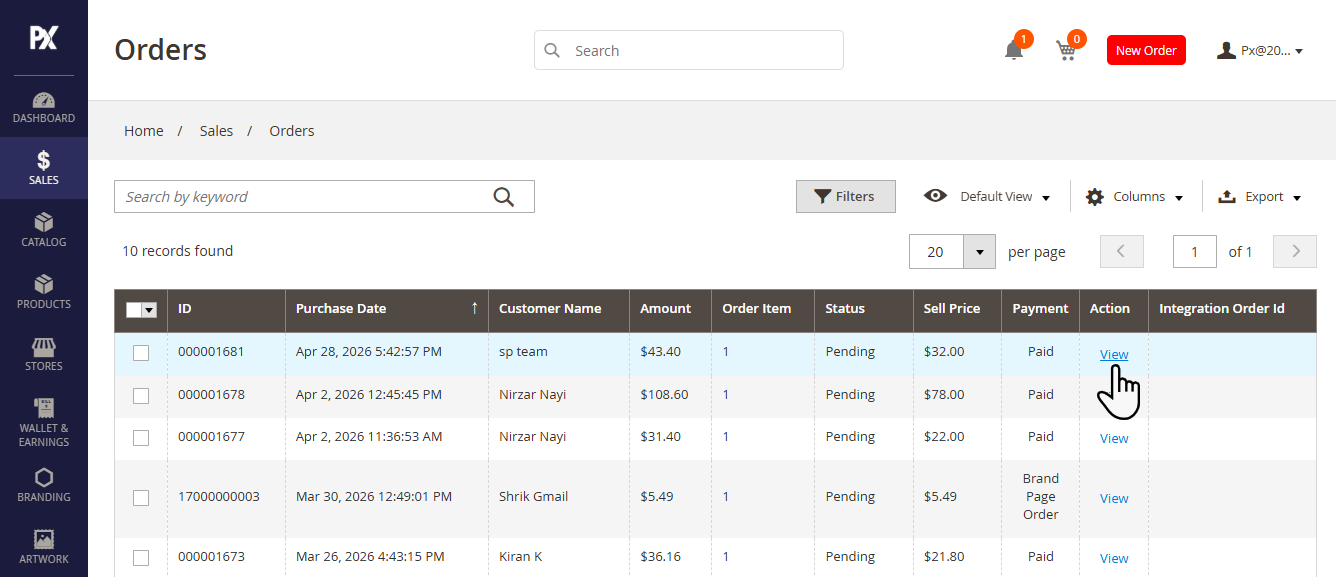
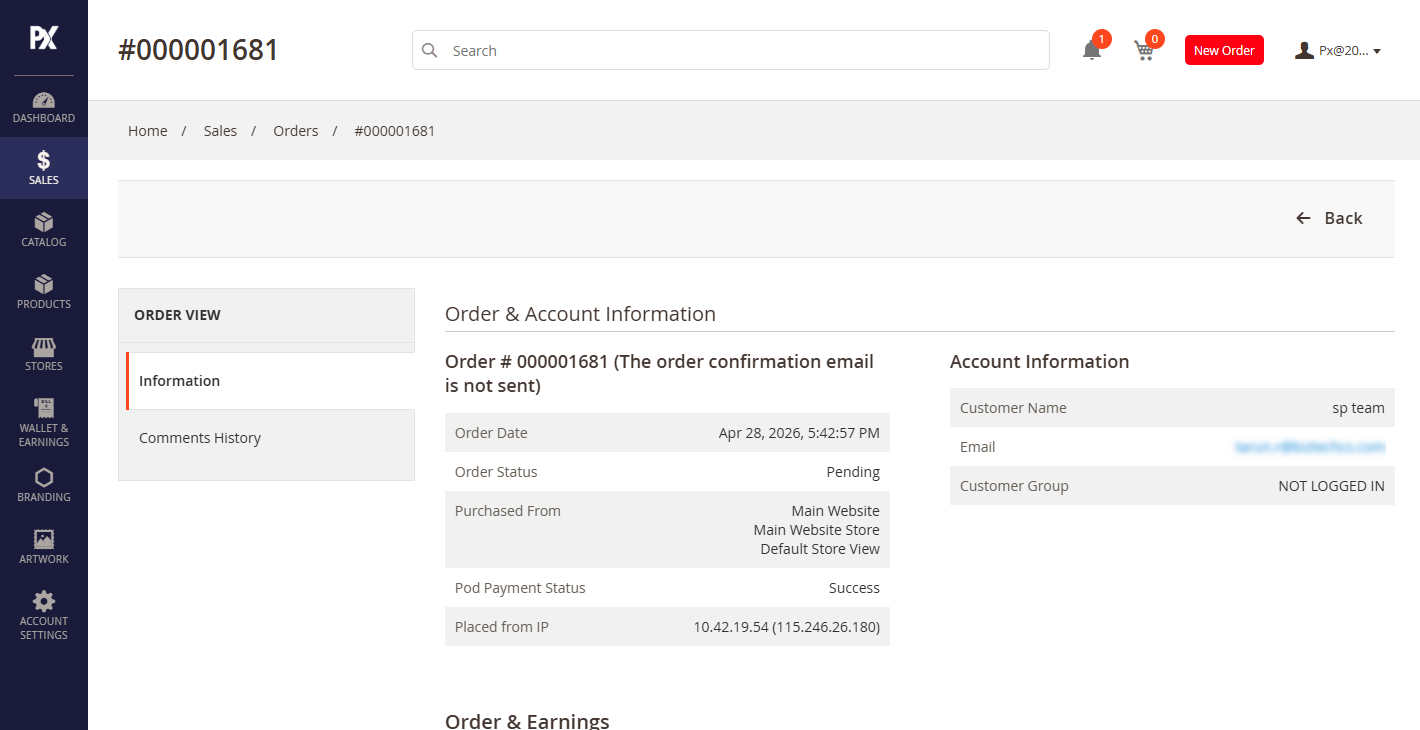
The View button in the Action column will direct you to the Order Details page. [1]
The Order Details page consists of details such as: Order & Account Information, Ordered Items, Order Total and Comments History. [2]
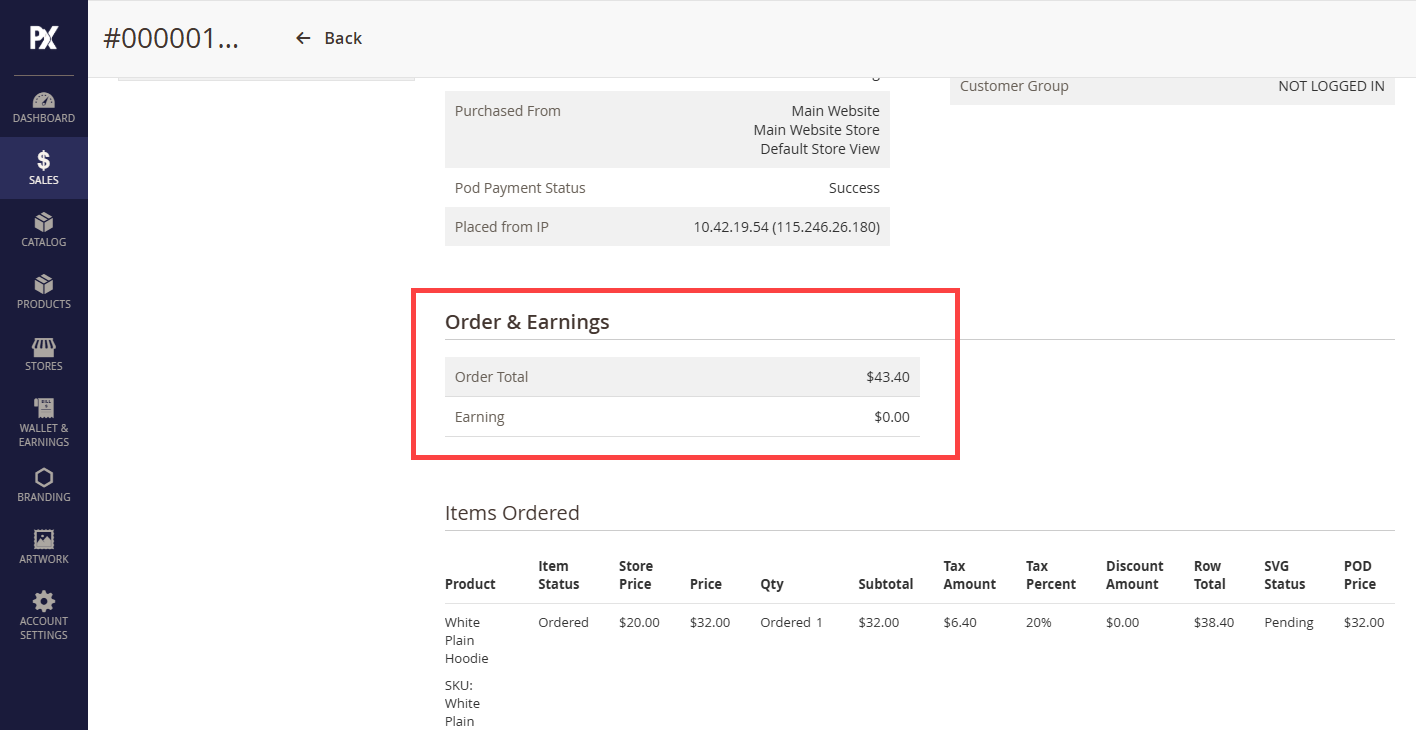
Resellers can view Order total and Earnings in the Order & Earnings sections. [3]
New Order
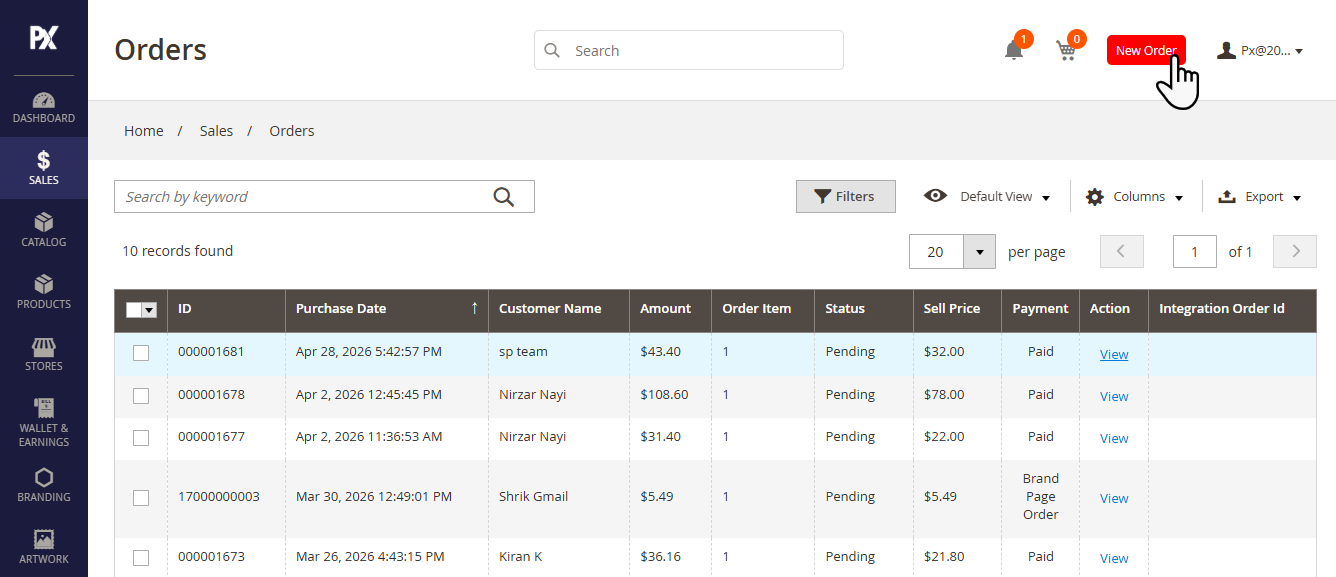
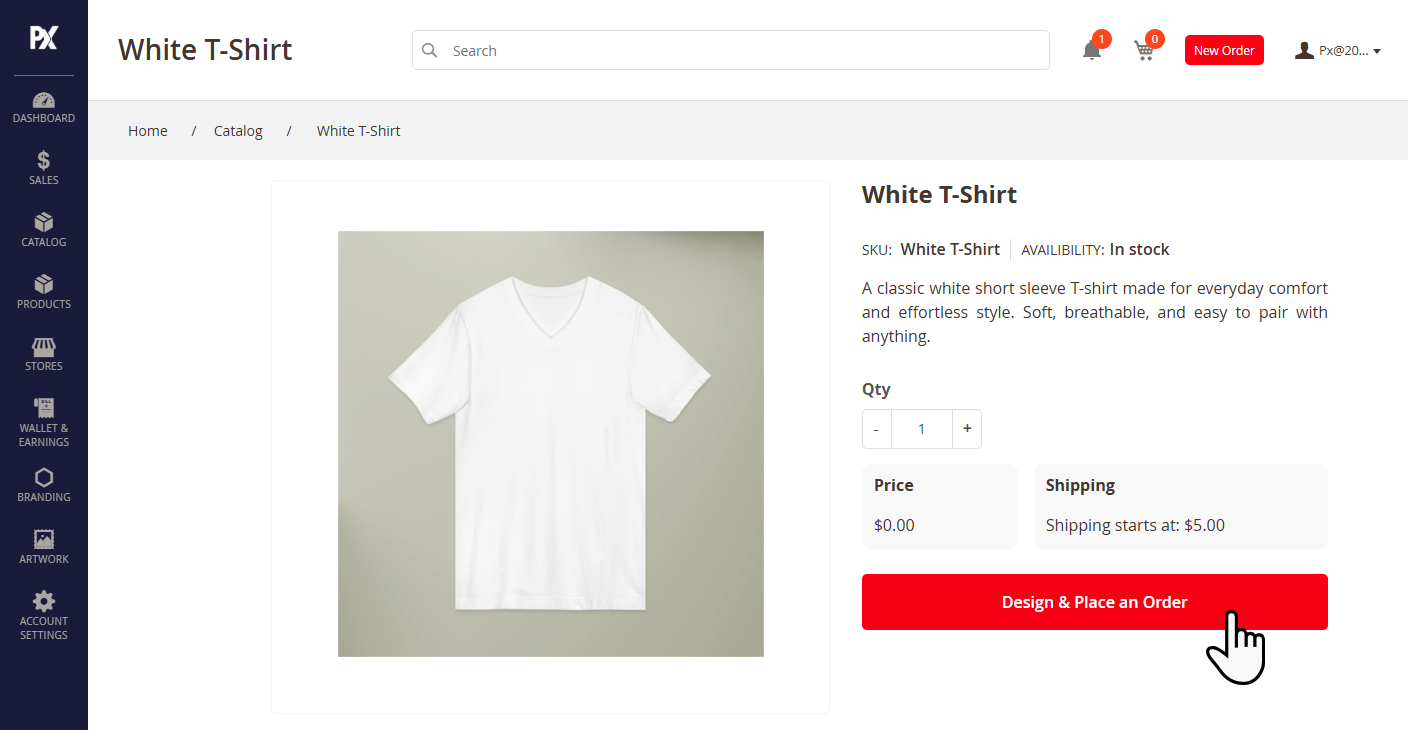
The reseller can also place orders through the reseller portal. To place an order, click the New Order button located in the top-left corner. This action redirects the reseller to the Catalog page. [1]
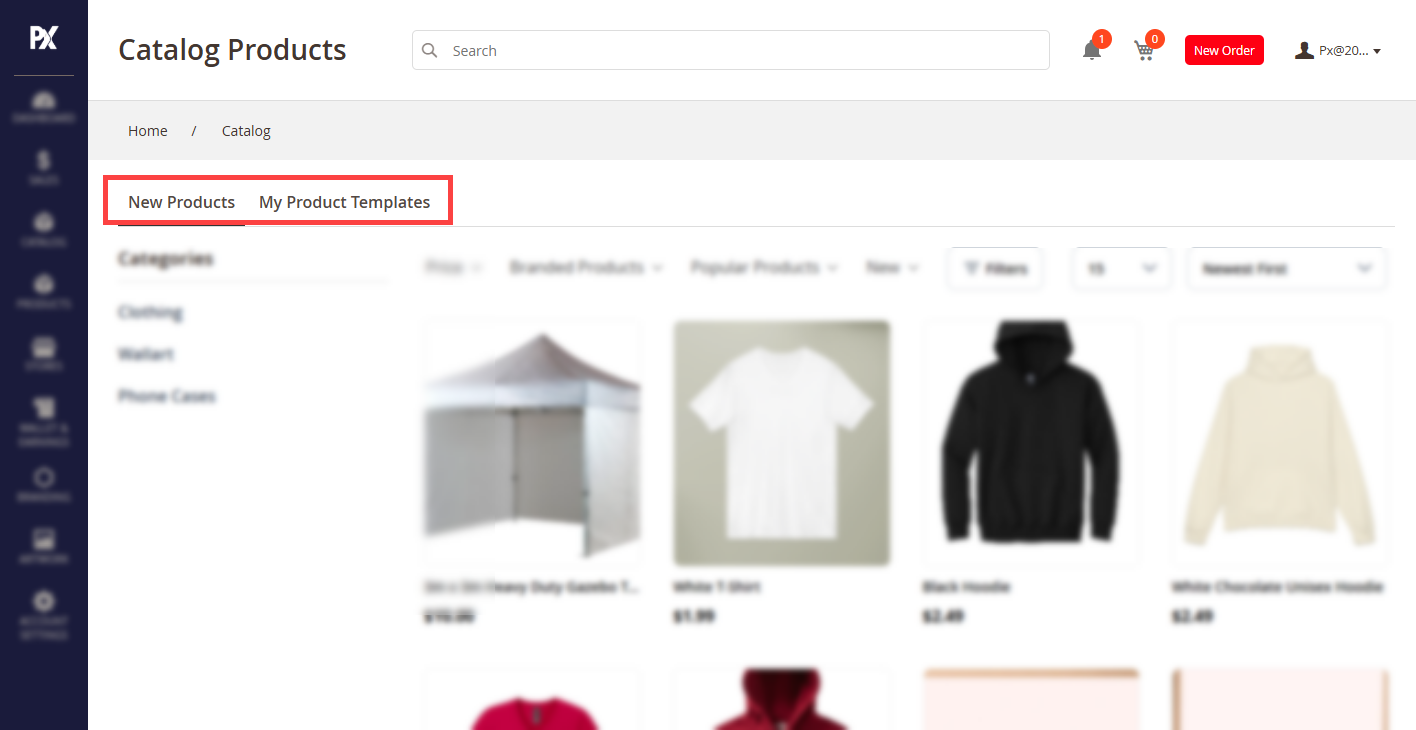
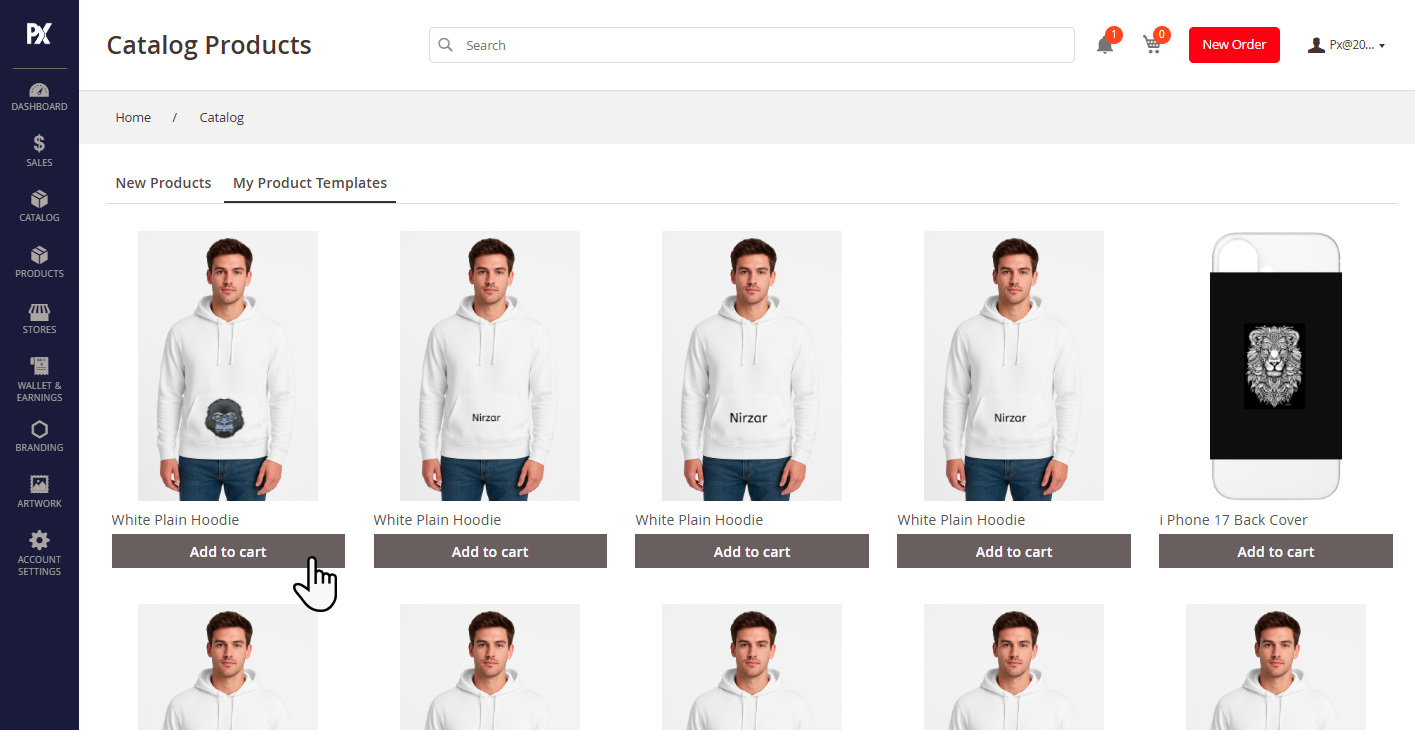
On the Catalog page, the reseller can select a product either from New Product or from My Product Template.[2]
In New Products, click on the desired product. The reseller will be redirected to the Order page. On this page, click the Design & Order button to place the order.[3]
In My Product Templates, all saved product templates are listed. Click the Add to Cart button for the desired product. If the product is configured, the reseller will be redirected to the product details page.[4]
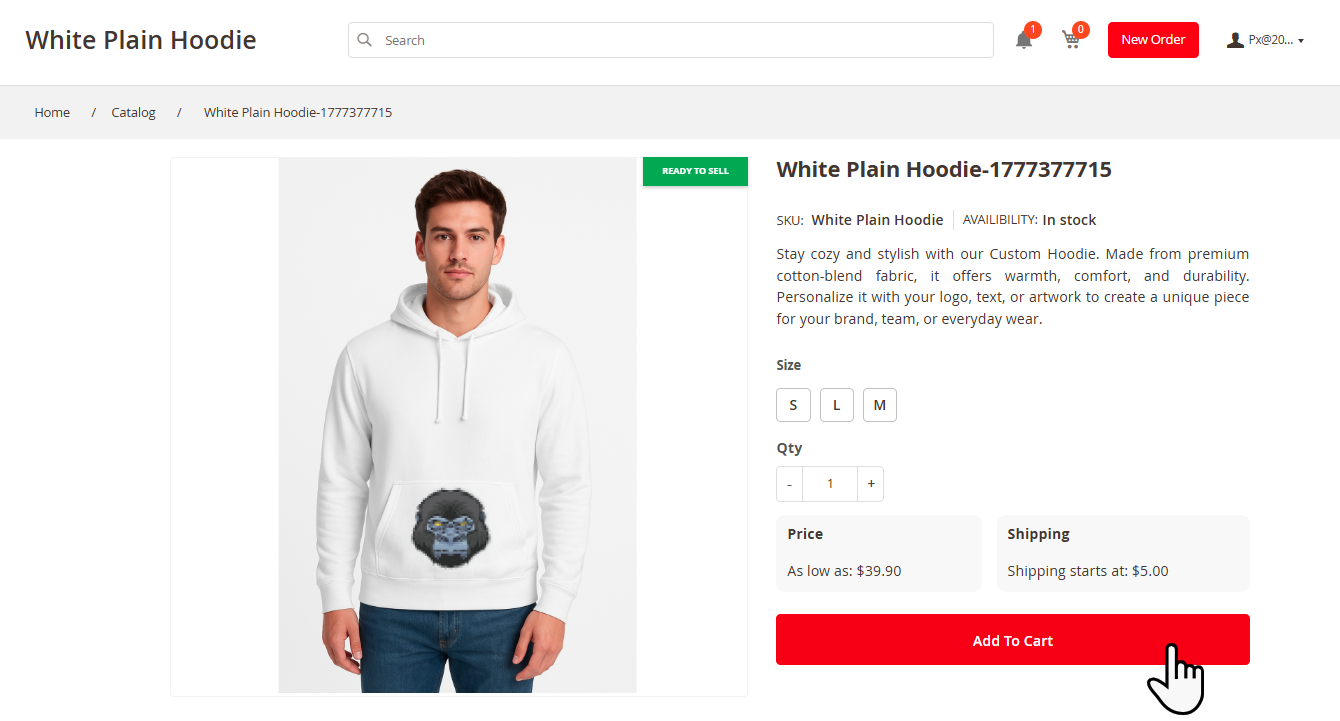
On the Product Detail page, select the desired custom options and click the Add to Cart button to add the product to the cart. Then, follow the standard checkout flow.[5]
Note: If the product is a simple product, it will be added directly to the cart.
Order Logs
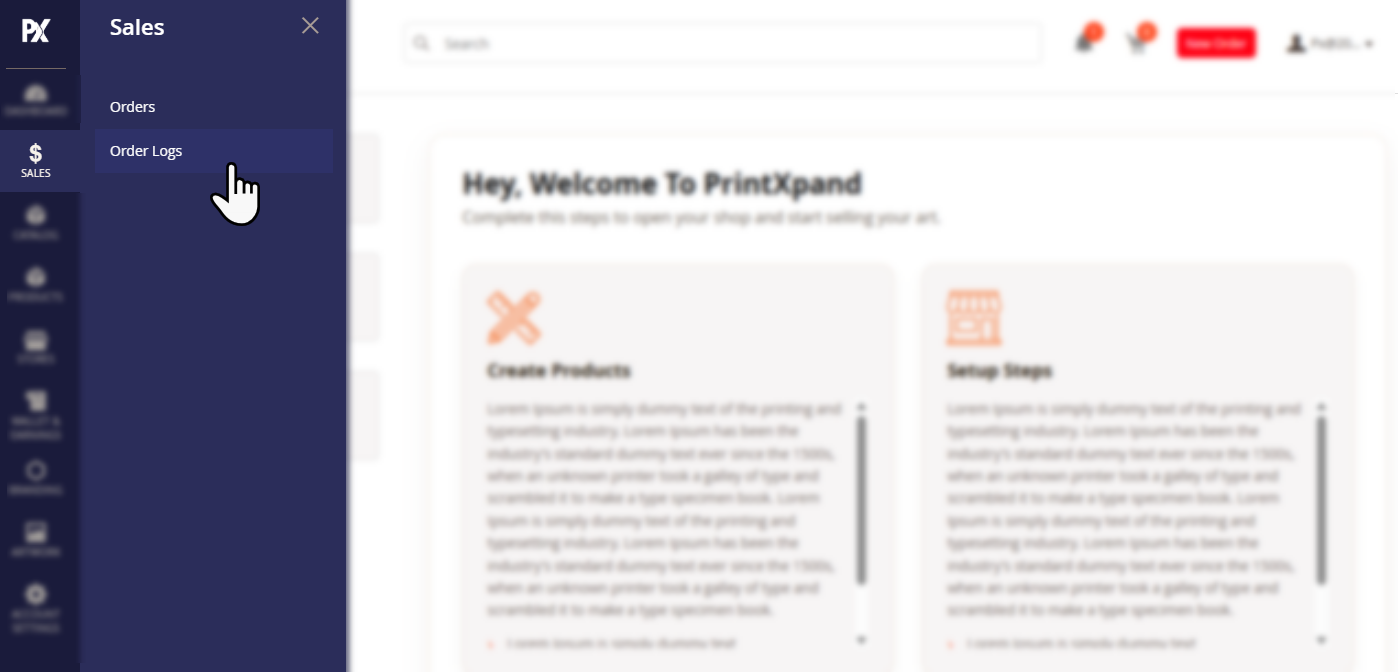
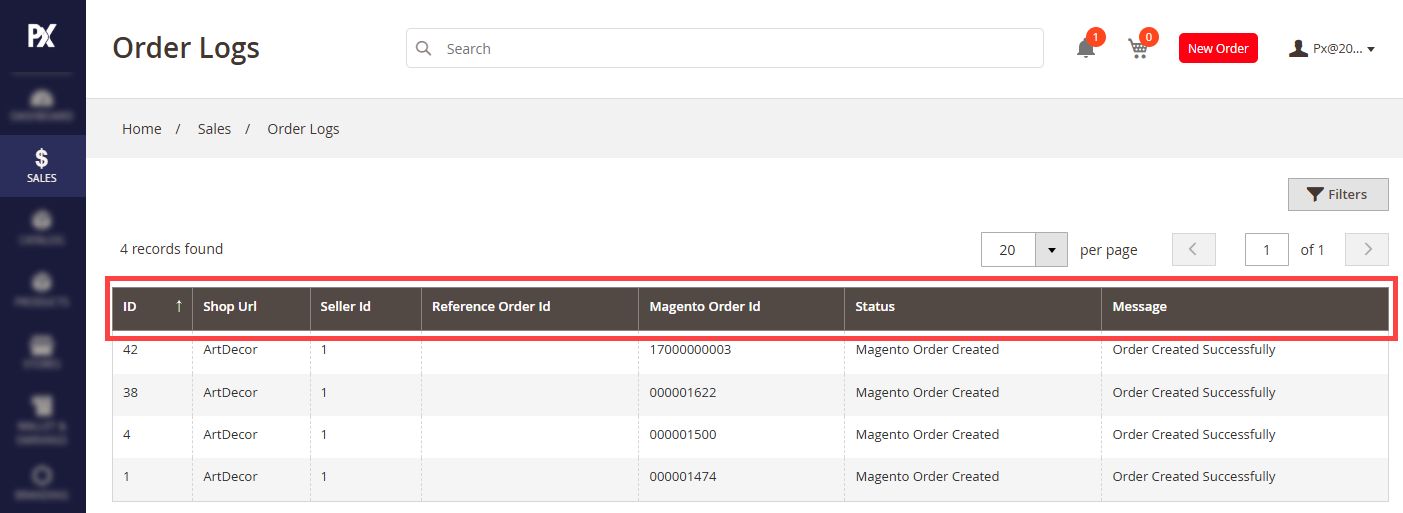
Navigate to Order Logs through Sales. [1]
Here, the orders placed from the 3rd party applications will be listed. The grid would contain the Order Id, Shop Url, Seller Id, Reference Order Id, Magento Order Id, Status and Message.
Using the Magento Order Id, you can search for the specific order in the ‘Sales -> Orders’ section. [2]
Wallet & Earnings
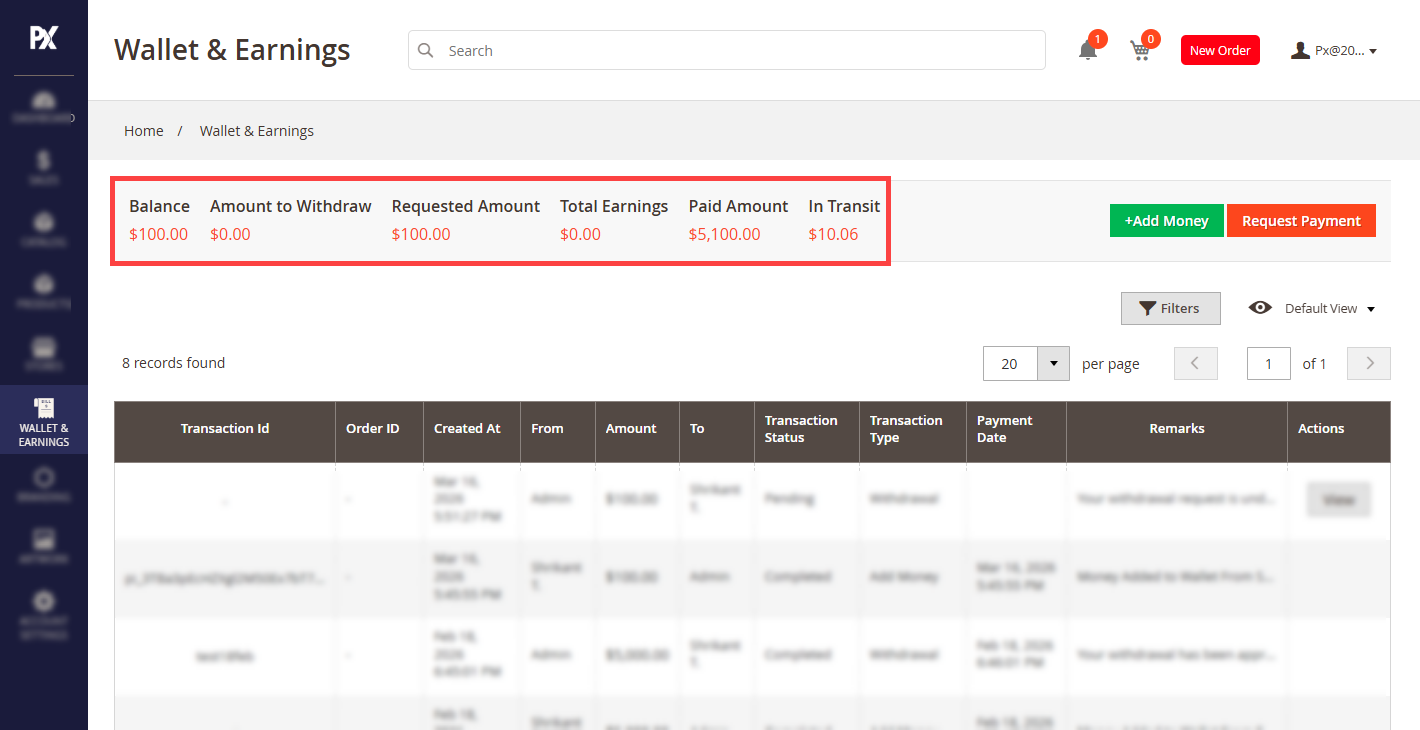
Balance – Total Balance of wallet. [1]
Amount Withdraw – The amount the reseller can presently withdraw.
Requested Amount – Amount the reseller has requested and from the admin’s side, the payment has yet to be completed.
Total Earnings – Till date the amount the reseller has earned.
Paid – The earnings that have been received will be displayed here.
In Transit – The total amount in transit.
Add Money
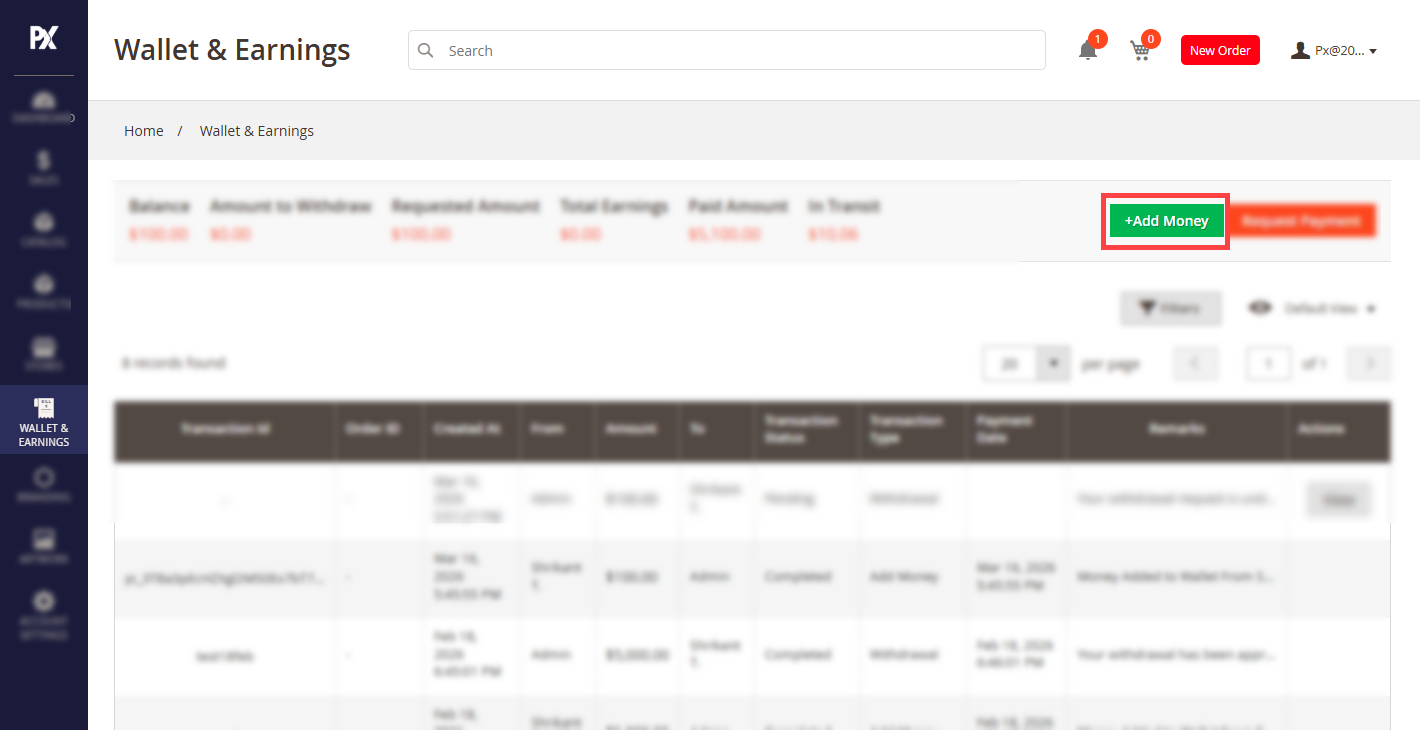
The seller can add money to the wallet using an integrated payment method/Card and see the transaction history from here. Click on the +Add Money wallet button. A Pay Online pop-up appears, enter price and click on pay now to add money.[2]
Requesting a Payout
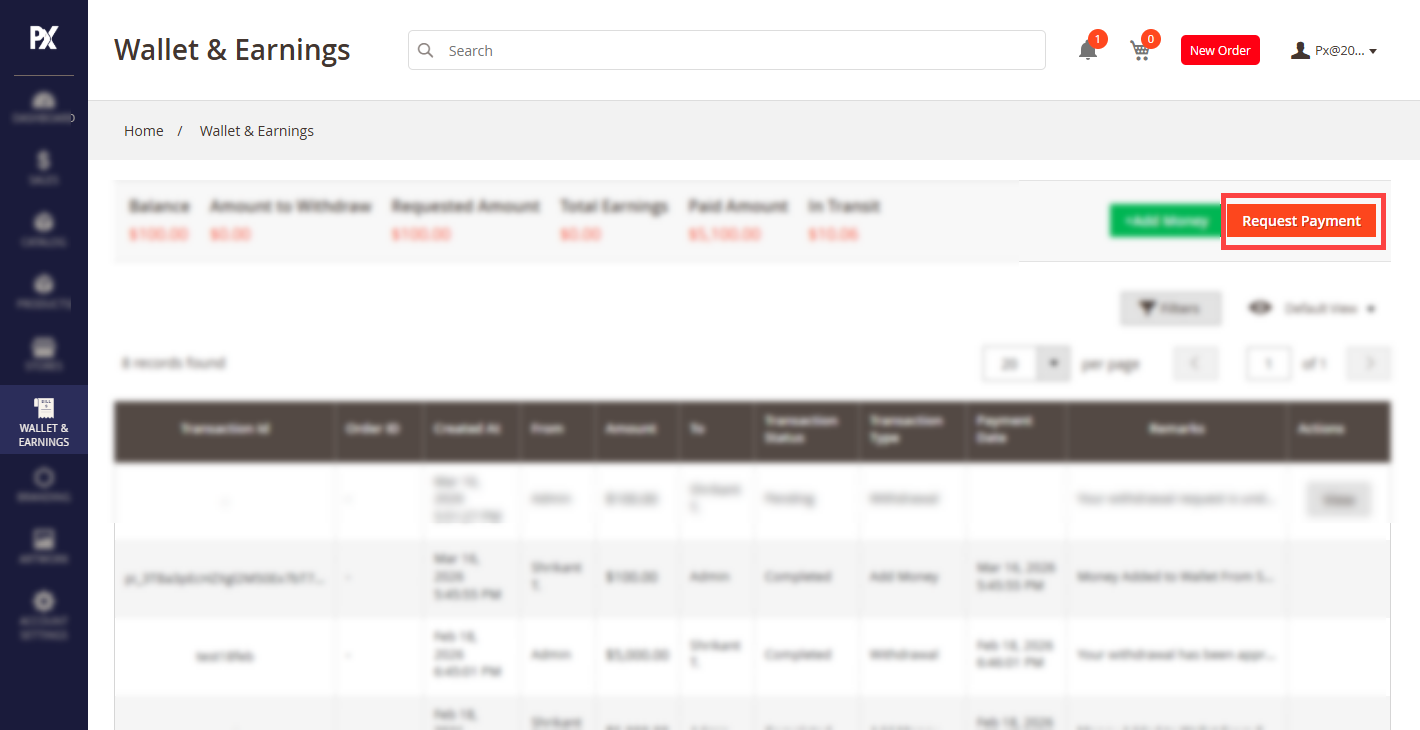
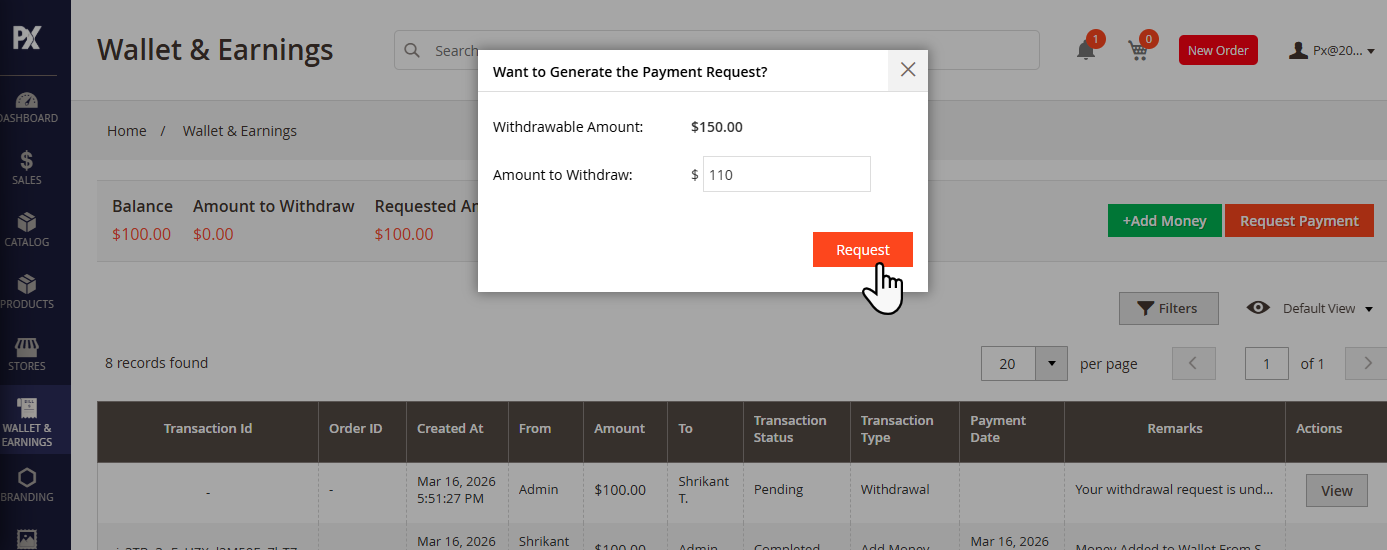
To submit a payout request, click the “Request Payment” button. A pop-up will appear displaying the Withdrawable Amount available for withdrawal.[3]
Follow these steps to complete the payout request:[4]
-
- – Review the Withdrawable Amount displayed in the pop-up
-
- – Enter the desired Amount to Withdraw in the input field, as per the minimum and maximum limits pre-configured by the admin
-
- – Click the “Request” button to submit the payout request.
Once submitted, the payment request will be sent to the admin for review and approval. Upon admin approval, the approved amount will be processed and added to the seller’s wallet accordingly.[4]
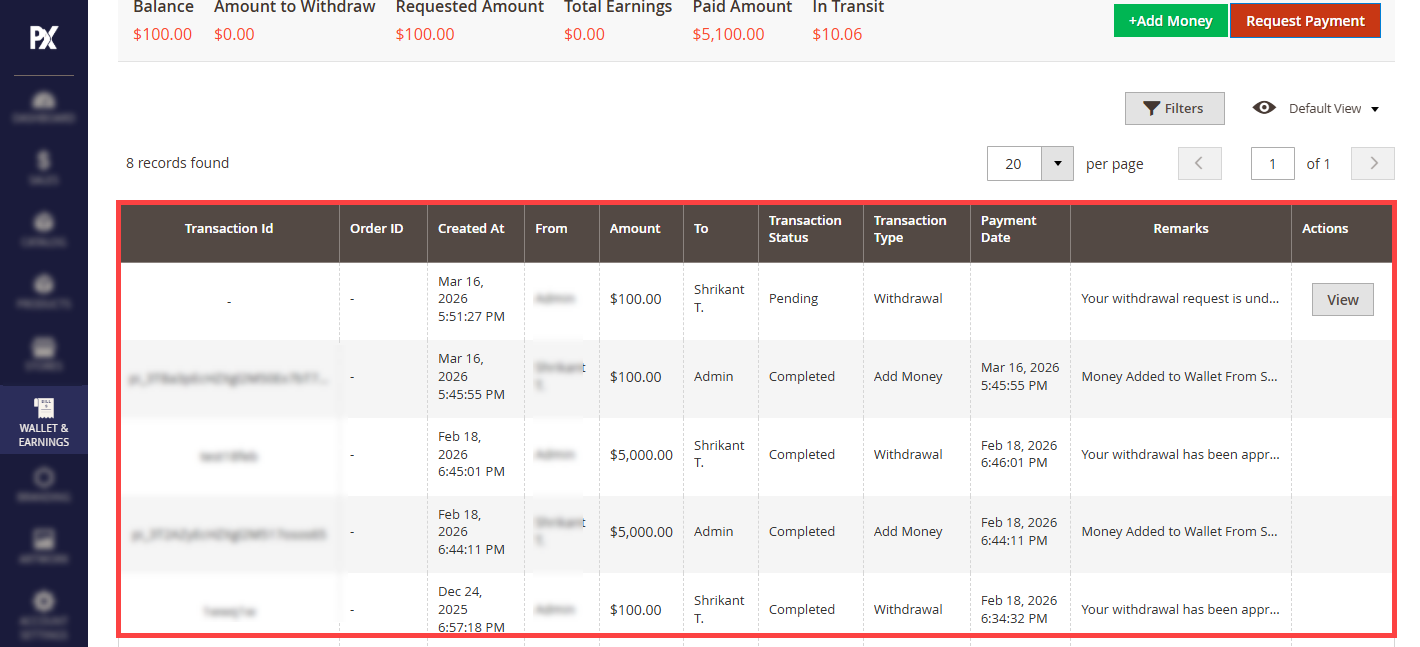
All transaction history is stored in a list. This list includes the following columns: Transaction ID, Order ID, Created At, From, Amount, To, Transaction Status, Transaction Type, Payment Date, Remarks, and Action.
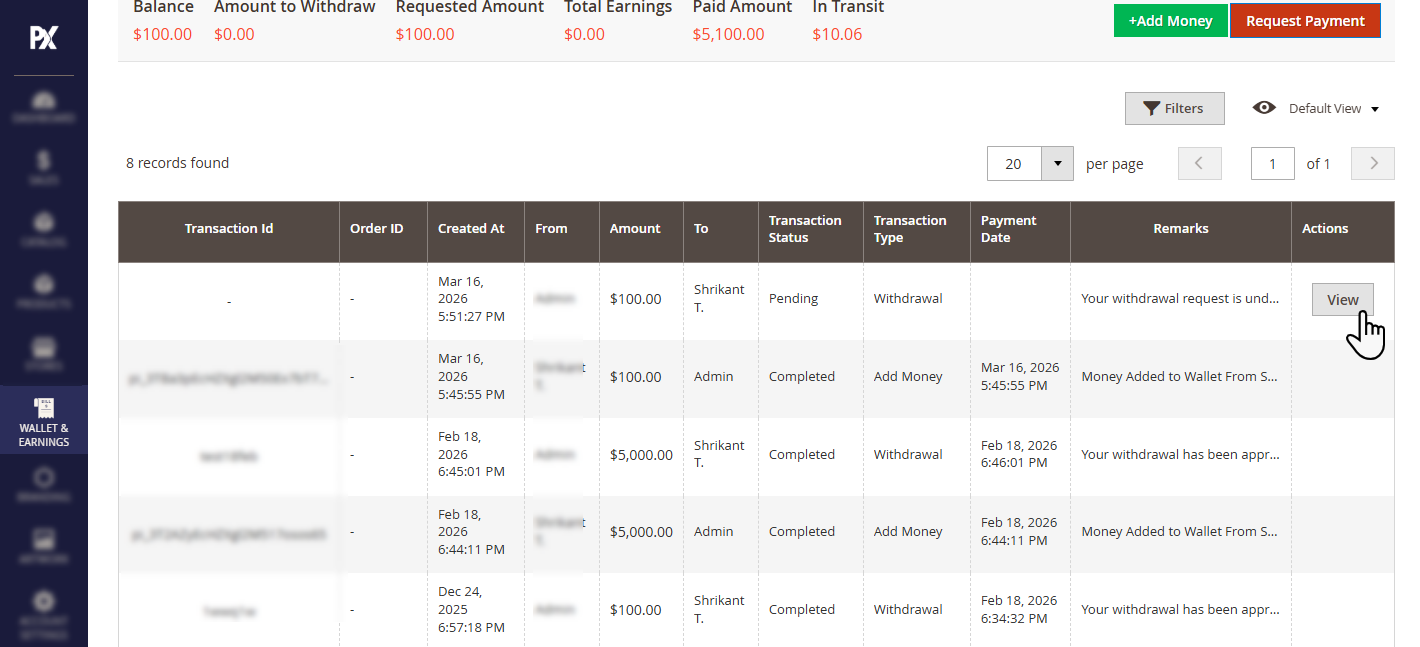
Resellers can monitor the status of their submitted payout requests at any time. To check the payment status of a specific request, locate the request in the payout list and click the “View” button in the Action column. This will display the full details and current status of the selected payout request allowing resellers to stay informed about the progress of their payment at every stage.[5]
A detailed slider appears and the seller can view the Requested time, Requested Amount and Status. If sellers want to cancel this request click on the Cancel Request button.
Store Products
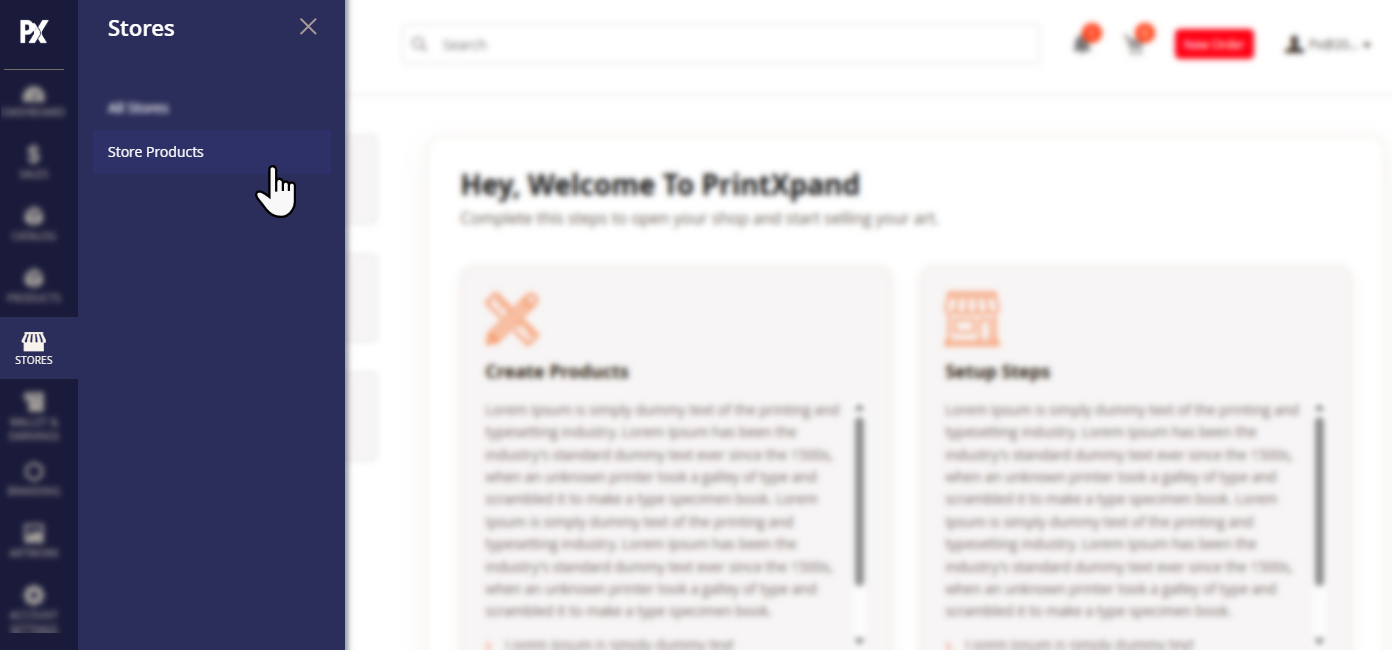
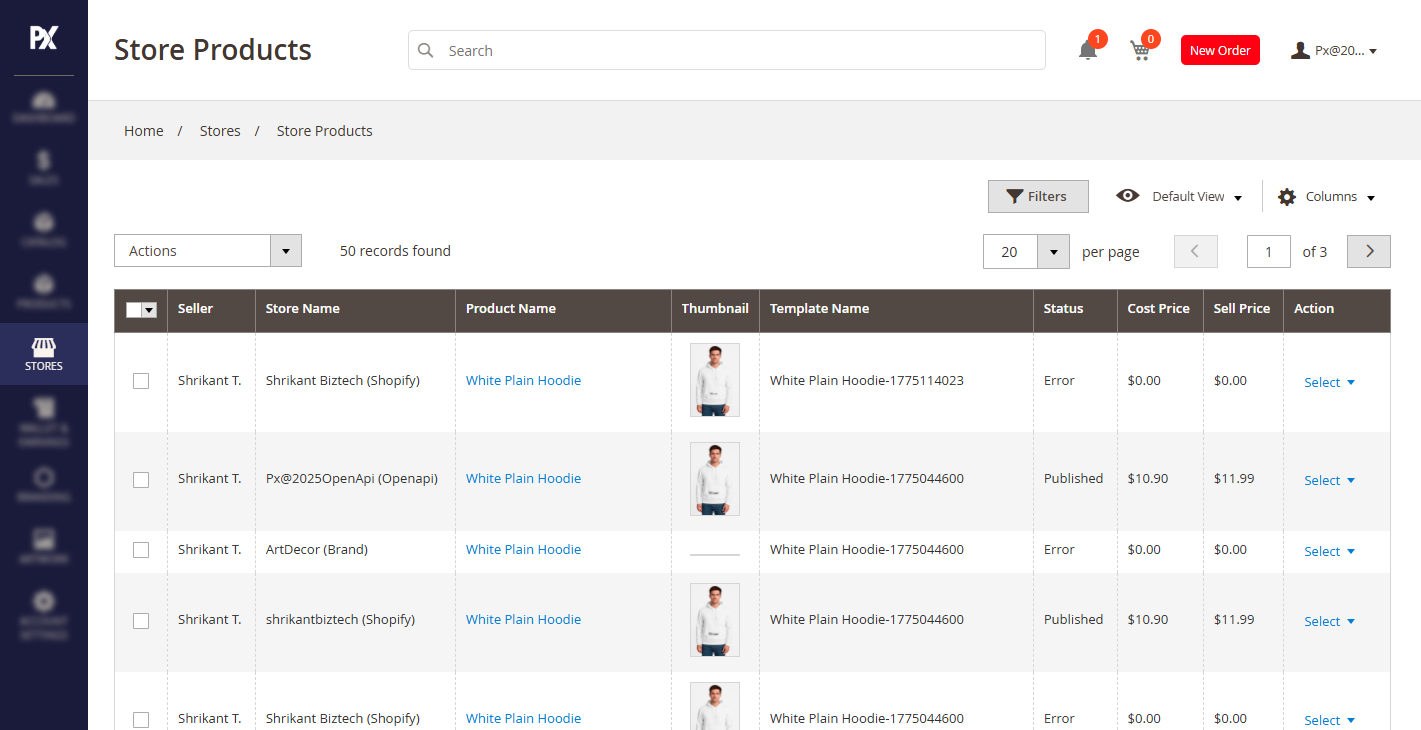
To direct towards the products that have been published onto the stores, navigate to Stores -> Store Products. [1]
The grid in this section contains all the products that have been published onto the connected stores.
Details such as Seller, Store Name, Status, Publish Status, Price and such are covered in the table of the published products. [2]
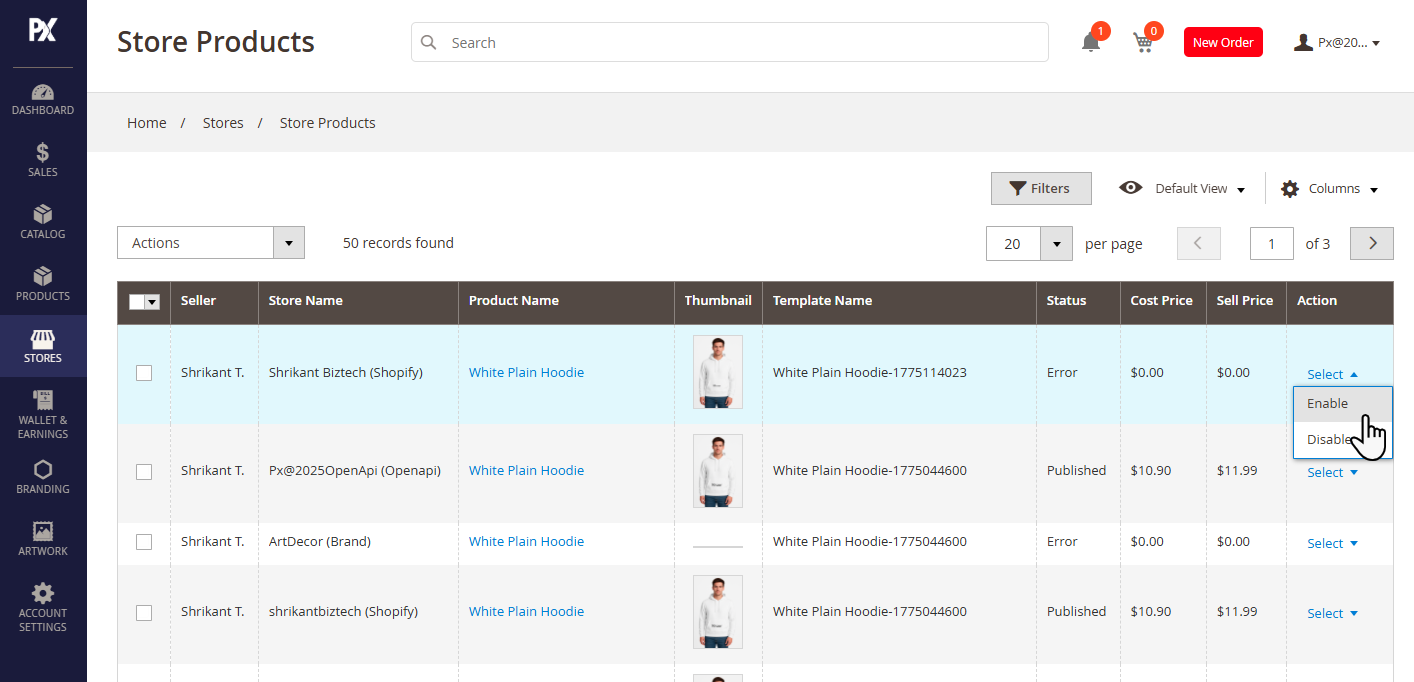
The reseller can Enable and Disable a particular product by navigating through the Select drop down menu present in the Action column.[3]
Branding
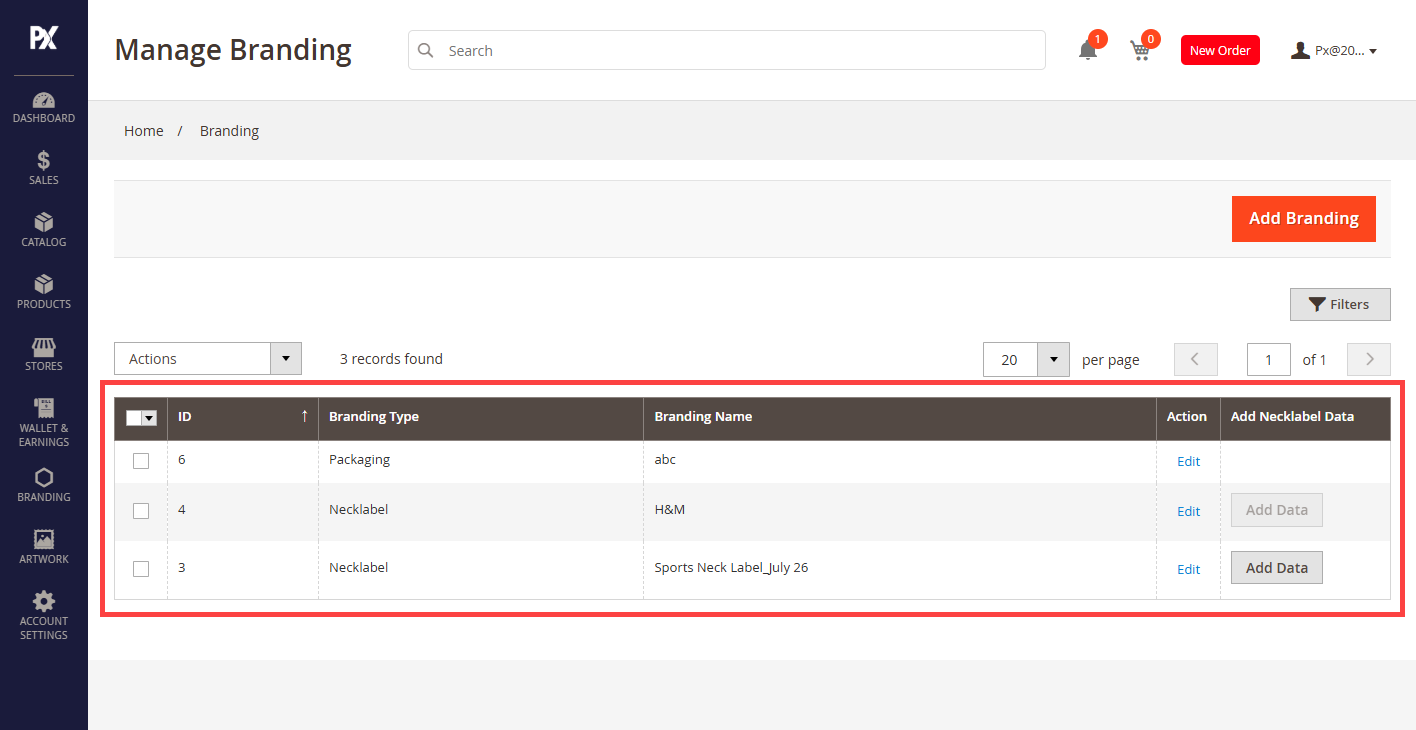
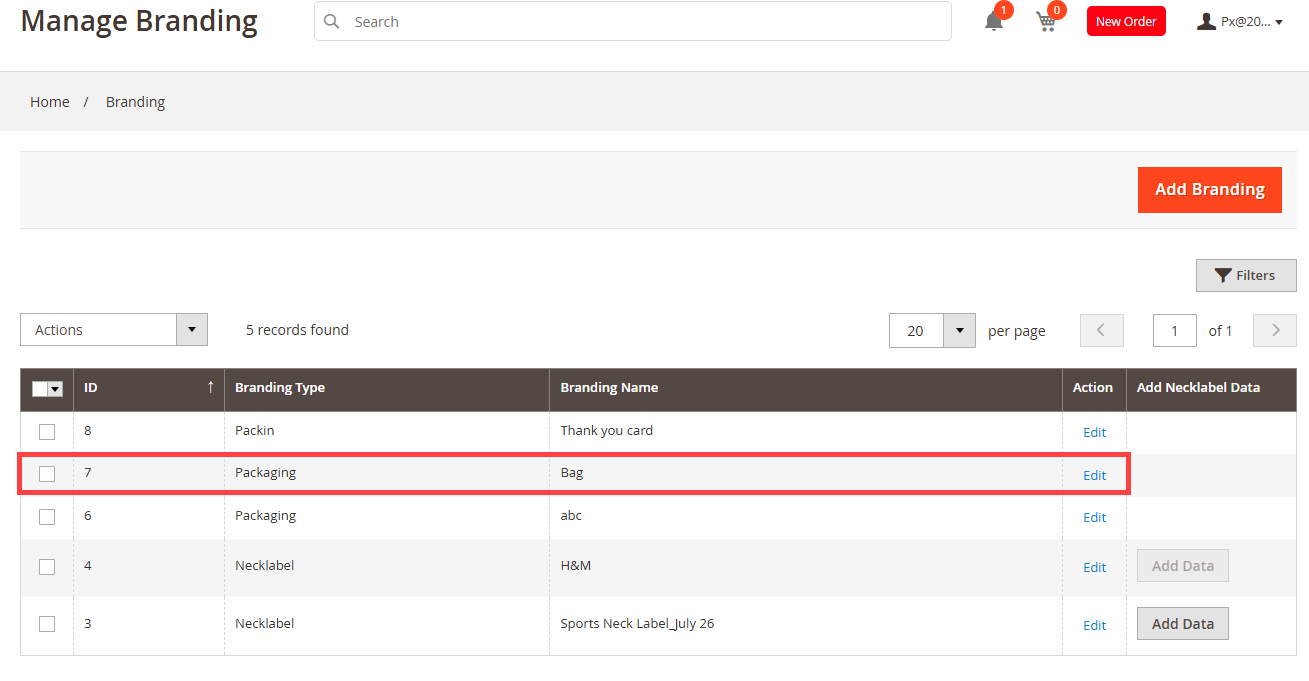
The reseller can manage the Branding from Branding module. In this grid all three Brandings are listed.[1]
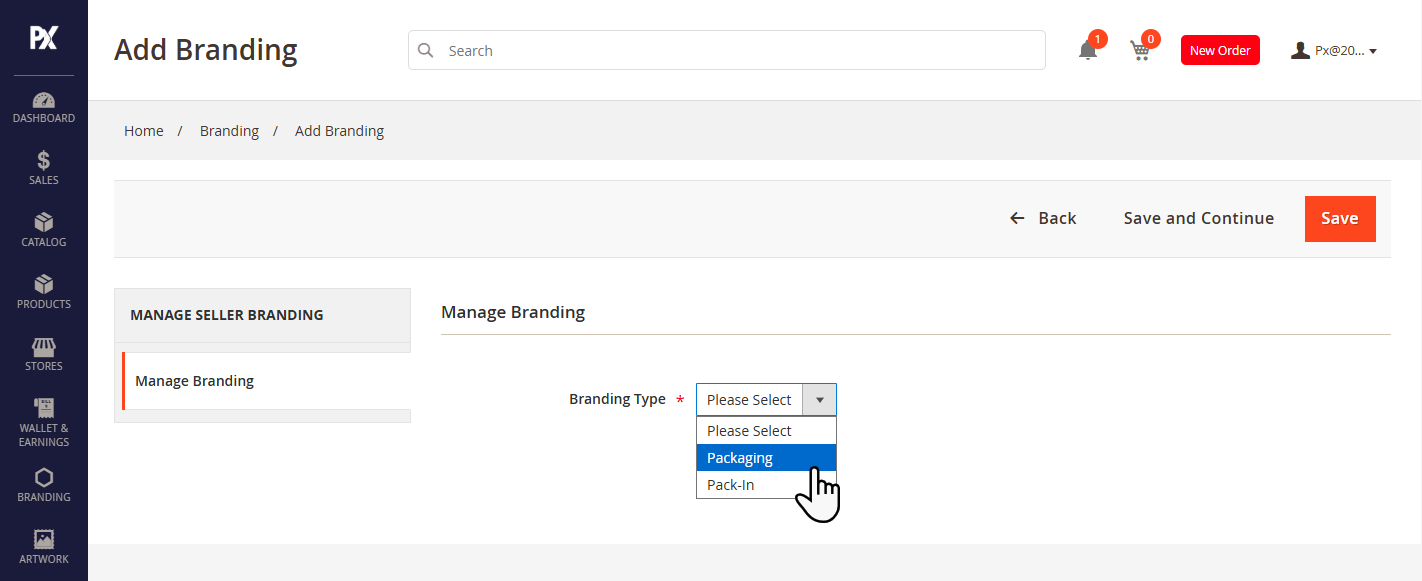
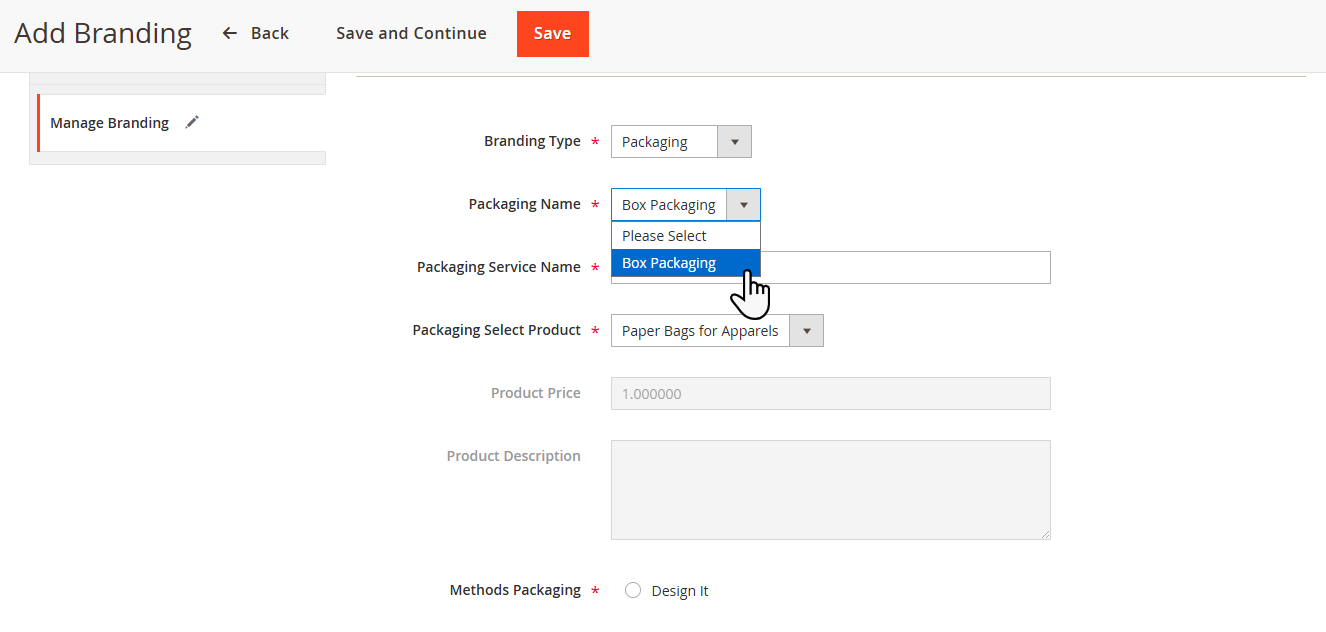
To add a new branding, click on ‘Add Branding.’ This will redirect the vendor to the Add Branding page. On this page, select the branding type from the ‘Branding Type‘ dropdown.[2]
Packaging
The Vendor can set Packaging as an extra service by selecting it from the dropdown. After selecting the branding, choose the packaging name from the ‘Packaging Name‘ dropdown. [1]
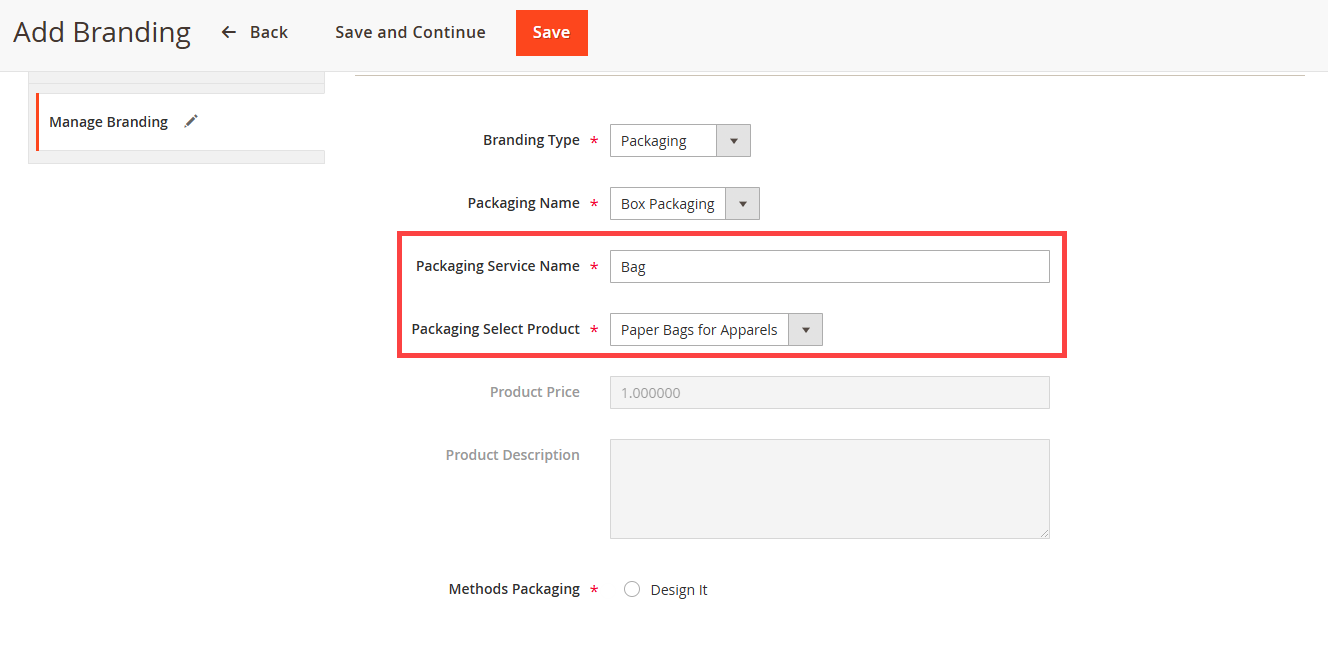
Now, the vendor needs to set the name of the packaging in the ‘Packaging Service Name‘ field and select the packaging product from the ‘Packaging Select Product‘ dropdown.[2]
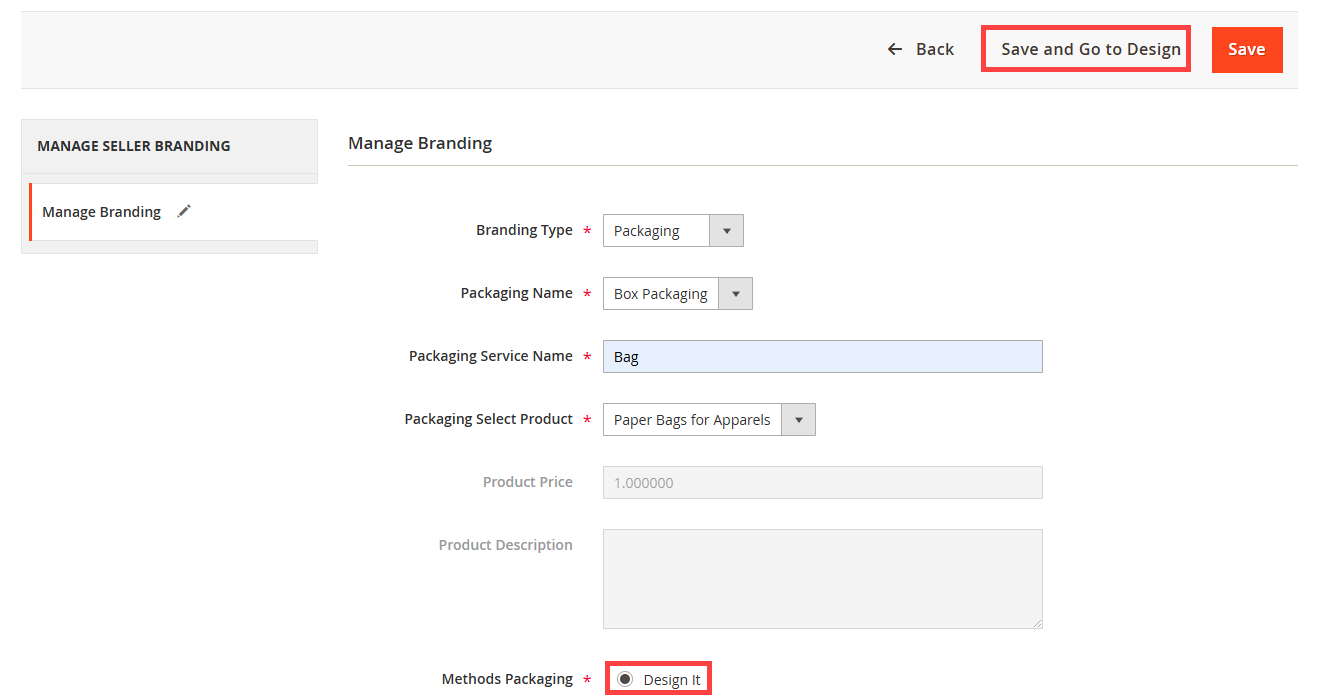
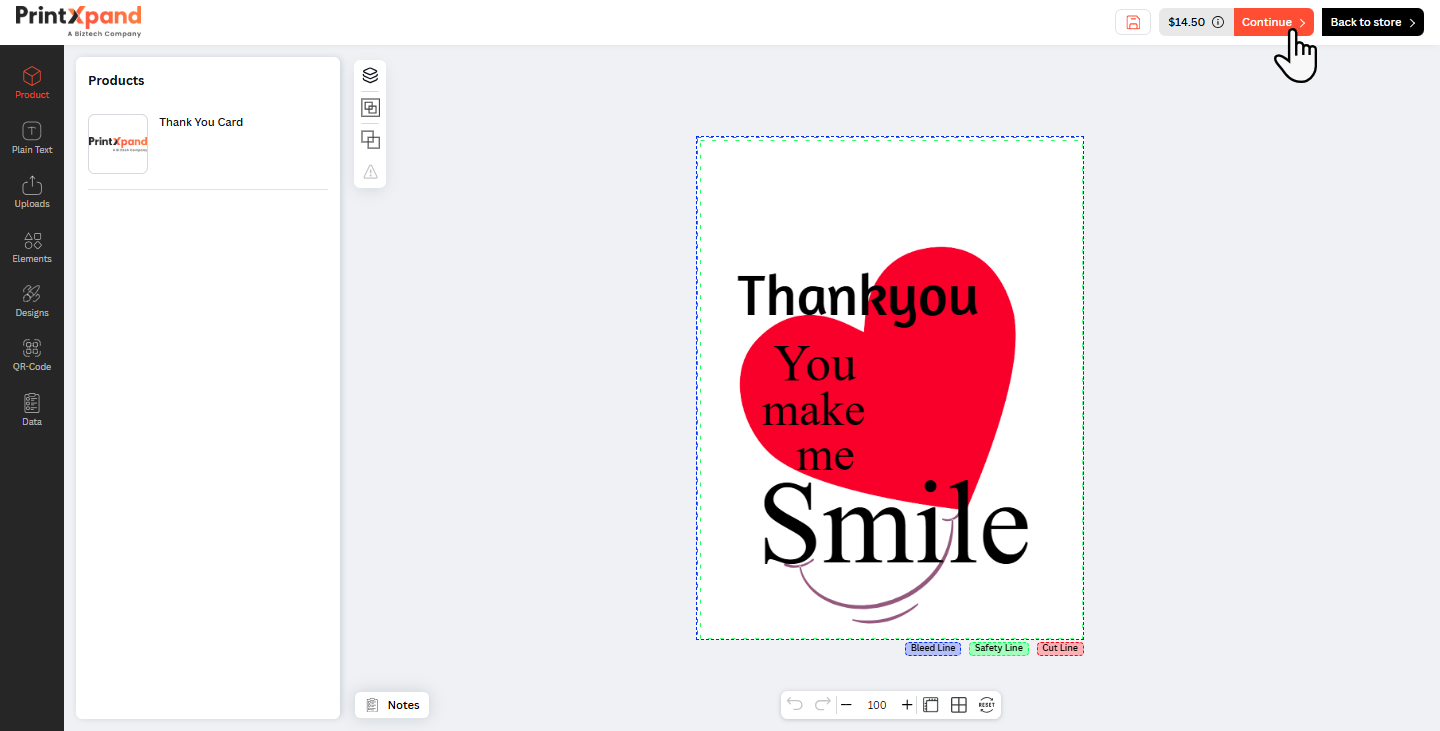
Select the packaging method ‘Design It.’ The vendor can design the packaging by clicking on ‘Save and Go to Design.‘ This will redirect the vendor to the Designer Tool. [3]
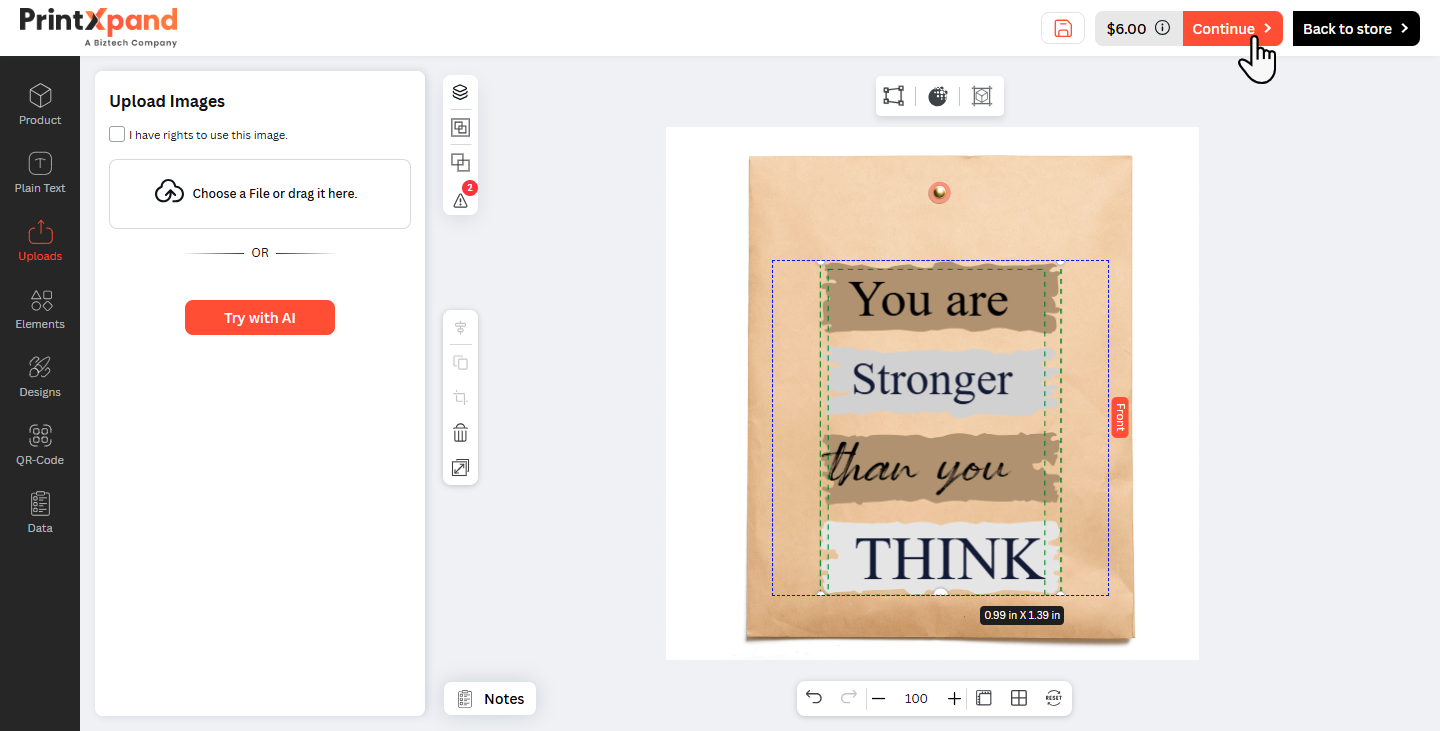
Here vendors can design the packaging as preferred. After design click on Continue to save the design. [4]
The saved Product is added to branding. [5]
Packin
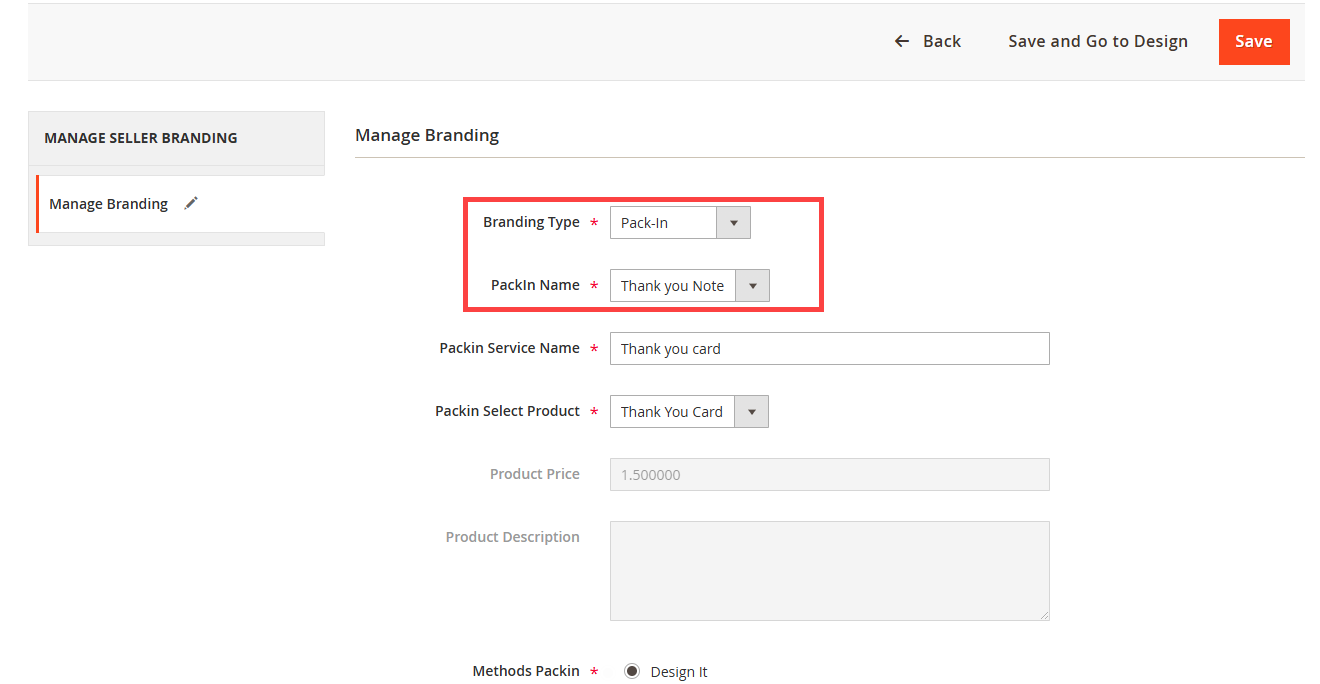
The Vendor can set Packin as branding by selecting it from the dropdown. After selecting the branding type, choose the packin name from the ‘Packin Name‘ dropdown.[1]
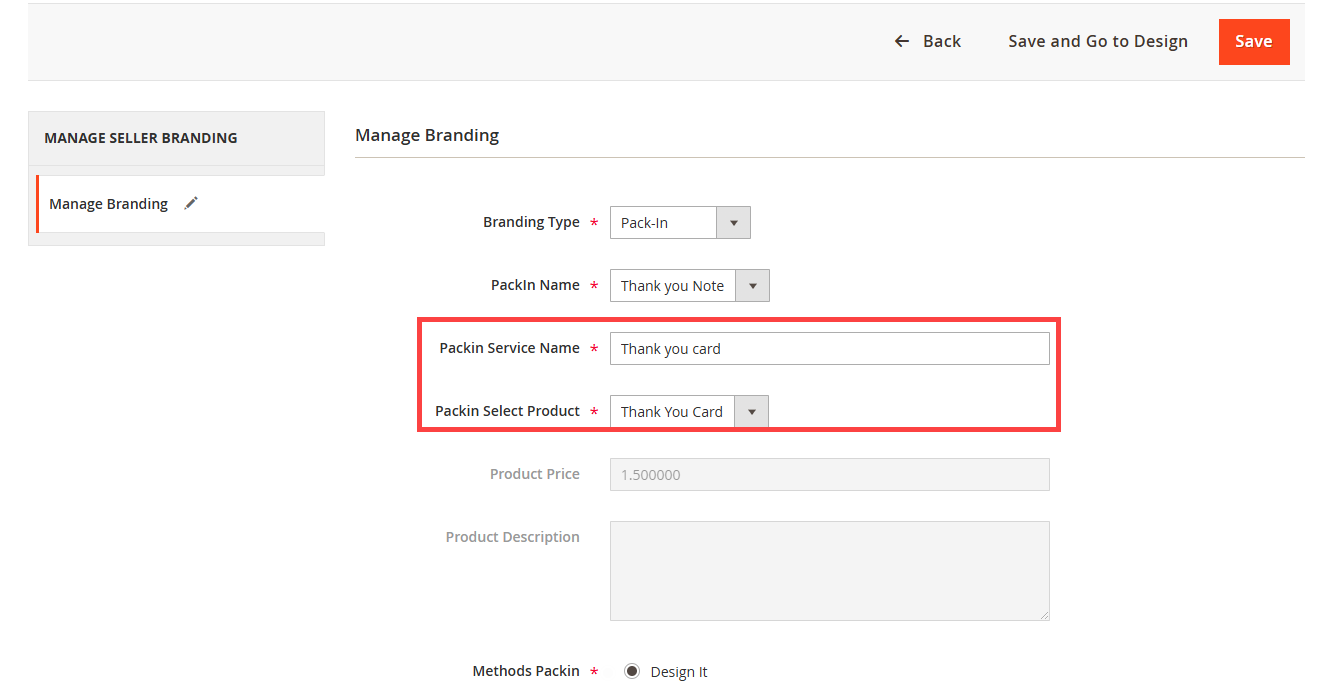
Now, the vendor needs to set the name of the packin in the ‘Packin Service Name‘ field and select the packin product from the ‘Packin Select Product‘ dropdown.[2]
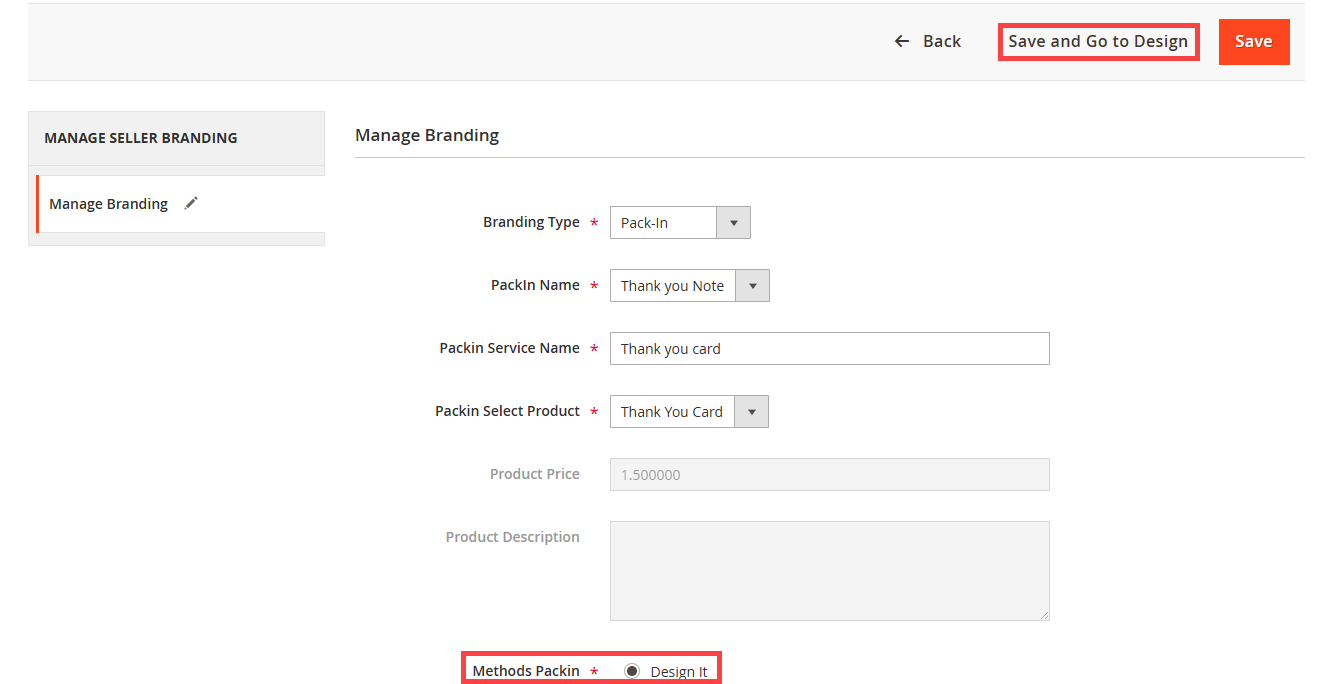
Select the Packin method ‘Design It.’ The vendor can design the Packin by clicking on ‘Save and Go to Design.‘ This will redirect the vendor to the Designer Tool.[3]
Here vendors can design the Packin as preferred. After design click on Continue to save the design. Saved design will be added to the list. [4]
Neck label
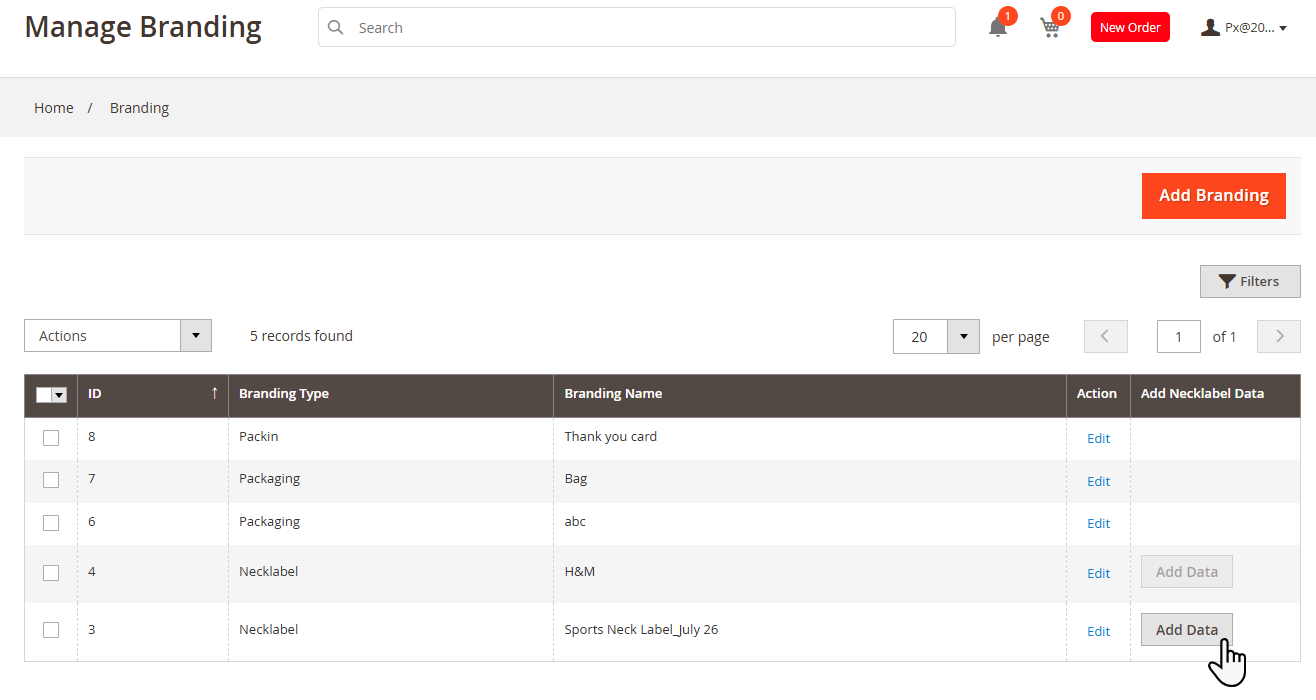
Vendors can add and configure the neck label for the product by clicking on the Add Data button.[1]
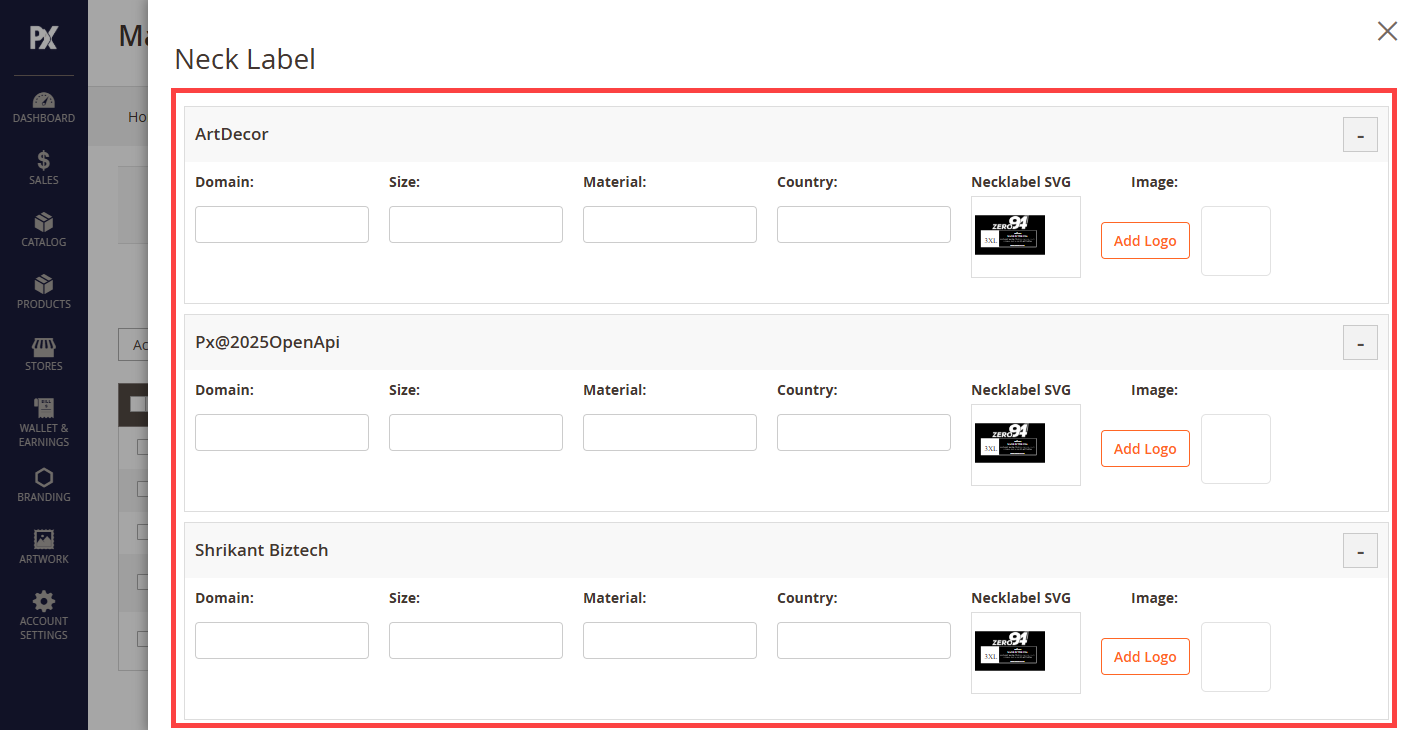
This will pop-up the Neck label window where vendors can add Domain, Country, Image, Necklabel SVG and Image by clicking on the Add Log button. Click the save button to add Neck Label. Sellers can configure the neck label for different stores.[2]
Note: This pop-up grid is controlled by the admin settings. Vendors are not permitted to modify any of its fields.