BACKGORUND IMAGES AND CATEGORIES
The customers can design the products by adding the background image to the design area.
Backend Configuration
You can allow the customers to design the product using the “Background Images” option.
Manage Layouts
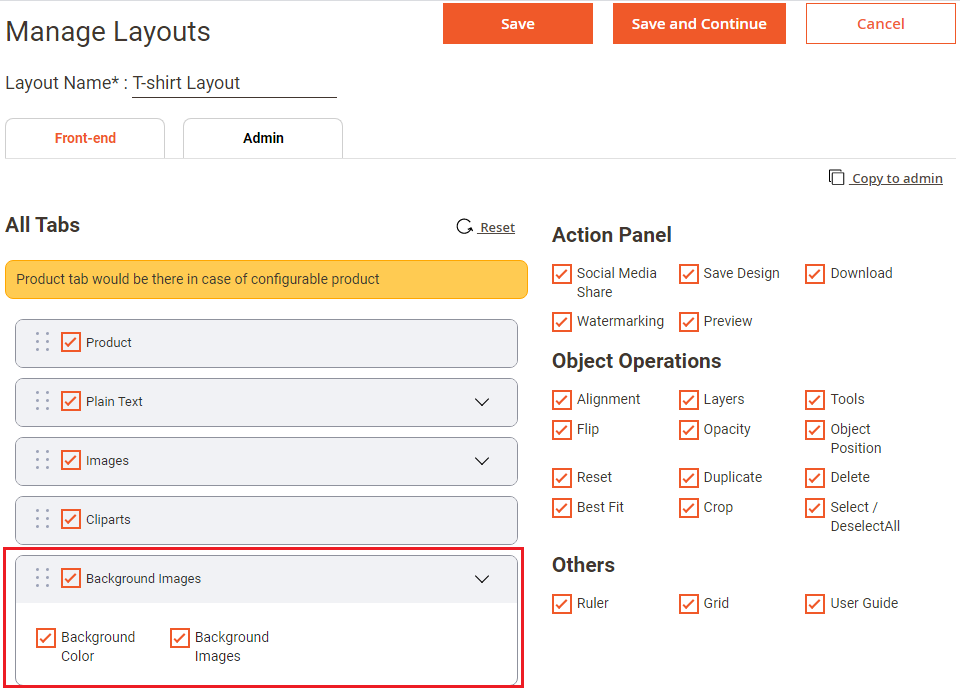
First of all, you need to enable the “Background Images” tab from the Manage Layouts for the specific Theme (Layout). Navigate to the Product Designer → Manage Layouts.
You will see the “Background Color” and “Background Images” options under the Background Images tab. Enable the option(s) as per your printing availability.
After configuring the layout options, click on the Save button.
Manage Background Image and Categories
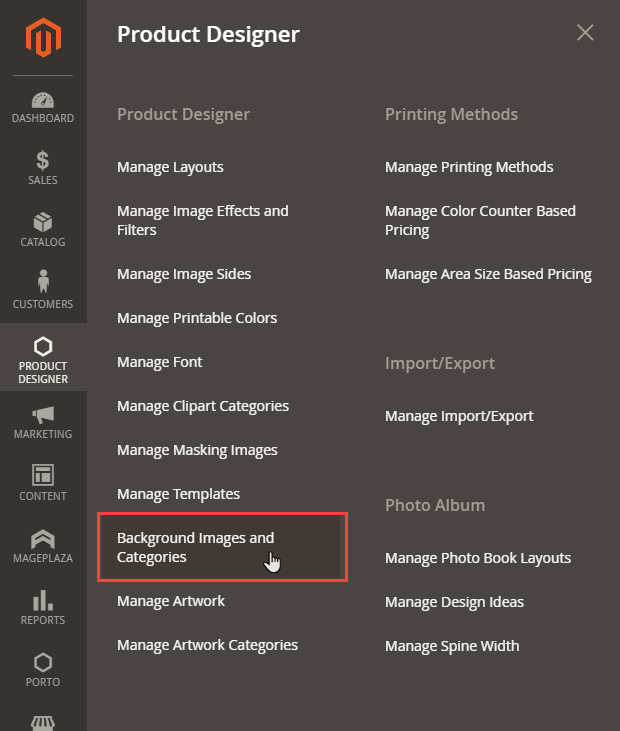
You can add and manage the Background Images by assigning the relevant categories. To manage the Background Images, go to Product Designer → Background Image and Categories.
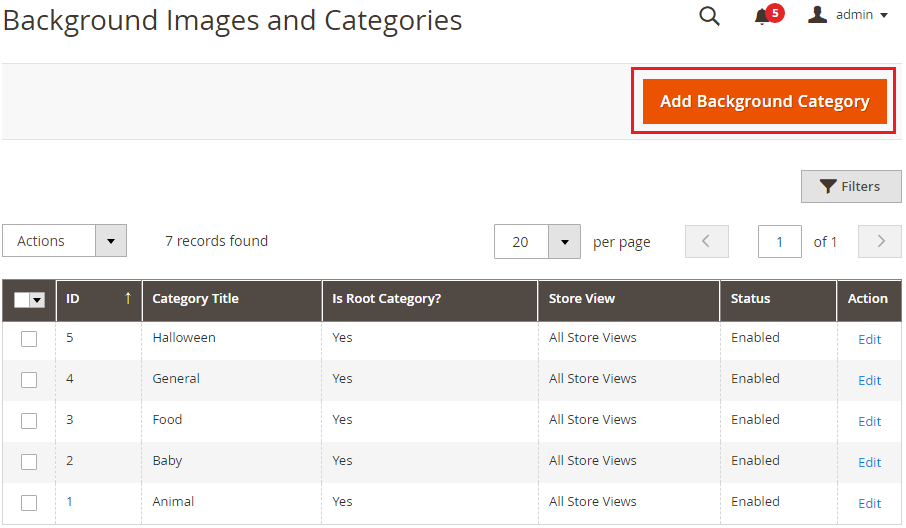
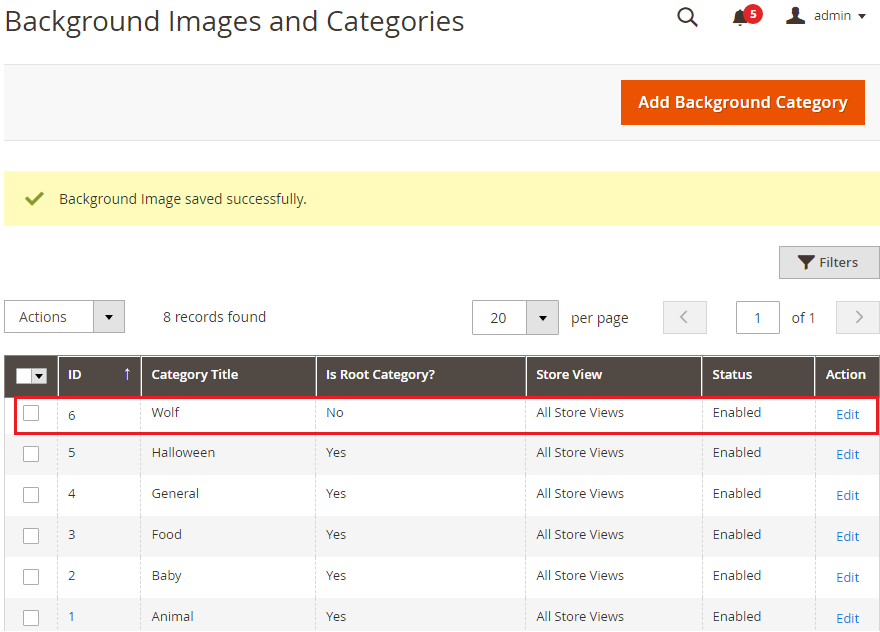
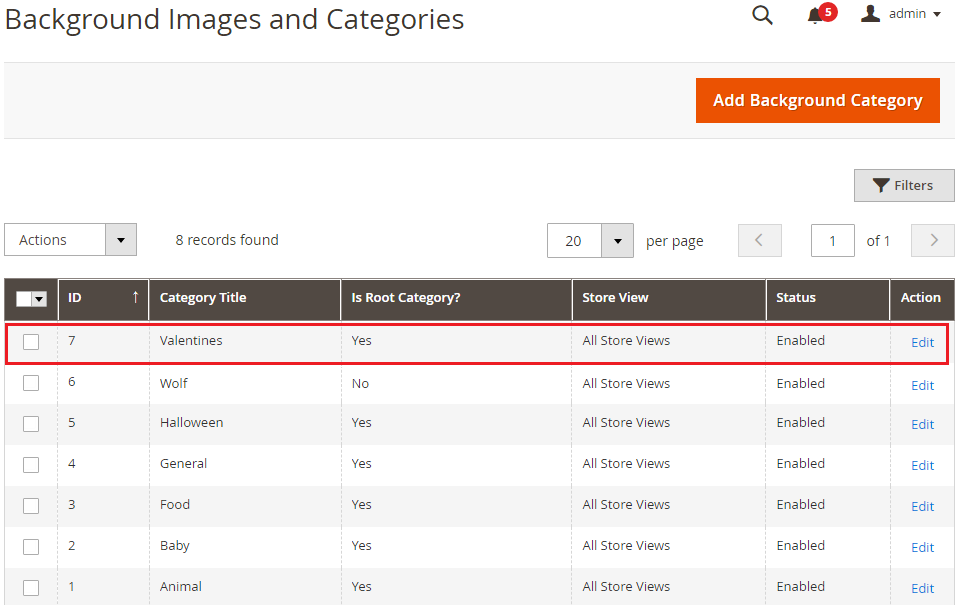
You will get the list of already inserted background images and categories by clicking on “Background Images and Categories”. You will get the list with the details like ID, Category Title, Is Root Category?, Store View, Status, and Action.
To add a new Background Images, click on the Add Background Category button. You will navigate to the “Add Background Images And Category”.
You need to insert and configure the following options:
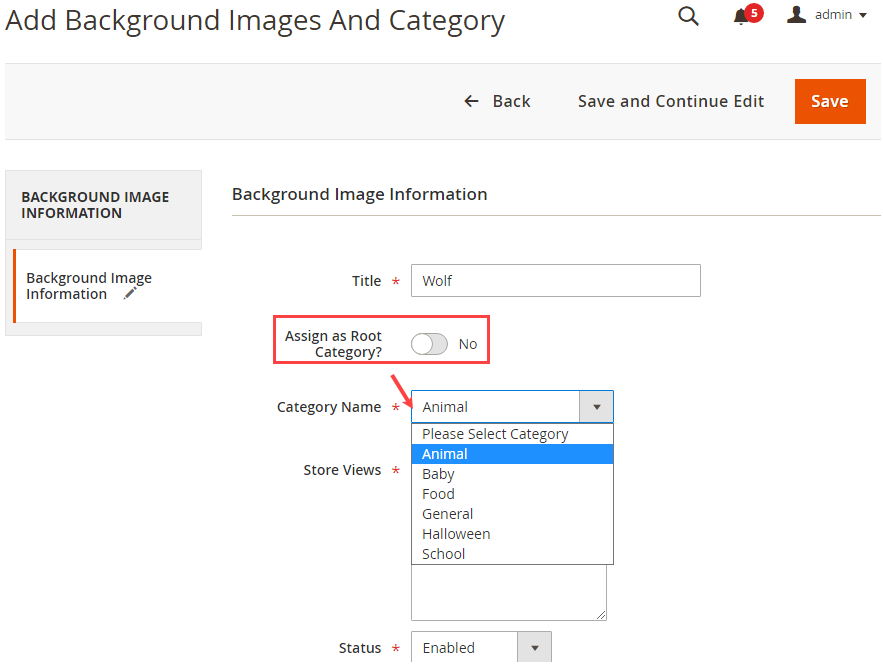
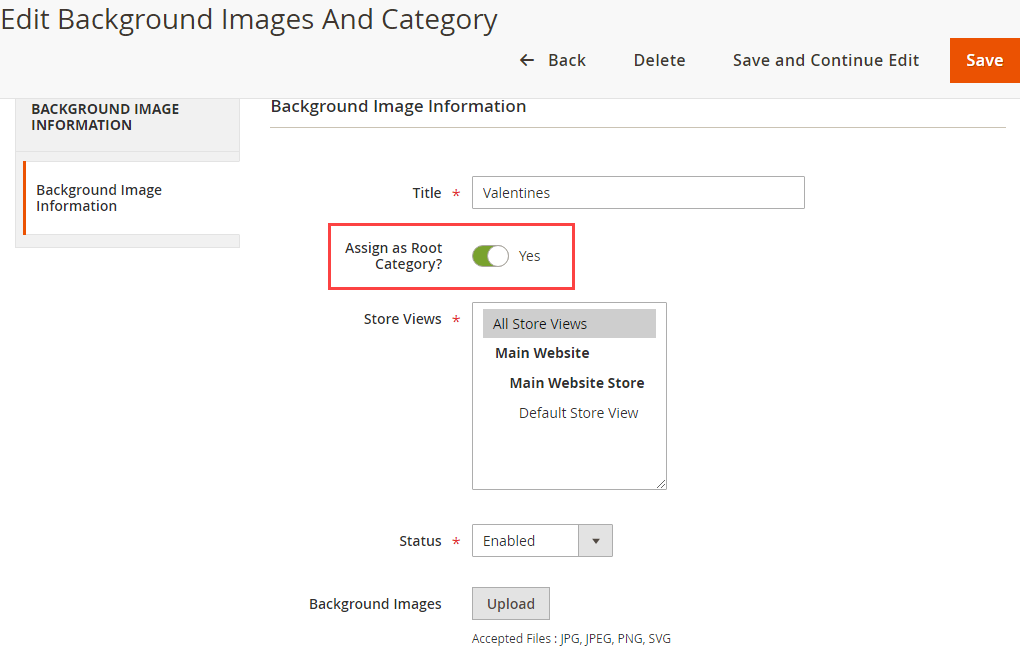
~ Title: Insert the relevant title to identify the category of the images.
~ Assign as Root Category: Enable this option if the category is the Root (Parent) category of the images.
If you disable this option, you can see the “Category Name” in the drop-down list from where you can select the parent category (Root Category).
~ Category Name: Select the parent category from the list. The customers will see the child category under its parent category. Here, the “Animal” is selected as the parent category.
~ Store Views: Select the stores in which the Background Images options will be displayed.
~ Status: Choose the default status of the Background Images category. (Enable/Disable)
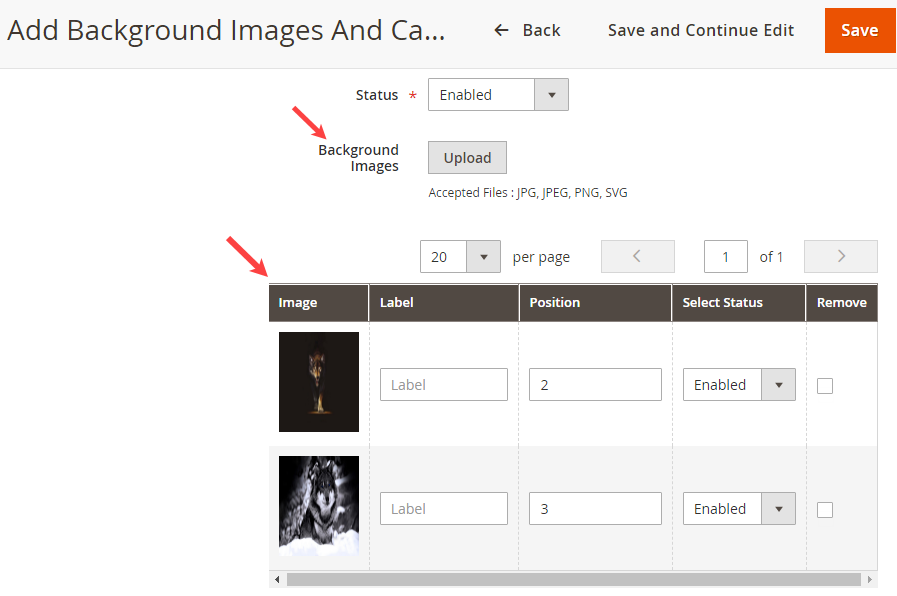
~ Background Images: You need to browse and upload the background images. The formats must be JPG, JPEG, PNG, and SVG.
You will see the uploaded images in the grid view. Here, you need to insert the following details for the images:
~ Label: Insert the image’s text label, so the customers can search the image by inserting the text label.
~ Position: Insert the position to manage the sequence of images.
~ Select Status: You can set the default status of the image (Enabled/Disabled).
~ Remove: If you want to delete any image, check the checkbox of the “Remove” and save the configuration.
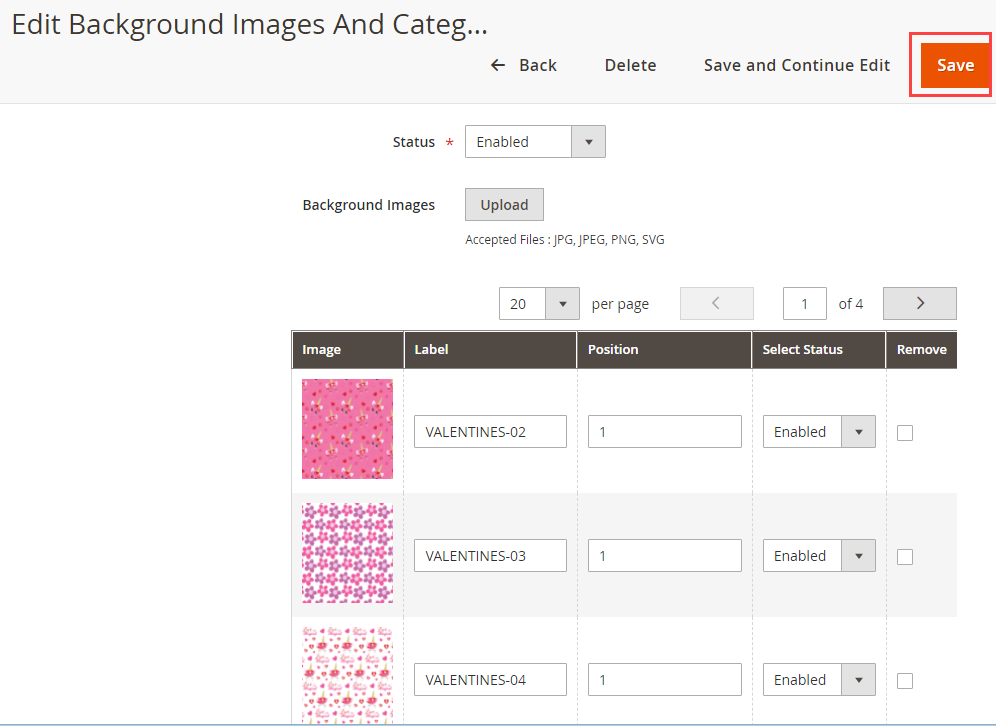
After inserting all the details, click on the Save button to add a new Background Images. Now, the newly added Background Images Category will be added to the list.
Here, you can see the added category is not a Root Category because its parent category is selected. But, if you want to add a new Background Images as a parent (root) category, you need to enable the “Assign as Root Category?” option.
Here, the Background Images are added as a parent category. You can upload the images with specific formats like JPG, JPED, PNG, and SVG.
After saving the Background Images, the category will be listed. Here, you can see the added category is a Root Category.
Edit, Delete, and Status
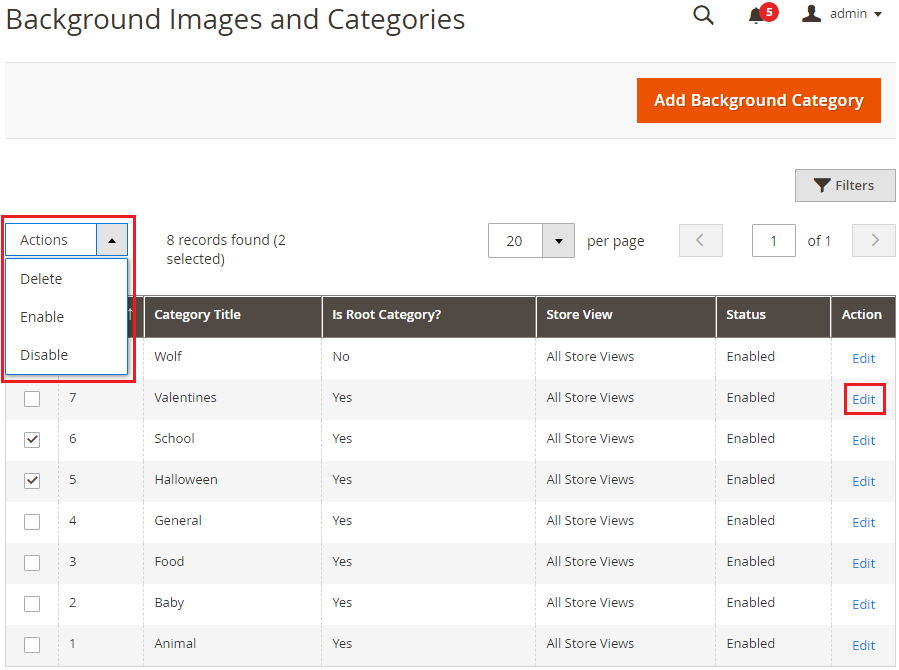
You can edit any category just by clicking on “Edit” under the Action column.
If you want to ‘Delete’ any category, select the category and click on the ‘Delete’ option from the ‘Actions’ dropdown list. A confirmation pop-up will appear after you click on the ‘Delete’ option. Select “OK” to perform the delete action.
Similarly, you can change the category status to Enable / Disable from the ‘Actions’ dropdown list.
Frontend View
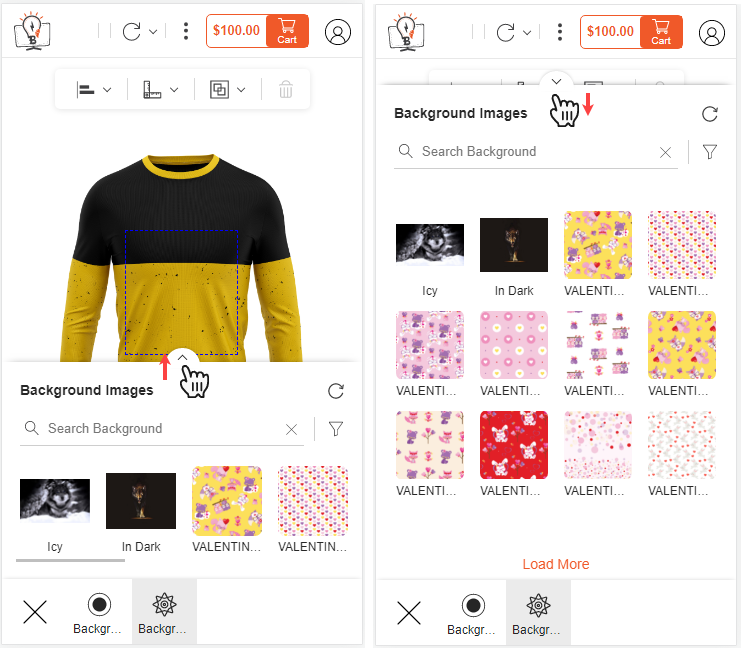
After configuring the BackgroundImages and Categories from the Backend, the customers can add the images to the background of the design area.
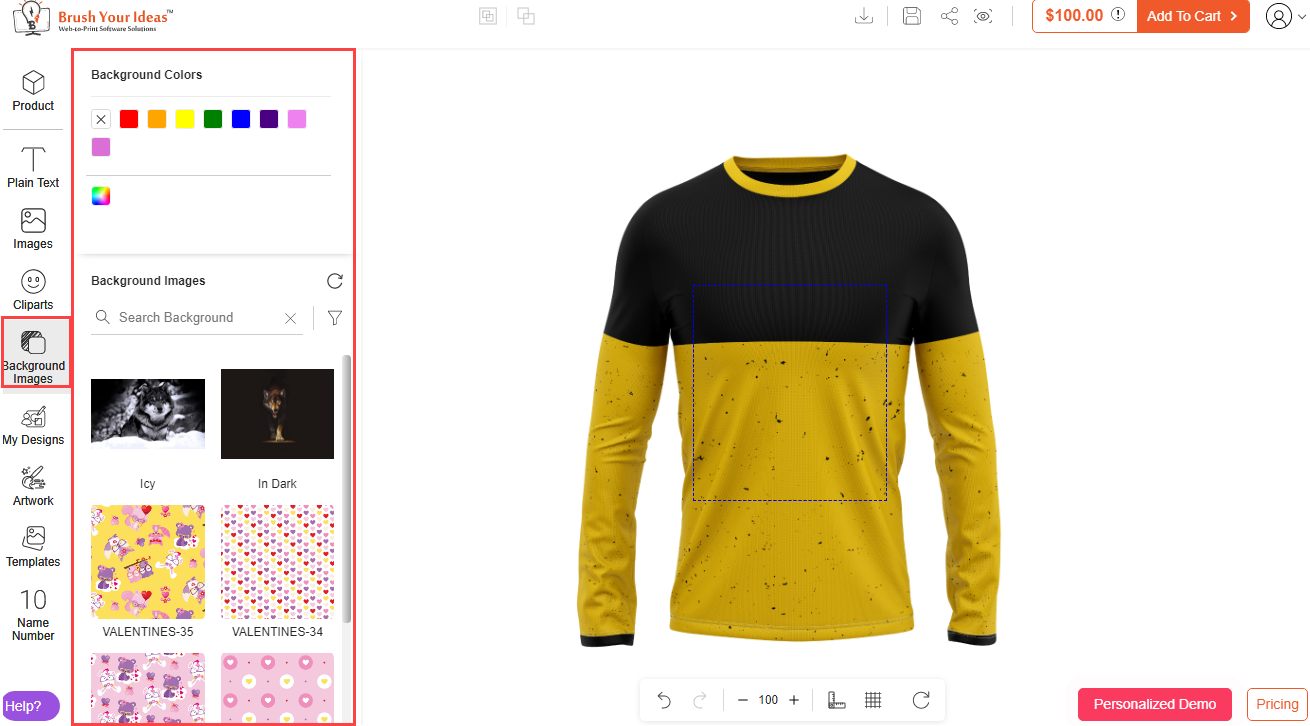
The customers can see the Background Images tab on the designer explorer panel on the left side. The customers can see the Background Images options in a sub-panel as enabled from the Manage Layouts.
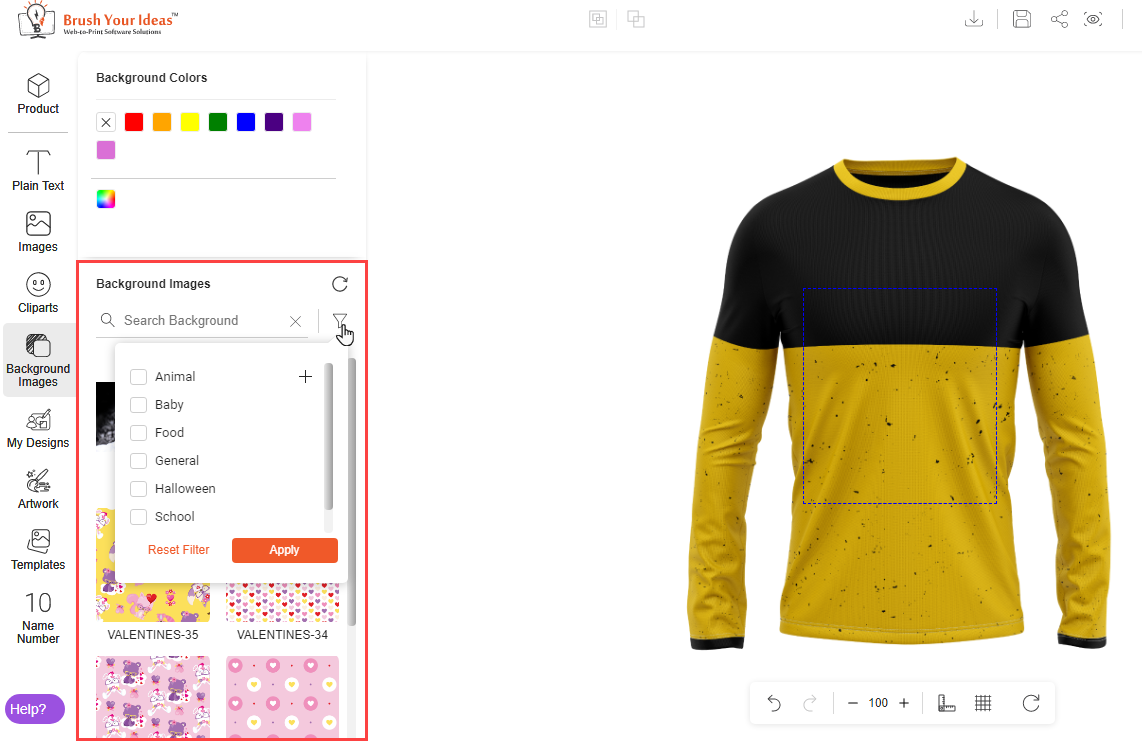
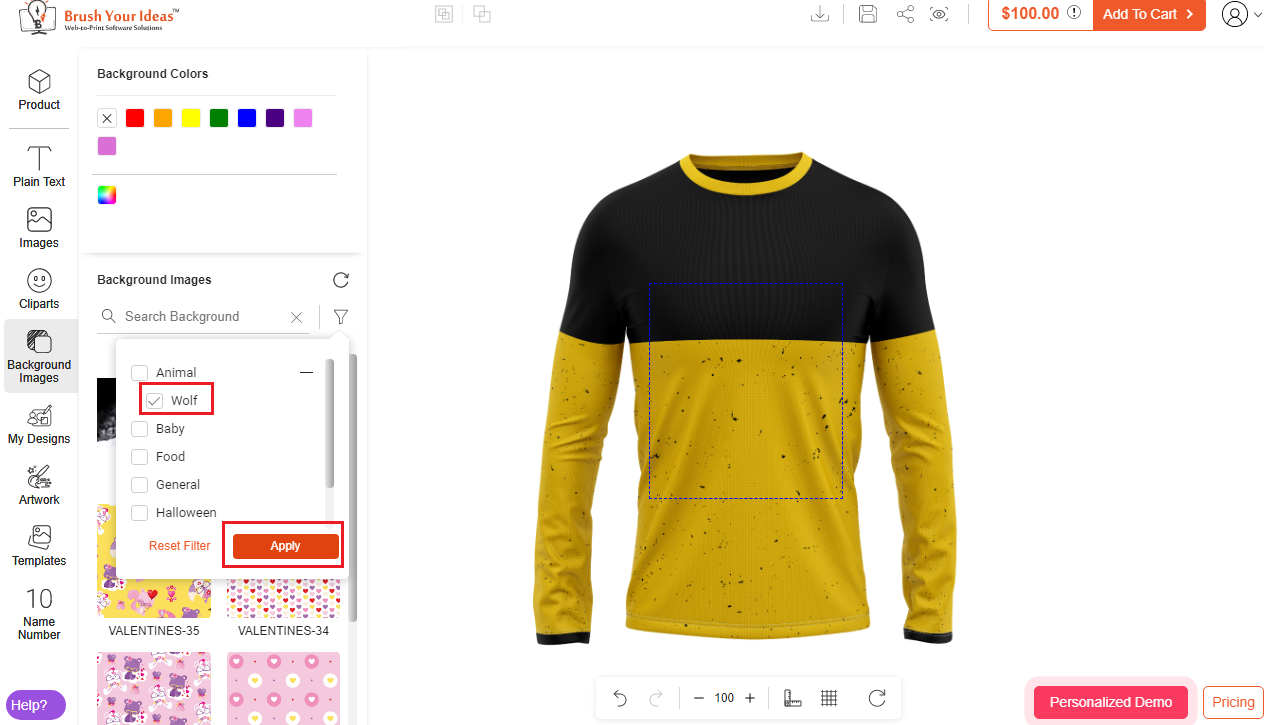
The customers can filter and search the images by inserting the ‘text label’ or by clicking on the ‘Filter’ icon under the “Background Images” option.
The customers can select the category of the Background Images. If any child category is there, the customers will see the “+” icon beside the category’s name.
Now, after selecting the category, the customers need to click on the Apply button to search for the results.
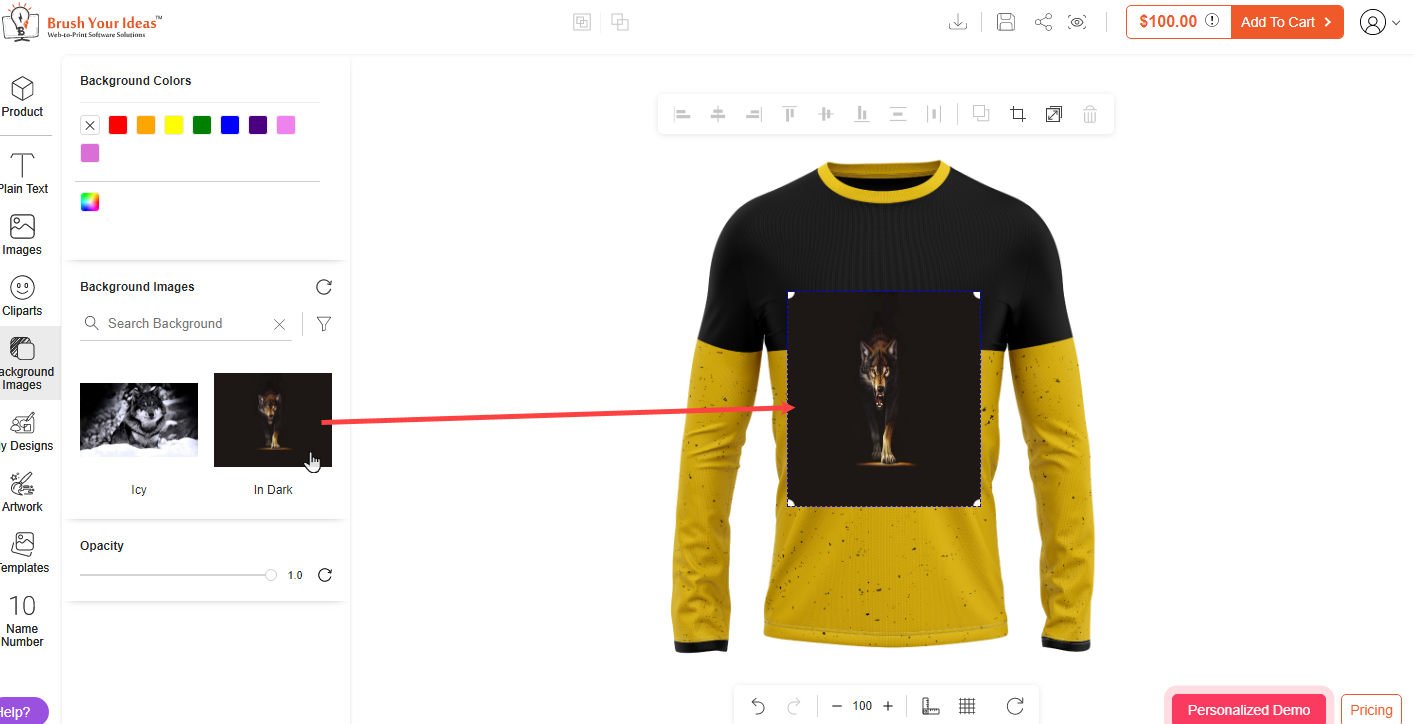
The customers can add the background by clicking on the image or simply drag and drop the image to the designing area. The image will be set as the background of the designer area. Now, the customers can design the product.
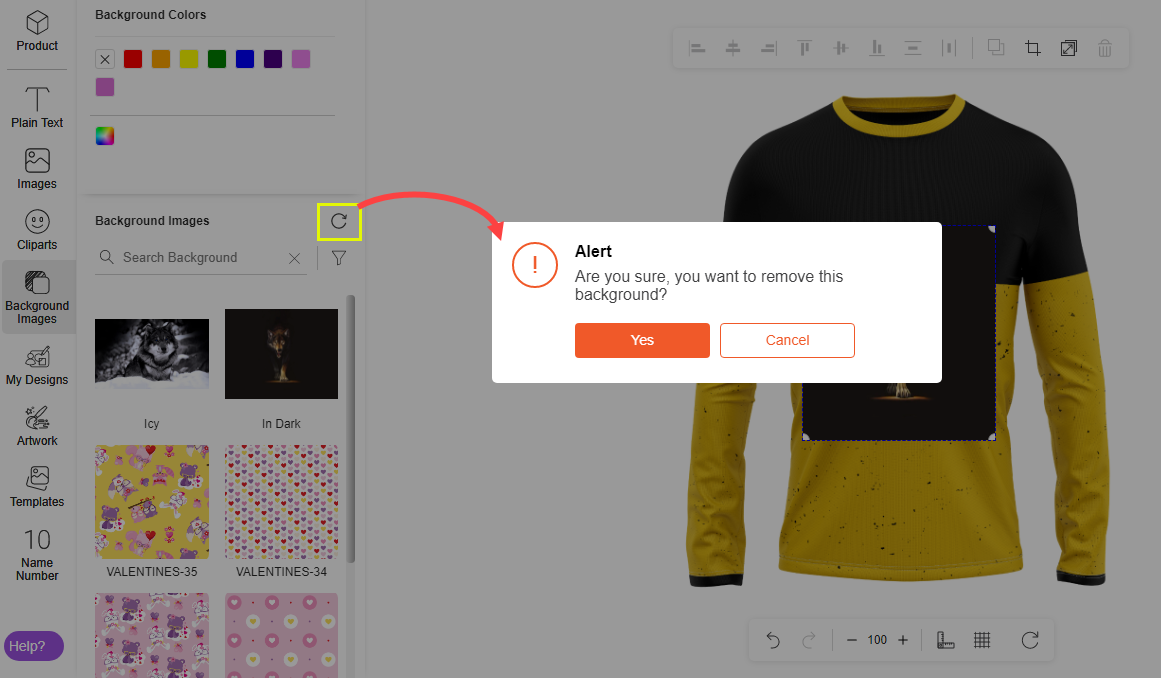
If the customers want to remove the background, they need to click on the ‘Remove’ icon beside the “Background Images” option. The customers will get the alert popup to confirm the removal of the background from the designing area.
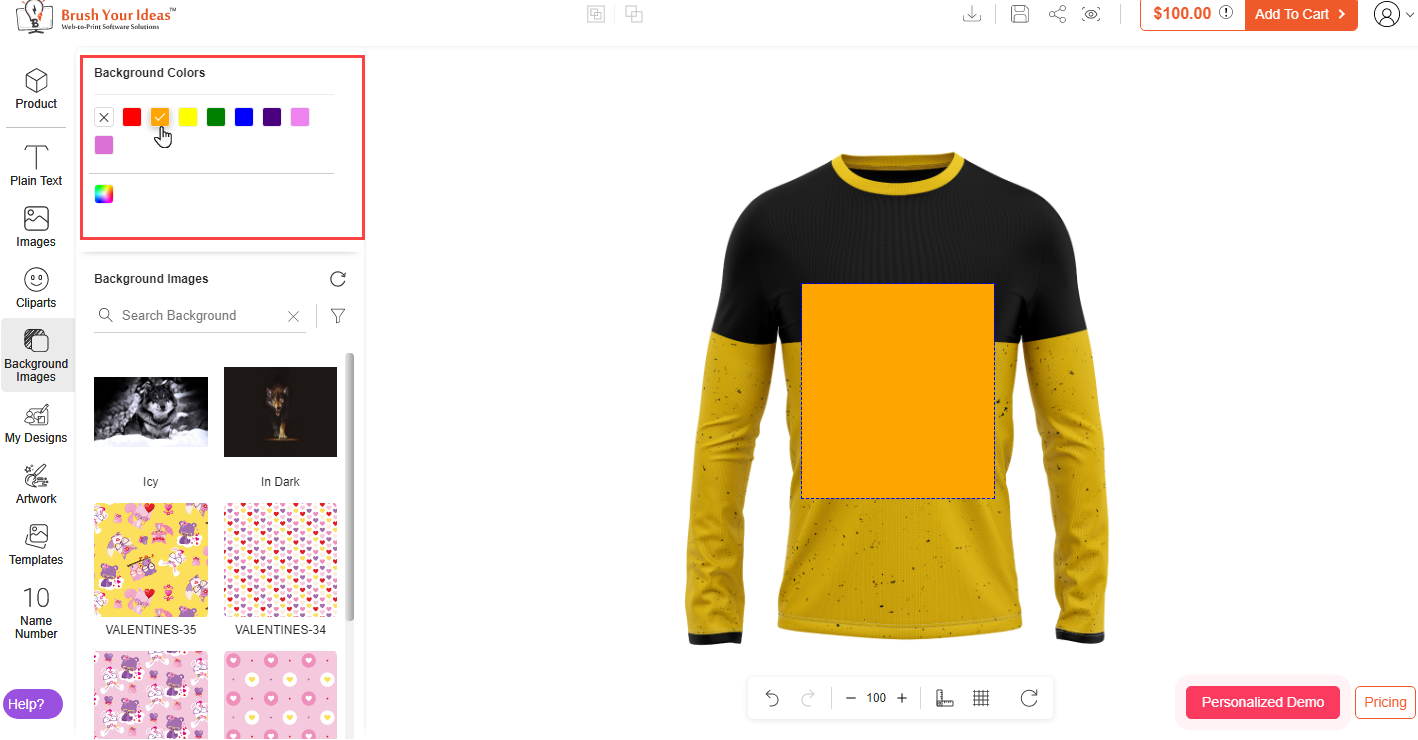
By clicking on the Yes button, the background image will be removed from the designing area of the product. The customers can also choose the background color if you have enabled the “Background Color” option from the “Manage Layouts”.
The customers will get the color options as managed and configured from the designer tool backend configuration. (Product Designer → Manage Printable Colors).
