CLIPART
Your customers can spice up their product designs with attractive and stylish Cliparts!
Our PrintXpand designer tool provides Clipart Gallery for your customers that contains pre-loaded unique designs which they can add to their products.
Backend Configuration
Manage Clipart Categories
You can manage and categorize the Clipart images. It is easy to set the parent and the child categories for the Cliparts.
To add and manage the Clipart and its Category, go to Product Designer → Mange Clipart Categories
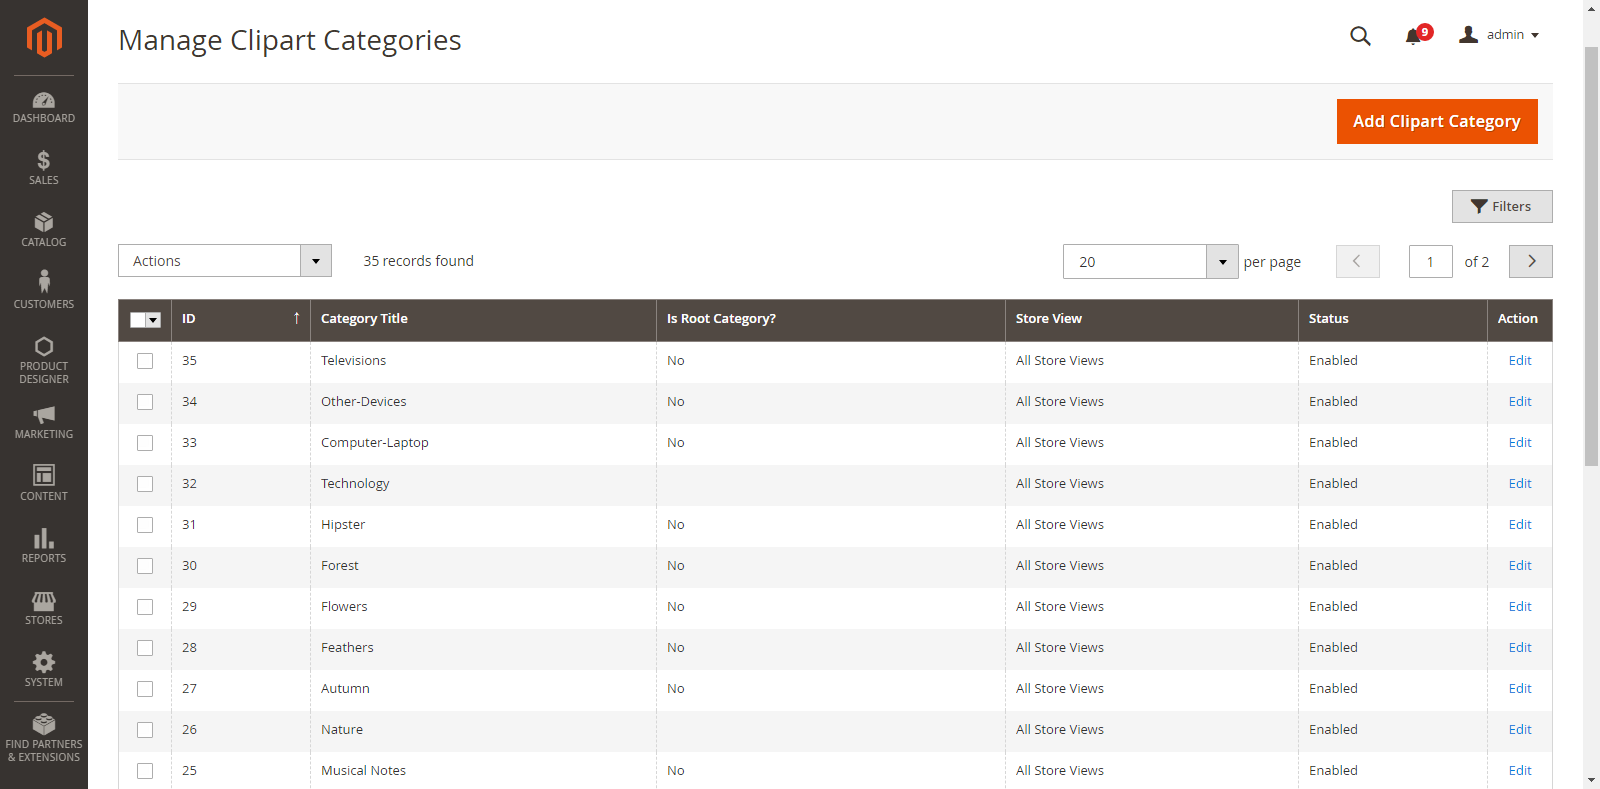
As you click on Manage Clipart Categories, you will get the list of already added clipart categories. You can manage and edit them as per your requirement.
By clicking on “Add Clipart Category”, you will be redirected to the “Add Clipart Category” page where you can add a new Clipart Category and Clipart Images.
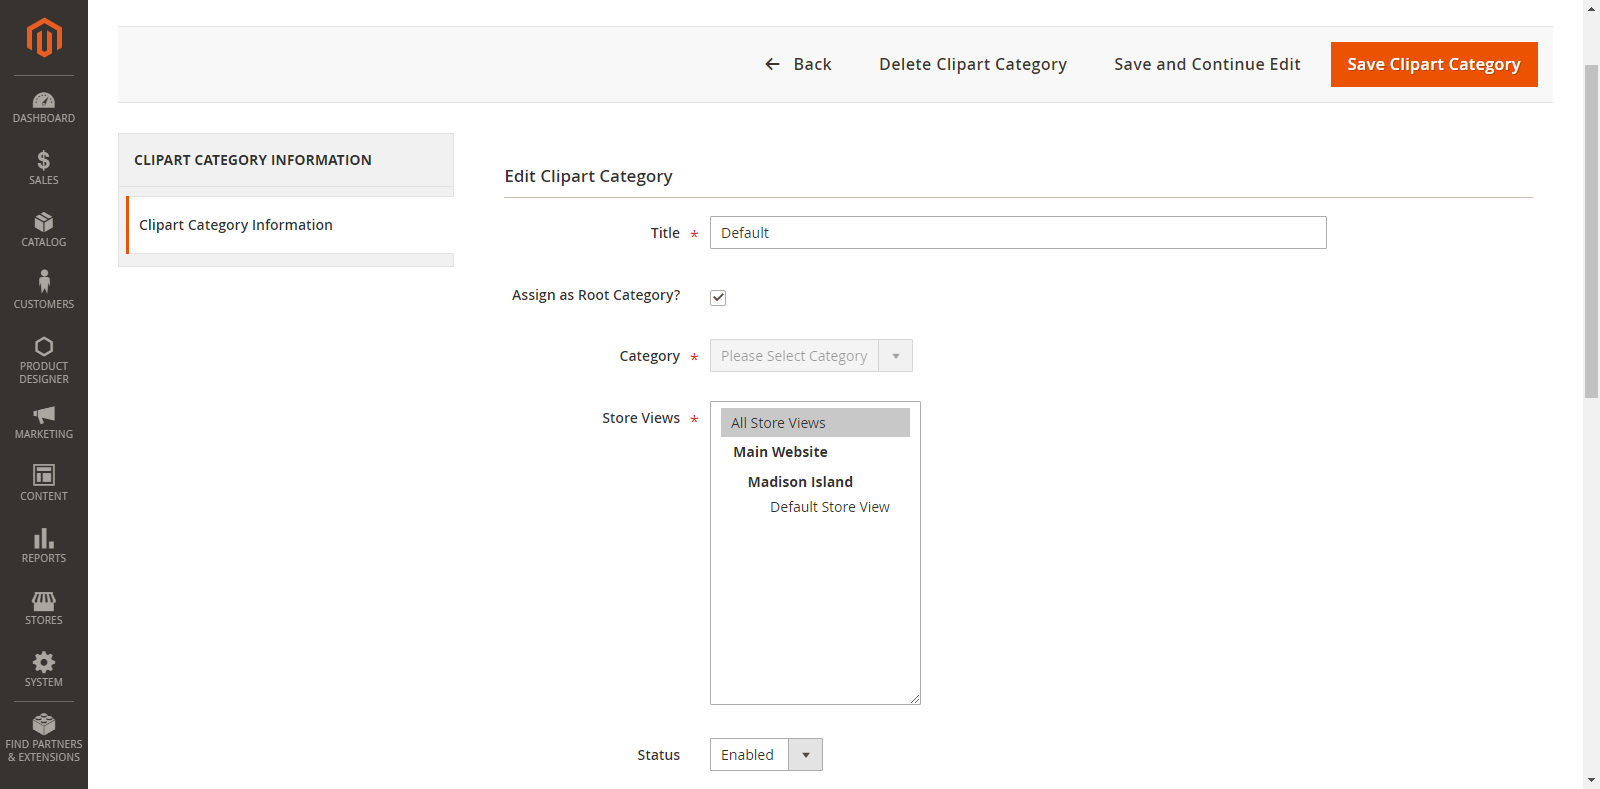
Now, select the parent/subcategory and enter the details as shown below:
Title: Enter the relevant name of a Clipart.
Assign as Root Category: Tick this option if it is a ‘parent category’.
Category: If you are adding clipart for ‘subcategory’, select its ‘parent category’ from the dropdown list.
Store Views: Select the stores in which the Clipart will be displayed.
Status: Choose the current status of Clipart. (Enable/Disable)
Add Clipart Images: Browse and upload the images to be added in the Clipart category.
JPG, JPEG, PNG and SVG formats can only be supported.
Label & Tags: Enter Clipart’s ‘Label & Tags‘ to ease out of the search.
Position: Enter the No. of position in which you would like to display the Clipart image at the Front End.
Exclude: Enable this option if you don’t want to display the clipart in the front end instead of permanently deleting.
Remove: Customer can permanently remove clipart image using this option.
After inserting all the details, click on the “Save Clipart Category” button and it will be added in the “Manage Clipart Categories” list. Later, you can edit as per your need.
To ‘Delete’ any Clipart Category, select it and click on “Delete” option from the “Actions” dropdown. As you click on the ‘Delete’ option, a confirmation message will appear. By clicking on the “OK” button, the selected clipart category will be deleted.
Clipart Configuration
To set the general Clipart Configurations from the Back End, go to Stores → Configurations → Clipart
From here, you can set the default configuration to display in the Front End.
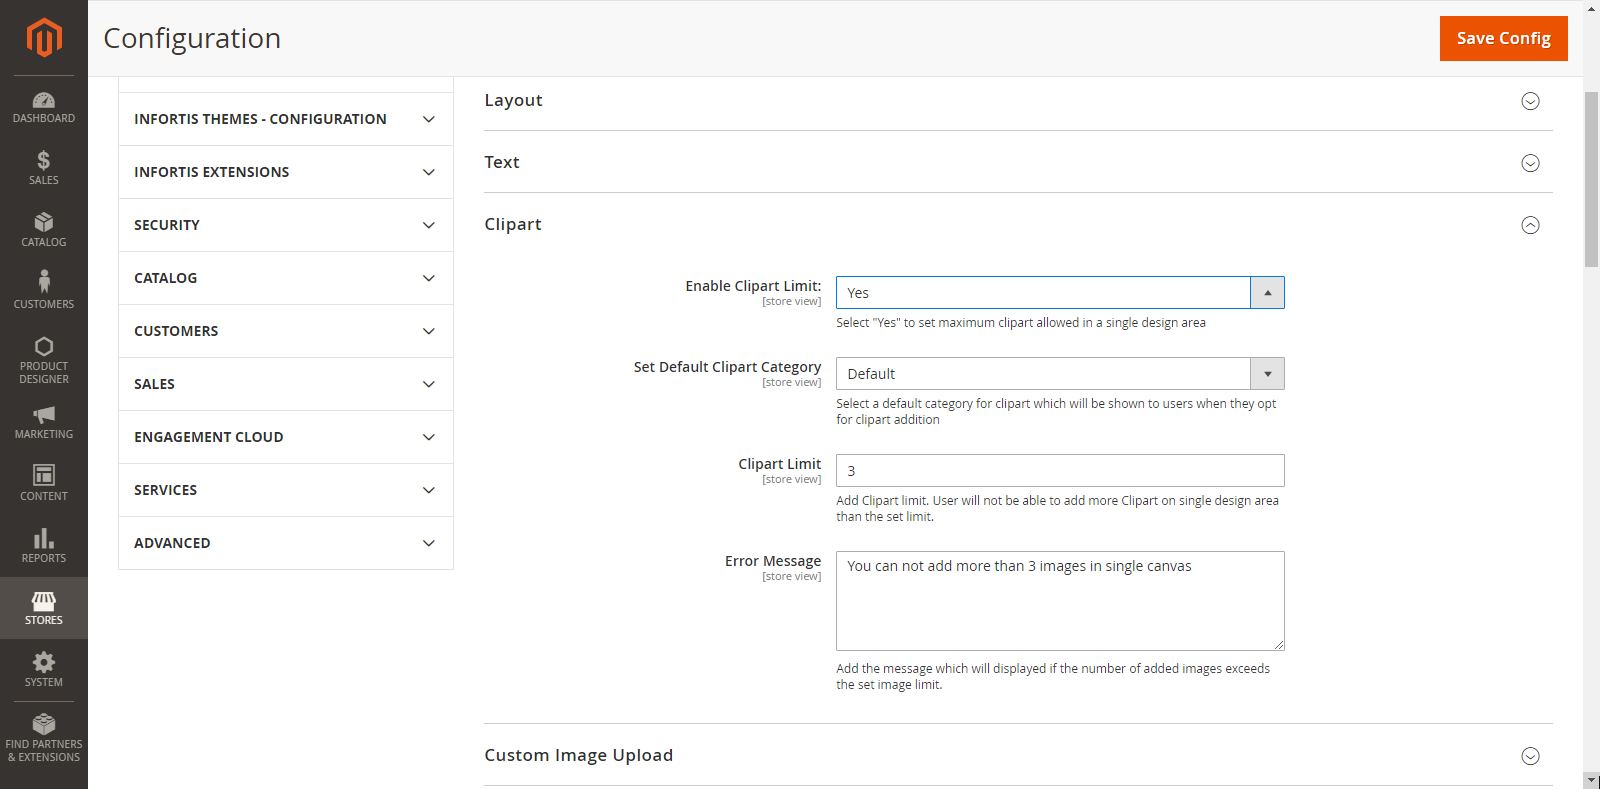
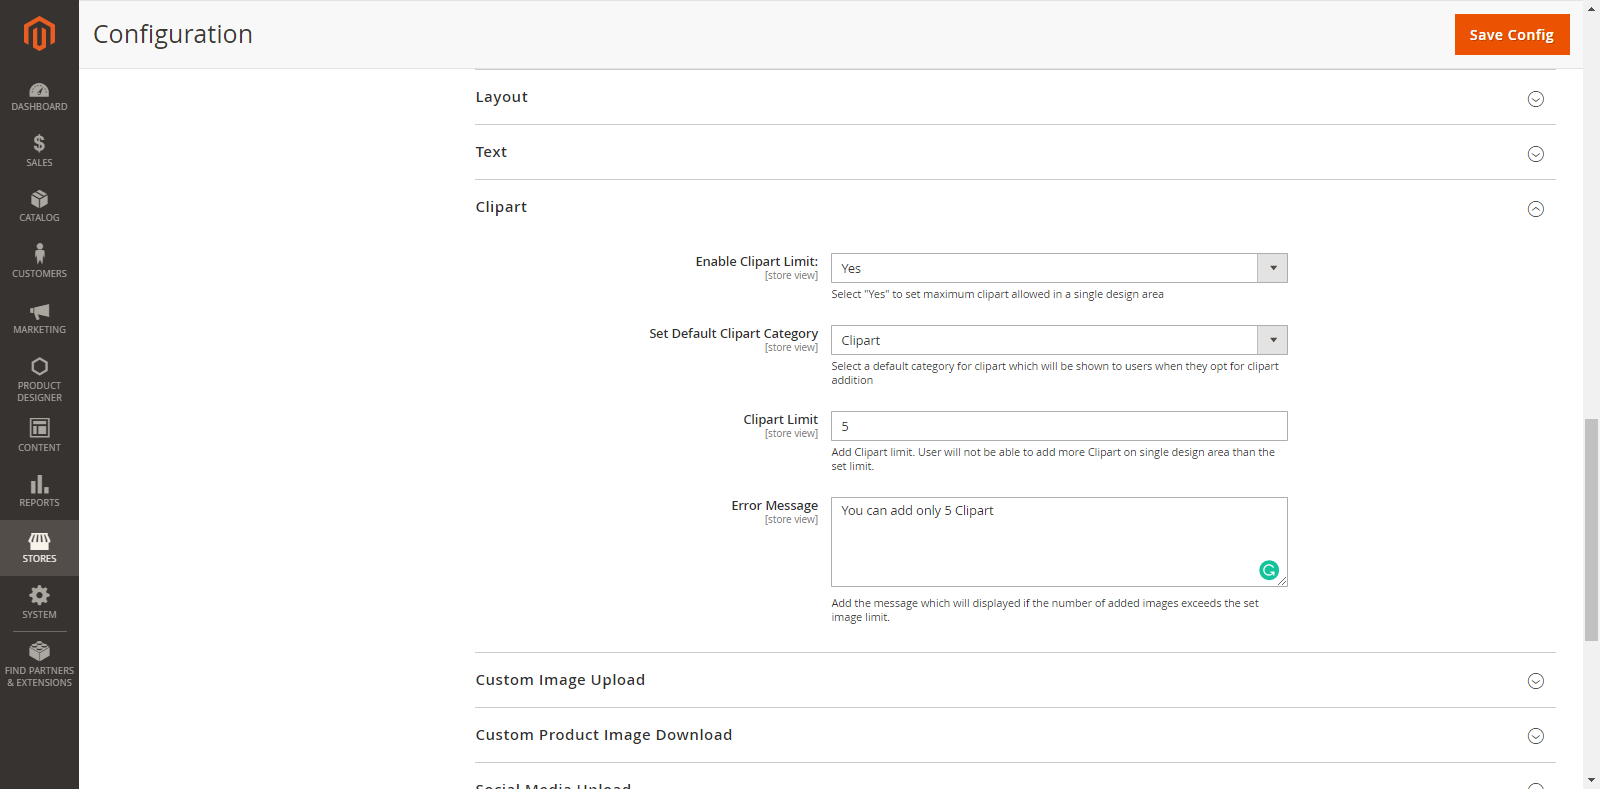
The general Clipart Configurations are shown as below:
Enable Clipart Limit: Select ‘Yes’ to set maximum clipart allowed in a single design area.
Set Default Clipart Category: Select a default Clipart Category which will be displayed when the customers click on the Clipart option.
Clipart Limit: Enter the value of Clipart limit so the customers cannot exceed the limit on the single design area.
Error Message Clipart: Enter the relevant Error Message which will be displayed when the customers exceed the limit.
Front End View
View Added Cliparts
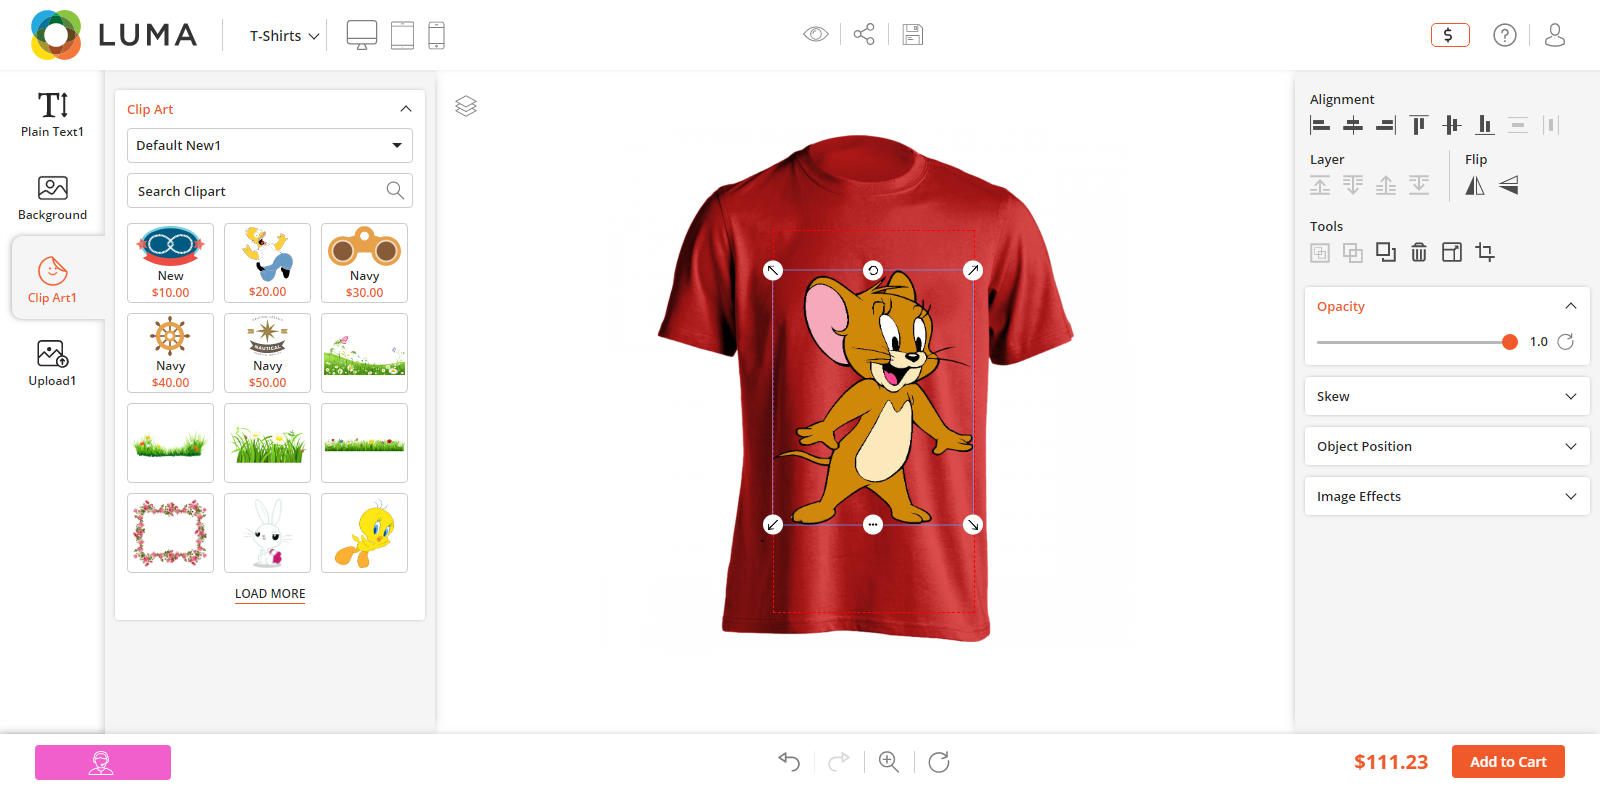
Click on Clipart tab from the ‘Designer Explorer’ (left side). The customer will see the Cliparts in the grid view and explore the clipart provided as configured from the backend. They can search and filter the clipart.
Now, the customers can add their favorite Clipart image and they can apply the Image Effects from the ‘Designer Tools’ tab (right side). They can set the alignment of the clipart, Front/Back positions by Layer, rotate and flip horizontal & vertical.
Note: The customers can crop the Clipart Images but the cropping will not be applied on SVG format images.
