PHOTOBOOK (Multi Product Designer)
Relive your favorite memories with PrintXpand-Photobook (Photo Album) with the help template designs, inbuilt designing material like backgrounds, clip arts, text captions with font design & formats.
Backend Configurations
The backend configuration for the Photo Album or Photo book is provided on the product detail page. This guide will help you select the Photoalbum/Photobook orientation as per your required design. You can select the album page count, set the default Photo Album Layout and Design Ideas Templates on frontend view, and page limitations.
Before starting, it is important to configure Photo Album Layouts, Design Templates, and Album’s width from the “Product Designer” option.
Manage Photobook Layouts
You can display the different Photobook Layouts for your customers.
For that you need to add the layout from the backend of the Product Designer Tool:
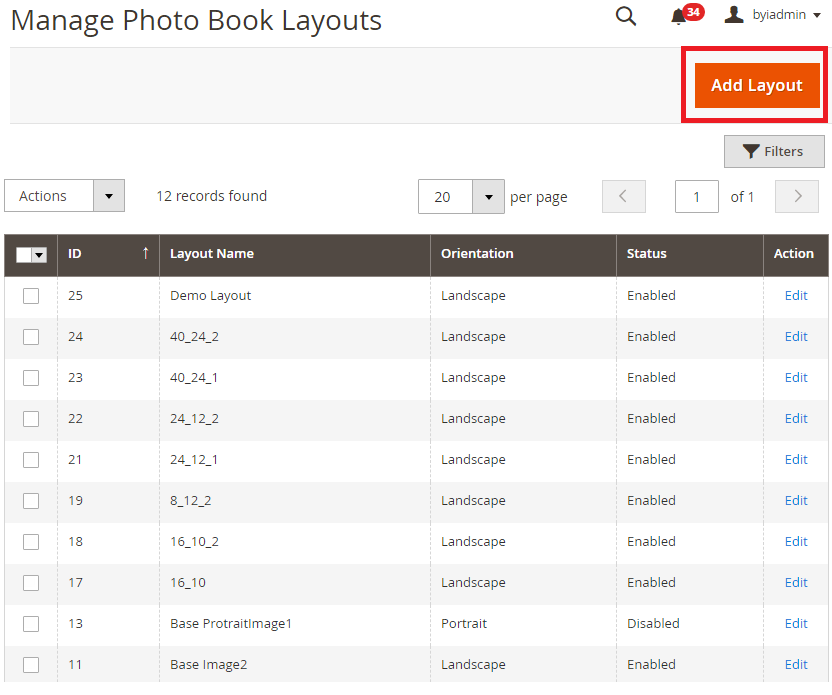
Go to Product Designer -> Manage Photobook Layouts.
By clicking on it, if layouts already have created, you can view the list of layouts along with details like name, orientation, and current status.
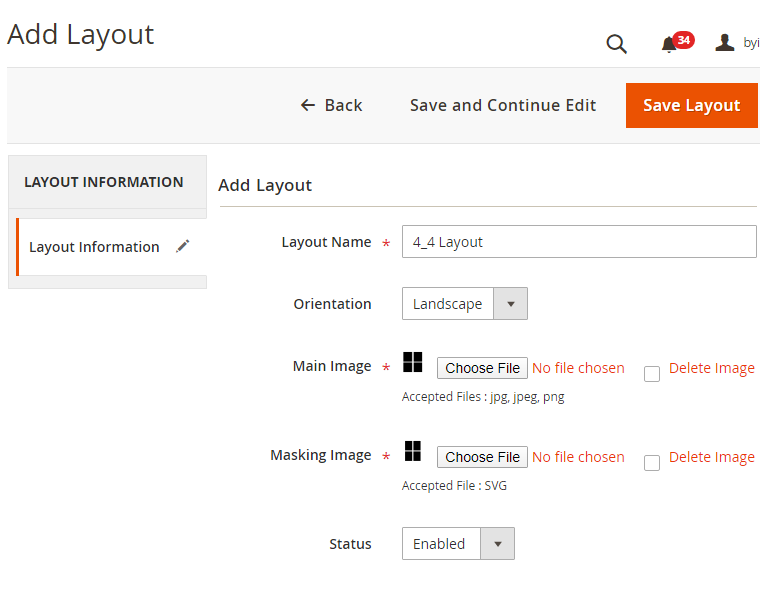
To add new Photo Album Layout, click on Add Layout button and you will be redirected to the “Add Layout” page with the following information for configurations:
Layout Name: Insert a relevant name. Ex. Marriage Album, Office Group Album, etc.
Orientation: Select the display of the Photo Album either Landscape (horizontal display) or Portrait (Vertical display).
Main Image: Select the Main image for Photo Album display.
Masking Image: Select the image to cover up parts in image so that only certain parts of an image can be shown.
Status: Keep the layout either Enable/Disable as per your requirement.
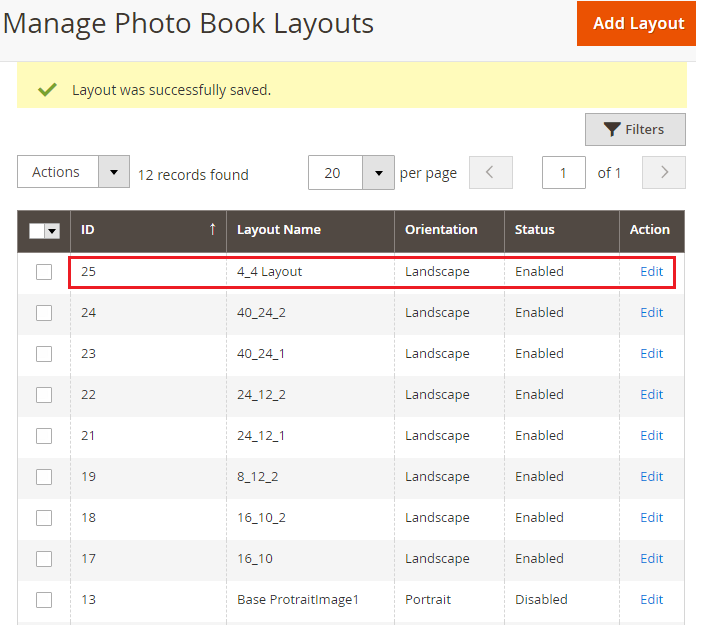
After configuring the layout information click on the Save Layout button. Thereafter new Layout will be added in the list of Photobook Layouts.
Later, you can edit any Layout by clicking ‘Edit’ option under Action. To delete any layout, select the layout first and then select the Delete from ‘Actions’ dropdown and click on ‘Submit’ button.
Manage Design Ideas
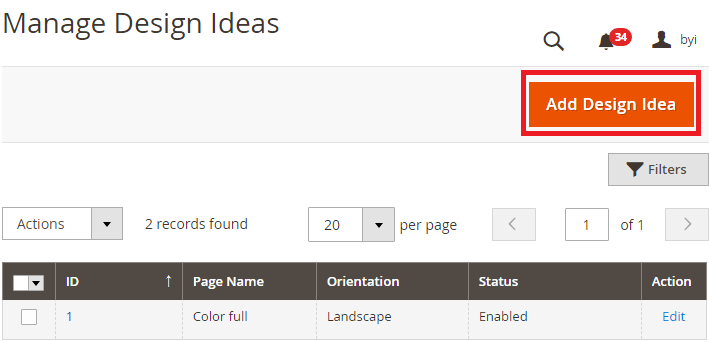
You can add as Design Ideas for the photobook. For that you can add the Design idea from the backend of Product Designer Tool: Product Designer -> Manage Design Ideas.
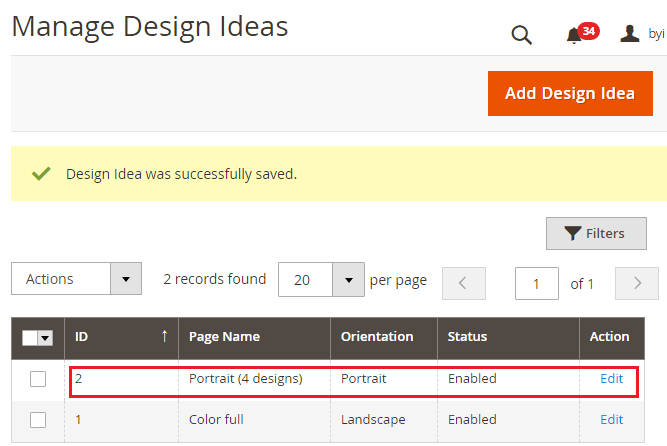
By clicking on it, if any Design Ideas already have created, you can view the list of Design Ideas along with its details like name, orientation, and current status.
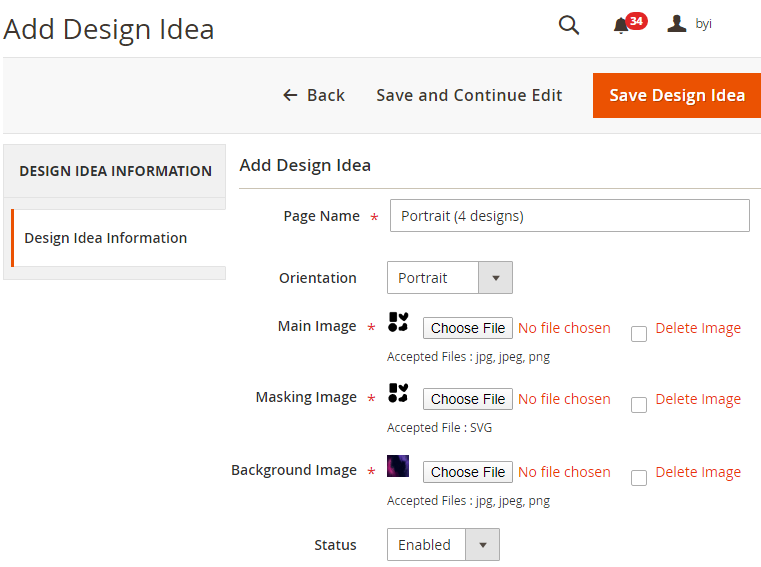
To add design idea, click on Add Design Idea button and you will be redirected to the “Add Design Idea” page with the following design idea information to configure:
Page Name: Insert a relevant name for Layout. Ex. Marriage Album, Office Group Album, etc.
Orientation: Select the display of the Photo Album either Landscape (horizontal display) or Portrait (Vertical display).
Main Image: Select the Main image for Photo Album display.
Masking Image: Select the image to cover up parts in image so that only certain parts of an image can be shown.
Background Image: Select the background image of the main image.
Status: Keep the design ideas either Enable/Disable as per your requirement.
After configuring the design idea information click on Save Layout button. Thereafter new Design Idea will be added to the list.
Later, you can edit any design ideas by clicking ‘Edit’ option under Action. To delete any design idea, select the design idea first and then select the Delete from ‘Actions’ dropdown and click on ‘Submit’ button.
Manage Background
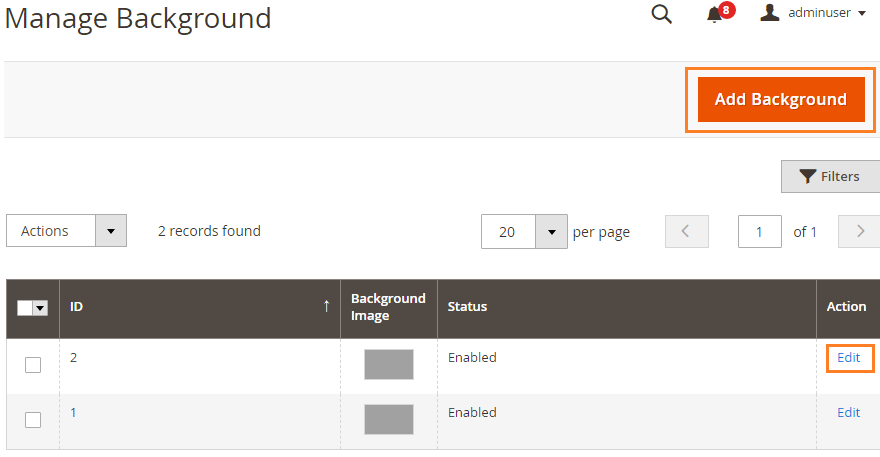
You can provide the background options for the Photobook design. Navigate to the Manage Background option under the “Photo Book” menu. You will get the list of the added background options.
You can edit the existing one to modify the details or you can add a new background option by clicking on the “Add Background” button.
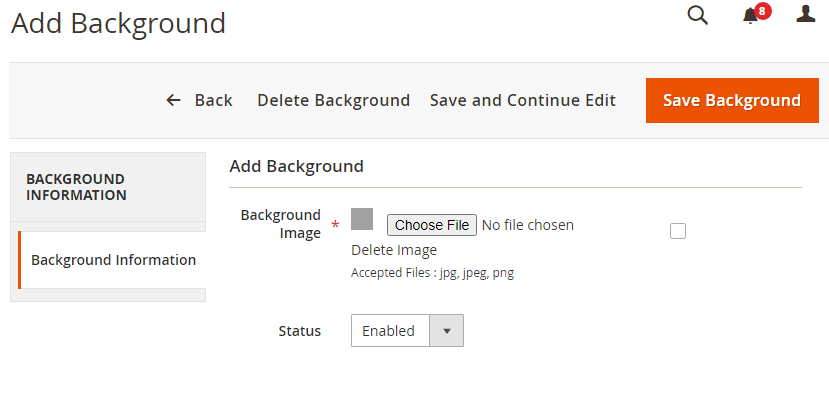
You need to select the image for the photobook background. Accepted image file formats: jpg, jpeg, png. After selecting the background image, click on the ‘Save Background’ button.
Manage Spine Width
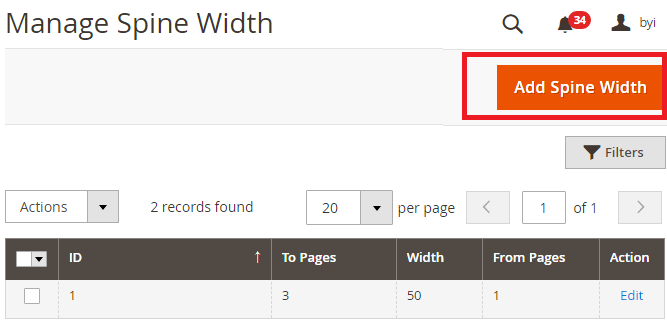
With the number of pages is increased, it is important to calculate the spine width as well.
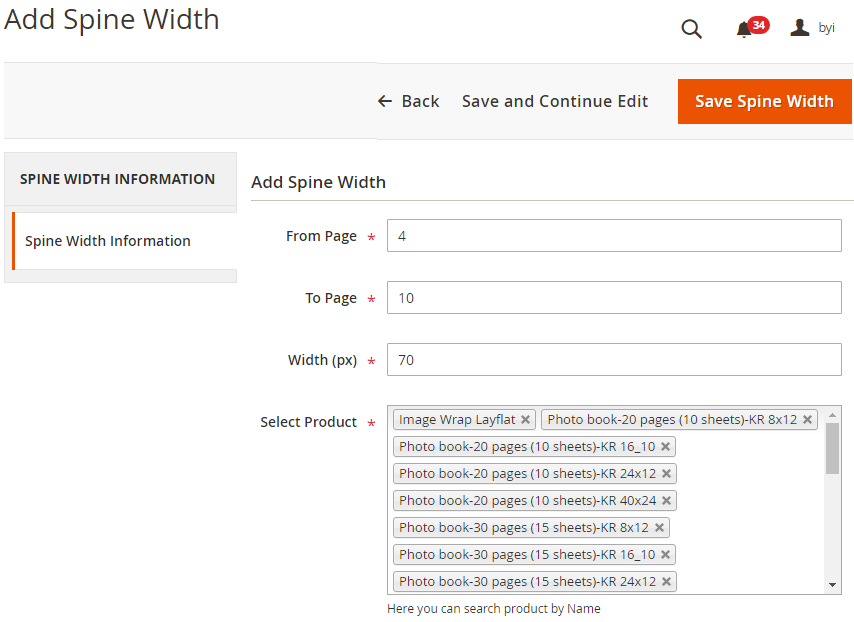
From Page: Insert a page no. from where the album pages added.
To Page: Till the page.
Width (px): Insert the width (in pixel) as per the pages.
Select Product: Select the Product. Here you will get Photo Book products only.
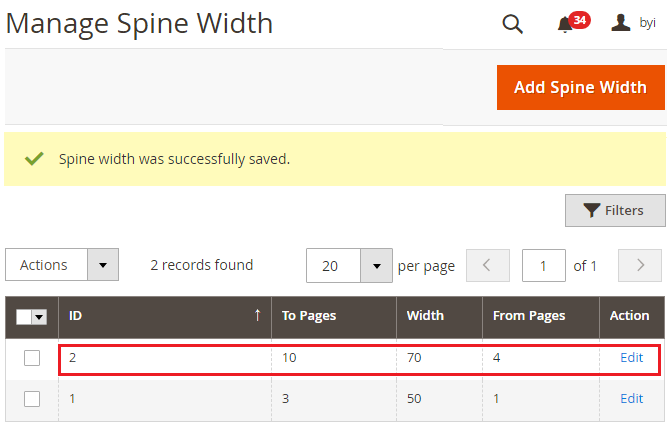
After inserting the Spine width details click on Save Spine Width button. Thereafter a new Spine Width will be added in the list.
Later, you can edit any Spine Width by clicking ‘Edit’ option under Action and delete Spine width by selecting it and then select the ‘Delete’ from ‘Actions’ dropdown and click on ‘Submit’ button.
Manage Blank Products
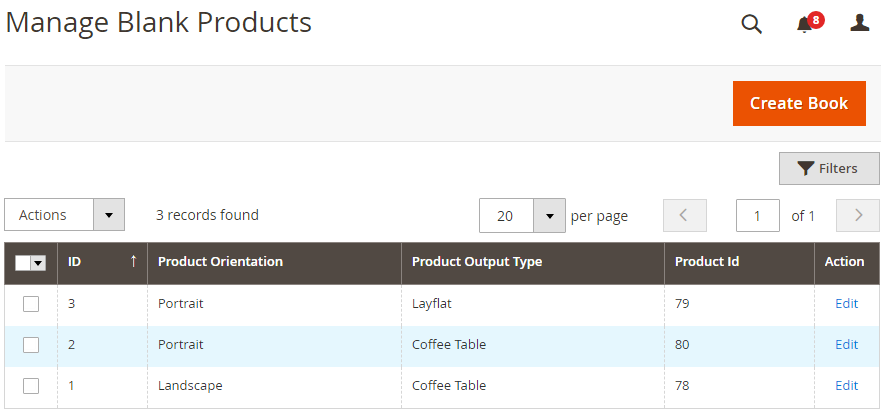
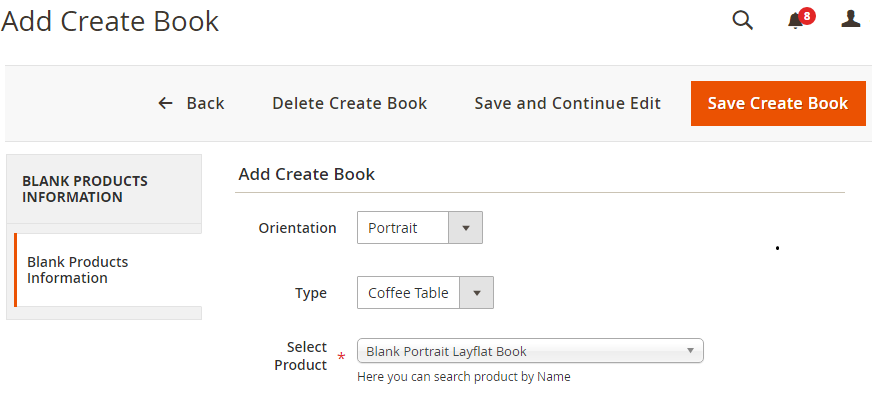
Under the “Manage Blank Products”, you can allow the customers to create a new “blank Photobook” from the scratch level on the product designer tool.
You can edit existing ones to modify the details or you can add a new create book by clicking on the “Create Book” button.
To create the Photo album products, select the following details:
– Orientation: Select the relevant orientation for the photobook: ‘Landscape’ or ‘Portrait’
– Type: Select the relevant type for the Photobook: ‘Layflat’ or ‘Coffee Table’.
– Select Product: Select the Photobook product from the list.
After selecting the details, click on the ‘Save Create Book’ button.
Manage Shapes
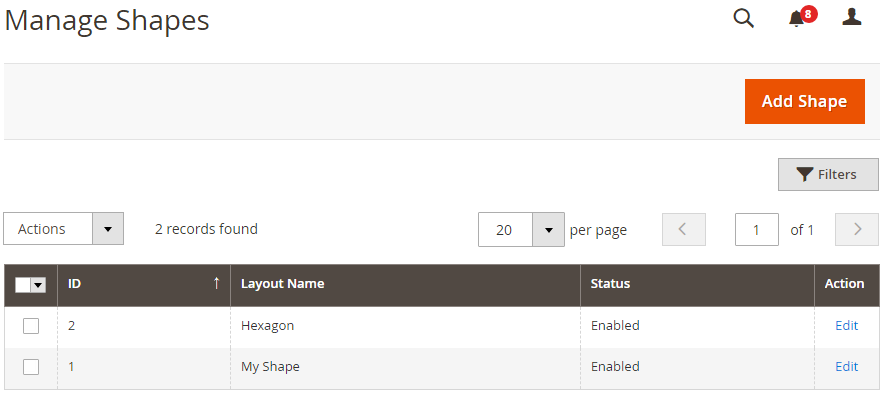
You can enable the “Shapes” option on the product designer tool to design the photobook with users of the different shapes.
Navigate to the Product Designer -> Manage Shapes. You will get the existing list of the added shapes.
You can edit the existing one to modify the details or you can add a new shape by clicking on the “Add Shape” button.
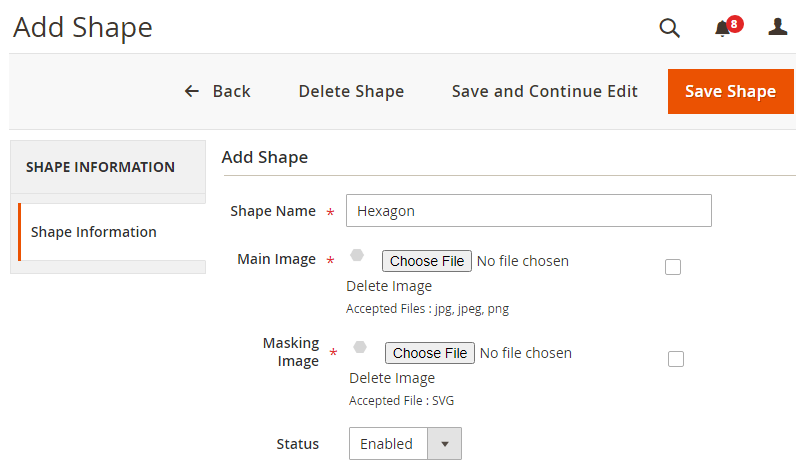
Select the following details:
– Shape Name: Insert the relevant name of the shape
– Main Image: Select the original image of the specific shape.
– Masking Image: Select the masking image of the original image of the shape.
– Status: Enable/Disable the status as per requirement.
After selecting the details, click on the ‘Save Shape’ button.
Frontend View
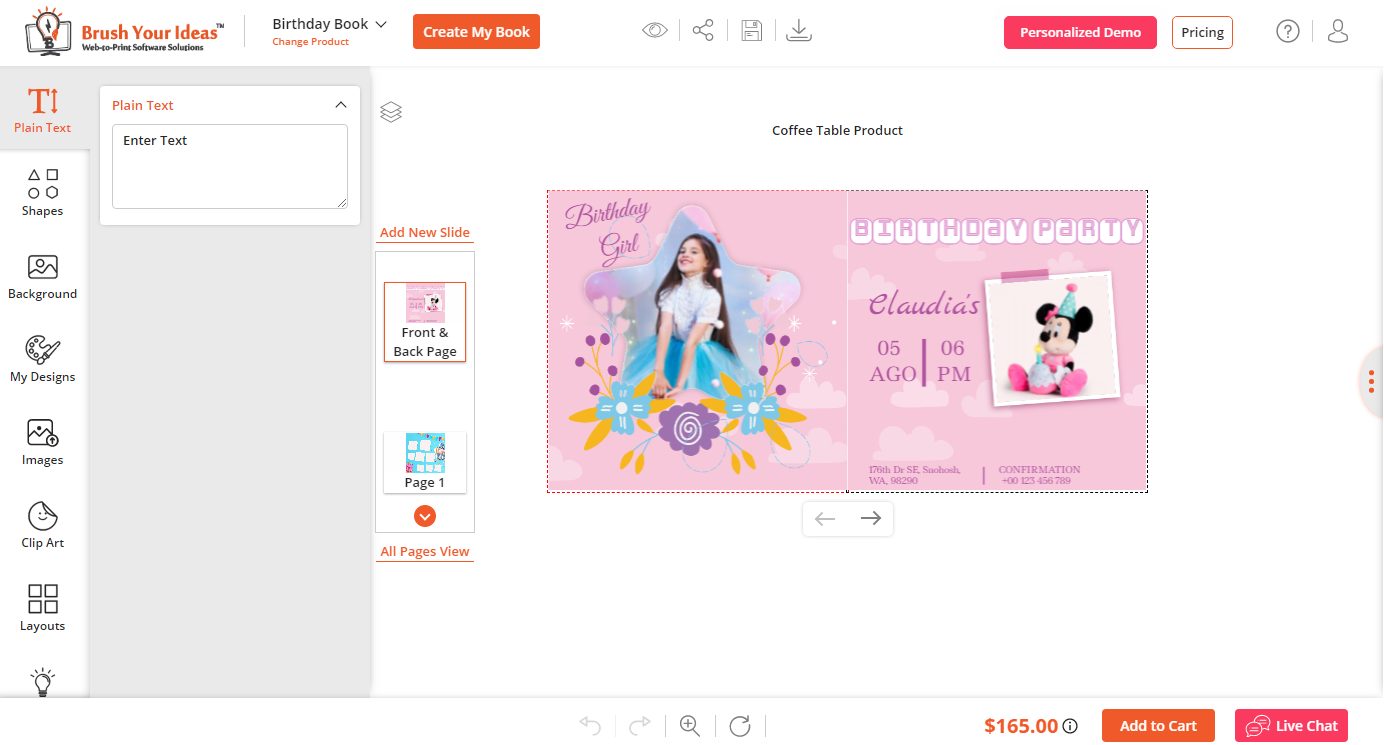
After all the configurations are, you will get the Photobook view with the open Layout option by default on the Product designer page.
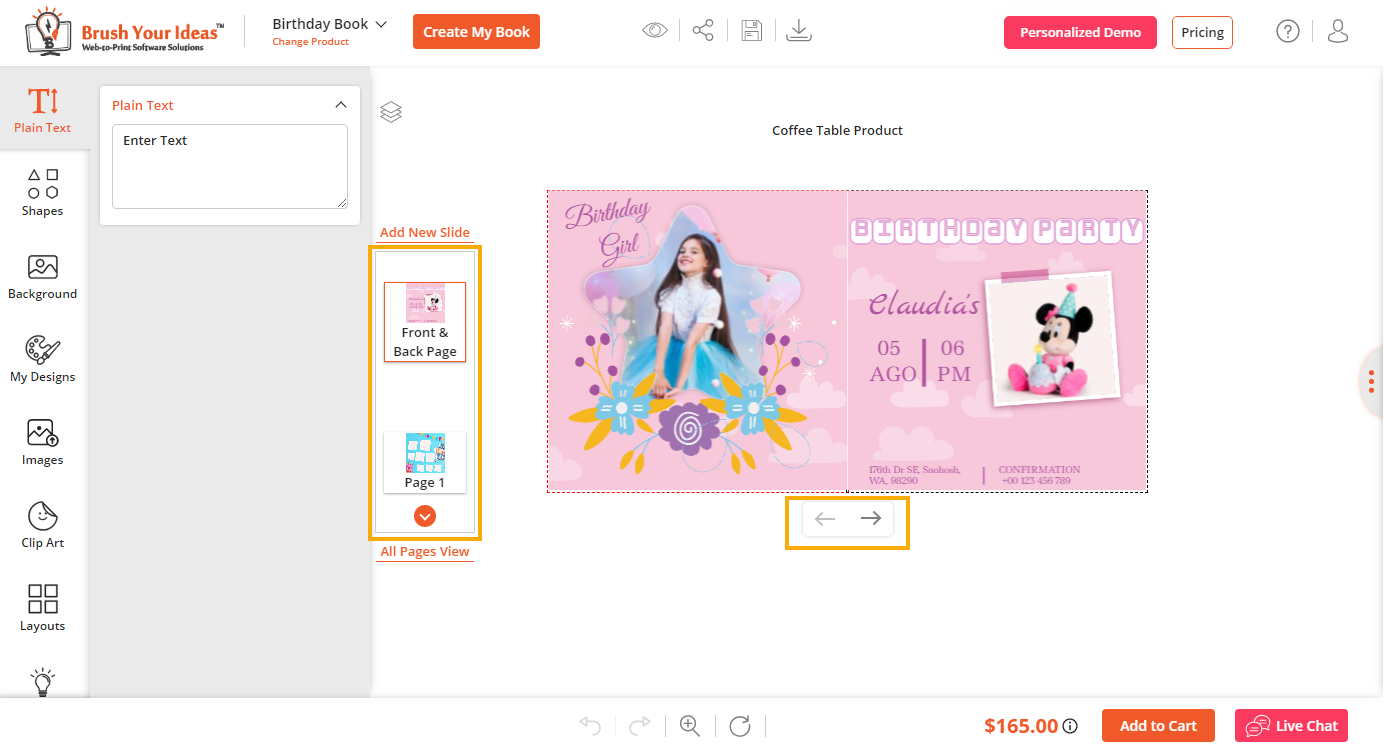
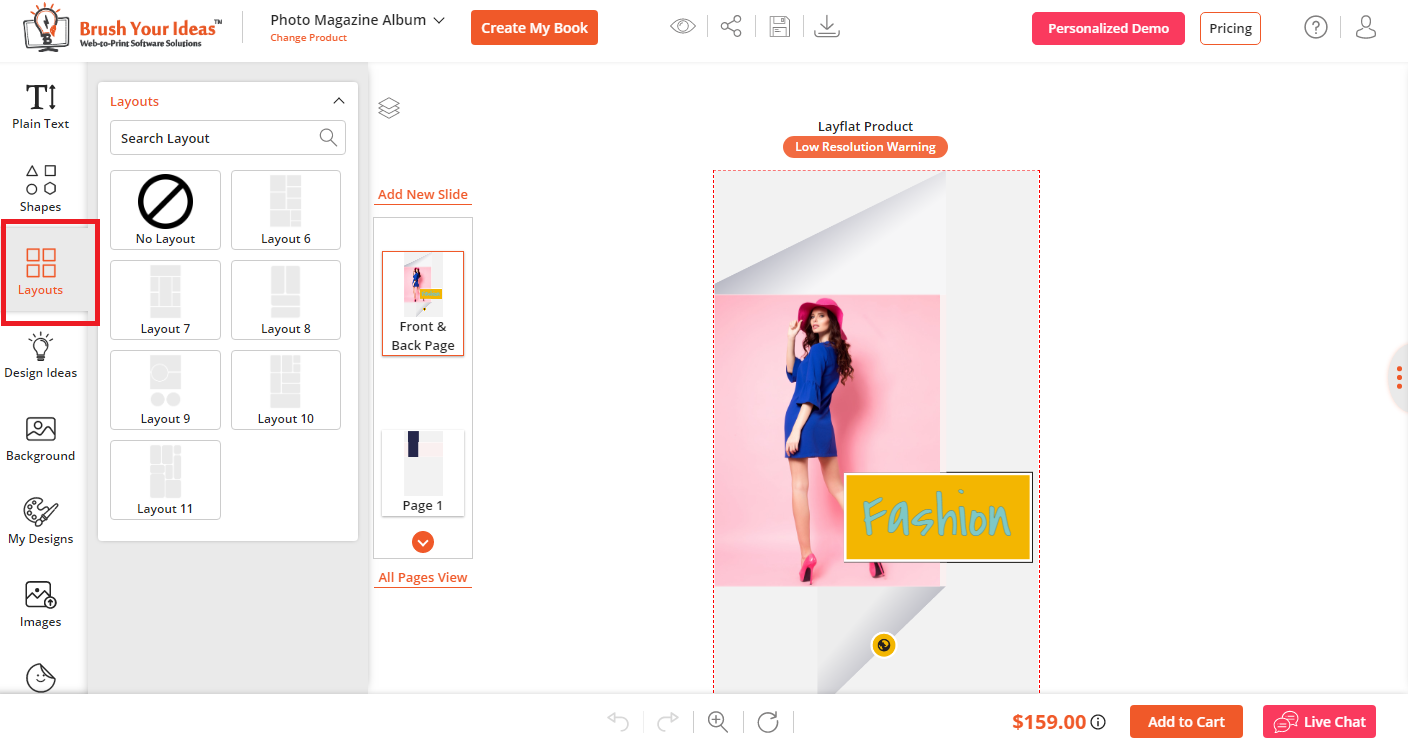
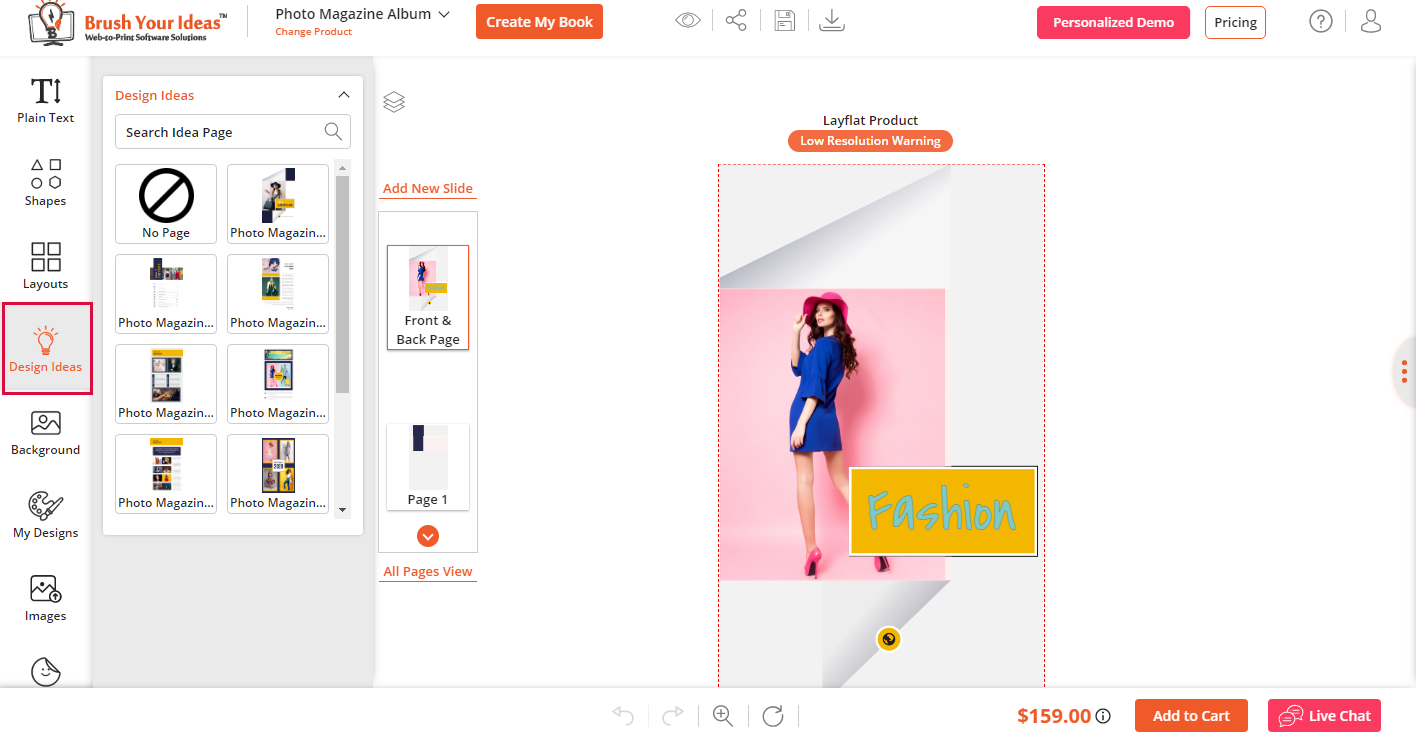
In the designer explorer (left panel), the Layouts & Design Ideas options will appear as your customer access the ‘Photo Album’ product.
Your customer can add the images, snaps to design the Album by inserting clip art, images, and text caption by applying font effects.
Your customer will get the changes in the Slider of Photobook pages of the selected photo book design template on left side of the designer area.
> Layouts
Under the “Layouts”, customers will get the grid view of the Layouts which are selected under the Product Designer Photobook option on the product details page from the backend.
> Design Ideas
Under the “Design Ideas”, you will get the predesigned ideas for Photobook. Design Ideas are similar to Layouts but the Background image selection is additionally added.
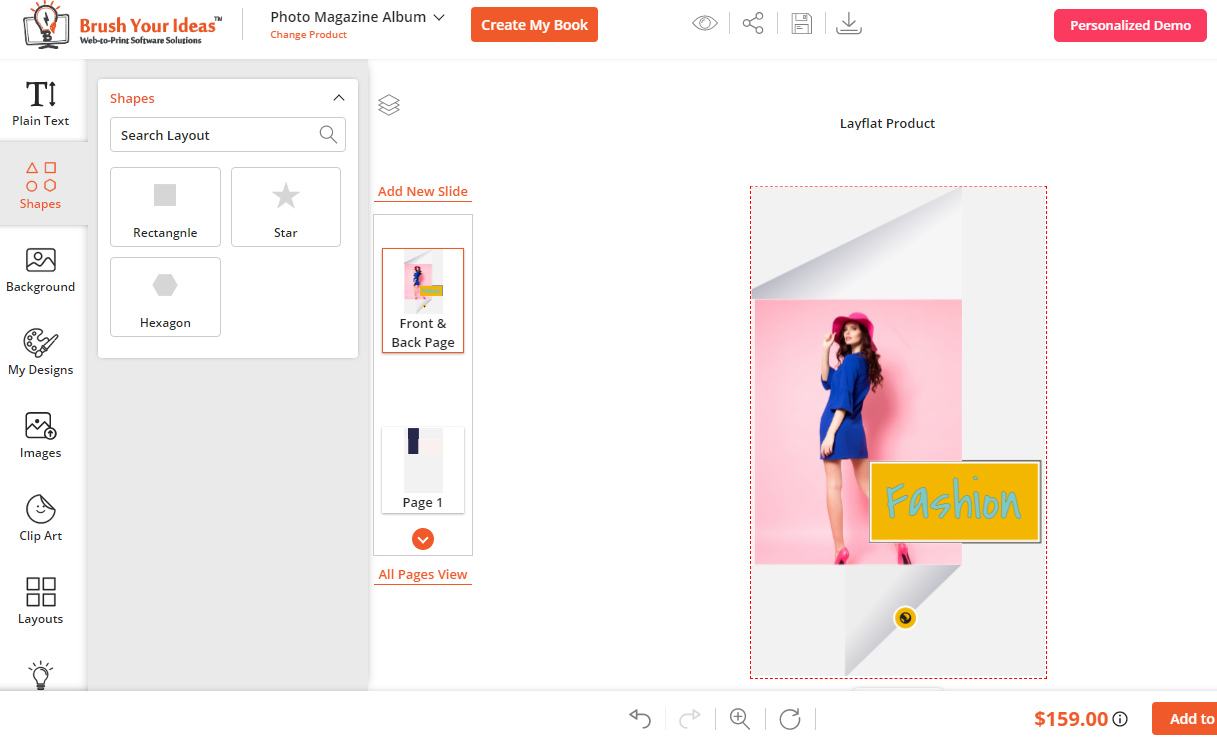
> Shapes
If you have configured the Shapes from the backend and at the product level, your customers will design the Photobook by adding shapes.
>Upload Images
Your customer can design the Photobook by dragging the uploaded images, adding the Clip art and the Text captions with Font effects on the pages.
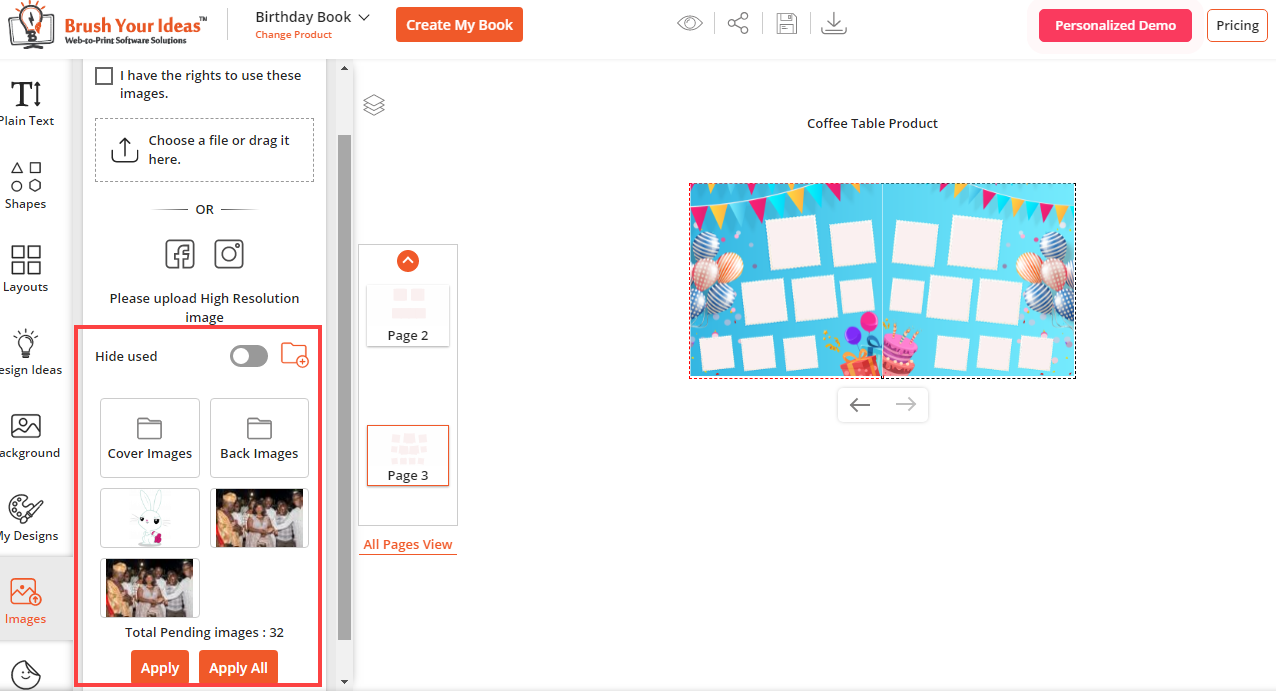
Once the customers upload the images, all the images will be listed under the Upload images tab. Your customers will get multiple images there and select the images to add to the photobook.
If your customers want to upload multiple images to create a photo album with ease, they can upload images by creating a folder. There are below options are provided:
– Hide Used: By enabling this option, the customers can hide the images which are already used in the Photobook.
– Create Folder (icon): By clicking on the create folder icon, our customers can manage the images folder wise.
– Apply: If the customers want to add multiple images at a time, by selecting the image click on the Apply button. The selected images will be added to the Photobook.
– Apply All: By clicking on the Apply All button, all the images will be added to the Photobook. Similarly, customers can add the images from the specific folder.
Note: Your customers will get the above functionality under the Upload images tab if they have logged in.
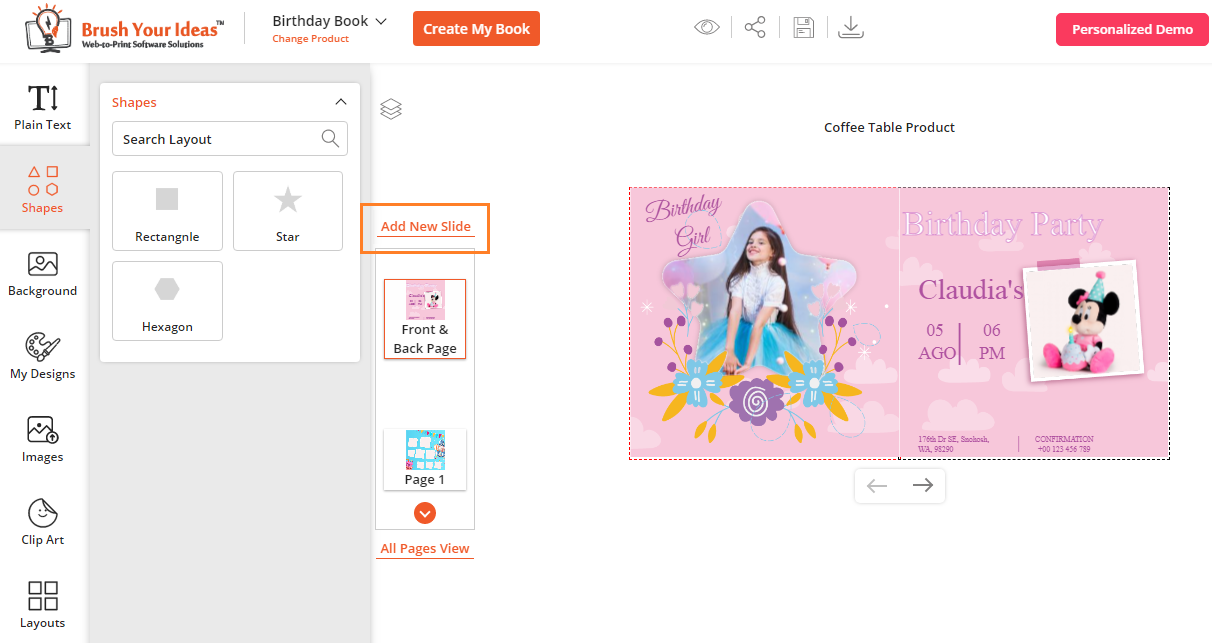
> Add New Slide
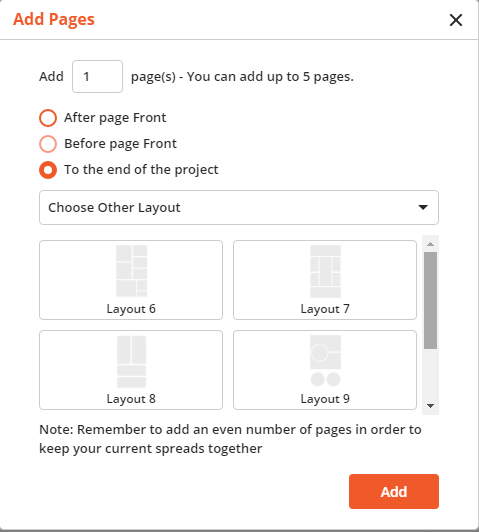
By clicking on the “Add New Slide” option, customers can add the new page to the Photobook. For that, select any page from the slides and then click on the Add New Slide button.
– Your customers can add a maximum of pages that are configured at the product level under Product designer Photobook.
– Select the option where the new page needs to be added: After Page Front or Before Page Front
– To the end of the project: Your customers can add the new sliders by selecting the layout:
Add Page with Blank Layout, Add Page with Current Layout, or Choose Other Layout.
If the customers select the Other Layout option, they will get the selected layouts for the selected product.
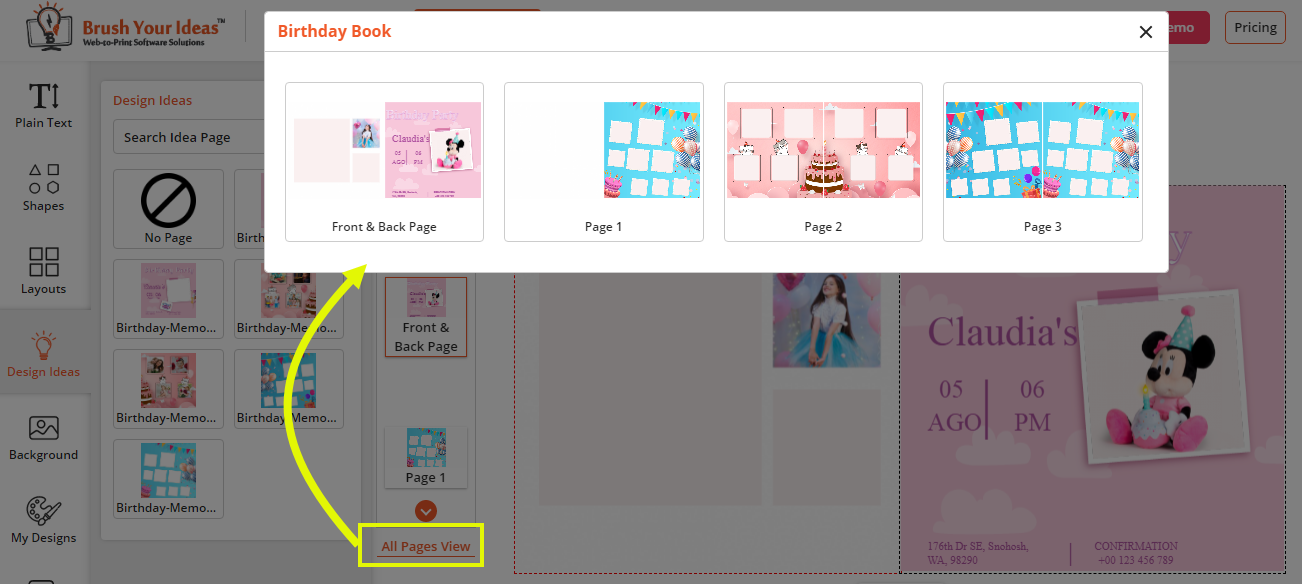
> All Pages View
By clicking on the “All Pages View” option, the customers will get a preview of all the pages.
> Create My Book
By clicking on the “Create My Book” option, the customers can create a new Photobook by designing their own ideas.
The customers need to select the “Orientation” & “Output Type” of the Photobook product.
View Design (Backend)
After designing the album and inserting the snaps, customers can order the photobook product.
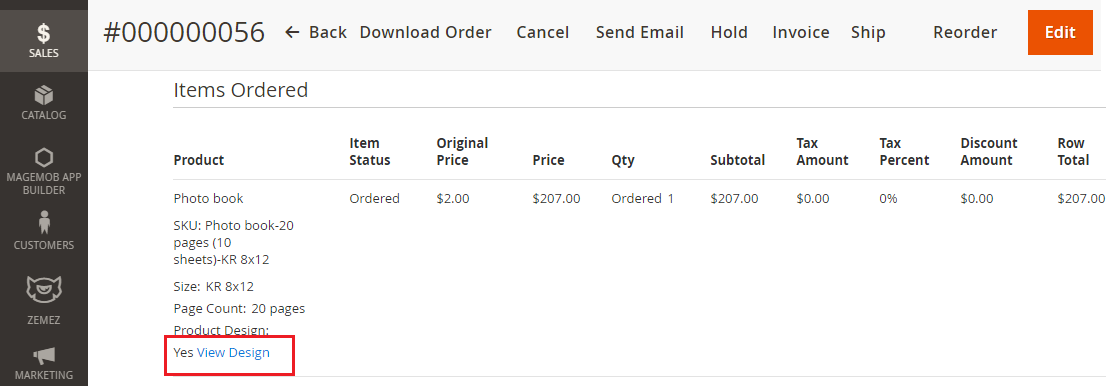
From the backend side you will get the Photobook orders in Sales -> Orders option. By clicking on the Orders option, you will get the list of orders in grid view.
Click on the View option of any order of Photobook. By scrolling down on the order detail page, you will get the View Design option. Here output images and PDFs are automatically generated by cron in the background.
-> If Photobook “Output Type” is Coffee:
You will get Cover Page PDF, Inner Pages PDF, and Separate Images (in PNG/JPG) based on the selected configuration from the backend.
“Cover Page Pdf” contains Front and Back Pages while “Inner Page pdf” contains all the Pages in sequence wise except Front and Back Page.
Separate Image names are given based on the product name and page sequence.
Ex.
“Print-Modern White Photo Book-8 x 12-White-Page 1 Left.png”
“Print-Modern White Photo Book-8 x 12-White-Page 1 Right.png” and so on.
You will get the additional PDFs for the Front & Back Cover pages individually as customers designed.
-> If Photobook “Output Type” is Layflat:
You will get Cover Page PDF, Inner Pages PDF, and Separate Images (in PNG/JPG) based on the selected configuration from the backend.
“Cover Page Pdf” contains Front and Back pages while “Inner Page pdf” contains all the Pages as per the layout of Cover Page Pdf.
