MANAGE TEXT AND FONT EFFECTS
Our PrintXpand Designer Tool provides unique text features for your customers to insert their favorite slogans, dialogues and one-liners on their choice of product (e.g. t-shirts, mugs, cards, etc.). Your customers can add attractive text like multi-colored text, text-shadow, and other designer text styles.
Backend Configuration
Manage Fonts
First, you must Manage the fonts which will be shown for the Text formatting during product designing to your customers.
Go to: Product Designer → Manage Fonts
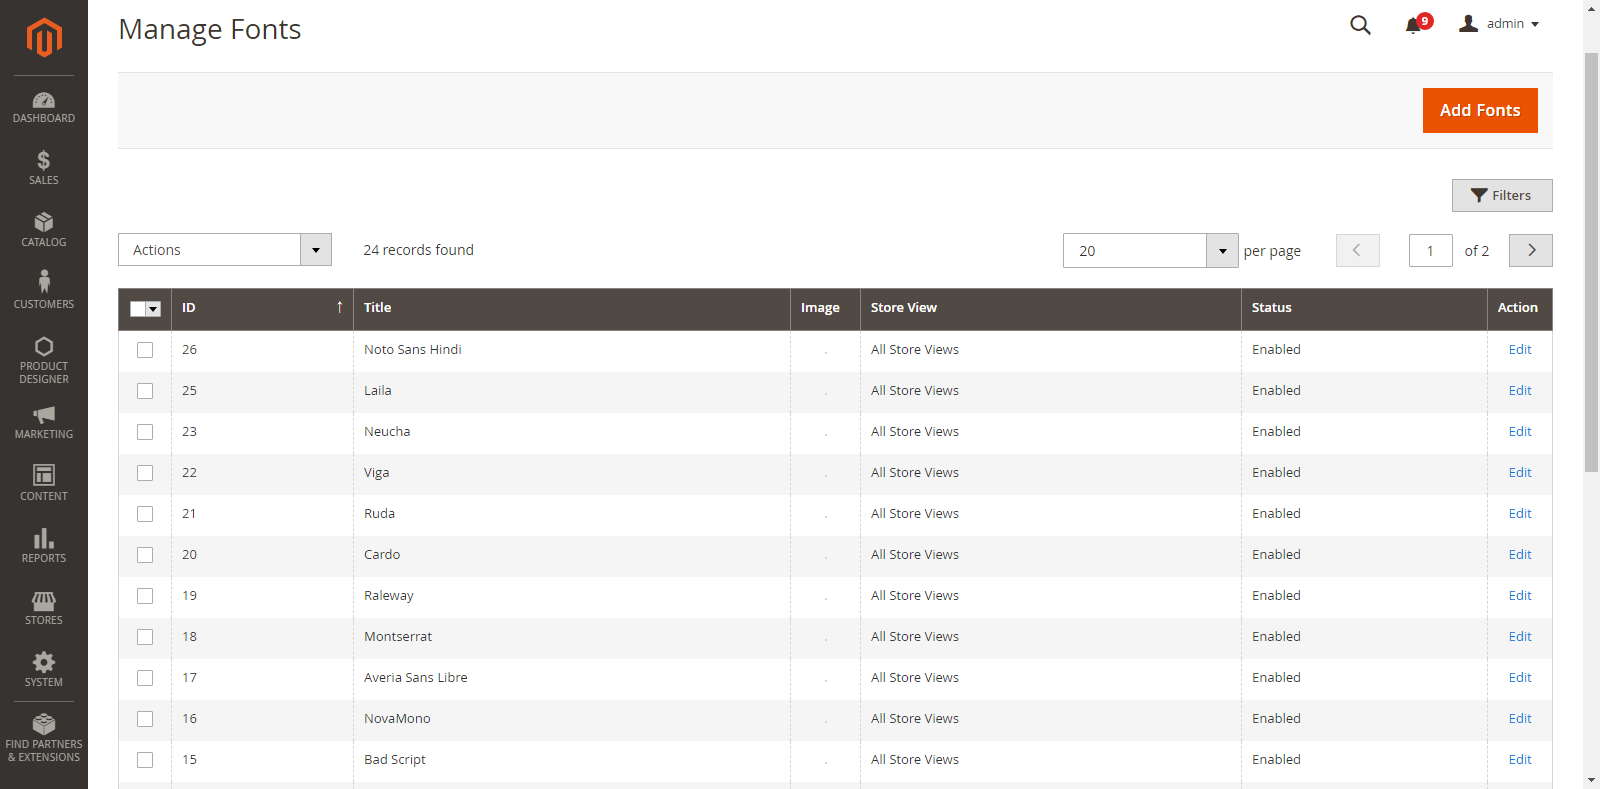
As you click on “Manage Fonts”, you will get the list of already inserted Fonts along with details like Id, Title, Thumbnail Image (if available), Store View, Status & Actions.
You can edit any font just by clicking on “Edit” from the Action Column.
If you want to ‘Delete’ any Font, select the Font and click on the ‘Delete’ option from ‘Actions’ dropdown list.
A confirmation pop-up will appear after you click on the ‘Delete’ option. Select “Ok” to perform the delete action.
Similarly, you can change the font status to Enable / Disable from ‘Actions’ dropdown list.
Text Configurations
You must set the general Text Configurations from the System Configuration.
Go to: Store → Configuration → Text option
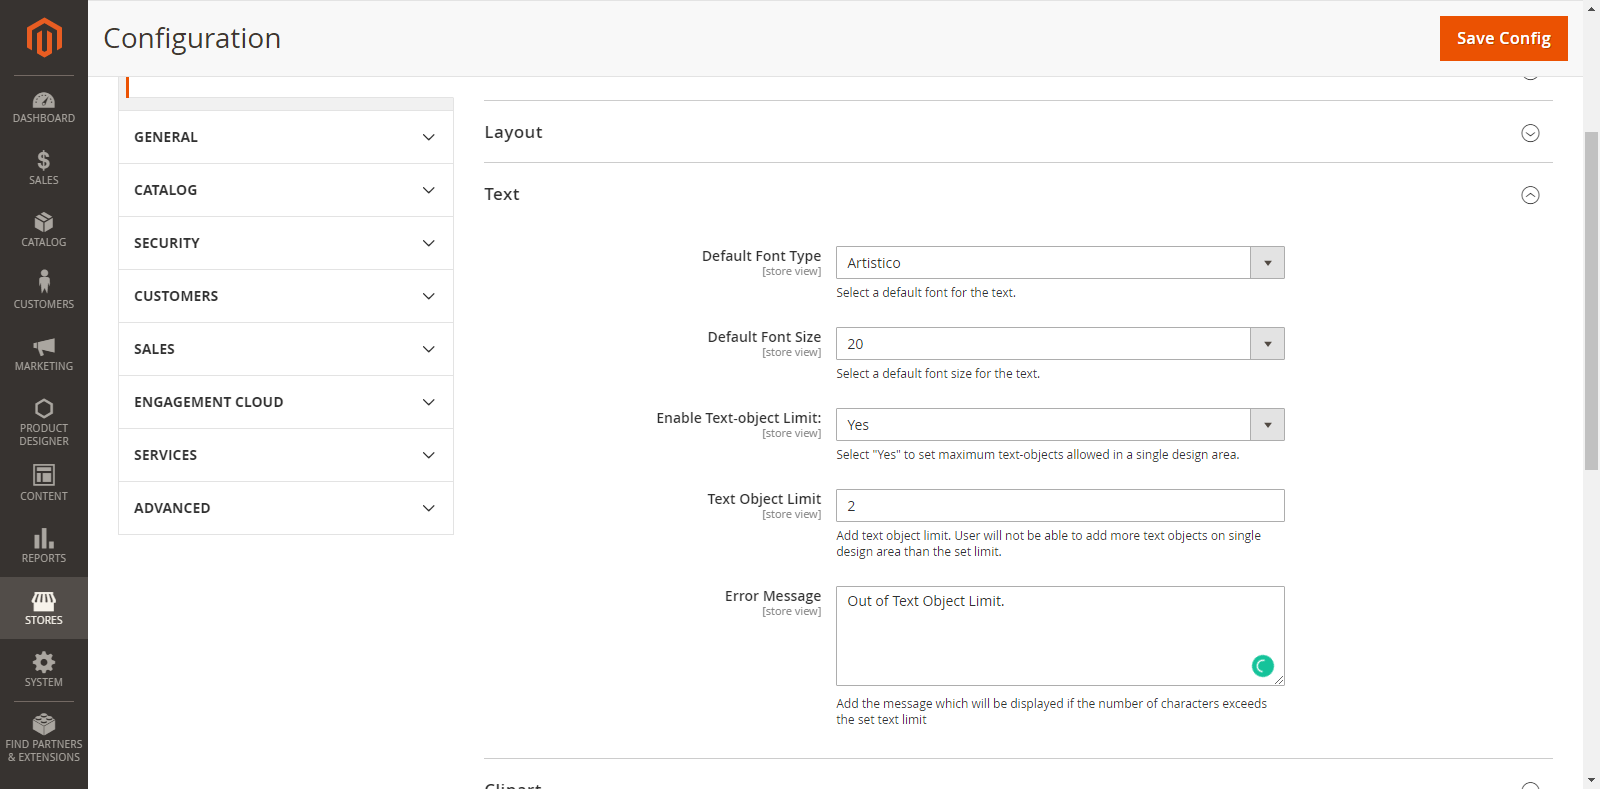
The general Text Configurations are shown as below:
Default Font Type: Select a default Font for the Text from this dropdown list. The text will appear in the default Font Type during Product designing in the front end.
Default Font Size: Select a default Font Size for the Text from this dropdown list. The text will appear in the default Font Size during Product designing in the front end.
Enable Text-Object Limit: If you select Yes, you can set a limit of the Text Object for your customers so they cannot cross the limit on the single design area.
Text object Limit: To add a limit for the Text Object, enter the value of text limit in this field.
Error Message: Enter the message which will be displayed if the customer exceeds the limits of the Text Object.
Frontend View
Text Design for a Product
After setting the Back End Configuration (Product Designer → Manage Fonts ) and General Text Configurations (Stores → Configuration → Text), the customers can start designing the product by adding a text element.
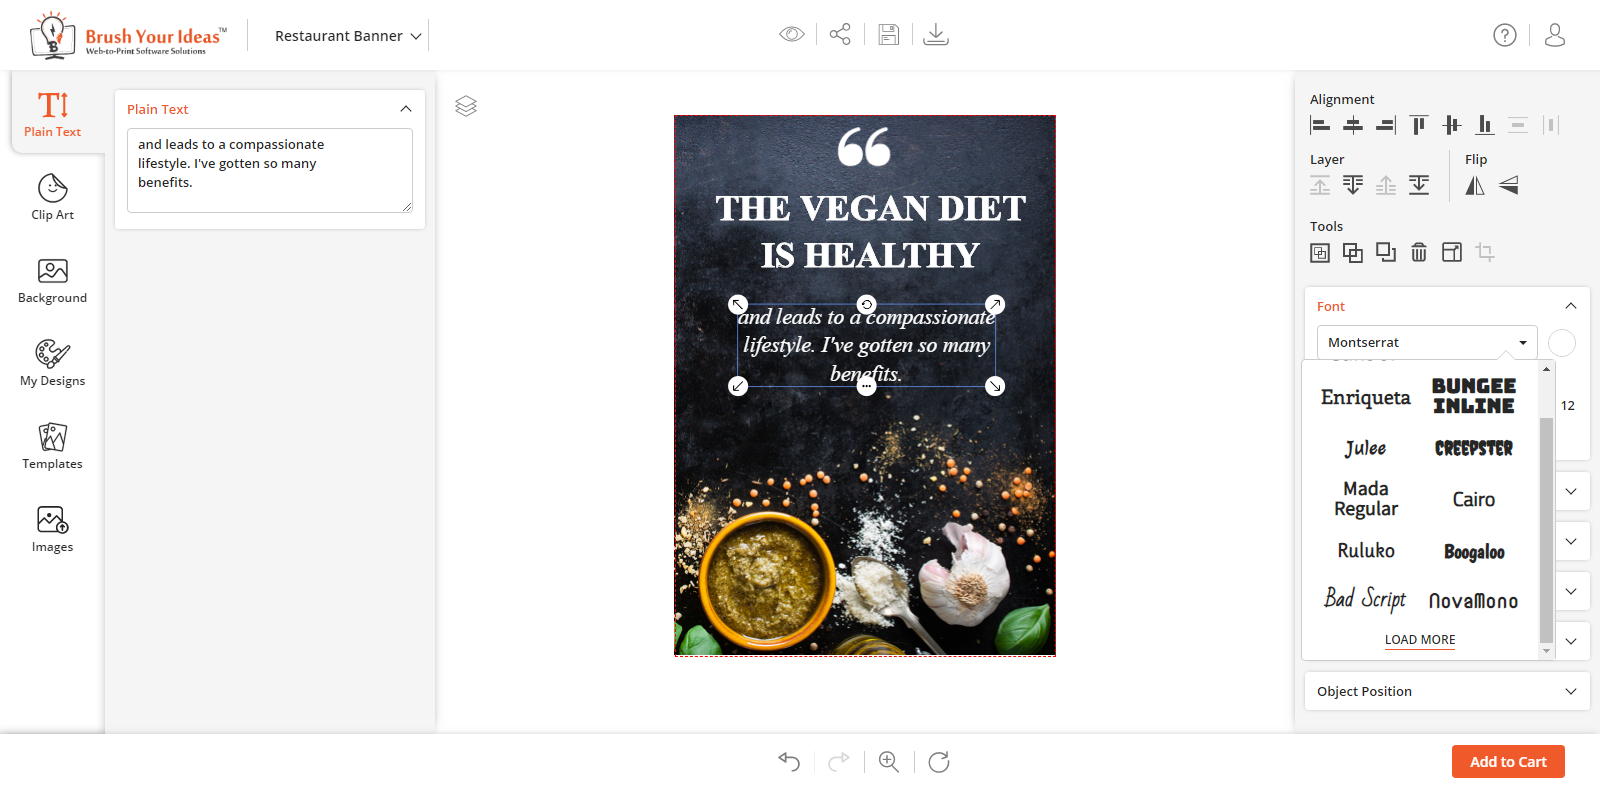
Now, click on the ‘Text’ tab in Designing Explorer. The customers can enter the Text which they want to show on their product. The customers can insert the Text until the text limit has exceeded. The customers will get an Alert message on exceeding the configured Text limit.
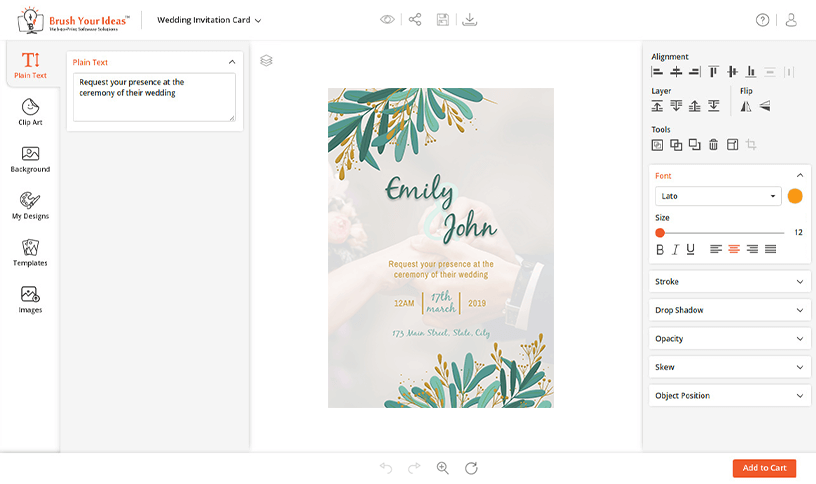
After inserting the Text, the Designer tool will be enabled on the right side. From here, the customers can customize the Font Size, Style, Color, and text alignment.
Apply the Text Effects
Font Style, Color & Size: The Font Style, Color & Size will appear as per the Text Configurations which has been set as the default from the Back End.
Customers can select their favorite ‘Font Style’ and pick a color from the ‘color selection’ option. They can increase the ‘Font Size’ by dragging the text size slider to right & left to decrease.
Customers can also ‘edit’ the text in Bold, Italic and Underline.
Customers can adjust the Text alignments to Left, Center, Right and Justify.
Stroke: To add the outline text effect of a particular color on the text.
Drop Shadow: To adjust the text-shadow effects horizontally (X-offset) & vertically (Y-offset) on the text.
Skew: To give horizontal or vertical italicized effects to the Text in the product design.
Object Position: To change X-Y coordinates for positioning (Horizontal-Vertical) in the product design.
Additionally with Add-on
As an Add-on, you can add custom fonts in your product designer font library. You also get best performing 900+ google fonts to make your e-store full of text options.
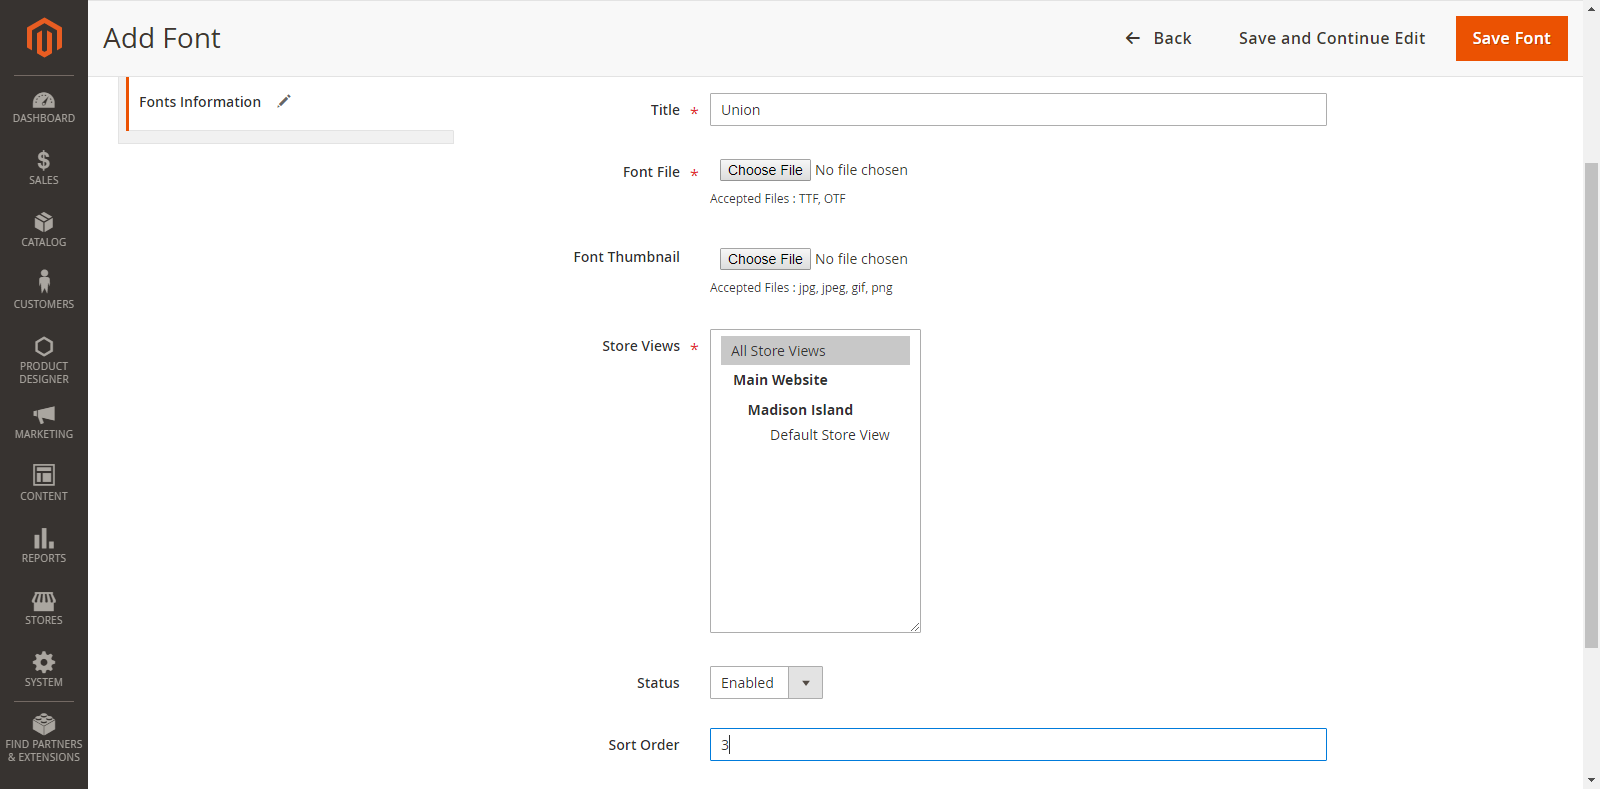
To add a font, go to Product Designer -> Manage Font . Add a new Font by clicking on the “Add Font” button at the top of the list. As you click on “Add Font” button, you will be navigated to the Add Font page.
Now, you must add the following details:
Title: Enter the related Title of the Font.
Font File: Choose and Upload the Font file for the particular ‘Font Style’. (only OTF & TTF formats)
Font Thumbnail: Choose and Upload the font thumbnail to display the ‘Font Style’ sample. (only JPG & PNG formats)
Store Views: Select the stores in which the Font Style will be displayed.
Status: Choose the default status of the Font.
Sort Order: Enter the sorting order of the particular font style.
After inserting all the details, click on “Save Font” and then the Font will be saved.
Now, the Font can be seen on the list.
User will get 200 Fonts with Essential and 900 Best performing Google Fonts (200 of Essential and 700 with the add-on) with Custom Fonts add-on.
